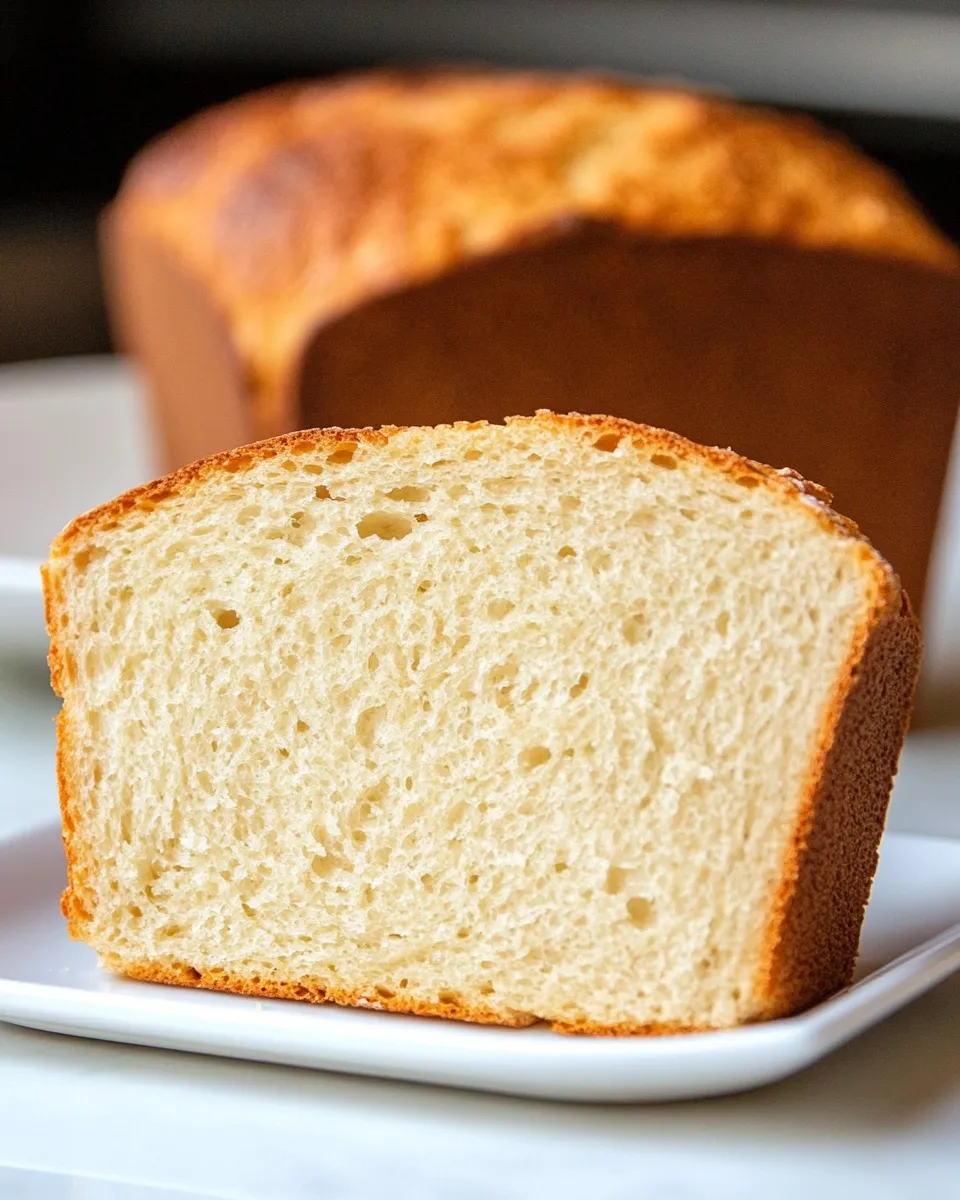
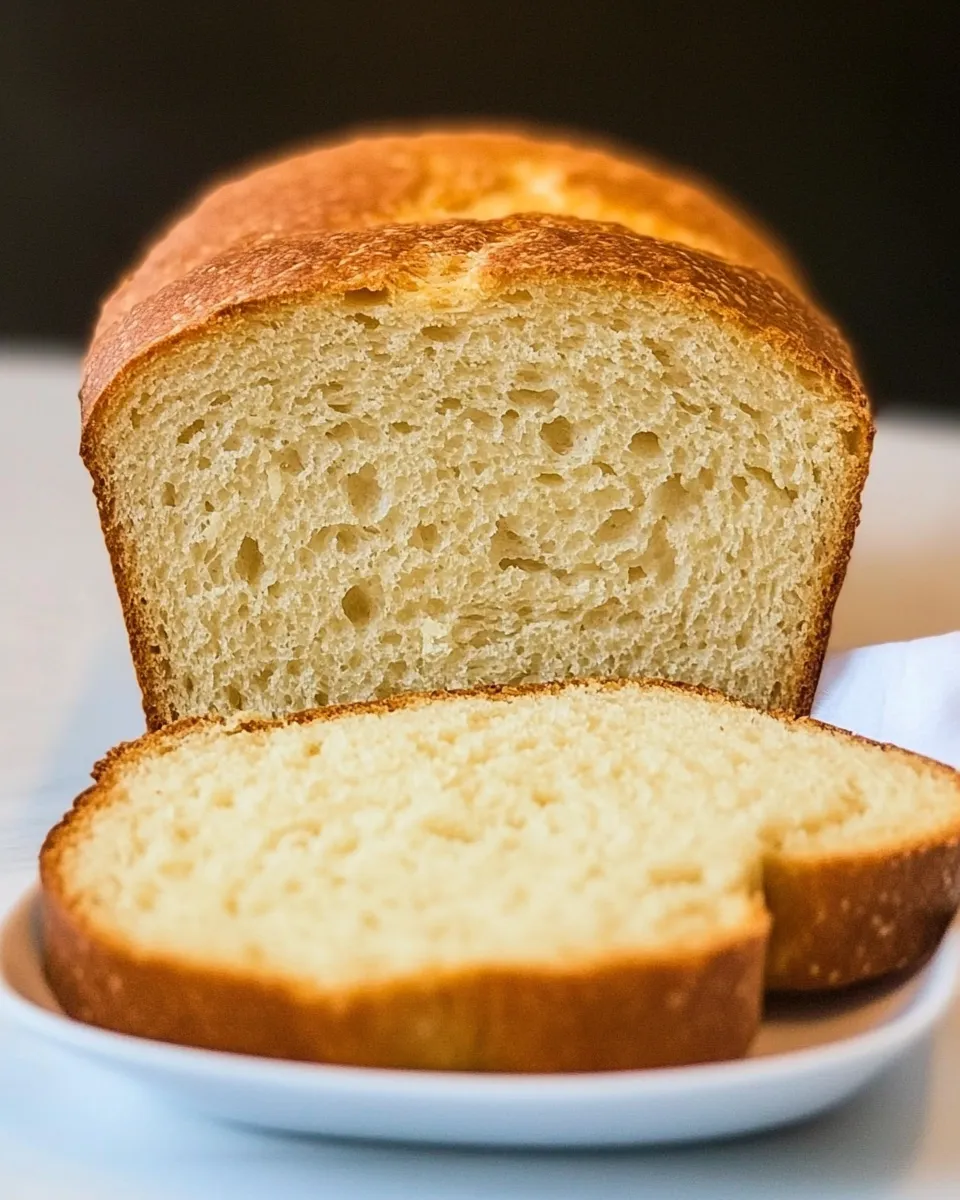
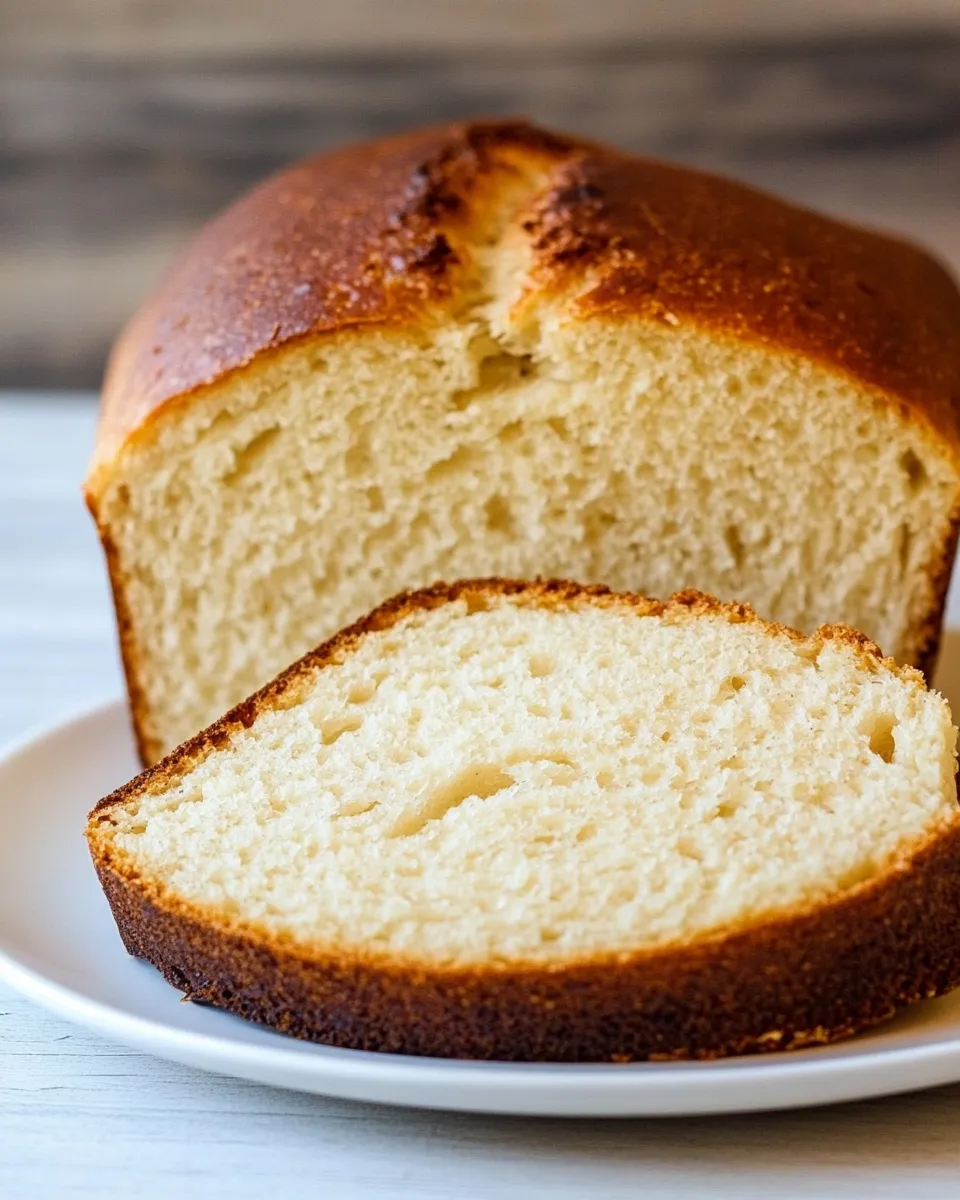
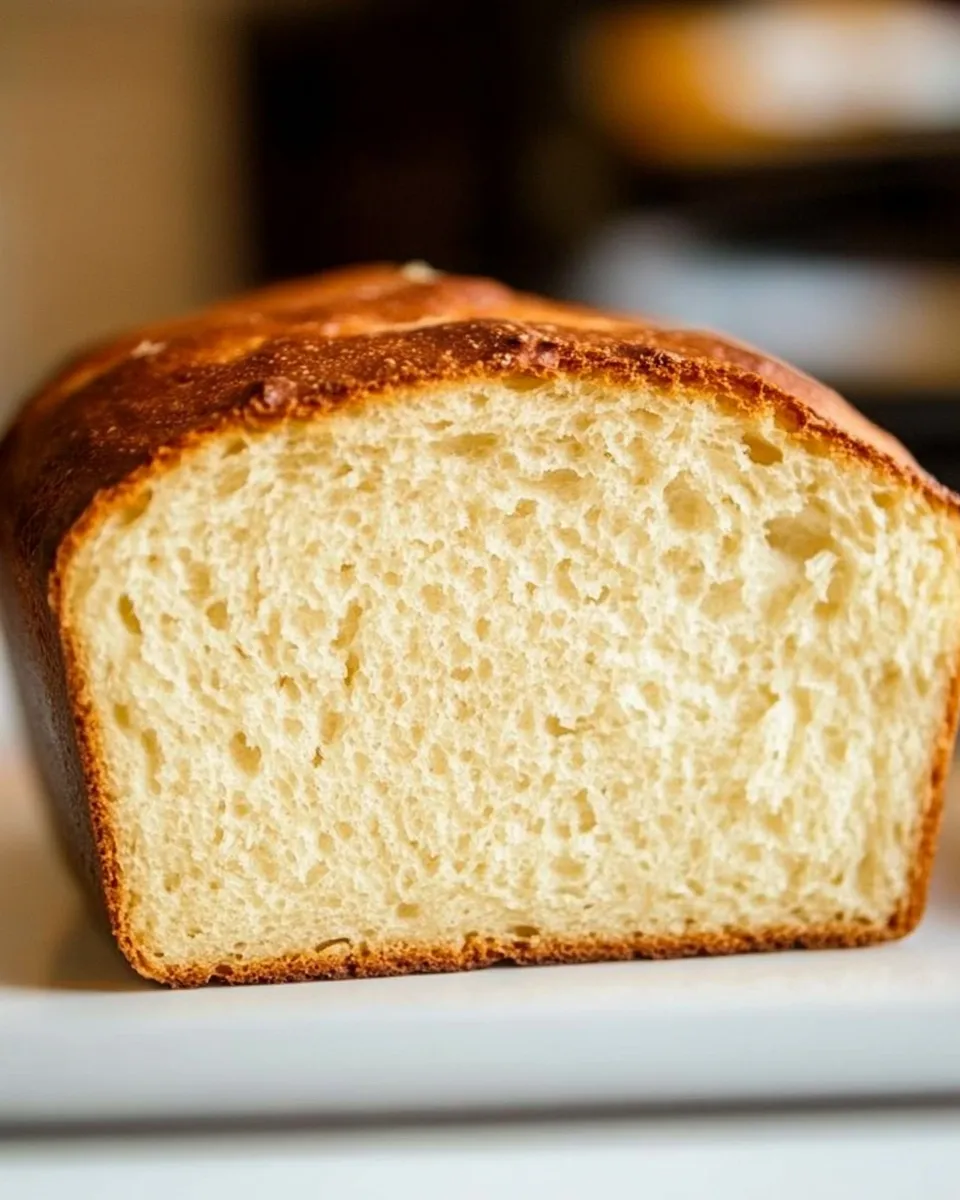
This Sally Lunn loaf is one of those comforting, slightly sweet breads that quietly steals the show at brunch. It has a tender crumb, a soft, slightly rich texture from eggs and shortening, and a crust that browns up to a gentle golden color. It’s forgiving and straightforward — excellent for a weekend project when you want something better than plain sandwich bread but not a fussy artisanal bake.
I’ve tested this recipe several times to find the rhythm of the rises and the feel of the dough. The dough should be soft and just a touch tacky before its first rise; that’s when you know the balance of wet and dry is right. The method is classic: warm the liquid, mix with part of the flour to form a sponge, add eggs and remaining flour, knead, rise, shape into a Bundt or tube pan, rise again, then bake.
Below you’ll find a clear ingredient checklist with notes, step-by-step instructions taken exactly from the original directions, practical equipment and storage advice, and answers to common questions I see when readers make this for the first time. No fluff — just the useful detail you need to get a beautiful loaf.
Ingredient Checklist
- 1 cup (227 g) milk — warmed with shortening and water to create the lukewarm liquid that activates the yeast.
- 1/2 cup (92 g) shortening — adds tenderness and richness; melts into the warm milk to disperse fat throughout the dough.
- 1/4 cup (57 g) water — small addition to adjust the hydration; warms with the milk and shortening.
- 4 cups (480 g) flour — the structure of the loaf; the recipe divides this between an initial mixing and finishing the dough.
- 1/3 cup (66 g) sugar — provides a subtle sweetness and helps yeast activity.
- 2 teaspoons (5 g) kosher salt — essential for flavor balance and controlling yeast fermentation.
- 2 1/4 teaspoons (7 g) active dry yeast, 1 package — the leavening agent; one standard packet is used.
- 3 (150 g) eggs — enrich the dough, contribute to structure and color, and make the crumb tender.
Sally Lunn Bread: Step-by-Step Guide
- In a small saucepan combine 1 cup (227 g) milk, 1/2 cup (92 g) shortening, and 1/4 cup (57 g) water. Warm over low heat until the shortening is melted and the mixture reaches about 120°F (49°C). Remove from heat.
- In a large mixing bowl, whisk together 1 1/2 cups of the 4 cups (480 g) flour, 1/3 cup (66 g) sugar, 2 teaspoons (5 g) kosher salt, and 2 1/4 teaspoons (7 g) active dry yeast.
- Pour the warm liquid into the flour mixture. Beat with an electric mixer on medium speed for about 2 minutes until combined.
- Add the remaining flour (the other 2 1/2 cups of the 4 cups total) and the 3 eggs to the bowl. Mix until a soft dough forms.
- Turn the dough out onto a lightly floured surface and knead until smooth and elastic, about 5–8 minutes by hand (or 3–5 minutes using a dough hook on low speed). The dough should be soft and slightly tacky but pull away from the sides of the bowl.
- Place the dough in a lightly greased bowl, cover with a clean cloth, and let rise in a warm, draft-free place until doubled in bulk, about 1 hour.
- Grease a tube or Bundt pan well.
- Punch down the risen dough to release air, press or shape it gently into the prepared pan so it is evenly distributed, and cover. Let the dough rise again in the pan until puffed and nearly doubled, about 30 minutes.
- Meanwhile preheat the oven to 350°F (177°C).
- Bake the bread at 350°F for about 40 minutes, or until the top is golden brown and a skewer inserted into the center comes out clean.
- Remove the pan from the oven and let the bread cool in the pan for about 10 minutes. Then turn the loaf out onto a board or plate to finish cooling.
- When cooled to a sliceable temperature, slice and serve.
Top Reasons to Make Sally Lunn Bread
- It’s soft and slightly sweet while still versatile — great with jam, butter, or as a base for savory sandwiches.
- The technique is straightforward: two rises, simple mixing steps, and a predictable bake time.
- The egg and shortening contribute to a tender crumb that stays moist for a day or two.
- It’s visually pretty when baked in a tube or Bundt pan — an elegant loaf with minimal effort.
- Once you understand the dough’s feel, it’s easy to scale and adapt for different shapes or add-ins later.
International Equivalents
- Ounces and grams: 1 cup milk ≈ 227 g; 1/2 cup shortening ≈ 92 g; 1/4 cup water ≈ 57 g; 4 cups flour ≈ 480 g; 1/3 cup sugar ≈ 66 g; 2 teaspoons salt ≈ 5 g; 2 1/4 teaspoons yeast ≈ 7 g; eggs listed as 3 (150 g) total.
- Oven temperatures: 350°F = 177°C. If your oven lists only gas marks, this is roughly gas mark 4.
- Yeast: the recipe calls for active dry yeast. If you only have instant yeast, you can use it at a slightly reduced amount (about 10–15% less); expect similar results, but keep the proofing times similar and monitor the dough, not the clock.
Before You Start: Equipment
- Small saucepan — to warm milk, shortening, and water together.
- Large mixing bowl — for mixing the flour and wet ingredients; leave room for a rise.
- Electric mixer with paddle (optional) and dough hook (optional) — the recipe calls for beating and then kneading; a mixer speeds this up.
- Kitchen thermometer — helpful to check the liquid reaches about 120°F (49°C) so you don’t kill the yeast.
- Lightly greased tube or Bundt pan — a standard Bundt or tube pan works; grease thoroughly to avoid sticking.
- Clean cloth or plastic wrap — to cover dough while it rises.
- Skewer or cake tester — to confirm doneness by testing the center.
Steer Clear of These
- Too-hot liquid: if the milk/shortening/water mixture is hotter than 120°F (49°C) you risk killing the yeast. Always test temperature or let it cool a bit before mixing.
- Adding all the flour at once: the recipe splits flour intentionally. Adding it all at once can make the dough too stiff and dry.
- Under-kneading or over-kneading: under-kneaded dough won’t gain structure and will be dense; over-kneaded dough (more common with stand mixers on too-high speed) can become tight. Aim for the described texture: smooth, elastic, slightly tacky.
- Skipping the second rise in the pan: that step puffs the loaf so it bakes evenly. Resist the urge to skip it even if impatient.
- Not greasing the pan well: Sally Lunn has a soft crumb that can stick to ungreased pans; grease thoroughly, getting into nooks of a Bundt if using one.
Allergy-Friendly Swaps
- Shortening replacement: if you prefer, use unsalted butter instead of shortening for flavor. Use the same weight (about 92 g) and melt it with the milk. Texture will be slightly different but still tender.
- Milk substitute: for dairy-free needs, use a neutral plant milk (soy or oat) at the same volume and temperature. Keep in mind flavor and crumb may vary slightly.
- Egg alternatives: eggs are structural and enriching here. For strict egg-free baking, a tested egg replacer or commercial binder is necessary; results will change. If allergies are severe, try a different eggless enriched dough recipe developed for that purpose rather than a direct swap.
- Yeast: active dry yeast is specified. If you must use instant yeast, reduce the amount slightly and mix directly with dry ingredients.
What I Learned Testing
I learned to trust the dough’s feel more than the clock. The times given for rises are good estimates, but factors like room temperature and flour humidity change how quickly the dough doubles. A warm kitchen will speed things; a cool one will slow them. I also found that beating the initial mixture for the full two minutes creates a smoother base before adding the remaining flour and eggs. That short mixer time reduces lumps and helps incorporate fat evenly.
When shaping into the pan, be gentle. Pressing the dough into the tube or Bundt pan rather than pulling or stretching keeps the crumb even. Finally, let the loaf rest about 10 minutes in the pan after baking — it firms slightly and releases more cleanly. If you try slicing immediately, the loaf can compress and tear.
Storing Tips & Timelines
- Room temperature: store loosely wrapped in plastic or in a bread box for up to 2 days. The crumb stays soft but will begin to dry after that.
- Refrigeration: not recommended for short-term storage; refrigeration can dry enriched breads faster. If you live somewhere very humid or the loaf has a spread on it, refrigeration may be useful but expect some firmness.
- Freezing: slice the cooled loaf, wrap slices or the whole loaf tightly in plastic and then foil, and freeze for up to 3 months. Thaw slices at room temperature or warm briefly in a toaster oven.
- Refreshing day-old bread: warm slices briefly in a 300°F (150°C) oven for 5–10 minutes or toast slices to revive texture.
Frequently Asked Questions
- Can I use active dry yeast straight from the packet without proofing? The recipe mixes the yeast into the dry ingredients; it does not call for a separate proofing step. That works because the warm liquid added later activates the yeast. If you prefer to proof, dissolve the yeast in a small amount of warm liquid with a pinch of sugar and wait until foamy before adding.
- My dough is sticky — what now? A slightly tacky dough is correct. If it’s very sticky and won’t hold shape, dust lightly with flour and continue kneading until it’s smooth and elastic. Be cautious adding too much flour; the dough should still be soft.
- How do I know when the loaf is done? The recipe calls for a skewer inserted into the center to come out clean and the top to be golden brown. Internal temperature for enriched breads around 190–200°F (88–93°C) indicates doneness if you use a thermometer.
- Can I add flavors like raisins or citrus? You can, but add-ins change dough hydration and texture. Fold in small quantities (a handful) of dried fruit after the first knead, and coat fruit lightly in flour so it distributes evenly. Large additions may require adjusting flour slightly.
- Why use a tube or Bundt pan? These pans create a tall, attractive loaf and allow heat to circulate through the center for even baking. A standard loaf pan will work, but baking time may change.
Let’s Eat
Slice this Sally Lunn while it’s slightly warm. A generous smear of butter and a dab of jam is classic. It also shines as a base for French toast, makes luxurious bread pudding, or becomes the soft foundation for savory sandwiches. Serve it at brunch with eggs and fruit, or package a few slices to share.
Make the recipe once and you’ll recognize the dough’s feel. From there, variations and small tweaks feel safe. Enjoy the process — the light aroma of baking bread is worth the effort, and this loaf rewards patience with a tender, comforting crumb.
Sally Lunn Bread Recipe
Ingredients
Ingredients
- 1 cup 227 gmilk
- 1/2 cup 92 gshortening
- 1/4 cup 57 gwater
- 4 cups 480 gflour
- 1/3 cup 66 gsugar
- 2 teaspoons 5 gkosher salt
- 2 1/4 teaspoons 7 gactive dry yeast, 1 package
- 3 150 geggs
Instructions
Instructions
- In a small saucepan combine 1 cup (227 g) milk, 1/2 cup (92 g) shortening, and 1/4 cup (57 g) water. Warm over low heat until the shortening is melted and the mixture reaches about 120°F (49°C). Remove from heat.
- In a large mixing bowl, whisk together 1 1/2 cups of the 4 cups (480 g) flour, 1/3 cup (66 g) sugar, 2 teaspoons (5 g) kosher salt, and 2 1/4 teaspoons (7 g) active dry yeast.
- Pour the warm liquid into the flour mixture. Beat with an electric mixer on medium speed for about 2 minutes until combined.
- Add the remaining flour (the other 2 1/2 cups of the 4 cups total) and the 3 eggs to the bowl. Mix until a soft dough forms.
- Turn the dough out onto a lightly floured surface and knead until smooth and elastic, about 5–8 minutes by hand (or 3–5 minutes using a dough hook on low speed). The dough should be soft and slightly tacky but pull away from the sides of the bowl.
- Place the dough in a lightly greased bowl, cover with a clean cloth, and let rise in a warm, draft-free place until doubled in bulk, about 1 hour.
- Grease a tube or Bundt pan well.
- Punch down the risen dough to release air, press or shape it gently into the prepared pan so it is evenly distributed, and cover. Let the dough rise again in the pan until puffed and nearly doubled, about 30 minutes.
- Meanwhile preheat the oven to 350°F (177°C).
- Bake the bread at 350°F for about 40 minutes, or until the top is golden brown and a skewer inserted into the center comes out clean.
- Remove the pan from the oven and let the bread cool in the pan for about 10 minutes. Then turn the loaf out onto a board or plate to finish cooling.
- When cooled to a sliceable temperature, slice and serve.
Equipment
- Small Saucepan
- Large Mixing Bowl
- Electric Mixer
- dough hook
- lightly greased bowl
- tube or Bundt pan
- skewer
- board or plate
Notes
from The Taste of Williamsburg