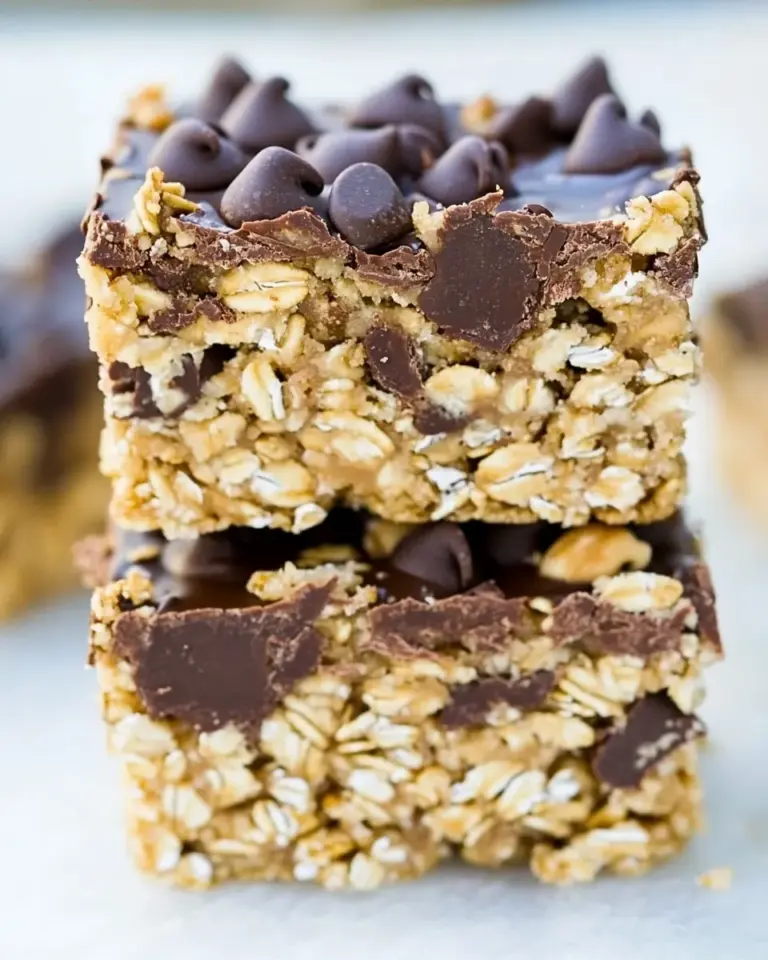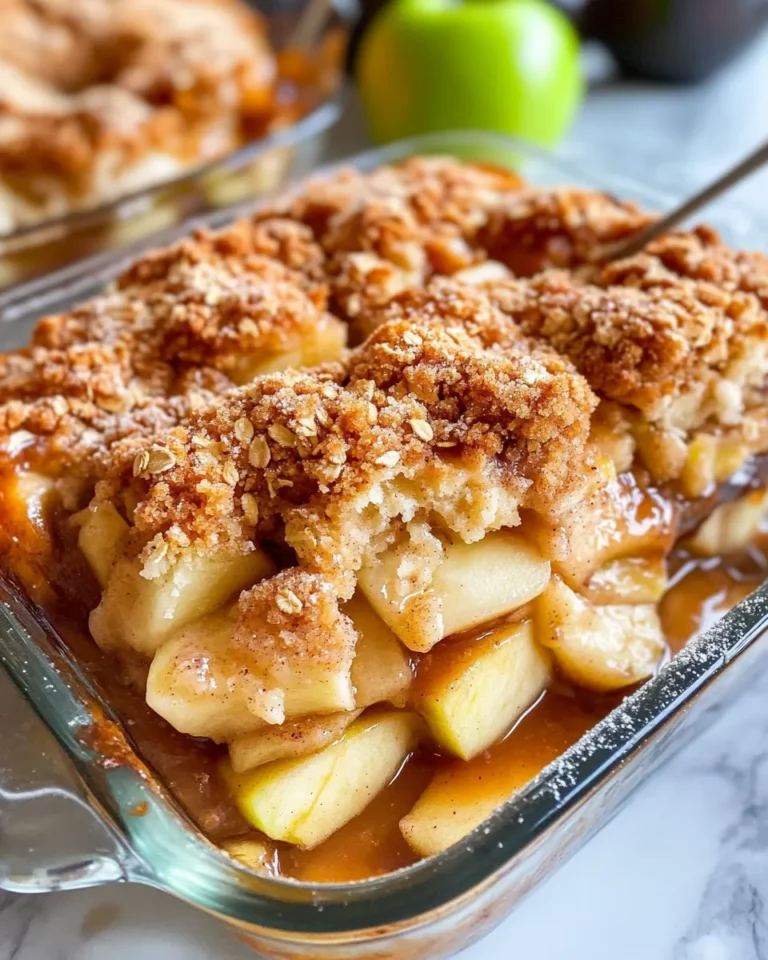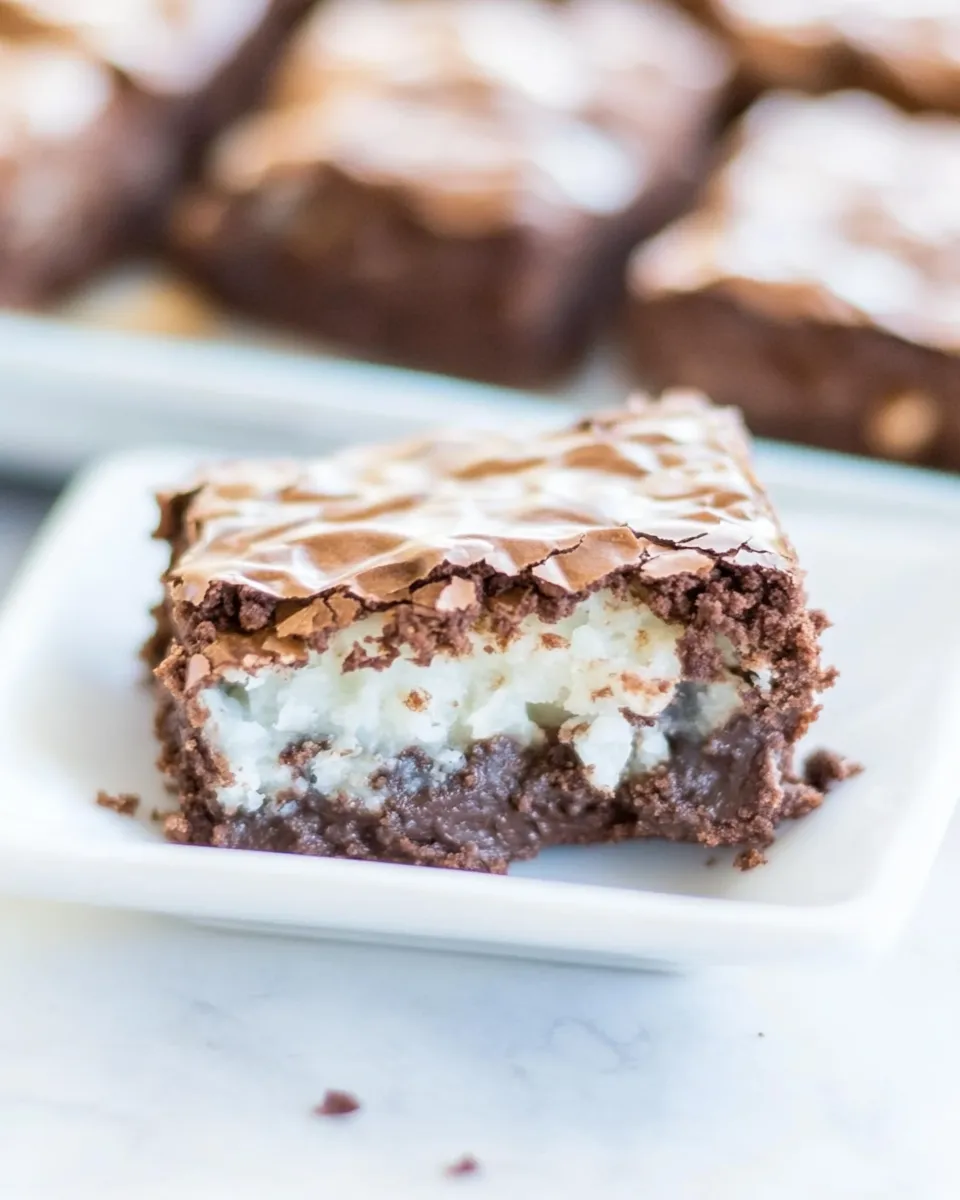
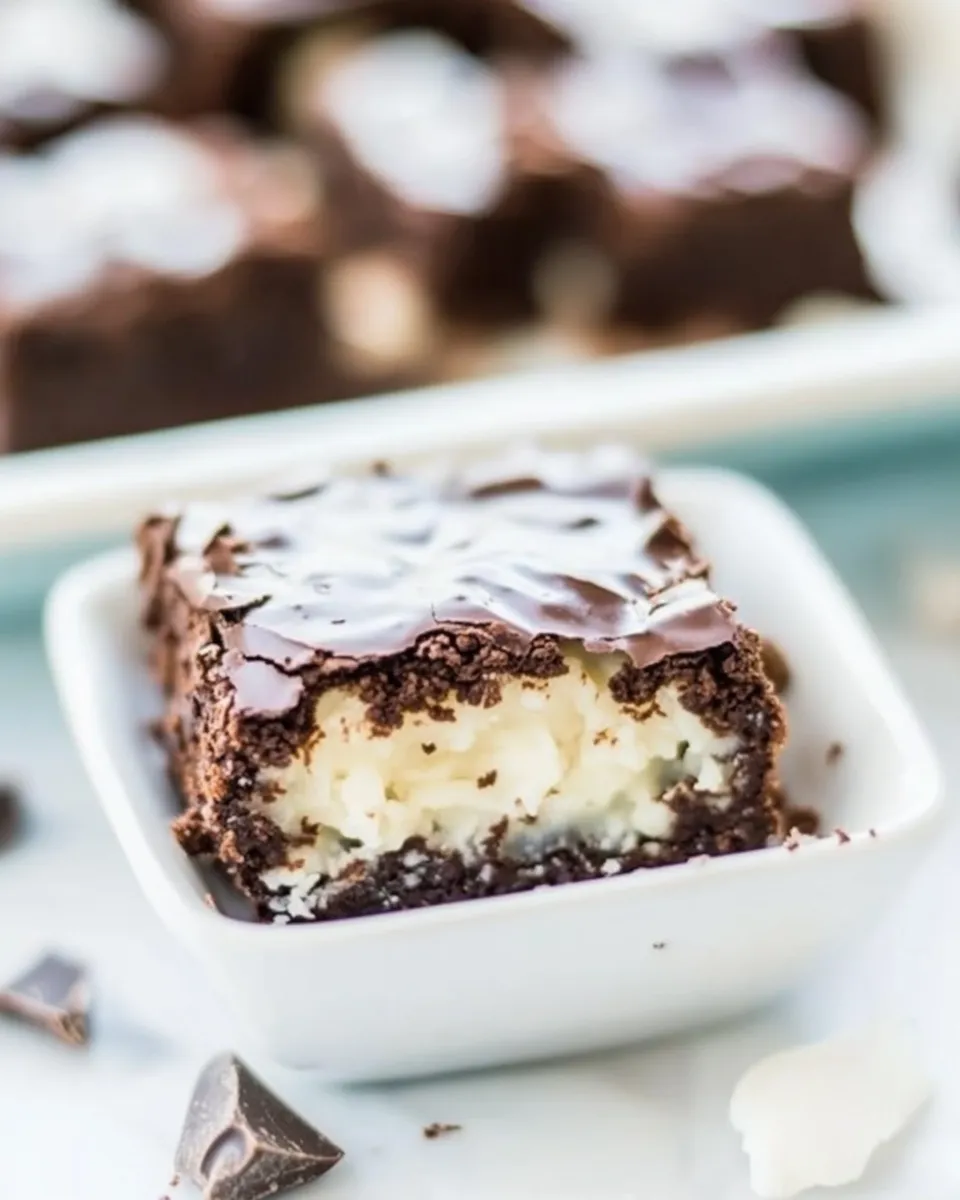
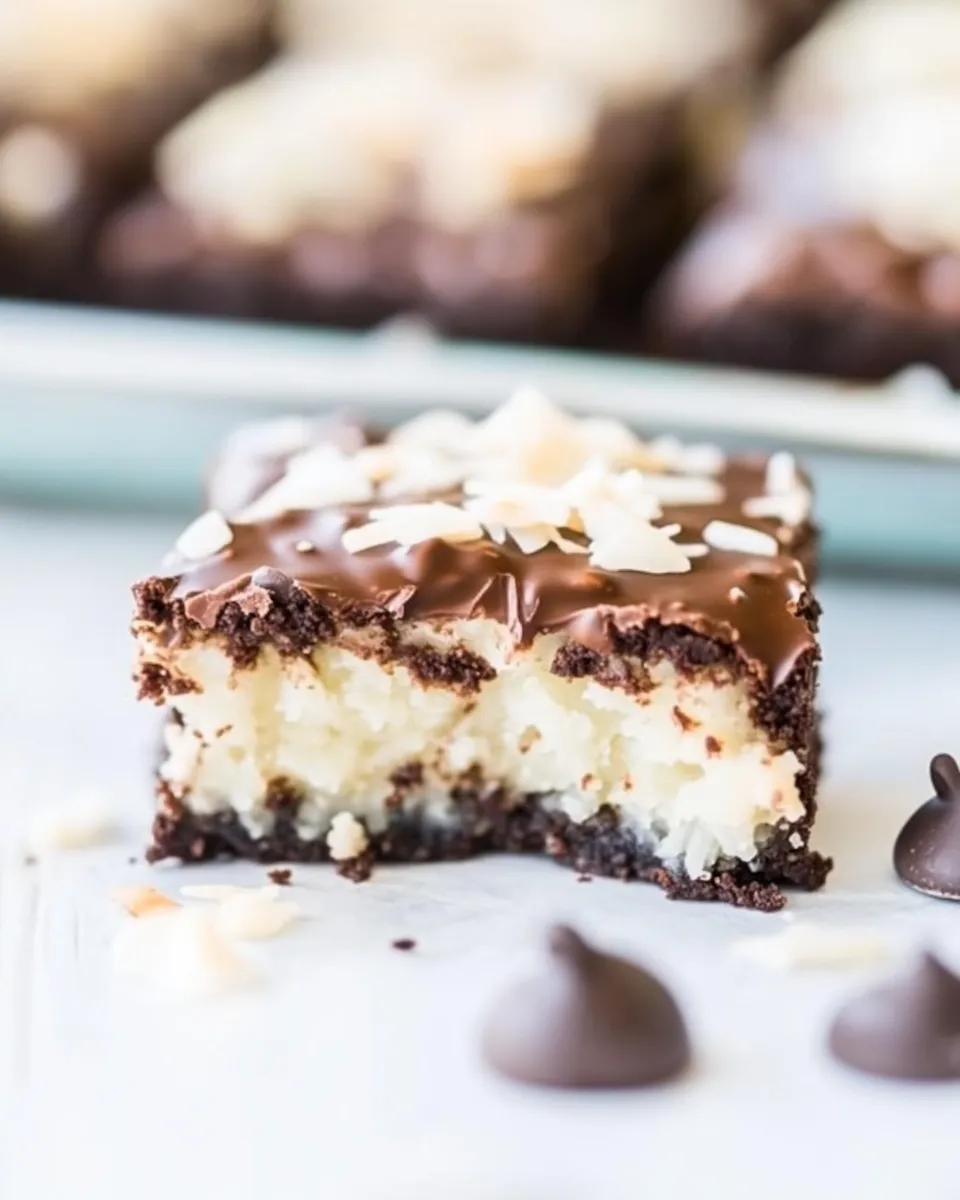
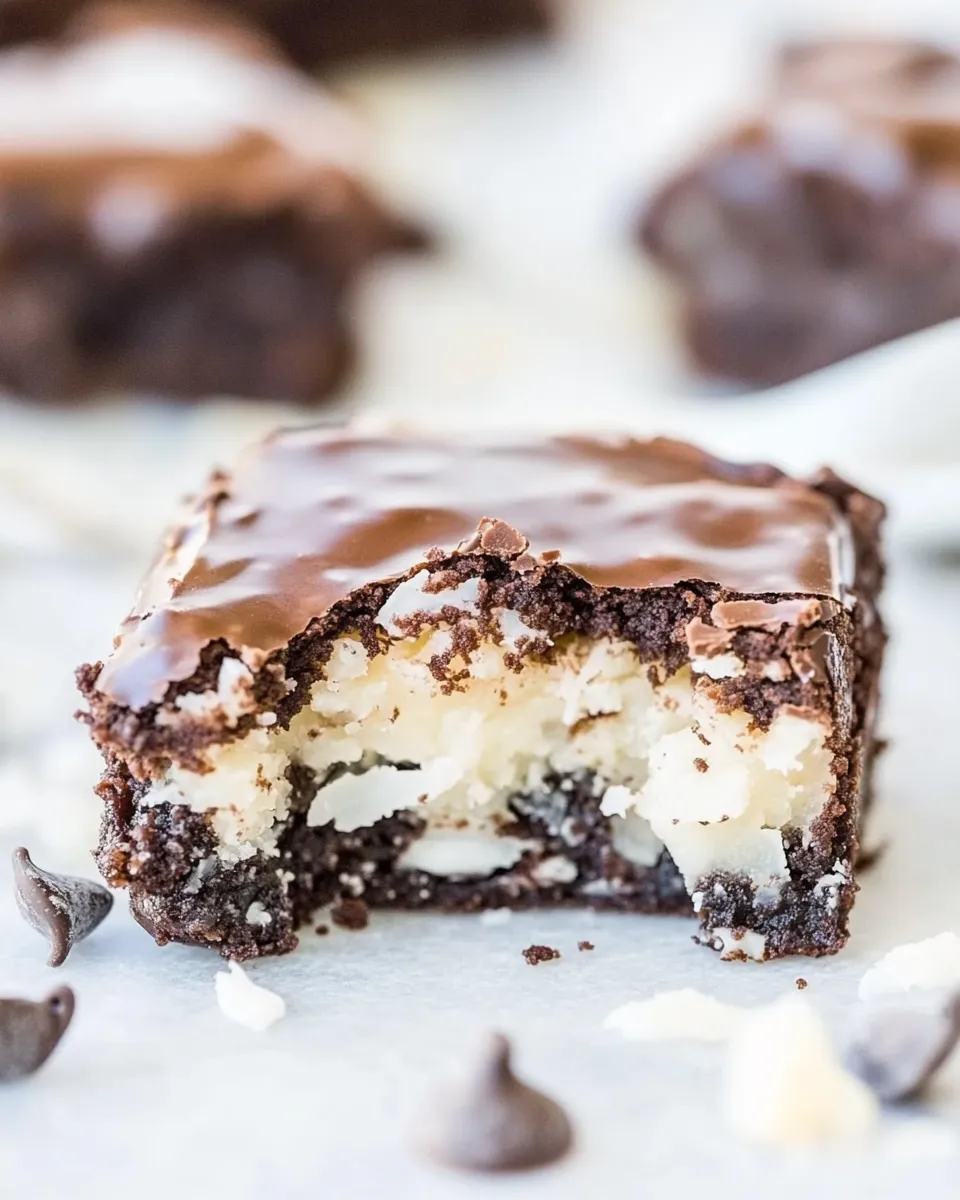
I make these Chocolate Coconut Mounds Bar Brownies when I want something that hits chocolate, coconut, and brownie cravings all at once. They look like a candy-bar mashup — fudgy brownie base, a sweet coconut middle, and a glossy chocolate top — and they behave like a grown-up treat that still comforts. No fancy gadgets, just straightforward steps and a little patience while they cool.
This recipe is reliable. I like it because the brownie layer sets a sturdy foundation and the coconut-sweetened condensed milk layer becomes chewy and cohesive, so the bars slice cleanly if you give them enough time to chill. You’ll read tips below on timing, texture-safe substitutions, and what to watch for while baking.
If you bake a lot, you’ll appreciate the small pan size: an 8×8-inch pan keeps portions modest and baking times reasonable. Make them for a potluck, tuck a few in a lunchbox, or keep them in the fridge for a chocolate fix that won’t collapse into a sticky mess.
Your Shopping Guide
These bars call for pantry staples and two small specialty items: shredded sweetened coconut and sweetened condensed milk. Both are easy to find in most supermarkets — check the baking aisle for shredded coconut and the canned goods aisle for condensed milk. The dark chocolate can be any bar you like; I used a 72% bar because it balances the sweet coconut.
Buy chocolate chips and a slightly higher-quality dark chocolate for the melted chocolate step. The chips melt again at the end and create that classic, glossy top; using semi-sweet chips is the sweet spot. If you have instant espresso granules on hand, add them; they don’t make these taste like coffee but they amplify chocolate flavor.
You’ll also want to make sure your butter is softened (not melted) so it incorporates smoothly into the melted chocolate. If you’re buying ingredients for the first time, get a can of sweetened condensed milk and a loosely packed bag of sweetened shredded coconut — volume matters for the texture of the middle layer.
Ingredients
- 6 ounces dark chocolate, coarsely chopped (I used TJ’s 72% Pound Plus bar) — melts into the brownie base and provides deep chocolate flavor.
- ½ cup unsalted butter, softened — enriches the batter and keeps the brownie fudgy.
- 2 large eggs — bind the batter and add structure.
- ¾ cup granulated sugar — sweetens and helps create a slightly shiny brownie top.
- ¼ cup light brown sugar, packed — adds moisture and a hint of caramel.
- 1 tablespoon vanilla extract — rounds and lifts the chocolate flavor.
- 1 tablespoon coffee, leftover from the morning brew is fine, optional but recommended — intensifies chocolate without adding coffee taste.
- 1 teaspoon instant espresso granules, optional but recommended — gives a deeper, more complex chocolate profile.
- ¾ cup all-purpose flour — provides structure; don’t overmeasure.
- 2 ½ cups sweetened shredded coconut flakes, loosely packed — the chewy, candy-like middle layer.
- one 12-ounce can sweetened condensed milk — binds the coconut and creates a sticky, sliceable layer.
- 1 ½ cups semi-sweet chocolate chips — melts into a glossy topping and sets firm for neat bars.
Make Chocolate Coconut Mounds Bar Brownies: A Simple Method
Follow these steps in order. I don’t change amounts or sequence; it works best that way.
- Preheat the oven to 350°F. Line an 8×8-inch pan with aluminum foil leaving an overhang on two opposite sides; spray the foil with cooking spray and set the pan aside.
- Put the 6 ounces coarsely chopped dark chocolate and ½ cup softened unsalted butter in a large microwave‑safe bowl. Microwave on high for about 1 minute, stop and stir, then continue in 15‑second bursts, stirring between bursts, until the mixture is fully melted and smooth. Let the mixture cool briefly so it is warm but not piping hot.
- Add 2 large eggs, ¾ cup granulated sugar, ¼ cup packed light brown sugar, 1 tablespoon vanilla extract, 1 tablespoon coffee (optional but recommended), and 1 teaspoon instant espresso granules (optional but recommended) to the melted chocolate mixture. Whisk until smooth and well combined.
- Add ¾ cup all‑purpose flour and stir or fold just until no streaks of flour remain. Do not overmix.
- Pour the batter into the prepared 8×8 pan and smooth the top lightly with a spatula.
- Bake the brownies for about 25–28 minutes, starting to check at 25 minutes. A toothpick inserted into the center should come out with a few moist crumbs but no wet batter. Remove from oven when they are just set.
- While the brownies are baking, use a large clean bowl (or wipe out the bowl you used previously) to combine 2½ cups sweetened shredded coconut (loosely packed) and one 12‑ounce can sweetened condensed milk. Toss or stir until the coconut is evenly coated; set aside.
- When the brownies come out of the oven, immediately spread the coconut mixture evenly over the hot brownie layer, smoothing gently and pressing into the corners so the layer is even.
- Evenly sprinkle 1½ cups semi‑sweet chocolate chips over the coconut layer.
- Return the pan to the oven and bake for 5 minutes.
- Remove the pan from the oven and, while the chocolate chips are softened, use a spatula to lightly smooth and press the chips so they settle into a more even top.
- Place the pan on a wire rack and cool undisturbed for at least 2–3 hours, or until the top chocolate layer has fully set (cooling overnight is best for cleaner slices).
- Use the foil overhang to lift the cooled bars from the pan onto a cutting board. Slice with a large, sharp knife. Longer cooling time will make slicing less messy.
Why Cooks Rave About It
There’s a satisfying contrast in these bars: a dense, fudgy brownie that holds up under a sticky coconut layer, topped with a crisp chocolate finish. The espresso and coffee are optional, but many cooks quietly keep them in the recipe because they sharpen chocolate flavor without making the bars taste like coffee.
These bars don’t fall apart like some layered desserts because of the condensed milk-coconut mix. It firms up during the second bake and while cooling, which means you can get cleaner squares than you’d expect from such a chewy middle. They’re also versatile: perfect for a casual bake sale or a dessert plate.
Finally, the method is forgiving. The microwave step for melting chocolate and butter is fast and controlled, and checking the brownies at the 25-minute mark prevents overbaking. Little attention in the oven yields a lot of flavor.
Texture-Safe Substitutions
– If you need gluten-free, replace the ¾ cup all-purpose flour with a 1:1 gluten-free baking flour blend. Look for blends that include xanthan gum for structure. Texture will be slightly different — typically a touch more crumbly — but still enjoyable.
– To reduce chewiness in the coconut layer, swap half the sweetened shredded coconut with unsweetened shredded coconut. That reduces overall sweetness and yields a less dense filling.
– For a bit richer brownie texture, some bakers replace a tablespoon of flour with 1 tablespoon cocoa powder. That will deepen the chocolate but slightly alter how the batter sets.
– If you prefer a milkier top, use milk chocolate chips instead of semi‑sweet. The top will be softer and sweeter; cooling time becomes more important for clean slices.
Equipment at a Glance
- 8×8-inch baking pan — for correct thickness and baking time.
- Aluminum foil — to line the pan and create an overhang for easy removal.
- Microwave-safe bowl — to melt chocolate and butter safely.
- Large mixing bowls — one for the batter, one for the coconut layer.
- Spatula and whisk — for smoothing and combining ingredients.
- Wire rack — so the pan can cool without trapping steam.
- Large sharp knife — for clean slicing once bars are fully set.
Slip-Ups to Skip
Do not skip the cooling step. Slicing these bars while warm turns the coconut layer into a sticky mess and makes the top chocolate smear. Give them the full 2–3 hours; overnight is even better.
Avoid overbaking the brownie base. Pulling the pan when the center still has moist crumbs ensures the brownie layer stays fudgy rather than cake-like. Also, don’t let the melted chocolate be piping hot when you add eggs. Let it cool briefly; otherwise, the eggs will scramble.
When spreading the coconut mixture on the hot brownie, be gentle. Pressing too hard can push too much filling into the brownie and change the balance of layers. Smooth it just enough to get an even surface.
Dietary Customizations
– Vegan: You can attempt a vegan version, but it requires more than simple swaps. Use a vegan butter substitute, replace eggs with flax eggs (2 tablespoons ground flaxseed mixed with 6 tablespoons water, chilled), and choose dark chocolate and sweetened condensed milk substitutes (canned coconut condensed milk can work). Expect different textures and adjust bake times.
– Lower sugar: Cut granulated sugar by a small fraction (e.g., reduce by 2 tablespoons) in the brownie layer if you like less sweet desserts. Do not alter the sweetened condensed milk or sweetened coconut without accepting a noticeably less candy-like middle.
– Nut-free: This recipe is naturally nut-free if you buy nut-free labeled chocolate chips and check packaging. It’s a good choice for nut-free gatherings.
What Could Go Wrong
– Chocolate seizing: If water gets into the melted chocolate, it can seize and become grainy. Always dry utensils and bowls thoroughly before coming into contact with melted chocolate.
– Runny coconut layer: Using tightly packed coconut instead of loosely packed will change the coconut-to-condensed-milk ratio and can yield a denser, possibly runnier middle. Measure loosely packed for best results.
– Soggy bottom: Underbaking the brownie layer could lead to instability when you spread the coconut topping. Bake until set with moist crumbs on a toothpick, as instructed.
– Cracked top: If you overbake the top chocolate layer during the final 5-minute return to the oven, it can dull or crack as it cools. Remove promptly and smooth the chips while they’re softened.
Save It for Later
Store the bars in an airtight container. At room temperature they’ll keep for 2 days; in the refrigerator they keep well for up to a week. Cold bars slice cleaner, so refrigeration helps if you want neat squares. For longer storage, freeze cut bars between layers of parchment in a sealed container for up to 3 months. Thaw in the refrigerator or on the counter for 30–60 minutes before serving.
Quick Questions
– Can I make these in a larger pan? Yes, but reduce baking time for a larger surface area or you’ll end up with a denser layer. The 8×8 pan gives the intended thickness and balance.
– Do I have to use both coffee and instant espresso? No. Both are optional but recommended. If you omit them, consider adding a touch more vanilla to keep flavor complexity.
– How do I get clean slices? Let the bars cool fully. For the cleanest edges, refrigerate or chill overnight and use a large, sharp knife; wipe the blade between cuts.
Final Bite
These Chocolate Coconut Mounds Bar Brownies are the sort of recipe that becomes a repeat because they deliver exactly what they promise: chocolate depth, a chewy coconut center, and a neat, chocolatey top. The steps are straightforward, and the payoff is high. Make a batch when you want something that looks like candy and tastes like a baker’s focused comfort. Keep the patience for cooling — that’s where the magic for clean, impressive bars happens. Enjoy.

Chocolate Coconut Mounds Bar Brownies
Ingredients
Ingredients
- 6 ouncesdark chocolate coarsely chopped (I used TJ’s 72% Pound Plus bar)
- 1/2 cupunsalted butter softened
- 2 large eggs
- 3/4 cupgranulated sugar
- 1/4 light brown sugar packed
- 1 tablespoonvanilla extract
- 1 tablespooncoffee leftover from the morning brew is fine, optional but recommended
- 1 teaspooninstant espresso granules optional but recommended
- 3/4 cupall-purpose flour
- 2 1/2 cupssweetened shredded coconut flakes loosely packed
- one 12-ounce can sweetened condensed milk
- 1 1/2 cupssemi-sweet chocolate chips
Instructions
Instructions
- Preheat the oven to 350°F. Line an 8×8-inch pan with aluminum foil leaving an overhang on two opposite sides; spray the foil with cooking spray and set the pan aside.
- Put the 6 ounces coarsely chopped dark chocolate and ½ cup softened unsalted butter in a large microwave‑safe bowl. Microwave on high for about 1 minute, stop and stir, then continue in 15‑second bursts, stirring between bursts, until the mixture is fully melted and smooth. Let the mixture cool briefly so it is warm but not piping hot.
- Add 2 large eggs, ¾ cup granulated sugar, ¼ cup packed light brown sugar, 1 tablespoon vanilla extract, 1 tablespoon coffee (optional but recommended), and 1 teaspoon instant espresso granules (optional but recommended) to the melted chocolate mixture. Whisk until smooth and well combined.
- Add ¾ cup all‑purpose flour and stir or fold just until no streaks of flour remain. Do not overmix.
- Pour the batter into the prepared 8×8 pan and smooth the top lightly with a spatula.
- Bake the brownies for about 25–28 minutes, starting to check at 25 minutes. A toothpick inserted into the center should come out with a few moist crumbs but no wet batter. Remove from oven when they are just set.
- While the brownies are baking, use a large clean bowl (or wipe out the bowl you used previously) to combine 2½ cups sweetened shredded coconut (loosely packed) and one 12‑ounce can sweetened condensed milk. Toss or stir until the coconut is evenly coated; set aside.
- When the brownies come out of the oven, immediately spread the coconut mixture evenly over the hot brownie layer, smoothing gently and pressing into the corners so the layer is even.
- Evenly sprinkle 1½ cups semi‑sweet chocolate chips over the coconut layer.
- Return the pan to the oven and bake for 5 minutes.
- Remove the pan from the oven and, while the chocolate chips are softened, use a spatula to lightly smooth and press the chips so they settle into a more even top.
- Place the pan on a wire rack and cool undisturbed for at least 2–3 hours, or until the top chocolate layer has fully set (cooling overnight is best for cleaner slices).
- Use the foil overhang to lift the cooled bars from the pan onto a cutting board. Slice with a large, sharp knife. Longer cooling time will make slicing less messy.
Equipment
- 8x8 Inch Pan
- Aluminum Foil
- Cooking spray
- Microwave-safe Bowl
- Spatula
- Large Bowl
- Wire Rack
- toothpick
- Knife
Notes
Brownies will keep airtight at room temperature for up to 1 week or in the freezer for up to 6 months.