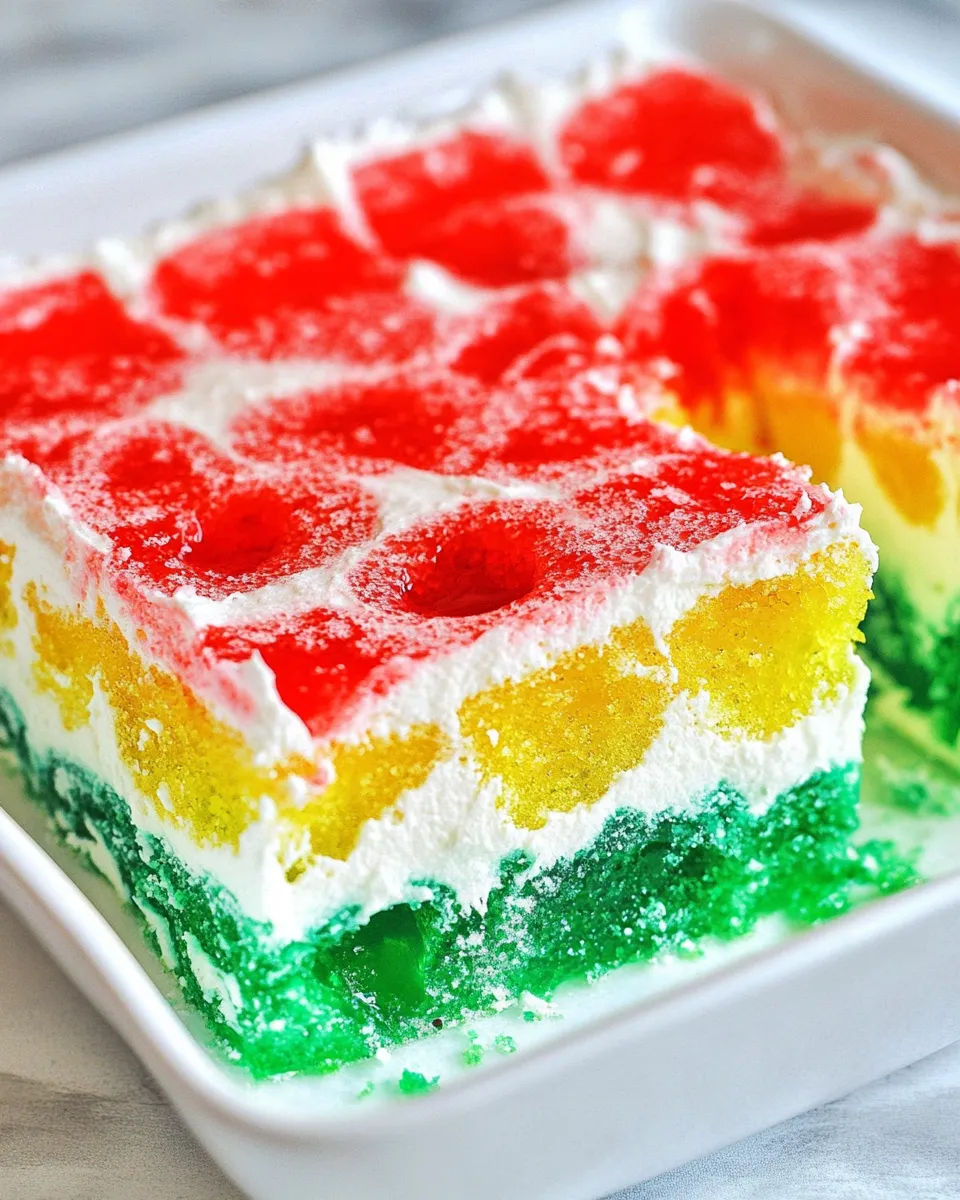
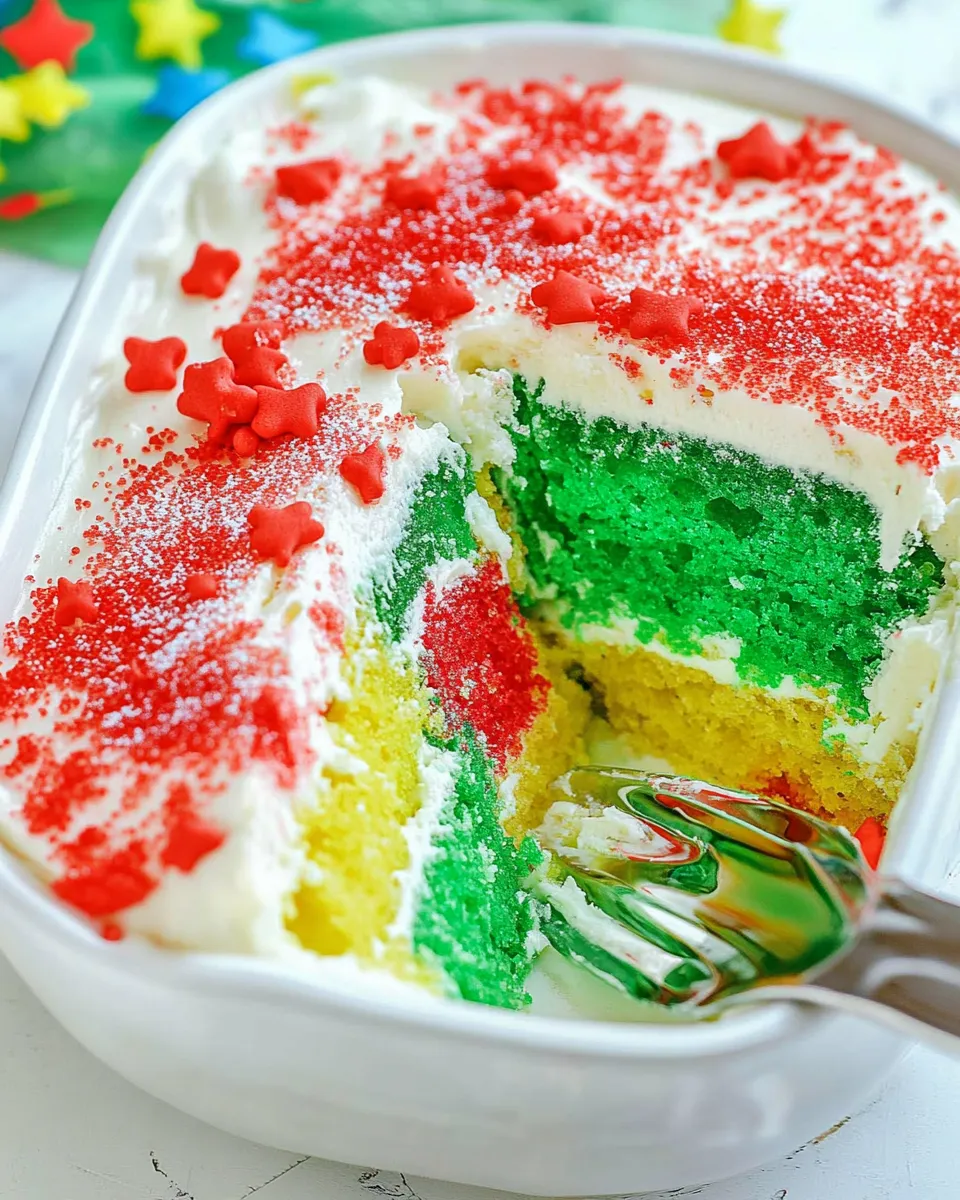
I love a dessert that looks like a party before you even cut it. This Colorful Jello Poke Cake does exactly that: vibrant gelatin pools that sink into tender white cake, topped with a cloud of Cool Whip. It’s nostalgic and playful, and it genuinely takes very little hands-on time.
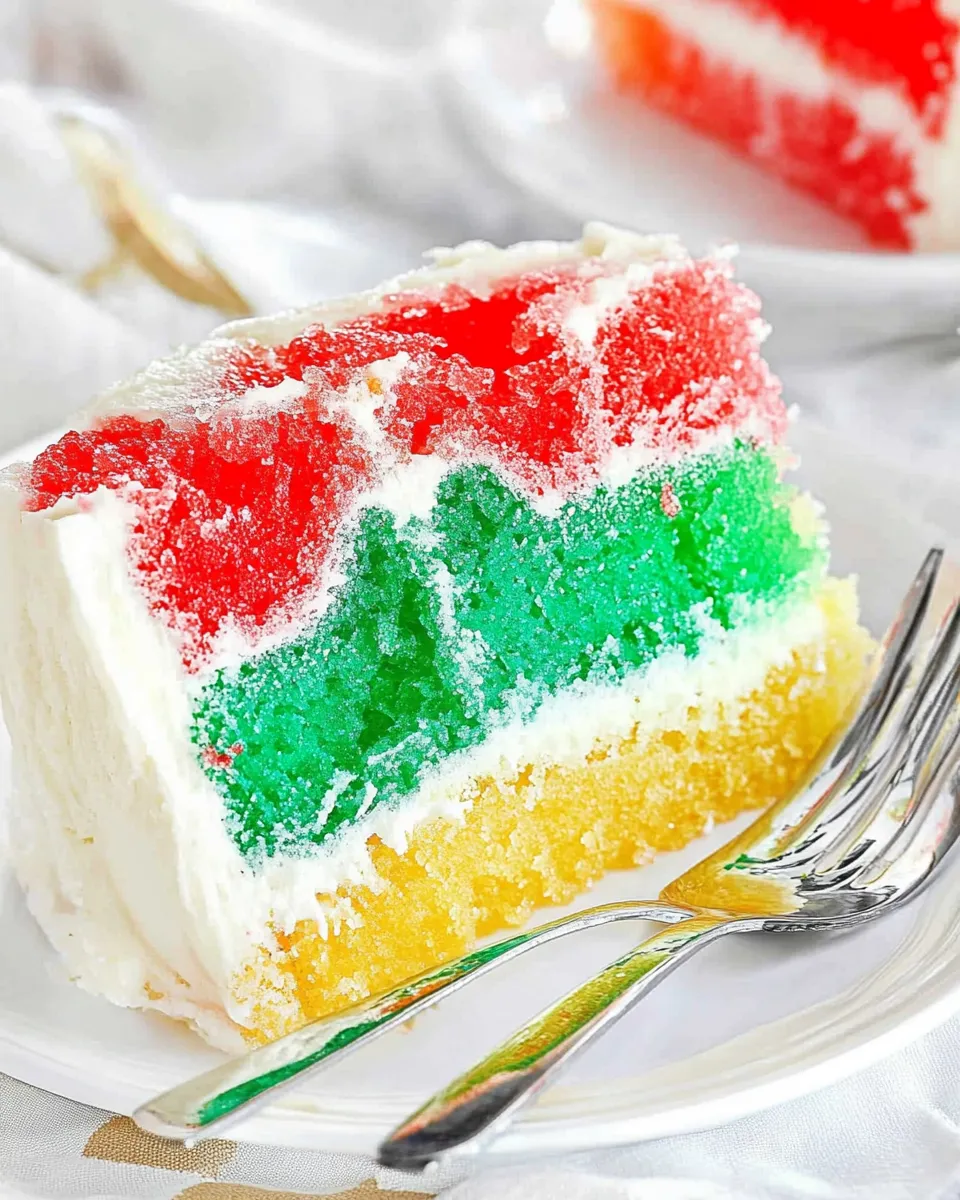
The technique is straightforward. You pierce the cake, pour brightly colored gelatin over it, let it set, stack the layers, and finish with Cool Whip. That simple sequence creates surprising texture contrasts—moist cake, jelly pockets, and creamy frosting—without complicated steps or obscure ingredients.
If you need a dessert for a crowd, a potluck, or a seasonal table, this cake delivers visuals and flavor without demanding your entire afternoon. Read on for a clear ingredient list, the exact step-by-step method, and practical tips that make this cake reliably successful every time.
The Ingredient Lineup
Ingredients
- 2 baked 9-inch white cake layers — the base structure; use evenly baked layers so the gelatin soaks in uniformly.
- 2 cups boiling water — divided into two 1-cup portions to dissolve each package of Jell-O.
- 2 packages Jell-O colors/flavors of choice — provide the color and the gelled pockets; pick contrasting colors for the most visual impact.
- 12 ounces Cool Whip — for the light, creamy finish and to tame the sweetness; reserve part for the middle and part for the top.
Stepwise Method: Colorful Jello Poke Cake
- Place each baked 9-inch white cake layer top side up in a separate 9-inch round cake pan.
- Pierce each cake layer all over with a large fork at 1/2-inch intervals.
- In two separate heatproof bowls, stir 1 package of Jell-O into 1 cup boiling water in each bowl; stir for 2 minutes or until dissolved.
- Carefully and slowly pour one gelatin mixture evenly over one pierced cake layer and pour the other gelatin mixture over the second pierced cake layer.
- Refrigerate the two pans for 3 hours to allow the gelatin to set.
- Dip one pan into warm water for about 10 seconds to loosen the cake, then invert the pan onto a serving plate to unmold the first layer.
- Spread 1 cup of the Cool Whip evenly over the unmolded first layer.
- Dip the second pan into warm water for about 10 seconds, invert it, and carefully place the second layer on top of the first layer.
- Frost the top and sides of the stacked cake with the remaining Cool Whip.
- Garnish as desired.
- Refrigerate the assembled cake for 1 hour before serving.
Why I Love This Recipe
First, it’s visually impressive with minimal effort. The poke method creates jewel-like pockets of gelatin that catch the light and invite curiosity. You don’t need advanced skills—basic steps yield a dessert that looks professional.
Second, the contrast of textures keeps every bite interesting. The cake stays moist because the gelatin sinks into the crumb, yet it doesn’t become soggy when you follow the chilling steps. The Cool Whip adds an airy finish and balances sweetness without weighing the cake down.
Finally, it’s forgiving. If one layer shifts slightly while stacking, a gentle nudge and a quick press usually settles it. The refrigerator time does the heavy lifting: chilling, setting, and stabilizing flavors so the dessert slices cleanly.
Budget & Availability Swaps
You don’t need specialty stores to make this. If pre-baked 9-inch white cake layers aren’t available, a store-bought sheet cake cut into rounds works, or use a boxed white cake mix baked in two 9-inch pans. Either option keeps costs down and saves time.
If the exact Jell-O flavors you want aren’t in stock, any two complementary flavors will do. The visual effect comes from contrast and saturation rather than specific flavor pairings. For a subtler look, pick similar hues but different flavors.
Cool Whip can be replaced by any ready-to-spread frozen whipped topping you prefer, but check package size to match the 12 ounces called for here. If you must scale up or down, keep the balance: two gelatin-soaked layers and a total of 12 ounces of topping give the intended texture and coverage.
Appliances & Accessories
- 9-inch round cake pans — you need two, one per layer.
- Large fork — for piercing at 1/2-inch intervals; a skewer works but the fork makes quick, uniform holes.
- Two heatproof bowls — for dissolving the Jell-O safely in boiling water.
- Refrigerator — for the 3-hour set and the final 1-hour chill; chilling time is essential for structure.
- Serving plate — choose one slightly larger than the cake so you can unmold and plate cleanly.
What Not to Do
Don’t rush the chilling steps. The 3-hour refrigeration after pouring the gelatin is not optional. If the gelatin hasn’t set enough, the layers will shift and the texture will be off.
Don’t skip the warm-water dip when unmolding. Ten seconds is enough to loosen the sides without melting the gelatin. Too long in warm water and you risk softening the gelled pockets at the edges.
Don’t pour the gelatin too quickly. Move slowly and pour evenly. Fast pouring can create channels rather than even pockets, which affects both appearance and texture.
Finally, don’t overfrost. The Cool Whip should be spread gently. Heavy-handed spreading can compress the gelatin pockets and flatten the cake.
Holiday & Seasonal Touches
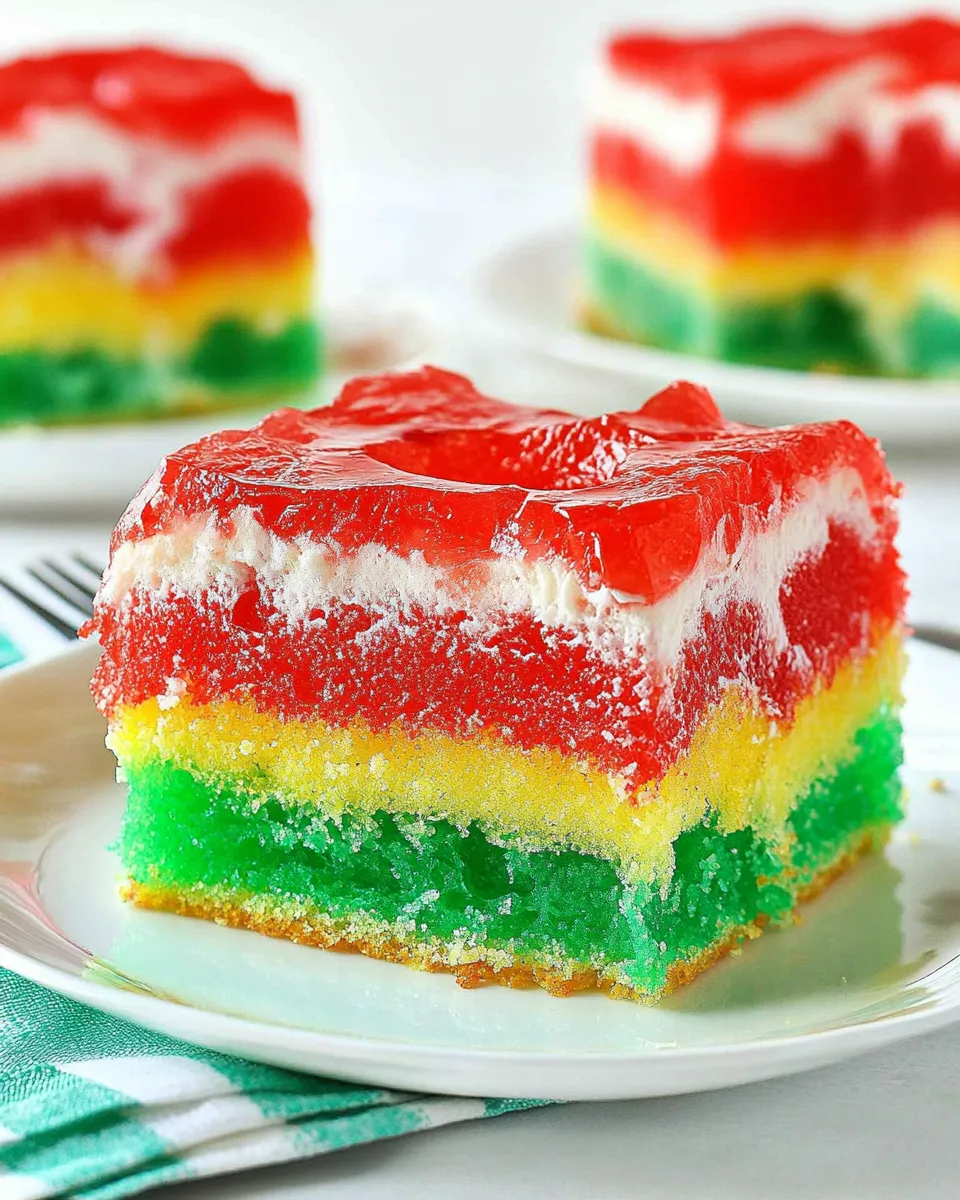
This cake is naturally seasonal because color choices set the tone. Warm reds and greens make it feel festive for end-of-year holidays. Light pastel Jell-O gives springtime or Easter vibes. Bright, primary colors work well for birthdays and summer parties.
If you want to theme the cake without changing the recipe, coordinate the Jell-O colors and the plate or table decor. You can also use colored sanding sugar or small decorative toppers at serving time, keeping in mind that the garnish should be added right before serving so it stays crisp.
Cook’s Notes
Timing and texture
Piercing at 1/2-inch intervals ensures the gelatin penetrates enough to moisten the crumb without turning the cake into a puddle. If your fork marks are too close together the cake may become overly wet. If they’re too far apart, the gelatin won’t distribute evenly.
Handling and assembly
When you dip the pan into warm water, do it gently and only long enough to loosen the cake from the sides. Place the serving plate directly on the pan rim and invert in one confident motion. If the cake resists, a second brief dip usually does the trick.
Frosting tips
Reserve one cup of Cool Whip for the middle layer as the method specifies. This keeps layers from sliding and gives a balanced moisture profile. Smooth the top and sides with an offset spatula or the back of a spoon, using light strokes.
Make-Ahead & Storage
This cake is a make-ahead dream. You can complete steps through the final refrigeration and keep the assembled cake chilled up to 24-48 hours. Tightly cover the cake (a cake dome or plastic wrap) to prevent odor absorption from the refrigerator.
Once sliced, store leftover pieces in an airtight container in the refrigerator for up to 3-4 days. The gelatin and Cool Whip will keep the cake moist, but textures may soften after a couple of days. Avoid freezing—the Cool Whip and gelatin don’t respond well to freezing and thawing.
Ask & Learn
If you try a different pairing of Jell-O colors, let me know which ones and how they turned out. If a layer won’t unmold or the gelatin seems runny after three hours, comment with details: which step you were on, the stability of your refrigerator, and the flavors used. I’ll help you troubleshoot.
Questions about scaling the recipe, swapping toppings, or adapting for dietary needs are welcome. I’ll answer practical options based on the source method so you can keep the structure and texture the recipe creates.
The Takeaway
Colorful Jello Poke Cake is an easy, show-stopping dessert that relies on simple technique rather than complex skills. Follow the piercing, dissolve-and-pour, set, and gentle-unmold sequence exactly as written, and you’ll have a bright, moist cake that slices neatly and delights a crowd. Make it ahead, keep it chilled, and let the colors do the rest.
Colorful Jello Poke Cake
Ingredients
Ingredients
- 2 baked9-inch white cake layers
- 2 cupsboiling water
- 2 packagesJell-Ocolors/flavors of choice
- 12 ouncesCool Whip
Instructions
Instructions
- Place each baked 9-inch white cake layer top side up in a separate 9-inch round cake pan.
- Pierce each cake layer all over with a large fork at 1/2-inch intervals.
- In two separate heatproof bowls, stir 1 package of Jell-O into 1 cup boiling water in each bowl; stir for 2 minutes or until dissolved.
- Carefully and slowly pour one gelatin mixture evenly over one pierced cake layer and pour the other gelatin mixture over the second pierced cake layer.
- Refrigerate the two pans for 3 hours to allow the gelatin to set.
- Dip one pan into warm water for about 10 seconds to loosen the cake, then invert the pan onto a serving plate to unmold the first layer.
- Spread 1 cup of the Cool Whip evenly over the unmolded first layer.
- Dip the second pan into warm water for about 10 seconds, invert it, and carefully place the second layer on top of the first layer.
- Frost the top and sides of the stacked cake with the remaining Cool Whip.
- Garnish as desired.
- Refrigerate the assembled cake for 1 hour before serving.
Equipment
- 9-inch Round Cake Pans
- large fork
- heatproof bowls
- Refrigerator
- Serving plate
- Measuring Cup
Notes
For the most eye-catching results, choose contrasting Jello colors with good visibility against the white cake. Dark colors like cherry, grape, and berry blue create the most dramatic effect. Also, letting the Jello cool slightly before pouring (about 5 minutes) helps prevent it from soaking into the cake too much while still ensuring it fills the holes.