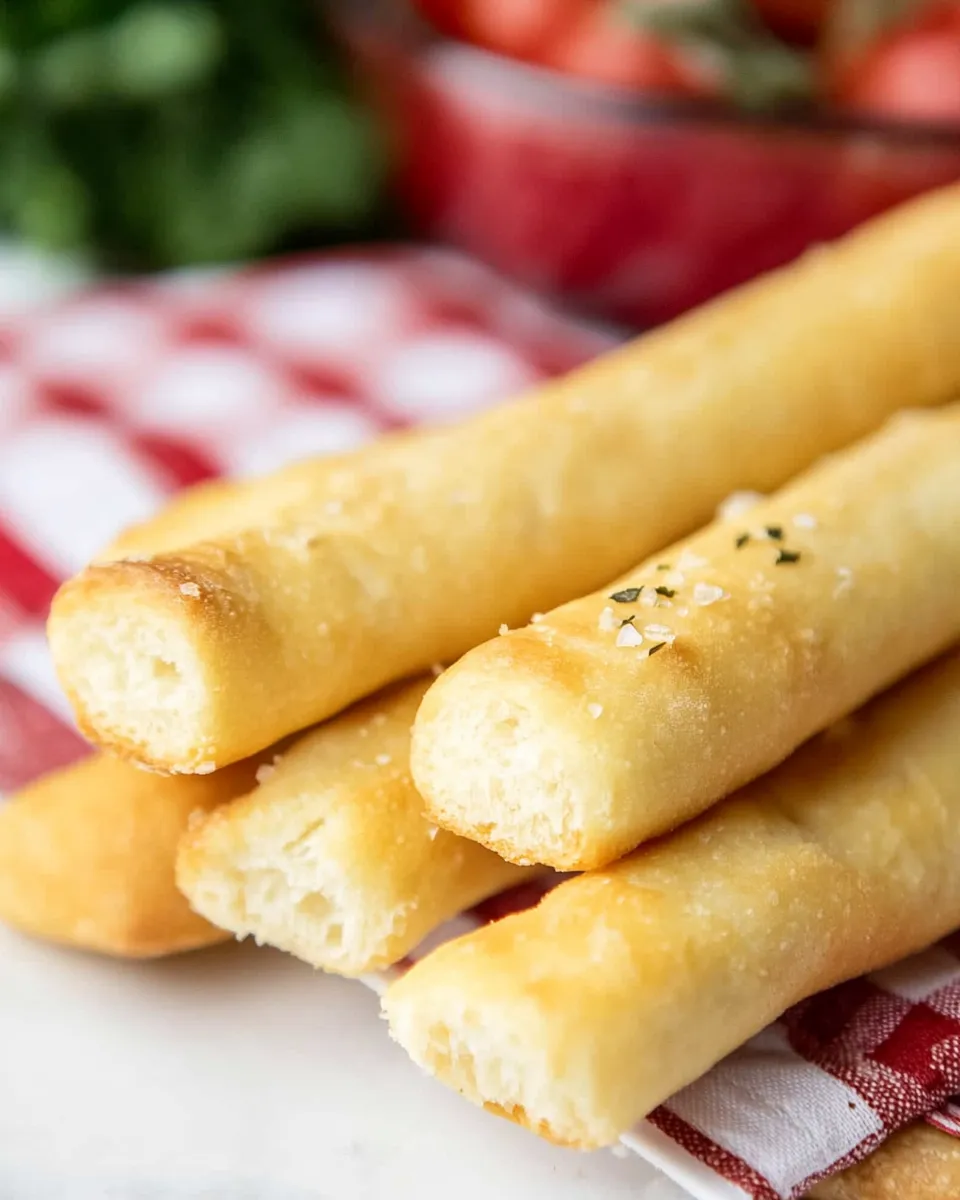
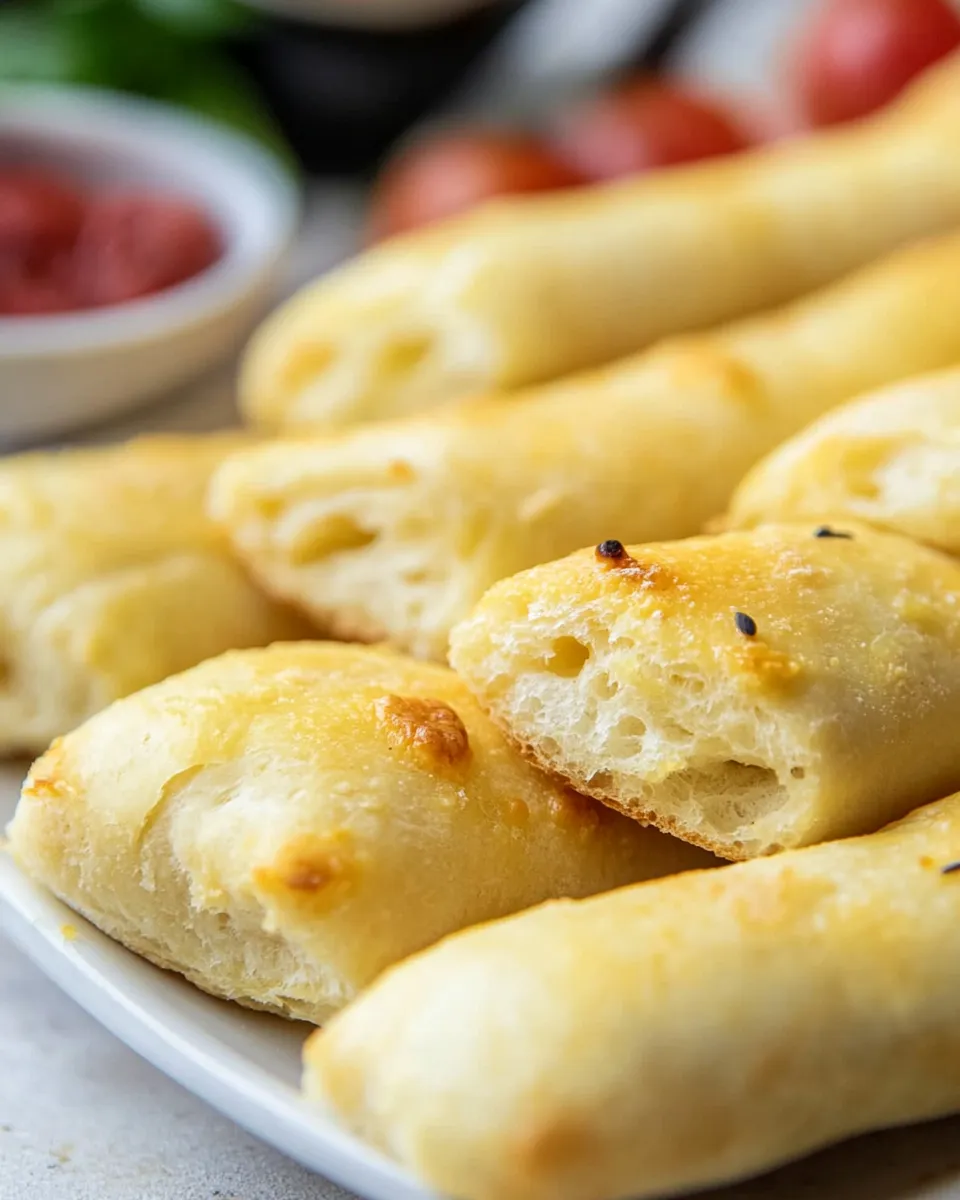
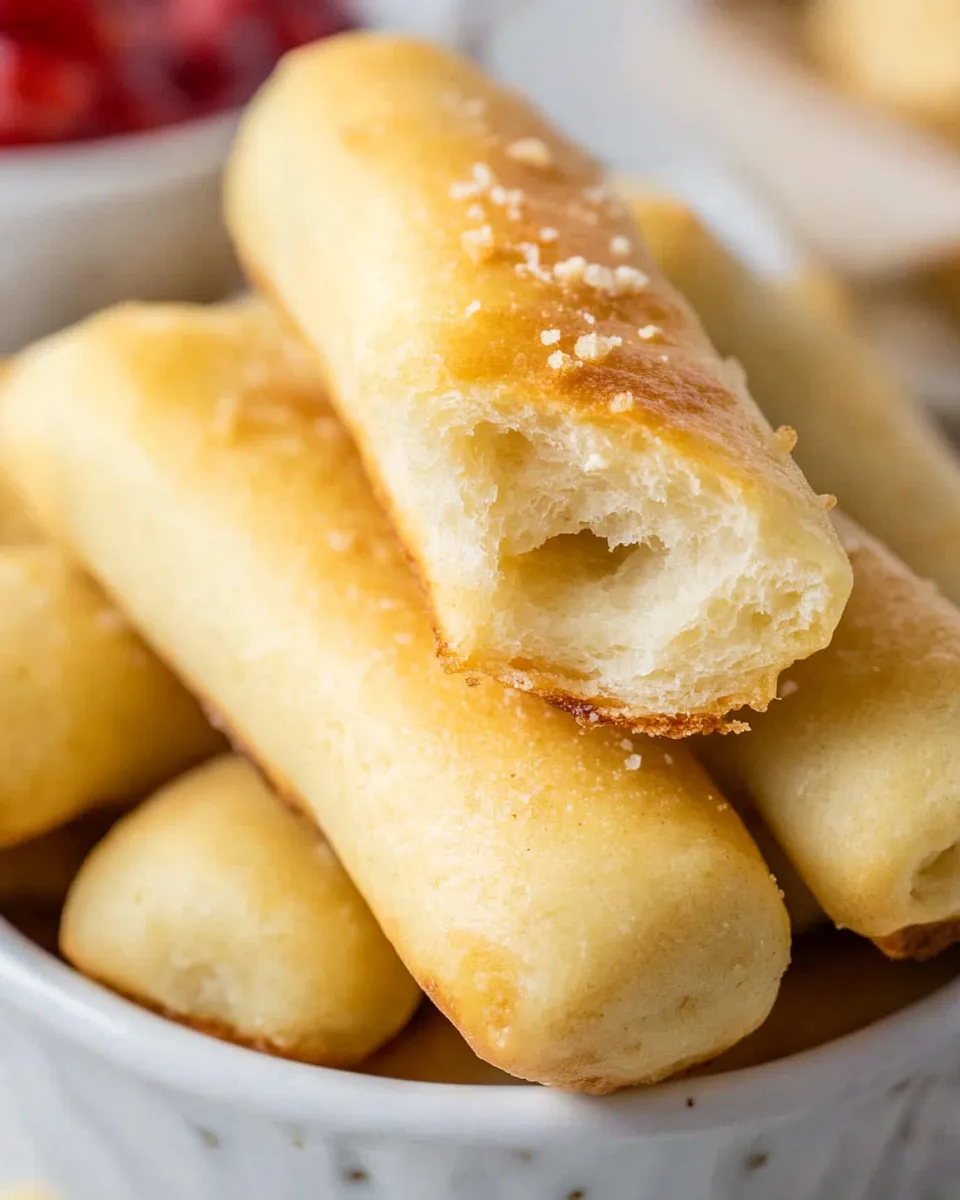
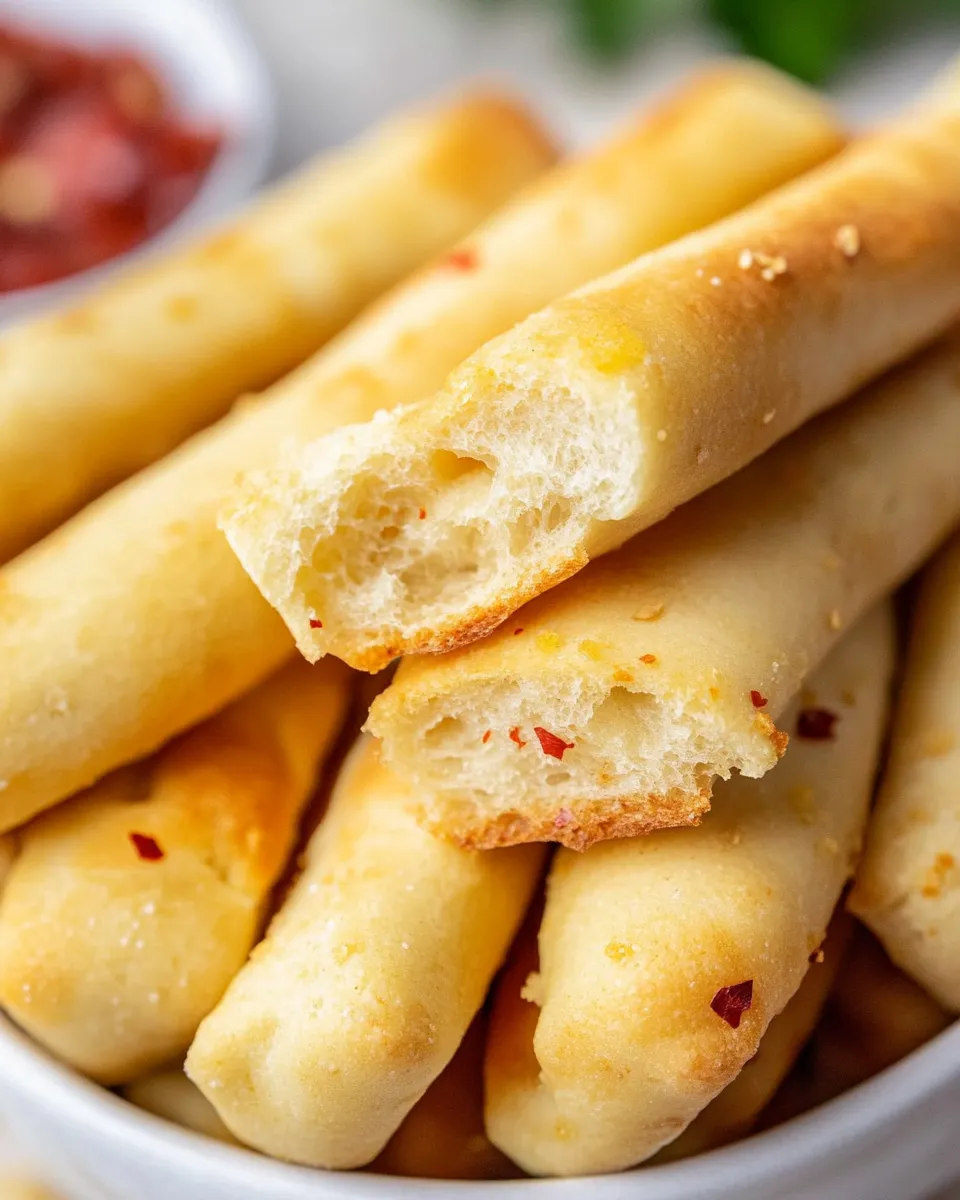
These breadsticks are the sort that disappear fast at family dinners and weeknight pasta nights. They’re soft, slightly chewy, and brushed with a buttery garlic finish that keeps everyone reaching for one more. I’ve tested this method until the texture was consistent: a tender interior and a pale, delicate crust that turns lightly golden in the oven.
I like this recipe because it’s straightforward and forgiving. The steps rely on simple techniques—proofing yeast, a short knead, a single rise—and they produce dependable results. You don’t need fancy equipment, just a little patience during the rise. Follow the order and timings below and you’ll have warm breadsticks ready in about two hours start to finish.
The Ingredient Lineup
- 1 and 1/2 cups warm tap water (up to 130°F / 55°C) — not boiling; used to activate the yeast. Aim for pleasantly warm to the touch.
- 2 tablespoons granulated sugar — feeds the yeast and helps browning.
- 2 teaspoons dry yeast — the leavening agent; check freshness if it doesn’t foam.
- 4 and 1/2 cups bread flour — gives structure and chew; measure by spooning into the cup and leveling.
- 2 teaspoons salt — balances flavor and strengthens gluten.
- 3 tablespoons unsalted butter, melted — adds richness to the dough.
- 1 tablespoon unsalted butter — for brushing the hot breadsticks; provides flavor and shine.
- 1/4 teaspoon salt — mixed with garlic for the finishing sprinkle; enhances the final taste.
- 1/2 teaspoon garlic granules — easy-to-use garlic flavor for the topping; adjust to taste.
Olive Garden Breadsticks: Step-by-Step Guide
- In a small bowl, combine 1 and 1/2 cups warm tap water (up to 130°F / 55°C), 2 tablespoons granulated sugar, and 2 teaspoons dry yeast. Stir once, then set aside for about 10 minutes until the mixture is foamy and bubbly.
- In a large bowl, whisk together 4 and 1/2 cups bread flour and 2 teaspoons salt.
- Add 3 tablespoons melted unsalted butter and the activated yeast mixture to the flour. Stir until a rough dough forms.
- Turn the dough onto a lightly floured surface and knead for about 7 minutes, until the dough is smooth and elastic and forms a cohesive ball.
- Divide the dough into 12 equal pieces. Shape each piece into a ball and roll each ball into a rope.
- Place the 12 ropes on a baking sheet lined with parchment paper, leaving space between them. Cover loosely with a clean towel and let rise in a warm place for 1 hour, until puffy.
- During the last few minutes of the rise, preheat the oven to 390°F (200°C).
- Bake the breadsticks for 15 minutes, until lightly golden.
- While the breadsticks bake (or just before they come out), melt 1 tablespoon unsalted butter. In a small bowl, combine 1/4 teaspoon salt and 1/2 teaspoon garlic granules.
- Remove the breadsticks from the oven and immediately brush them with the melted 1 tablespoon butter. Sprinkle the salt-and-garlic mixture evenly over the warm breadsticks. Serve warm.
Why This Recipe Is Reliable
There are no tricky temperatures or unusual flours to chase here—just basic bread baking principles. The yeast proof (step 1) confirms the yeast is active; if it foams, you’re off to a solid start. Using bread flour gives the sticks the right chew without turning heavy. The single, one-hour rise is long enough to develop flavor and loft but short enough to keep this an achievable weeknight project.
Measurements and timings are balanced for a consistent outcome. Kneading for about seven minutes builds gluten without tiring your hands. The oven temperature—390°F (200°C)—creates a gentle color and a soft crust instead of a thick, hard shell. Brushing with melted butter and the garlic-salt finish while the sticks are hot locks in flavor and keeps the exterior tender.
Vegan & Vegetarian Swaps
Vegetarian: This recipe is vegetarian-friendly as written. It relies on butter for richness, which many vegetarians eat without issue.
Vegan: Make a simple swap by replacing both the butter in the dough and the brushed butter with a vegan butter or a neutral-tasting oil such as light olive oil. Melted vegan butter gives a similar mouthfeel and flavor when brushed on hot sticks. The dough behavior stays largely the same; expect the crust to be slightly different in color and the flavor slightly less dairy-forward.
Setup & Equipment
- Small bowl — for proofing the yeast and mixing the finishing salt-garlic.
- Large bowl — for mixing the dough.
- Whisk — to combine dry ingredients quickly.
- Lightly floured surface — for kneading; a countertop or pastry board works fine.
- Baking sheet and parchment paper — parchment prevents sticking and eases cleanup.
- Clean towel or plastic wrap — to cover the dough during the rise and keep drafts off.
- Pastry brush — for melting butter and glazing the finished breadsticks.
- Oven — preheated to 390°F (200°C) for proper baking.
Common Errors (and Fixes)
- Dough didn’t rise: The yeast likely wasn’t active. Check the initial proof—if the mixture didn’t get foamy after 10 minutes, start over with fresh yeast and make sure the water is warm, not hot.
- Too sticky to shape: Resist adding too much extra flour. Dust your hands and the surface lightly and knead a bit longer; the dough will come together. If it stays excessively sticky, sprinkle a teaspoon of flour at a time until manageable.
- Dense breadsticks: Under-kneading or not enough rise time are usual culprits. Knead the full seven minutes until the dough feels smooth and elastic. Make sure the rise occurs in a warm, draft-free spot.
- Too brown or hard crust: Oven might be running hot. Confirm temperature with an oven thermometer. If they brown too quickly, tent lightly with foil for the last few minutes.
- Garlic topping falls off: Brush the breadsticks while they’re hot so the butter helps the garlic-salt adhere. Sprinkle evenly and press lightly with the back of the brush if needed.
Variations for Dietary Needs
Low-sodium: Reduce the dough salt slightly, but keep a small amount so the yeast and gluten structure behave properly. You can also reduce the finishing 1/4 teaspoon salt or omit it and rely on a garlic-only finishing.
Gluten-free: This dough relies on bread flour and its gluten. For a gluten-free version, use a tested gluten-free baking mix formulated for yeasted breads and follow that mix’s instructions for hydration and binders—results vary widely by blend.
Lower-fat option: Use oil in place of the melted butter in the dough and a light brush of oil after baking instead of butter. Flavor will be different but still tasty.
Behind the Recipe
These sticks are inspired by a familiar restaurant classic—soft, subtly seasoned, and designed to accompany a bowl of saucy pasta or a pile of salad. I developed this version by focusing on texture first: a soft interior achieved with bread flour and a moderate rise, and a finish that nods to the original with a buttery garlic sprinkle. The method is intentionally simple so home bakers can repeat it consistently without special techniques.
What I love about this recipe is how forgiving it is. The steps reward attention but don’t punish small mistakes. If your first batch is slightly denser, adjust proofing temperature and kneading next time and you’ll see quick improvements.
Keep-It-Fresh Plan
Room temperature: Store cooled breadsticks in an airtight container or resealable bag at room temperature for up to 2 days. Keep them away from direct heat and sunlight to preserve softness.
Reheating: Warm the breadsticks in a 300°F (150°C) oven for 5–7 minutes, or microwave a single stick for about 10–12 seconds wrapped in a paper towel to restore softness quickly.
Freezing: After baking and cooling, wrap the breadsticks individually in plastic wrap and freeze in a resealable bag for up to 1 month. Reheat from frozen in a 325°F (160°C) oven for 10–12 minutes, brush with a little melted butter after heating, and sprinkle the garlic-salt if desired.
Troubleshooting Q&A
- Q: My yeast didn’t foam. What now? A: Discard that batch of proofed yeast, check water temperature (should be warm, not hot), and try again with fresh yeast. Expired yeast often fails to activate.
- Q: The dough felt dry after mixing. A: Humidity and flour brands vary. If the dough looks dry, add a teaspoon of warm water at a time while stirring until it comes together, then knead.
- Q: Breadsticks are pale after baking. A: They should be only lightly golden. If you prefer more color, raise oven temperature slightly or bake 2–3 minutes longer, watching closely to avoid hard crusts.
- Q: The garlic flakes taste raw or too strong. A: Garlic granules can intensify when raw. Mix them with the melted butter and salt as instructed; brushing onto hot bread mellows and blooms their flavor.
Let’s Eat
Serve these warm with a bowl of marinara, a hearty soup, or alongside your favorite salad. They’re best straight from the oven but reheat beautifully. Pull them apart, brush again if you like extra butter, and enjoy the soft, garlicky comfort they bring. Practical, satisfying, and reliably delicious—these Olive Garden-style breadsticks are one of those recipes you’ll make again and again.
Olive Garden Breadsticks
Ingredients
Ingredients
- ?1 and 1/2 cupswarm tap waterNOT boiling or super hot up to 130°F (55°C) see note 1.
- ?2 tablespoonsgranulated sugar
- ?2 teaspoonsdry yeastsee note 2
- ?4 and 1/2 cupsbread flour
- ?2 teaspoonssalt
- ?3 tablespoonsunsalted buttermelted
- ?1 tablespoonunsalted butter
- ?1/4 teaspoonsalt
- ?1/2 teaspoongarlic granules
Instructions
Instructions
- In a small bowl, combine 1 and 1/2 cups warm tap water (up to 130°F / 55°C), 2 tablespoons granulated sugar, and 2 teaspoons dry yeast. Stir once, then set aside for about 10 minutes until the mixture is foamy and bubbly.
- In a large bowl, whisk together 4 and 1/2 cups bread flour and 2 teaspoons salt.
- Add 3 tablespoons melted unsalted butter and the activated yeast mixture to the flour. Stir until a rough dough forms.
- Turn the dough onto a lightly floured surface and knead for about 7 minutes, until the dough is smooth and elastic and forms a cohesive ball.
- Divide the dough into 12 equal pieces. Shape each piece into a ball and roll each ball into a rope.
- Place the 12 ropes on a baking sheet lined with parchment paper, leaving space between them. Cover loosely with a clean towel and let rise in a warm place for 1 hour, until puffy.
- During the last few minutes of the rise, preheat the oven to 390°F (200°C).
- Bake the breadsticks for 15 minutes, until lightly golden.
- While the breadsticks bake (or just before they come out), melt 1 tablespoon unsalted butter. In a small bowl, combine 1/4 teaspoon salt and 1/2 teaspoon garlic granules.
- Remove the breadsticks from the oven and immediately brush them with the melted 1 tablespoon butter. Sprinkle the salt-and-garlic mixture evenly over the warm breadsticks. Serve warm.
Equipment
- Small Bowl
- Large Bowl
- Mixing Spoon
- Baking Sheet
- Parchment Paper
- clean towel
- Measuring Cups
- Measuring Spoons
Notes
Yeast– use yeast that is labelled with “instant” or “rapid rise”. If using normal yeast (usually labelled “active dry yeast”) then dissolve yeast in water first.
On super hot days, the dough might rise so quickly i.e 30 minutes might be enough so keep an eye on it as you won’t want it to over-rise.
Nutritioncalculated is per breadstick.
Plain breadsticks– brush with an egg wash before baking.
Everything bagel breadsticks– brush with an egg wash and sprinkle with everything bagel seasoning before baking.
Italian herb breadsticks– brush with an egg wash and sprinkle with oregano before baking.
Sweet cinnamon– leave the breadsticks plain, bake and then brush with melted butter and toss in cinnamon sugar (granulated sugar mixed with ground cinnamon).