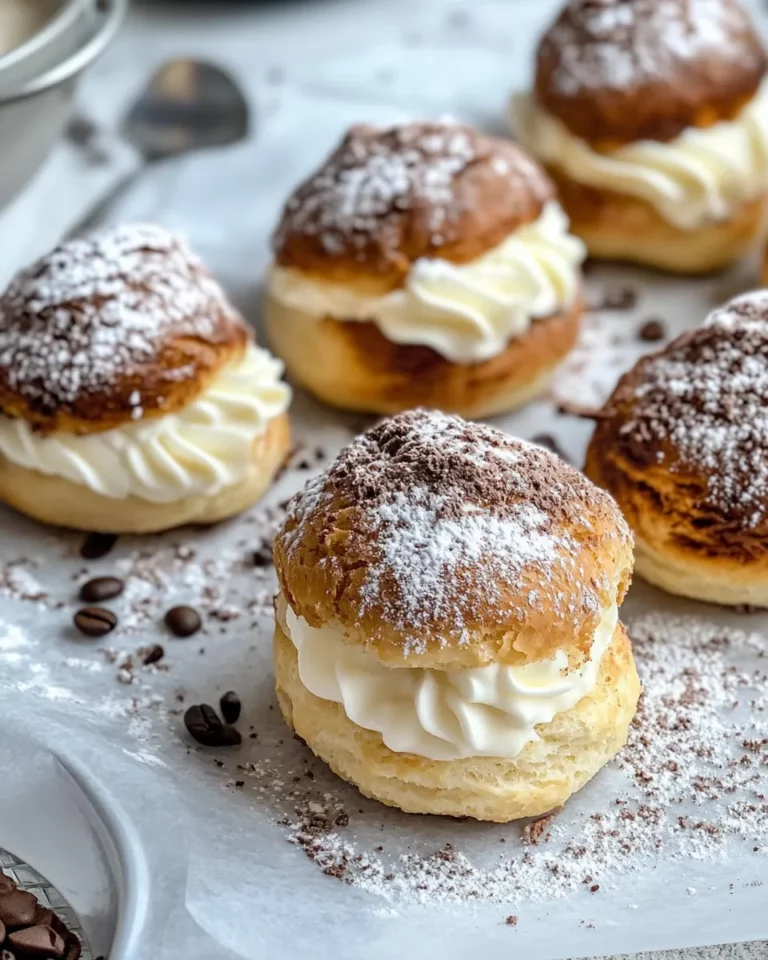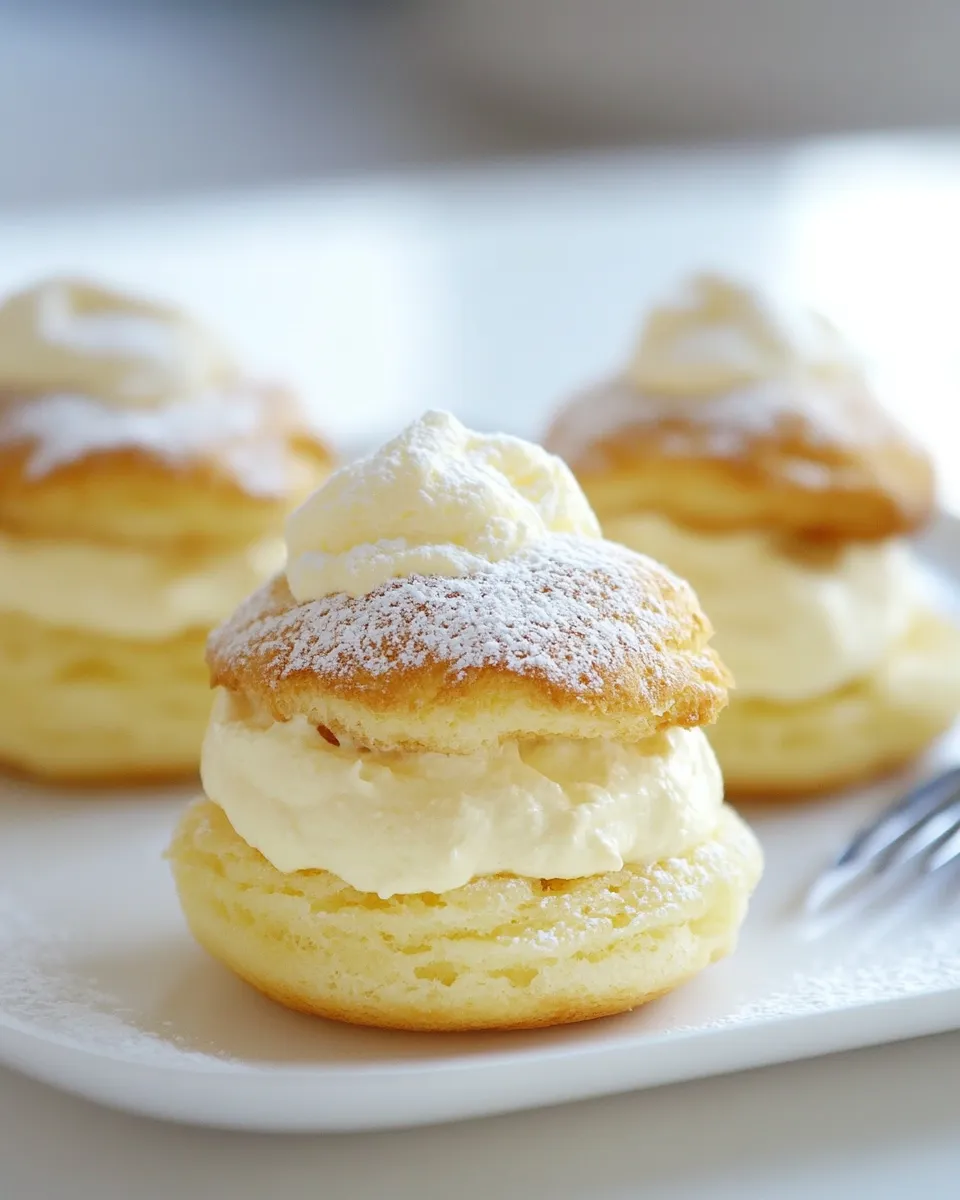
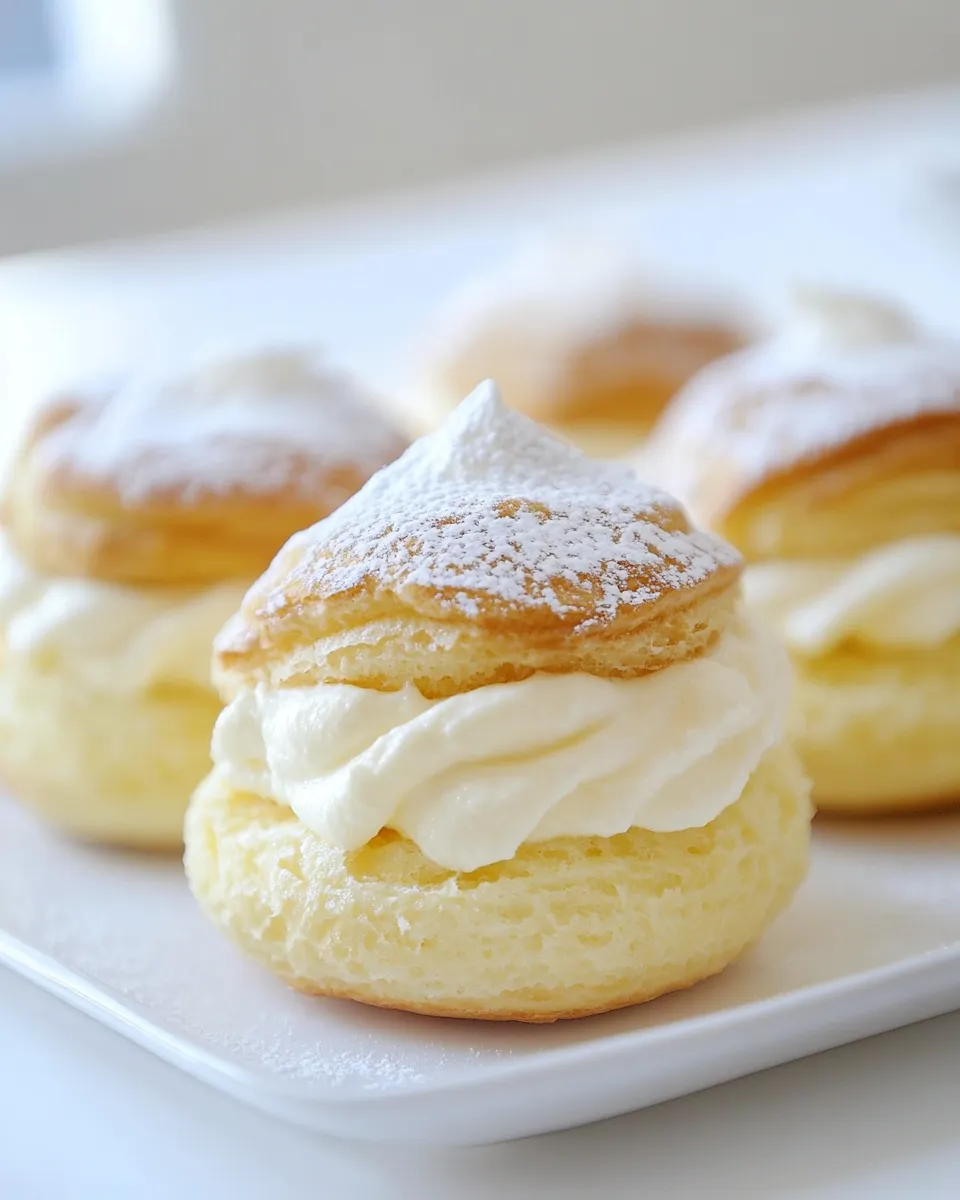
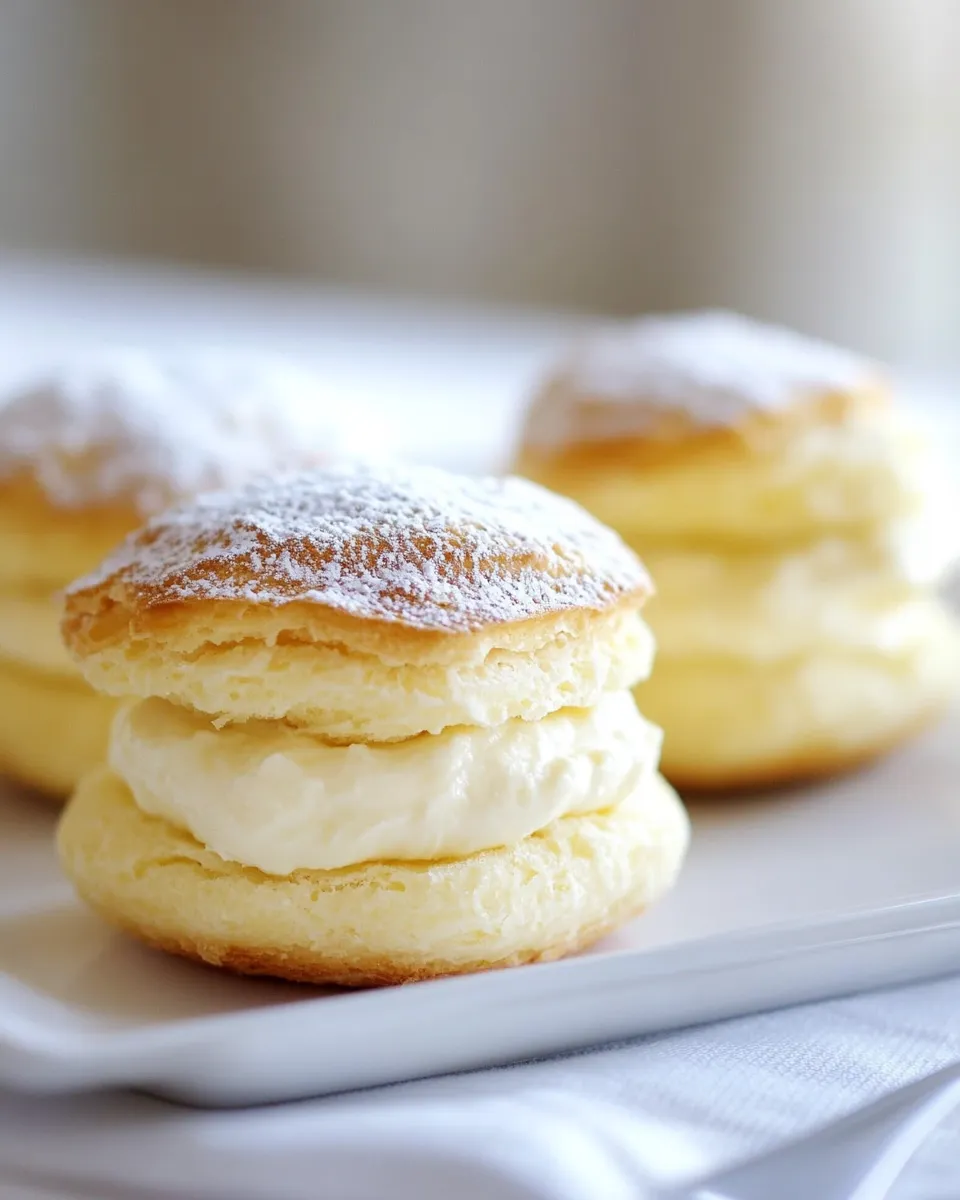
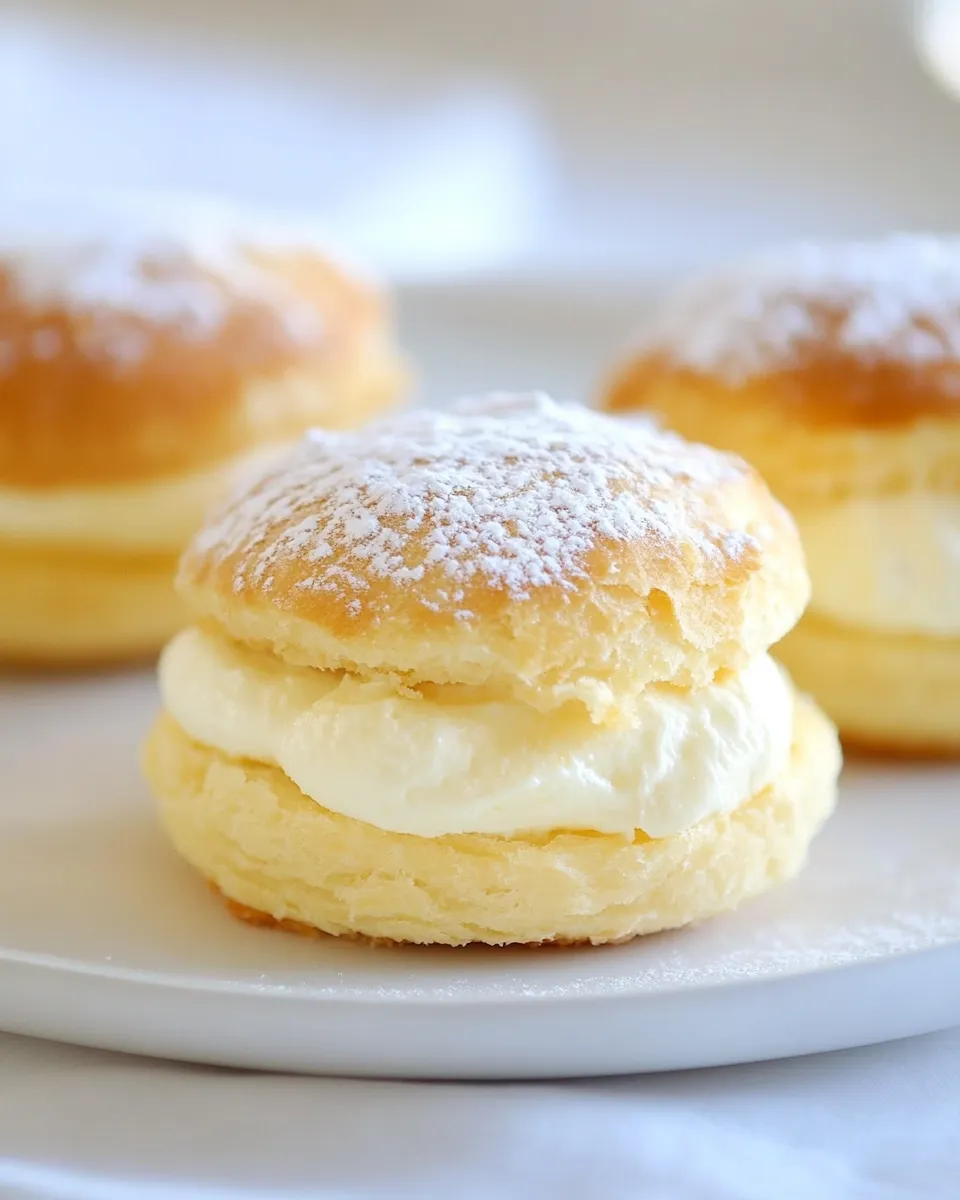
I make these lemon cream puffs whenever I want a dessert that feels fancy but doesn’t require a pastry chef’s timetable. The choux shells are crisp, hollow centers perfect for a lemony cream that’s light, bright, and not overly sweet. You’ll get a satisfying contrast of textures — a delicate crunch giving way to a creamy, citrus-forward center.
This recipe is practical: it uses one classic choux dough and a quick instant-pudding–based lemon filling that whips up in minutes. The steps are repeatable and forgiving if you keep a few technique notes in mind. It’s a dessert that travels well to a brunch, can be made ahead in stages, and disappears fast once people try one.
If you enjoy hands-on baking but hate recipes that overpromise and underdeliver, this is for you. I’ll walk you through precise steps, explain why they matter, and offer sensible troubleshooting and storage tips so your puffs turn out reliably every time.
What You’ll Need
Ingredients
- 1 cup water — provides the steam that puffs the choux; measure accurately for consistent texture.
- 1/2 cup butter — adds fat and flavor; unsalted allows you to control seasoning.
- 1/4 teaspoon salt — enhances flavor; don’t skip it unless you must.
- 1 1/4 cups all-purpose flour — the structure of the shells; spoon and level for accuracy.
- 4 large eggs — the lifting agents and moisture for the dough; add one at a time and beat well.
- 3.4 oz instant lemon pudding 1 box — forms the lemon base of the filling with stable flavor.
- 1 1/2 cups heavy cream — whipped into the filling for lightness and body.
- 1 cup milk — hydrates the pudding mix; colder milk will help the mixture whip up cleanly.
- 1 teaspoon vanilla — rounds the lemon and adds depth to the filling.
- zest of 1 lemon — brightens the filling with fresh citrus oil; zest right before using for peak aroma.
- 2 tablespoons sugar — balances acidity in the filling; adjust slightly if your pudding is very sweet.
- powdered sugar for garnish — a light dusting for presentation and a hint of sweetness on the exterior.
Cook Lemon Cream Puffs Like This
- Preheat the oven to 425°F (220°C). Line two baking sheets with parchment paper and set aside.
- In a medium saucepan combine 1 cup water, 1/2 cup butter, and 1/4 teaspoon salt. Place over medium heat until the butter melts, then increase heat to high and bring to a rolling boil.
- Remove the pan from the heat and add 1 1/4 cups all-purpose flour all at once. Stir vigorously with a wooden spoon or spatula until the flour is fully incorporated.
- Return the pan to medium heat and cook, stirring constantly, until the dough smooths out and pulls away from the sides of the pan and follows the spoon (about 30 seconds). Remove from heat.
- Let the dough cool for 5–10 minutes, until it is hot but not so hot that it would cook the eggs when added (you should be able to hold a fingertip in it briefly).
- Transfer the dough to a mixing bowl or the bowl of a stand mixer. Add 4 large eggs one at a time, beating well after each addition. The dough may look curdled at times but should become smooth after the last egg. Beat for at least 2 minutes after the last egg to ensure the mixture is smooth and glossy.
- Using a tablespoon-sized scoop or two spoons, drop generous mounds of the choux batter (about 3 to 4 tablespoons each) onto the prepared baking sheets, spacing them about 3 inches apart.
- Bake at 425°F for 15 minutes. Without opening the oven door, reduce the oven temperature to 350°F (175°C) and continue baking for an additional 25 minutes, until the puffs are a medium golden brown.
- Remove the baking sheets from the oven. Use a small knife to make a small slit in the top of each puff to release steam, then return the puffs to the oven for 5 minutes to dry the interiors. Transfer the puffs to a wire rack to cool.
- While the shells cool, make the lemon filling: in a mixing bowl combine the 3.4 oz box of instant lemon pudding mix and 1 cup milk; then add 1 1/2 cups heavy cream. Beat the mixture with an electric mixer for 2–3 minutes, until light and fluffy.
- Stir in 1 teaspoon vanilla, the zest of 1 lemon, and 2 tablespoons sugar into the filling until evenly combined.
- When the cream puff shells are cool enough to handle, split each in half horizontally. Fill each bottom half generously with the lemon filling (spoon or pipe the filling), replace the tops, and dust with powdered sugar.
- Refrigerate the filled cream puffs until ready to serve.
Why This Recipe is a Keeper
It’s the combination of simple technique and reliable ingredients. Choux isn’t complicated — it’s chemistry. The initial high oven temperature produces a burst of steam that puffs the shells; the lower temperature finishes cooking and browns them without burning. That two-stage bake is what gives you hollow, dry interiors that accept filling without collapsing.
The lemon filling is intentionally straightforward. Instant pudding speeds the process, and whipped heavy cream lightens the texture so the final bite never feels heavy. Zest and a measured amount of sugar keep the flavor bright and balanced: you get lemon character without one-sided tartness or cloying sweetness.
Finally, the steps are staged so you can pause: make and bake shells one day, then whip the filling and assemble the next. That makes these excellent for entertaining without last-minute fuss.
Allergy-Friendly Substitutes
Choux shells depend heavily on eggs and gluten; swapping both will change the texture and behavior significantly. Still, here are practical options if you must adapt:
- Egg allergy: Commercial egg replacers or aquafaba can work in some bakes, but choux is egg-driven — expect less rise and a different crumb. If you try aquafaba, be ready for trial and error.
- Dairy allergy: Use non-dairy milk for the pudding step and a thick non-dairy cream (such as canned coconut cream) beaten to stability. Use a plant-based butter substitute in the dough, though puffing may be slightly altered.
- Gluten-free: A cup-for-cup gluten-free flour blend may produce decent results, but keep expectations modest; the dough can be stickier and less elastic.
- Sugar concerns: You can reduce the 2 tablespoons of sugar in the filling slightly, but the instant pudding mix itself contributes sweetness, so taste before making big cuts.
Appliances & Accessories
- Oven — accurate temperature is key; use an oven thermometer if yours runs hot or cold.
- Medium saucepan — for the initial water/butter/flour step.
- Wooden spoon or sturdy spatula — for working the dough in the pan.
- Stand mixer or electric hand mixer — makes incorporating eggs and whipping the filling much easier.
- Baking sheets lined with parchment — ensures even baking and easy release.
- Scoop or two spoons (tablespoon-sized) — for uniform shells; a cookie scoop gives consistent sizing.
- Wire rack — allow shells to cool without sogginess.
- Small paring knife — to make the venting slit before the final drying step.
- Piping bag (optional) — for neat, fast filling; a spoon works fine for a rustic look.
Frequent Missteps to Avoid
- Adding eggs while the dough is too hot — this cooks the eggs and prevents proper emulsion. Follow the cool-down guideline (5–10 minutes).
- Undermixing the eggs — the dough needs to become smooth and glossy; beating at least 2 minutes after the last egg is key.
- Opening the oven in the first 15 minutes — you’ll lose steam and the puffs may collapse.
- Underbaking — shells that aren’t dry inside will deflate and become chewy. The slit-and-dry step is essential.
- Filling hot shells — always cool completely before cutting and filling to prevent steaming the filling and sogginess.
Spring–Summer–Fall–Winter Ideas
Spring: Serve with a scattering of fresh berries alongside — they add color and a fresh contrast to the lemon cream.
Summer: Chill the filled puffs well and serve with a light fruit coulis for an outdoor brunch — bright, refreshing, and portable.
Fall: Pair with a drizzle of warm caramel or a spiced honey over the top for an autumnal twist. The lemon still cuts through the richness nicely.
Winter: Offer as part of a dessert board with dark chocolate shavings and candied citrus; the cream puffs bring brightness to heavier seasonal flavors.
Chef’s Rationale
Every technique here solves a specific problem. The water-and-butter boil turns the water into steam and the butter into fat pockets — that combination creates lift when eggs are added. Adding the flour off heat and then cooking it briefly removes excess moisture so the dough can hold structure. Cooling the dough prevents scrambling the eggs and allows proper incorporation.
The oven strategy — hot then lower — is a classic choux approach: high heat for expansion and steam, followed by lower heat to dry and set the shell. Making a small slit and returning the shells to the oven is a quick insurance policy against soggy interiors.
The lemon filling relies on instant pudding as a stable base so you don’t need a long-cooked custard. Whipping in heavy cream lightens the mixture and gives a texture that complements the crisp shell without weighing it down.
How to Store & Reheat
Short-term storage
Refrigerate filled cream puffs in an airtight container. They’re best eaten within 24–36 hours; beyond that the shells gradually soften from the filling’s moisture. Keep them chilled until serving.
Longer storage and reheating
You can freeze unfilled shells in a sealed container for up to one month. Thaw at room temperature and re-crisp in a 325°F oven for 5–8 minutes if they need it. Do not freeze filled puffs — the filling texture suffers. If you need to prepare ahead, make and freeze shells, thaw and fill the day you serve.
Quick Questions
- Can I pipe the batter? — Yes, piping yields more uniform shells. If using spoons, try to keep sizes consistent.
- Can the filling be made in advance? — Yes, make and refrigerate the filling up to a day ahead; give it a short re-whip if it loses some volume before filling.
- Why did my puffs deflate? — Likely one of: opened oven too soon, shells underbaked, or the dough had incorrect egg incorporation.
- Can I use homemade lemon curd instead of pudding mix? — You can, but homemade curd is denser; fold in whipped cream to keep the same lightness and adjust sweetness to taste.
In Closing
These Lemon Cream Puffs are one of my go-to desserts when I want something that looks elegant without an extravagant time commitment. Follow the technique for the choux, keep the filling bright and well-whipped, and you’ll have a crowd-pleasing dessert that’s easy to scale. Make the shells a day ahead if you like, whip and fill when guests arrive, and enjoy the delighted reactions — the contrast of crisp shell and creamy lemon center is always a winner.
If you try them, tell me what you paired them with — I love hearing small adaptations that work in home kitchens. Happy baking.

Lemon Cream Puffs
Ingredients
Ingredients
- 1 cupwater
- 1/2 cupbutter
- 1/4 teaspoonsalt
- 1 1/4 cupsall purpose flour
- 4 largeeggs
- 3.4 ozinstant lemon pudding1 box
- 1 1/2 cupsheavy cream
- 1 cupmilk
- 1 teaspoonvanilla
- zest of 1 lemon
- 2 tablespoonssugar
- powdered sugarfor garnish
Instructions
Instructions
- Preheat the oven to 425°F (220°C). Line two baking sheets with parchment paper and set aside.
- In a medium saucepan combine 1 cup water, 1/2 cup butter, and 1/4 teaspoon salt. Place over medium heat until the butter melts, then increase heat to high and bring to a rolling boil.
- Remove the pan from the heat and add 1 1/4 cups all-purpose flour all at once. Stir vigorously with a wooden spoon or spatula until the flour is fully incorporated.
- Return the pan to medium heat and cook, stirring constantly, until the dough smooths out and pulls away from the sides of the pan and follows the spoon (about 30 seconds). Remove from heat.
- Let the dough cool for 5–10 minutes, until it is hot but not so hot that it would cook the eggs when added (you should be able to hold a fingertip in it briefly).
- Transfer the dough to a mixing bowl or the bowl of a stand mixer. Add 4 large eggs one at a time, beating well after each addition. The dough may look curdled at times but should become smooth after the last egg. Beat for at least 2 minutes after the last egg to ensure the mixture is smooth and glossy.
- Using a tablespoon-sized scoop or two spoons, drop generous mounds of the choux batter (about 3 to 4 tablespoons each) onto the prepared baking sheets, spacing them about 3 inches apart.
- Bake at 425°F for 15 minutes. Without opening the oven door, reduce the oven temperature to 350°F (175°C) and continue baking for an additional 25 minutes, until the puffs are a medium golden brown.
- Remove the baking sheets from the oven. Use a small knife to make a small slit in the top of each puff to release steam, then return the puffs to the oven for 5 minutes to dry the interiors. Transfer the puffs to a wire rack to cool.
- While the shells cool, make the lemon filling: in a mixing bowl combine the 3.4 oz box of instant lemon pudding mix and 1 cup milk; then add 1 1/2 cups heavy cream. Beat the mixture with an electric mixer for 2–3 minutes, until light and fluffy.
- Stir in 1 teaspoon vanilla, the zest of 1 lemon, and 2 tablespoons sugar into the filling until evenly combined.
- When the cream puff shells are cool enough to handle, split each in half horizontally. Fill each bottom half generously with the lemon filling (spoon or pipe the filling), replace the tops, and dust with powdered sugar.
- Refrigerate the filled cream puffs until ready to serve.
Equipment
- Oven
- Baking Sheets
- Parchment Paper
- Medium Saucepan
- Wooden Spoon
- Mixing Bowl
- stand mixer or electric mixer
- tablespoon or scoop
- Wire Rack
- small knife