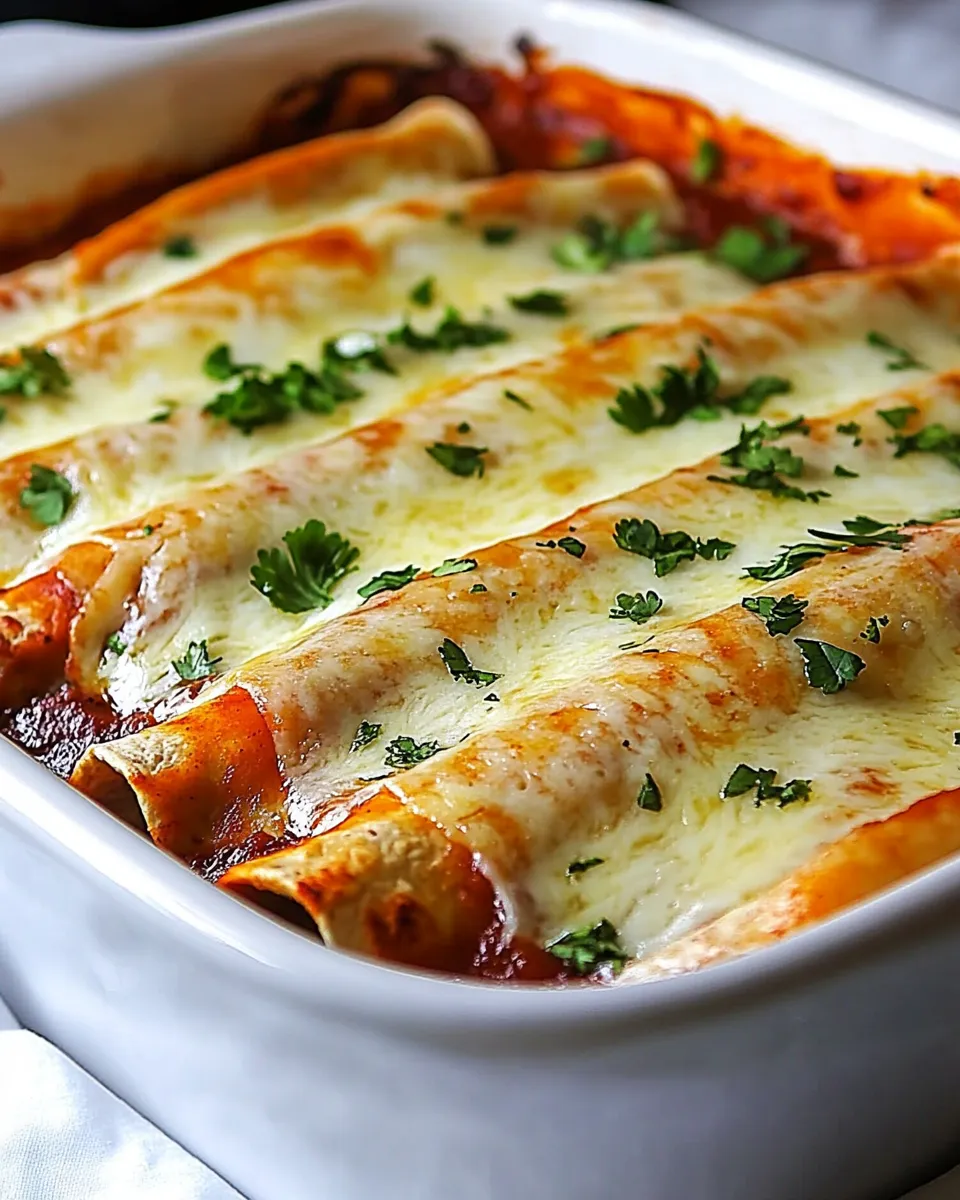
There are recipes that feel like second nature after a few tries, and this beef enchilada is one of those for me. It’s straightforward, forgiving, and hits that cozy, saucy comfort we all crave on a weeknight. I make it when I want something that feels like a proper meal but doesn’t require a full day in the kitchen.
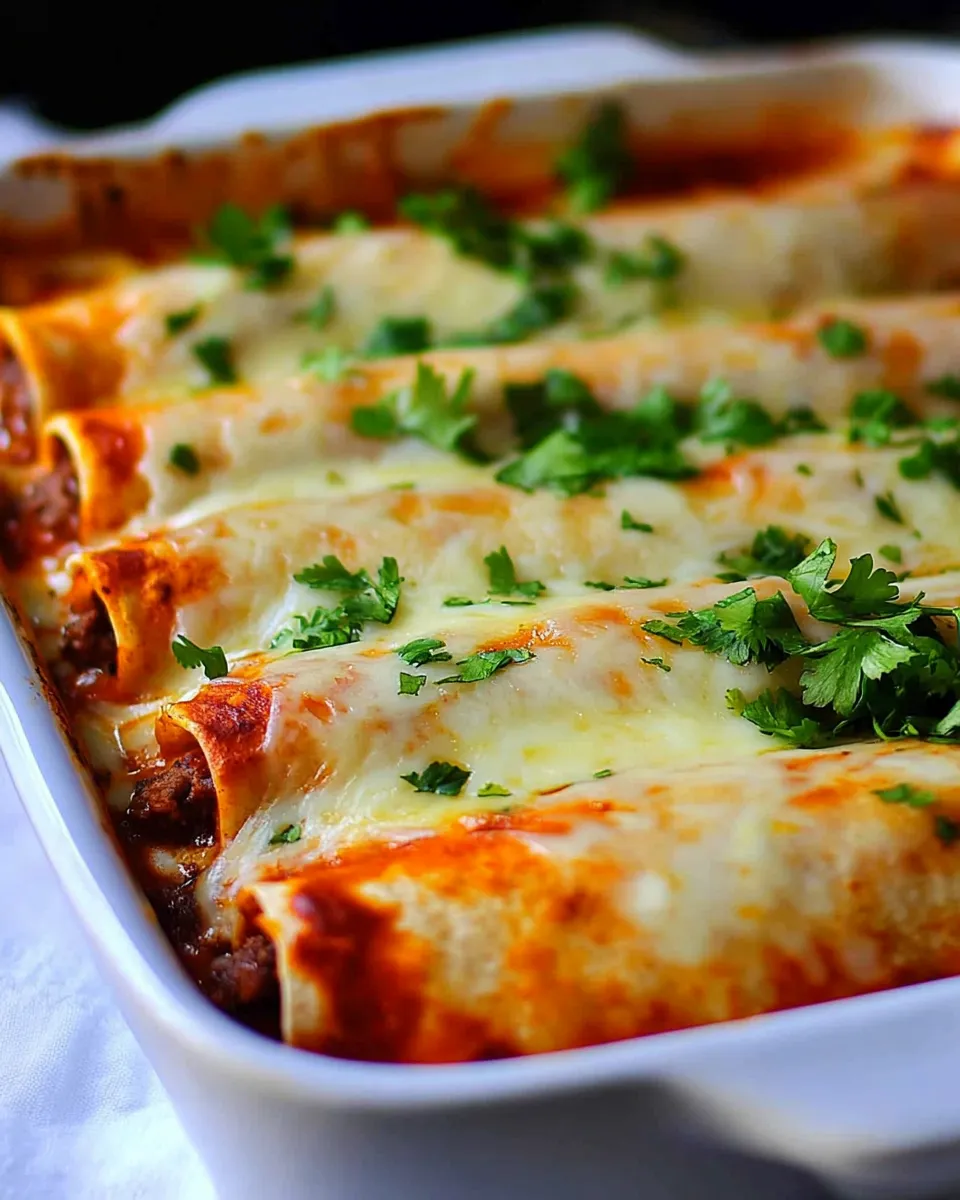
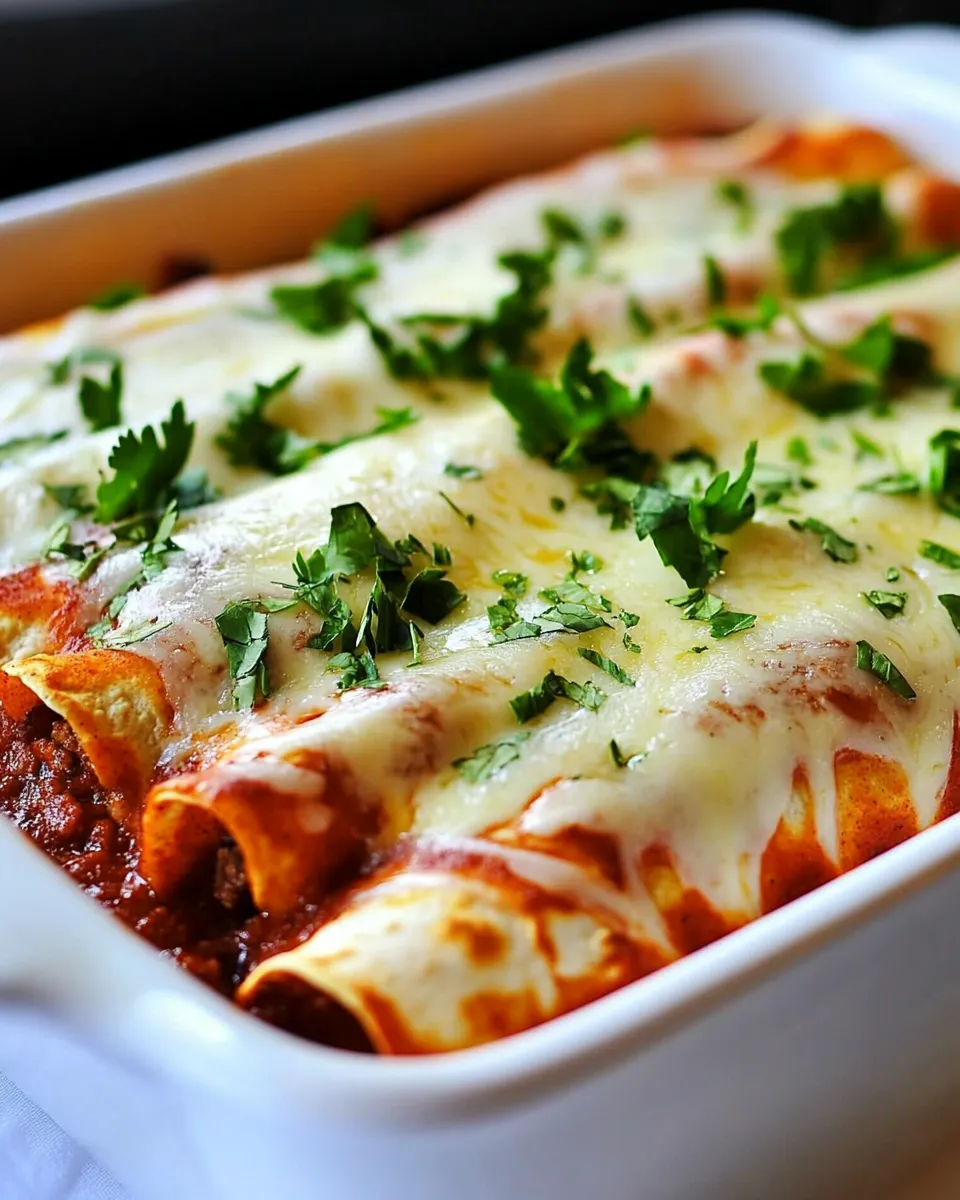
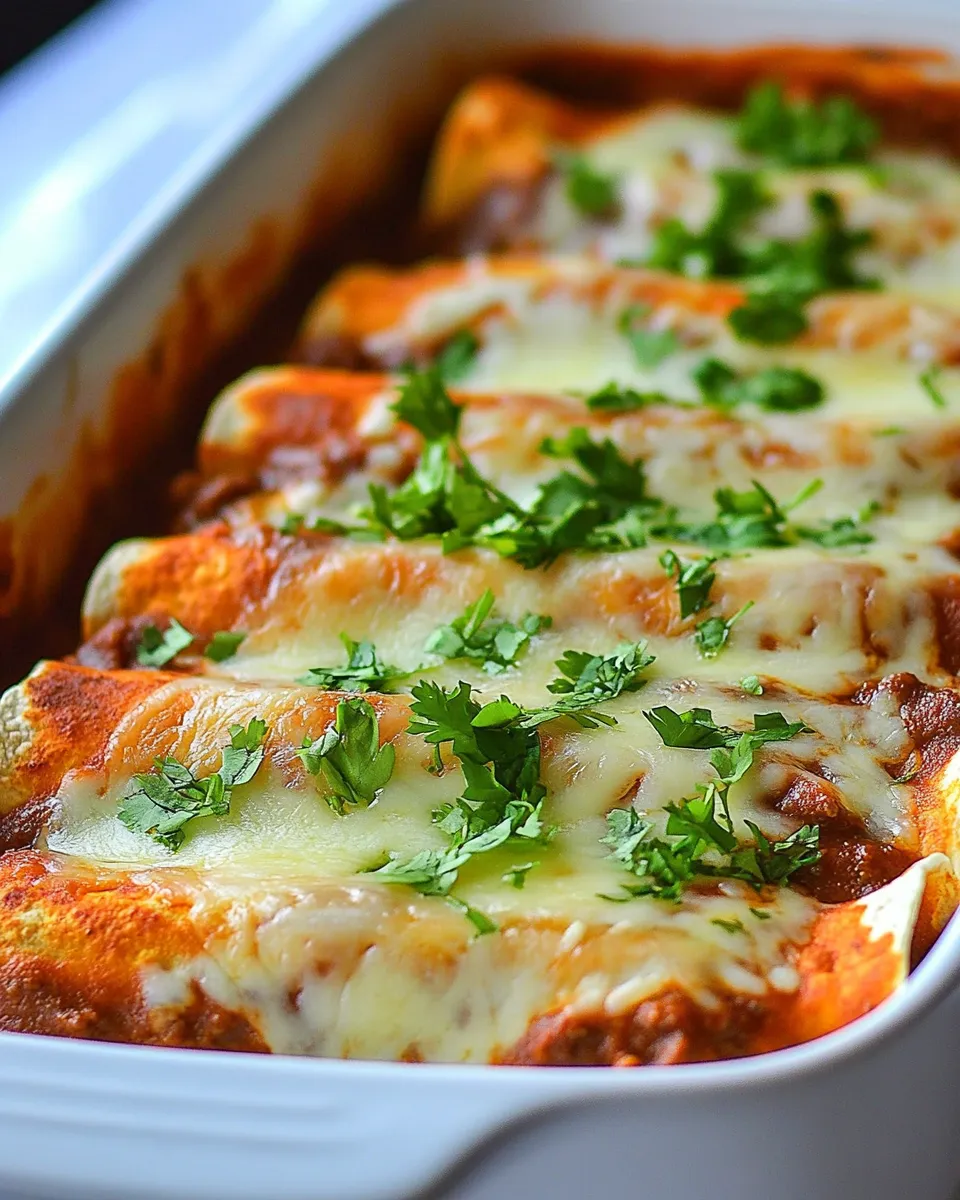
What I love about this method is how predictable it is: brown the beef, dress it with sauce, warm the tortillas so they roll without cracking, assemble, and bake. The result is a platter of neat, saucy enchiladas with a smooth, melty cheese top and a sharp tang from the sour cream. It feeds a crowd but is simple enough for two.
Below I’ll walk you through the exact ingredients and the step-by-step method I use, plus tips, swaps, and troubleshooting so your batch comes out great every time. No mystery, just reliable technique and a few small habits that make a big difference.
Gather These Ingredients
Ingredients
- 1 1/2 pounds ground beef — the main protein; brown thoroughly and drain to control grease.
- 3 tablespoons vegetable or canola oil — used to warm the tortillas so they bend without tearing.
- 10 tortillas — hold the filling; warming makes rolling much easier.
- 8 ounces sour cream — adds creaminess and a cool contrast when spooned into each tortilla.
- cilantro, optional — bright garnish that cuts through the richness; use sparingly if you’re not a fan.
- 2 cups grated monterey jack cheese — melts beautifully and creates the golden, gooey top.
- homemade enchilada sauce — moistens the beef filling and dresses the assembled enchiladas; you’ll use some in the filling and the rest as a topping.
Beef Enchilada Made Stepwise
- Preheat the oven to 350°F (175°C).
- In a skillet over medium-low heat, brown 1 1/2 pounds ground beef, breaking it into crumbles, until fully cooked. Drain off excess drippings and return the beef to the skillet.
- Stir enough homemade enchilada sauce into the cooked beef to moisten and coat it evenly; set the beef mixture aside.
- Pour some enchilada sauce into the bottom of a 9×13-inch oven-safe casserole dish to lightly coat the bottom; reserve the remaining sauce for topping.
- In a clean skillet, heat 3 tablespoons vegetable or canola oil over medium-low heat.
- Working one tortilla at a time, warm each of the 10 tortillas in the hot oil about 20–45 seconds per side until soft and pliable but not crispy. Transfer each warmed tortilla to a paper towel to drain excess oil.
- For each warmed tortilla, place it on a work surface and add a portion of the beef mixture down the center, a spoonful of the 8 ounces sour cream, a sprinkle of the grated monterey jack cheese, and cilantro if using. Roll the tortilla to enclose the filling and place it seam-side down in the prepared casserole dish. Repeat until all 10 tortillas are filled and arranged in the dish.
- Pour the remaining enchilada sauce over the assembled enchiladas to cover them, then top with the remaining monterey jack cheese so the enchiladas are evenly covered.
- Bake in the preheated oven for about 15 minutes, or until the cheese is fully melted and the sauce is hot.
- Remove from the oven, garnish with additional cilantro if desired, let rest a few minutes, and serve.
Why This Recipe Is Reliable
This approach focuses on a few control points that make success repeatable. First, browning and draining the ground beef removes excess fat that can make the casserole greasy. Second, stirring sauce into the beef ensures every bite is flavorful rather than relying on sauce only at the finish. Third, warming tortillas briefly in oil—rather than trying to roll them dry—prevents splitting and gives the finished enchiladas a silkier mouthfeel.
The timing is modest: a short bake at 350°F is long enough to heat through and melt cheese without drying the tortillas. There are no fiddly steps or delicate timings, so you’ll get consistent texture and flavor even when cooking for a crowd.
Ingredient Swaps & Substitutions
Want to switch things up? Here are practical swaps that preserve the structure of the dish.
- Protein swap: Substitute ground beef with ground turkey, chicken, or a plant-based ground “meat” if you prefer a lighter or vegetarian option.
- Cheese options: Monterey jack is mild and melty. Pepper jack adds heat; a blend with cheddar will give a sharper bite.
- Tortillas: Flour and corn both work, but warming is key. If your corn tortillas are thick or dry, warm them slightly longer and handle gently to avoid cracking.
- Sour cream alternative: Greek yogurt can stand in for sour cream if you want a tangier, higher-protein option—use full-fat or 2% versions for the best texture.
- Sauce: The method uses homemade enchilada sauce, but a good store-bought sauce can substitute in a pinch. Taste it first and adjust seasoning if needed.
Appliances & Accessories
Minimal equipment keeps this accessible. You’ll need a skillet for browning the beef and another for warming tortillas (you can reuse the first, after draining), a 9×13-inch oven-safe casserole dish, a spatula or wooden spoon, a grater for the cheese, and paper towels for draining excess oil. An oven thermometer is handy if your oven’s accuracy is in doubt.
Mistakes Even Pros Make
Small errors can turn a simple bake into a soggy or dry one. Here’s what to watch for:
- Not draining the beef: Leaving too much fat in the skillet makes the filling greasy and the assembled enchiladas heavy.
- Overheating oil for tortillas: If the oil is too hot the tortillas will crisp instead of becoming pliable; keep the pan at medium-low and watch closely.
- Overfilling tortillas: Too much filling leads to splitting or uneven baking. Even distribution keeps everything tidy.
- Skipping the sauce in the filling: The step that mixes sauce into the beef matters—without it the center can be dry while the edges are saucy.
- Baking too long or too hot: High temps will harden the tortillas and dry the filling. 350°F for about 15 minutes is the sweet spot here.
Better-for-You Options
This recipe adapts well to lighter choices. Use lean ground beef (90/10 or leaner) and drain it well. Swap part of the oil used to warm tortillas for a quick pass with a nonstick spray or a pastry brush to reduce added fat. Choose low-fat sour cream or plain Greek yogurt, and opt for reduced-fat cheese if you want fewer calories. Smaller tortillas will also naturally reduce portion size.
Chef’s Rationale
Every instruction has a purpose. Browning the beef over medium-low ensures even cooking without burning the exterior. Draining removes excess fat so the finished enchiladas aren’t greasy. Mixing sauce into the meat guarantees moisture and flavor in each bite rather than concentrating it only on the surface. Warming tortillas in oil (rather than microwaving or dry heating) gives a pliability and a little flavor that holds the roll together. The short bake at moderate temperature melts cheese without overcooking the tortillas or drying out the filling.
I recommend assembling them seam-side down so they keep their shape during baking. Letting the dish rest a few minutes after it comes out of the oven gives the sauce and cheese a chance to settle, which makes serving neater.
Save It for Later
Storage is straightforward. Cool leftovers completely, then refrigerate in an airtight container for up to 3–4 days. Reheat in a 350°F oven for 10–15 minutes until warmed through, or use a microwave for single portions—cover loosely to keep moisture in.
To freeze, assemble the enchiladas but don’t bake them. Wrap the casserole tightly with plastic wrap and foil, or transfer single servings to freezer-safe containers. Freeze for up to 2–3 months. When ready to cook, thaw overnight in the refrigerator and bake at 350°F until heated through and the cheese is melted—this may take 25–35 minutes depending on the size and how cold it was.
Top Questions & Answers
Can I use corn tortillas instead of flour?
Yes. Corn tortillas work well, but they tend to be drier and more prone to cracking. Warm them a bit longer in the oil and handle gently. Some cooks briefly steam corn tortillas before filling to make them more pliable.
Do I have to brown the beef first?
Yes—browning develops flavor and cooks out excess moisture. It also improves the texture. Cooking the beef fully before assembling prevents an undercooked center after baking.
Can I assemble ahead of time?
Yes. You can assemble the enchiladas and refrigerate them, covered, for a few hours before baking. If refrigerating longer, consider that tortillas can absorb sauce and become softer; bake straight from the fridge until heated through.
How do I prevent soggy enchiladas?
Drain the cooked beef and avoid adding too much sauce inside each tortilla—mix enough to moisten the meat but not drench it. Pouring a thin base layer of sauce into the dish helps the bottom stay saucy without turning soggy.
Before You Go
This beef enchilada method gives you consistent, saucy enchiladas without fuss. Focus on proper browning, modest sauce in the filling, warming the tortillas just enough, and a short bake to finish. The payoff is classic comfort food that’s easy to scale for weeknight dinners or a potluck.
If you try it, tell me how you adjusted it and what you liked—favorite swaps or a tweak that made it yours. Simple recipes that work become family favorites when we personalize them, and I love hearing those small victories in the kitchen.

Beef Enchilada Recipe
Ingredients
Ingredients
- 1 1/2 poundsground beef
- 3 tablespoonsvegetable or canola oil
- 10 tortillas
- 8 ouncessour cream
- cilantro optional
- 2 cupsgrated monterey jack cheese
- homemade enchilada sauce
Instructions
Instructions
- Preheat the oven to 350°F (175°C).
- In a skillet over medium-low heat, brown 1 1/2 pounds ground beef, breaking it into crumbles, until fully cooked. Drain off excess drippings and return the beef to the skillet.
- Stir enough homemade enchilada sauce into the cooked beef to moisten and coat it evenly; set the beef mixture aside.
- Pour some enchilada sauce into the bottom of a 9×13-inch oven-safe casserole dish to lightly coat the bottom; reserve the remaining sauce for topping.
- In a clean skillet, heat 3 tablespoons vegetable or canola oil over medium-low heat.
- Working one tortilla at a time, warm each of the 10 tortillas in the hot oil about 20–45 seconds per side until soft and pliable but not crispy. Transfer each warmed tortilla to a paper towel to drain excess oil.
- For each warmed tortilla, place it on a work surface and add a portion of the beef mixture down the center, a spoonful of the 8 ounces sour cream, a sprinkle of the grated monterey jack cheese, and cilantro if using. Roll the tortilla to enclose the filling and place it seam-side down in the prepared casserole dish. Repeat until all 10 tortillas are filled and arranged in the dish.
- Pour the remaining enchilada sauce over the assembled enchiladas to cover them, then top with the remaining monterey jack cheese so the enchiladas are evenly covered.
- Bake in the preheated oven for about 15 minutes, or until the cheese is fully melted and the sauce is hot.
- Remove from the oven, garnish with additional cilantro if desired, let rest a few minutes, and serve.
Equipment
- Skillet
- 9x13-inch oven-safe casserole dish
- Paper Towels
- Oven
Notes
Enchilada Sauce:
For this recipe, I love to use either my
blender enchilada sauce
for a grain-free, gluten-free enchilada sauce OR my
homemade enchilada sauce
. Both are delicious!