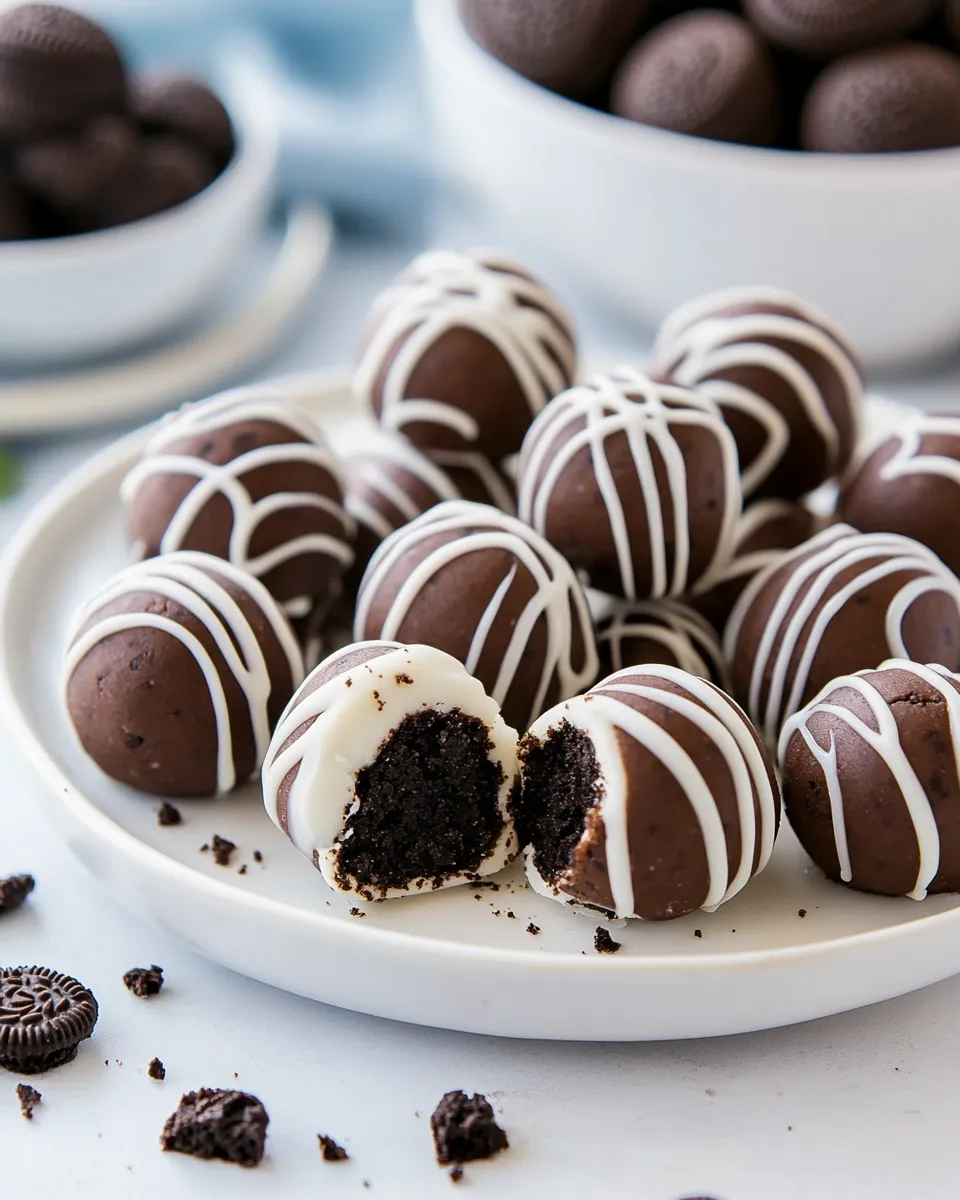
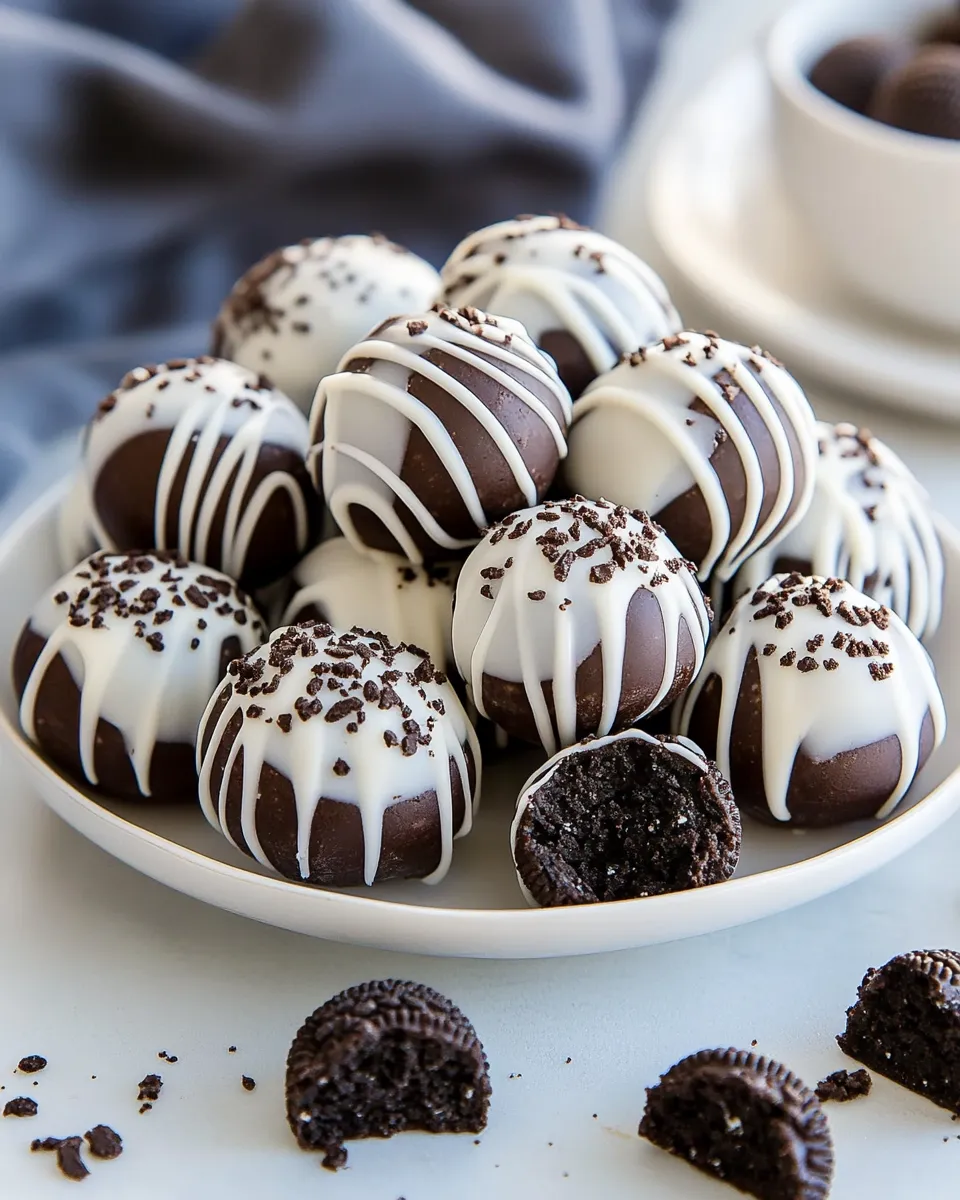
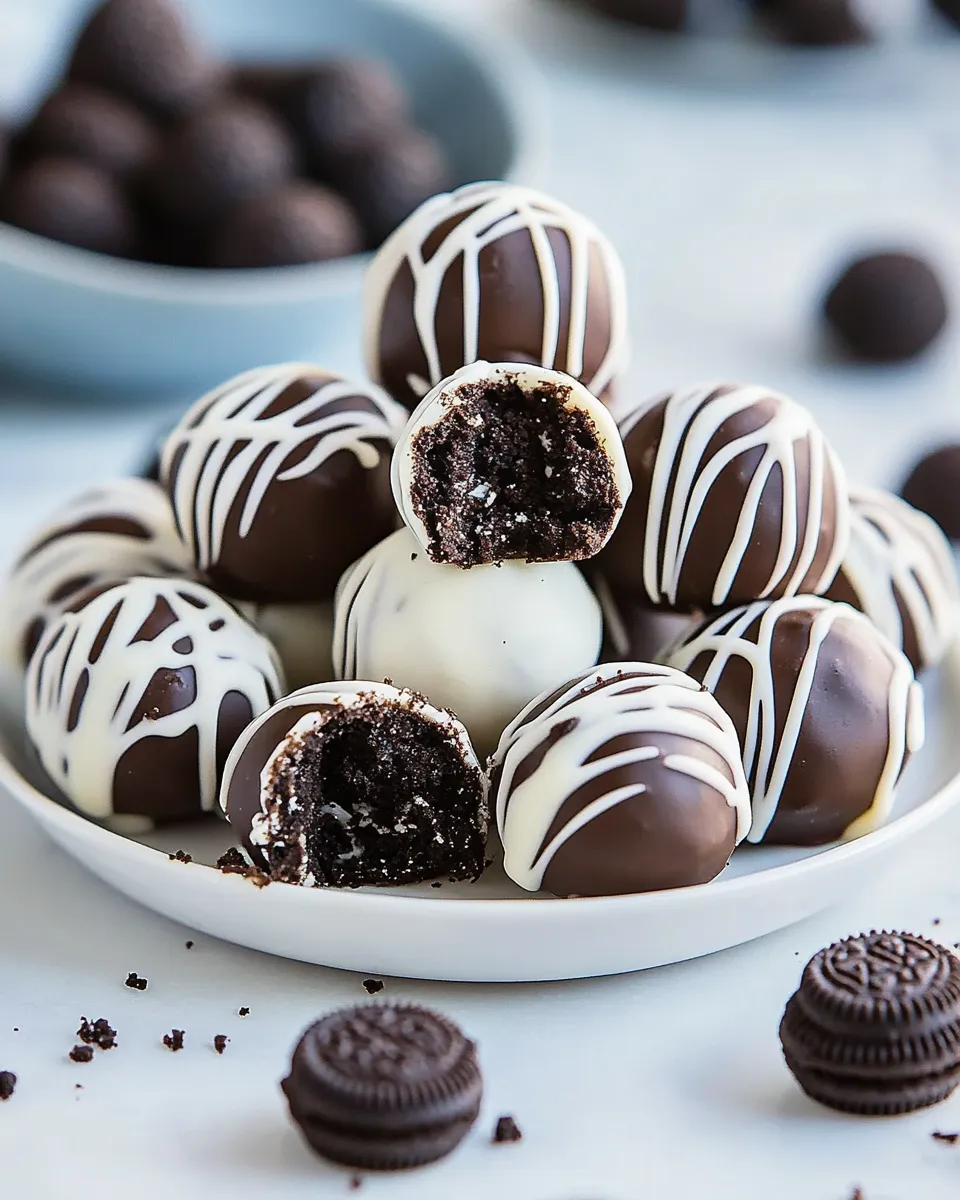
These Oreo Balls — often called Oreo Truffles — are the shortcut dessert that reliably makes parties and hurried afternoons better. They’re a tiny assembly of three ingredients that plays big on texture: crunchy cookie, creamy cheese, and glossy chocolate. No baking required, which is why I reach for them when I want a real treat without babysitting the oven.
I make a batch and feel smug: they keep well, ship nicely, and almost everyone assumes I spent longer on them than I did. The method is straightforward, but a few small habits make a big difference in final texture and appearance. I’ll walk you through exactly what I do, the tools I trust, and the troubleshooting I’ve learned the hard way so your truffles come out perfectly every time.
Follow the steps below exactly for reliable results. I’ll also share variations, storage tips, and answers to the questions people ask me most when they try this at home.
Ingredient Checklist
- 36 Oreos (original not double stuf) — whole cookies (do not remove the cream filling); they form the base and provide most of the cookie flavor.
- 3 Oreos — reserved and crushed for topping if desired; use these to add crunch and a finished look while the coating is wet.
- 1 (8 oz) package cream cheese, softened — the binder that turns crumbs into a scoopable, creamy center; softening makes mixing smooth and fast.
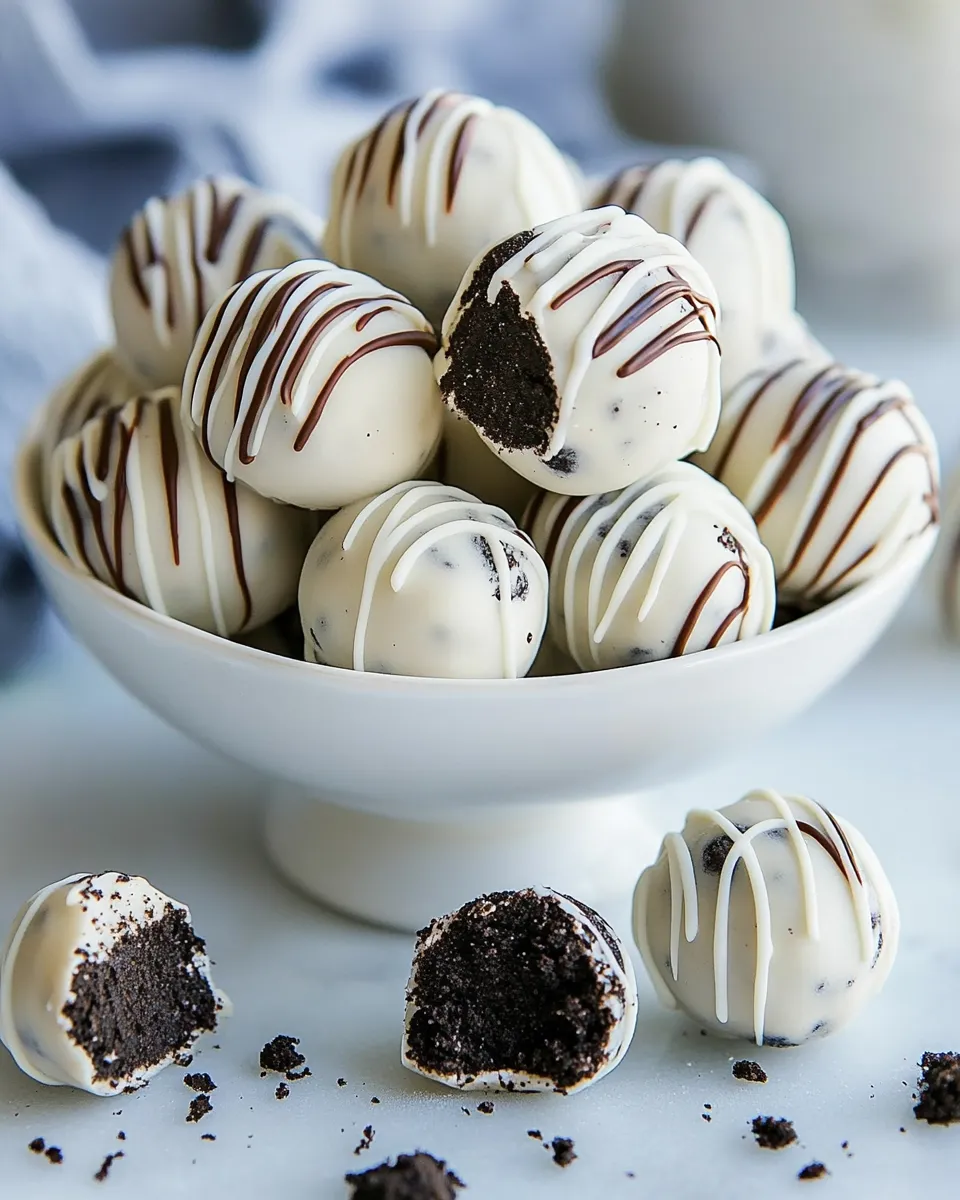
- 16 oz vanilla or chocolate candy melts — or melted white chocolate, milk chocolate or dark chocolate; this is the coating that sets into a shiny shell.
Stepwise Method: (Oreo Balls Oreo Truffles)
- Line an 18- by 13-inch baking sheet with wax paper or parchment paper.
- Reserve 3 Oreos for topping (if using) and crush them finely; set the crushed 3 Oreos aside.
- Place the remaining 36 Oreos (whole cookies—do not remove the cream filling) into a food processor and pulse until they are fine crumbs.
- Add the softened 8 oz cream cheese to the Oreo crumbs and pulse in short bursts until the mixture is well combined and homogeneous. Scrape down the sides of the bowl as needed.
- Using about 1 tablespoon of the mixture per portion, scoop and roll into 1-inch balls. Place the formed balls in a single layer on the prepared baking sheet.
- Freeze the balls on the baking sheet for 15 minutes to firm them.
- While the balls freeze, melt 16 oz of vanilla or chocolate candy melts (or melted white chocolate, milk chocolate, or dark chocolate) according to the package directions until smooth.
- Remove the chilled truffle balls from the freezer. Dip each ball into the melted chocolate using a fork or dipping tool, tapping or lifting to let excess chocolate drip off. If needed, use a spoon to drizzle additional chocolate over any spots.
- Immediately after dipping, place each coated truffle back on the prepared baking sheet and, if desired, sprinkle the reserved crushed 3 Oreos on top while the chocolate is still wet.
- Allow the chocolate to set at room temperature or speed setting by chilling briefly in the refrigerator until firm.
- Store finished truffles in an airtight container in the refrigerator.
Why This Recipe is a Keeper
It’s dependable. The ratio of crumbs to cream cheese gives you a center that’s firm enough to roll and dip, but soft and pleasantly creamy in the mouth. The coating sets quickly and hides any small imperfections from rolling, so they look like you spent more time than you did.
It’s versatile. Use vanilla or chocolate melts, white or dark chocolate — each yields a different visual and taste profile. You can garnish with the reserved crushed Oreos for texture and contrast. These truffles are great for gifting, cookies boxes, potlucks, or as an easy dessert during the holidays.
It’s accessible. Three pantry-friendly ingredients. Minimal equipment. No baking. That combination makes this a repeatable favorite in my rotation.
Low-Carb/Keto Alternatives
If you’re aiming for low-carb or keto, keep the approach and swap components rather than the method. Use a low-carb or keto-style sandwich cookie as the crumb base and a sugar-free or sugar-replacement chocolate for coating. Full-fat cream cheese keeps the texture creamy and satisfying; it’s an easy switch that preserves the truffle-like mouthfeel.
Tools & Equipment Needed
- Food processor — for turning Oreos into fine crumbs quickly and evenly.
- 18- by 13-inch baking sheet lined with wax or parchment paper — a single layer keeps balls from sticking together and makes dipping tidy.
- Measuring tablespoon or small cookie scoop — for consistent portion size and uniform cooking/chilling.
- Freezer — to firm the balls before dipping.
- Microwave-safe bowl or double boiler — for melting candy melts or chocolate.
- Dipping fork or regular fork and a spoon — to dip and help manage excess coating.
- Airtight container — for storing finished truffles in the refrigerator.
Things That Go Wrong
- Centers too soft to roll — cream cheese wasn’t fully softened or Oreos weren’t processed finely enough. Soften cream cheese just until malleable and pulse the cookies until crumbs are fine.
- Truffles lose shape during dipping — centers were not chilled long enough. Freeze for the full 15 minutes; if your kitchen is warm, add a little extra chill time.
- Chocolate coating is streaky or clumpy — chocolate was overheated or not smooth. Melt according to package directions and stir until fully smooth before dipping.
- Coating won’t set — chocolate or candy melts used may require tempering or refrigeration. Chill briefly in the fridge to speed setting, but avoid long refrigeration before coating or chocolate can bloom.
Make It Fit Your Plan
Want bite-sized treats for a party? Keep the 1-tablespoon portion, which yields about uniform 1-inch balls that are easy to eat. Need smaller portions for kids? Reduce scoop size but expect more pieces. Packing these into gift boxes: arrange in a single layer or with parchment cups so coatings don’t stick together.
For allergy swaps, look for dairy-free cream cheese and dairy-free melts; they follow the same method but check manufacturer recommendations for melting and setting behavior. If you need to scale the recipe, double the ingredients and work in batches — the processing bowl shouldn’t be overloaded.
Cook’s Commentary
I make these when I need a quick impressive dessert. My favorite small detail is reserving three cookies for an espresso-fine crunch on top — it adds texture and signals “Oreo” immediately. Rolling by hand is soothing and gives you a rhythm: scoop, roll, chill, dip. The ritual matters.
One practical habit: line the sheet and keep a trimmed offset spatula or spoon nearby during dipping to nudge imperfect drips into shape. Little tools save time and make presentation cleaner. And if you plan to share, I always let them sit at room temperature for 10–15 minutes before serving so the centers are just out of the fridge — they taste better that way.
How to Store & Reheat
Store finished truffles in an airtight container in the refrigerator as the final step in the method instructs. They keep well chilled for up to 2 weeks; for longer storage, freeze them in a single layer on a tray, then transfer to a sealed freezer container for up to 2 months.
To serve from frozen, thaw in the refrigerator for several hours and then bring to room temperature for 10–15 minutes before serving. There’s no reheating required — these are best enjoyed chilled or just slightly cooled so the centers are creamy rather than rock-hard.
Common Questions
- Can I use Double Stuf Oreos? — The recipe specifies original not double stuf because the standard filling-to-cookie ratio is what the texture was developed around. Double Stuf will increase sweetness and change the mixture’s moisture slightly, which can make the centers softer.
- Can I make the centers ahead of time? — Yes. You can form the balls and keep them chilled on the baking sheet covered for a day before dipping. For longer storage, freeze them solid and finish dipping from frozen.
- What if my chocolate blooms or loses shine? — Bloom is often caused by temperature fluctuations or refrigeration after coating. If presentation matters, use candy melts which are formulated to set with a stable finish, or temper high-quality chocolate carefully before dipping.
- How do I get a smooth coating? — Make sure the melts are fully melted and stirred until smooth. Tap the fork gently to drain excess and keep the truffle moving to prevent pooling. A second quick drizzle can cover any thin spots.
Save & Share
These are the kind of treats people ask for repeatedly. Save the method, and you’ll have a reliable go-to for last-minute desserts and thoughtful edible gifts. If you’re sharing a photo, a sprinkle of the crushed reserved Oreos on top and a small decorative drizzle of contrasting chocolate makes them photograph as well as they taste.
If you make them, drop a note about what coating you chose and whether you tried a variation — I love hearing which tweaks become the new favorite in someone else’s kitchen.

Oreo Balls Oreo Truffles
Ingredients
Ingredients
- 36 Oreos original not doublestuf, plus 3 more, crushed, for topping if desired
- 1 8 oz packagecream cheese, softened
- 16 ozvanilla or chocolate candy melts or melted white chocolate, milk chocolate or dark chocolate
- See notes for peppermint variation
Instructions
Instructions
- Line an 18- by 13-inch baking sheet with wax paper or parchment paper.
- Reserve 3 Oreos for topping (if using) and crush them finely; set the crushed 3 Oreos aside.
- Place the remaining 36 Oreos (whole cookies—do not remove the cream filling) into a food processor and pulse until they are fine crumbs.
- Add the softened 8 oz cream cheese to the Oreo crumbs and pulse in short bursts until the mixture is well combined and homogeneous. Scrape down the sides of the bowl as needed.
- Using about 1 tablespoon of the mixture per portion, scoop and roll into 1-inch balls. Place the formed balls in a single layer on the prepared baking sheet.
- Freeze the balls on the baking sheet for 15 minutes to firm them.
- While the balls freeze, melt 16 oz of vanilla or chocolate candy melts (or melted white chocolate, milk chocolate, or dark chocolate) according to the package directions until smooth.
- Remove the chilled truffle balls from the freezer. Dip each ball into the melted chocolate using a fork or dipping tool, tapping or lifting to let excess chocolate drip off. If needed, use a spoon to drizzle additional chocolate over any spots.
- Immediately after dipping, place each coated truffle back on the prepared baking sheet and, if desired, sprinkle the reserved crushed 3 Oreos on top while the chocolate is still wet.
- Allow the chocolate to set at room temperature or speed setting by chilling briefly in the refrigerator until firm.
- Store finished truffles in an airtight container in the refrigerator.
Equipment
- Food Processor
- 18- by 13-inch baking sheet
- Wax paper or parchment paper
- Fork or dipping tool
- Spoon
- Refrigerator
Notes
**If you don't own a mixer you can just blend mixer in a mixing bowl with a spoon.
Recipe adapted fromKraft
Mix 1 1/2 tsp of peppermint extract with the cream cheese in a stand mixer first, then add the Oreo crumbs and continue as directed.
Dip chocolates then immediately sprinkle tops with peppermint bits crushed candy canes or crushed starlight mints (instead of more crushed Oreos).