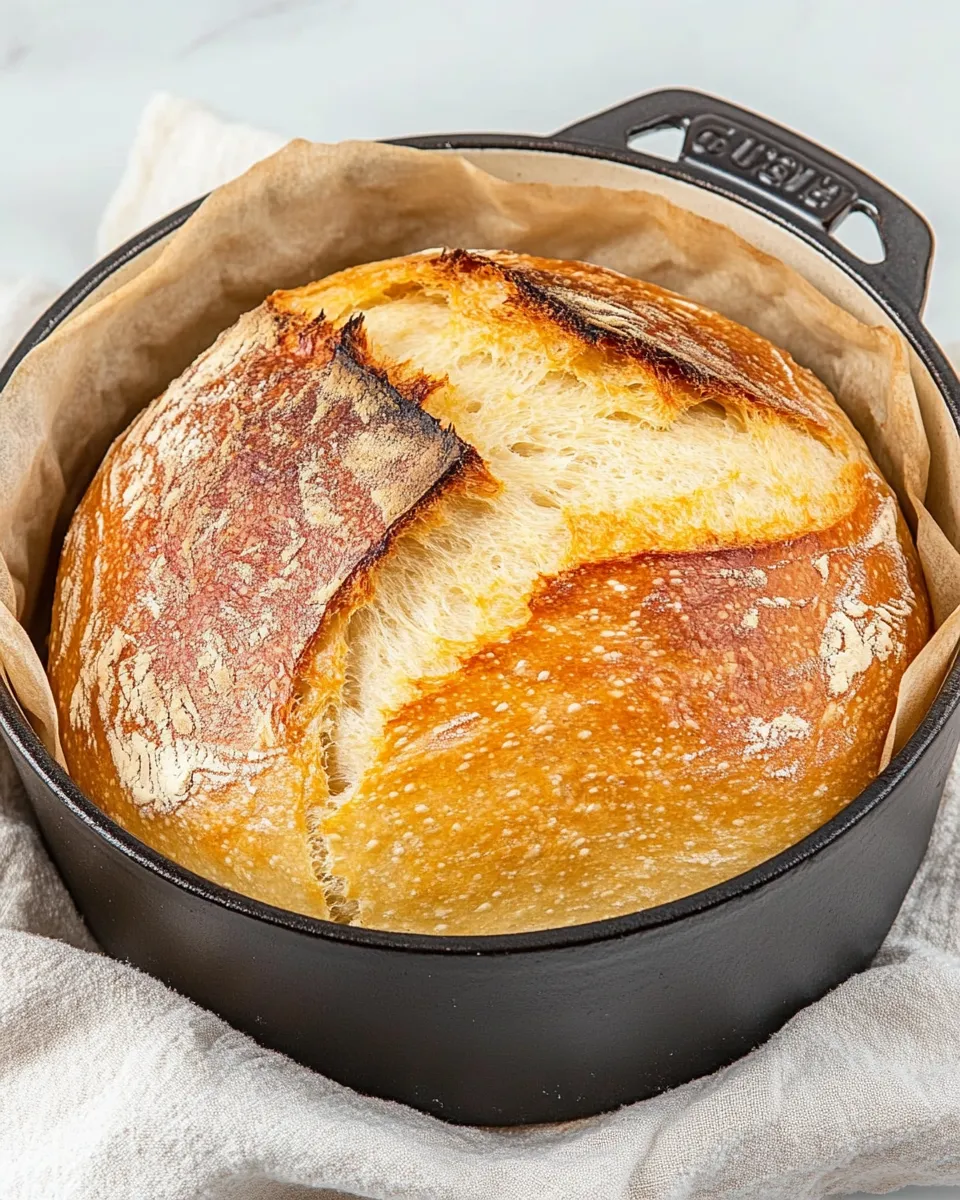
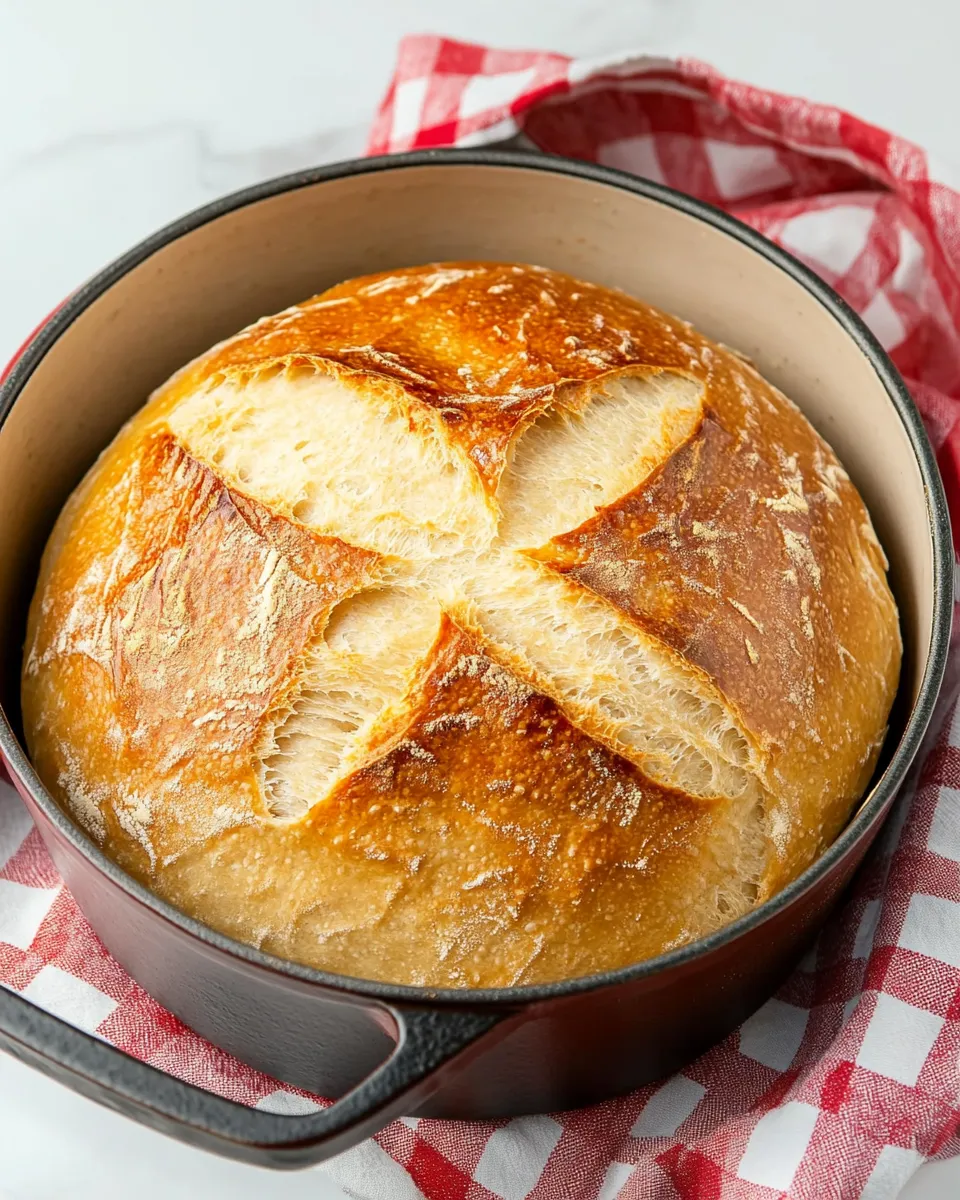
This is the kind of bread that makes your kitchen feel like a bakery without turning your day into a project. It asks for very little hands-on time, uses straightforward pantry staples, and rewards you with a deep, crackly crust and an open, chewy crumb. I love it because it’s honest — no tricks, just patience and heat.
You’ll shape it once, let the dough rest, and then let a hot pot do the magic. The method is forgiving, which is perfect for busy evenings or weekend mornings when you want fresh bread but don’t want to fuss. Read the steps through, set a timer, and you’ll have a loaf that makes simple meals sing.
Below you’ll find the ingredients, the exact step-by-step instructions to follow, troubleshooting tips, and practical notes for storage and reheating. This recipe is one I come back to again and again; I hope it earns a regular spot on your counter, too.
Ingredients at a Glance
- 3 cups all-purpose flour — the bulk of the loaf; provides structure and that light, open crumb.
- 2 teaspoons active dry yeast — the leavening agent; gives the dough lift during the rise.
- 2 teaspoons salt — controls fermentation and seasons the bread for flavor.
- 1 1/2 cup lukewarm water — hydrates the flour and activates the yeast; temperature should feel warm to the touch (about 100–110°F).
Dutch Oven No-Knead Bread: Step-by-Step Guide
- In a large bowl, combine 3 cups all-purpose flour, 2 teaspoons active dry yeast, and 2 teaspoons salt; stir to mix the dry ingredients evenly.
- Make a shallow well in the center of the dry mixture and add 1 1/2 cups lukewarm water (about 100–110°F). Use a wooden spoon to slowly stir from the center outward until the ingredients are fully combined and a shaggy, sticky dough forms. Do not knead.
- Cover the bowl with plastic wrap or a clean kitchen towel and let the dough rest at room temperature for 1–2 hours, until it has almost doubled in size.
- About 30 minutes before you plan to bake (while the dough is rising or when it has nearly doubled), place the dutch oven with its lid inside your oven and preheat the oven to 450°F. Preheating the pot for at least 30 minutes ensures it is thoroughly hot.
- When the dough has nearly doubled, generously flour a work surface or sprinkle about 1 tablespoon of flour onto the surface to prevent sticking. Using a rubber spatula or scraper, gently scrape the dough out of the bowl onto the floured surface.
- With floured hands and without kneading, shape the dough into a round loaf by folding the edges toward the center a few times to create surface tension, then gently pat it into a tight round. Avoid pressing or working the dough too much.
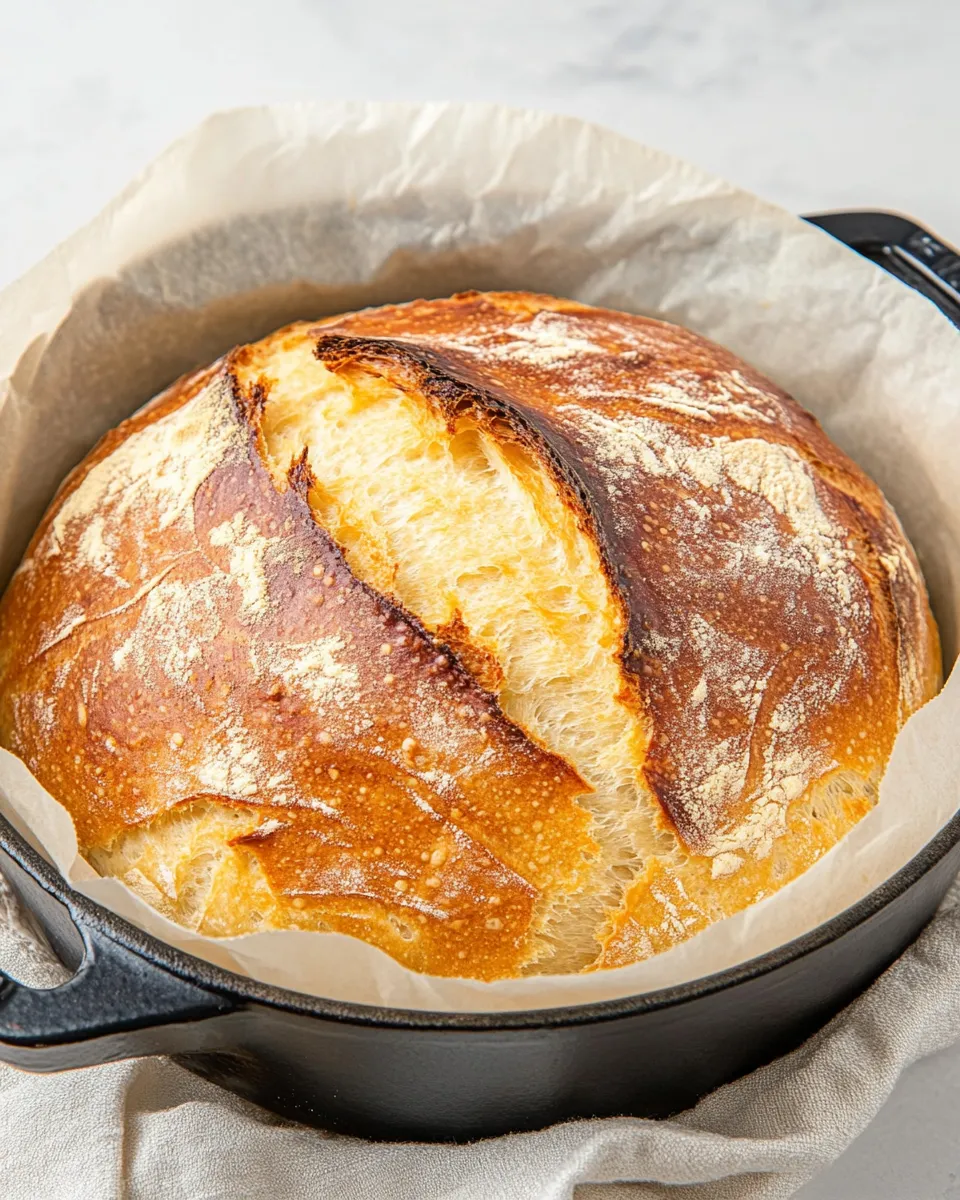
- Place the shaped dough seam-side down on a sheet of parchment paper (smooth side up) large enough to lift the dough.
- Wearing oven mitts, carefully remove the preheated dutch oven from the oven. Lift the parchment with the dough and place it into the hot dutch oven. Replace the lid.
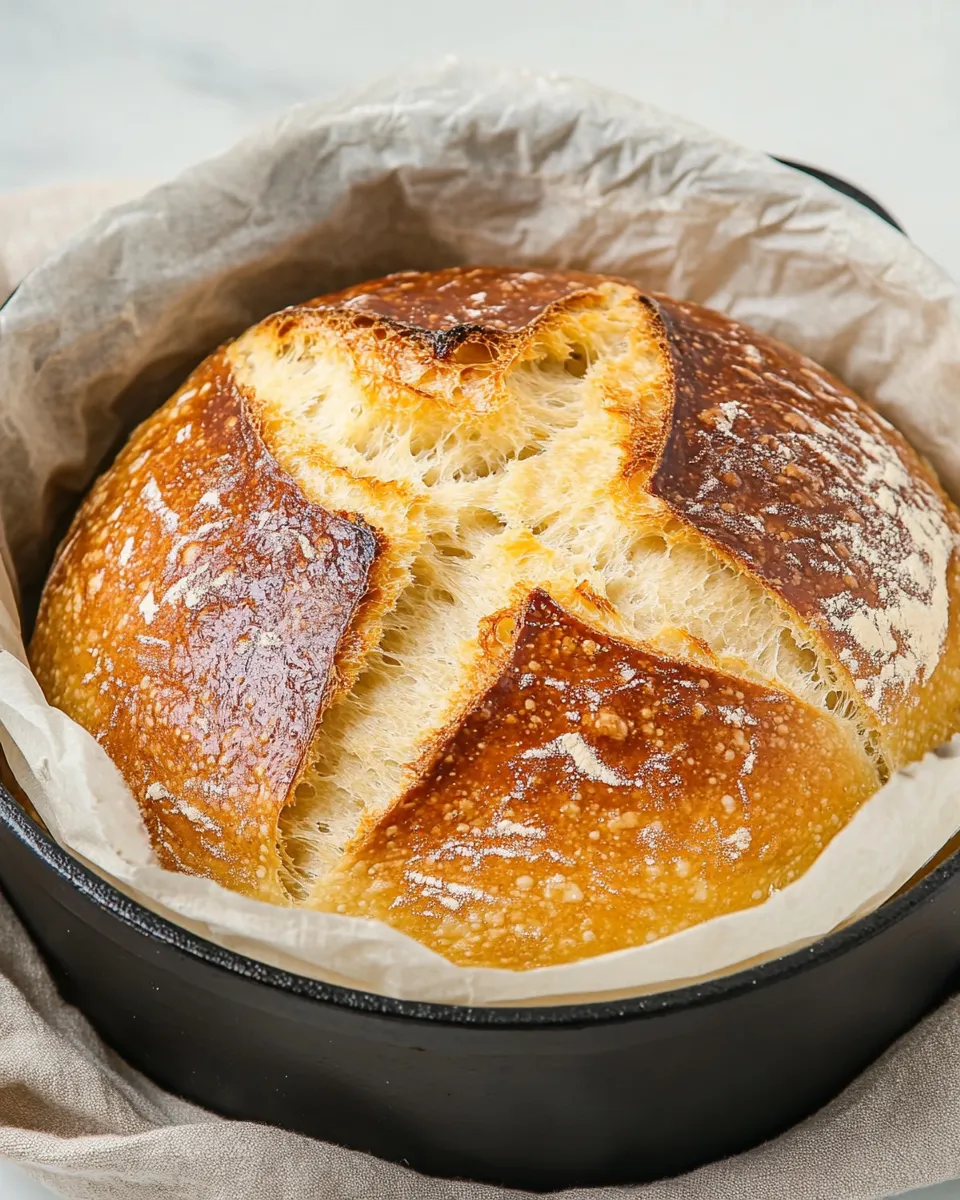
- Bake covered at 450°F for 30 minutes. After 30 minutes, remove the lid and continue baking for an additional 10 minutes to brown and crisp the crust.
- Using oven mitts, remove the dutch oven from the oven and transfer the bread (on the parchment) to a cooling rack or cutting board. Allow the bread to cool for about 10 minutes before slicing and serving.
Why You’ll Keep Making It
This loaf delivers a bakery-worthy result with minimal fuss. You don’t need special skills or a stand mixer — just a bowl and a preheated pot. The long, hands-off rise develops flavor and gives the crumb those desirable irregular holes. The dutch oven traps steam during the initial bake, which helps the crust blister and brown deeply, something you generally only get with professional steam-injected ovens.
It’s also a flexible base. Once you’ve mastered the method, you can bake more often because the time investment is small and the payoff is big. It pairs with almost anything: soups, salads, cheeses, or simply a smear of butter. Because the technique relies on hydration and time rather than intense manipulation, even beginners get consistent, impressive results.
International Equivalents
No-knead, country-style loaves show up in many baking traditions. The round shape and crisp crust are similar to a French boule. In Italy, a rustic pane casareccio shares the same home-baked, open-crumb character though often made with different flours or starters. In many regions, bakers use local flours or hydration levels, but the basic idea — combine, rest, and bake in a hot, covered pot — is a universal approach to getting great crust and crumb at home.
Tools & Equipment Needed
- Large mixing bowl — for combining ingredients and proofing the dough.
- Wooden spoon — to stir the wet and dry ingredients together.
- Rubber spatula or dough scraper — helpful for transferring sticky dough.
- Kitchen towel or plastic wrap — to cover the dough while it rests.
- 1 dutch oven with lid — a 4–6 quart pot with a tight-fitting lid is ideal for heat retention and steam.
- Parchment paper — makes lifting the loaf into the hot pot safe and simple.
- Oven mitts — essential for safety when handling the preheated pot.
- Cooling rack — to cool the bread and preserve the crust’s texture.
Frequent Missteps to Avoid
- Skipping the preheat of the pot — if the pot isn’t hot, you won’t get the same oven spring or crust development.
- Overworking the dough — this is a no-knead method; handling it too much will tighten the crumb and reduce air pockets.
- Cutting too soon — slicing a very hot loaf can gum the crumb; let it rest about 10 minutes so the interior sets.
- Using water that’s too hot or too cold — lukewarm water (about 100–110°F) activates yeast without killing it or slowing it down.
- Ignoring salt — salt is crucial for flavor and fermentation control; don’t omit or drastically reduce it.
In-Season Flavor Ideas
Think of this loaf as a blank canvas. In autumn and winter, hearty pairings like roasted vegetables, warm stews, and braises complement the bread’s texture. In spring and summer, use it for light open-faced sandwiches or alongside fresh salads and chilled soups. When stone fruits or figs are in season, the contrast of sweet fruit and the bread’s tangy interior is delightful.
If you want to experiment with inclusions, add them sparingly and without changing the method’s timing: small quantities of savory mix-ins or seeds work best. Remember that wet additions (like olives) can alter hydration and the dough’s behavior, so introduce changes cautiously.
Little Things that Matter
Measure flour by scooping lightly into the cup or, better yet, weigh it if you have a scale — 3 cups of all-purpose flour can vary noticeably by how it’s packed. Keep your hands lightly floured while shaping; too much flour will dry the surface and limit expansion. A quick, confident set of folds creates surface tension without flattening the dough. And when lifting the parchment into the pot, center the dough so it has room to expand without touching the sides immediately.
Humidity and temperature play subtle roles. If your kitchen is very warm, check the dough earlier in the rise period. If it’s cooler, it may need the full 2 hours to approach doubling. The dough is ready when it looks airy and has visibly puffed, not necessarily doubled to the exact measurement.
Storage & Reheat Guide
To keep a crusty top, store leftover loaf at room temperature, loosely wrapped in a clean kitchen towel or paper bag for up to two days. Plastic wrap will soften the crust because it traps moisture — if you prioritize soft crumb over crust, plastic is fine. For longer storage, slice and freeze portions in a sealed container or bag for up to three months.
To refresh the crust, reheat slices or a whole loaf in a 350°F oven for 8–12 minutes (wrapped in foil to prevent over-browning) or 3–5 minutes directly on the oven rack for a crisp finish. For frozen slices, pop them in a toaster or under the broiler for a quick revival.
Dutch Oven No-Knead Bread Q&A
What if my dough never seems to double?
Timing can vary. If your kitchen is cool, the rise will take longer. Check that your yeast is fresh — active dry yeast older than its expiration may be slow. Also confirm water temperature; if it was too cool, the yeast may be sluggish. Give it more time, ideally in a slightly warmer spot, until the dough is noticeably puffed.
Can I use instant yeast instead?
Yes. If you use instant yeast, you can mix it directly with the dry ingredients. The quantity here (2 teaspoons active dry yeast) translates closely for instant yeast, but if you swap, don’t expect dramatically faster fermentation under this simple schedule — just monitor the dough’s readiness rather than rigidly following the clock.
Can I make this with whole wheat or other flours?
Substituting whole grain flours will change hydration and texture. Whole wheat absorbs more water and can yield a denser crumb. If you try a mix, consider increasing water slightly and expect a shorter oven spring. For best results, replace up to half the all-purpose flour with whole grain and adjust if needed on future bakes.
My crust is darkening too fast. What can I do?
If the crust browns too quickly after you remove the lid, tent the loaf loosely with foil for the remainder of the bake to slow browning while the crumb finishes cooking. Also check your oven’s temperature accuracy with an oven thermometer; many ovens run hot or cool.
Can I make the dough ahead of time?
Yes. For a slower fermentation and more flavor, refrigerate the mixed dough (covered) for up to 24 hours. Bring it back to room temperature and let it finish its rise before shaping and baking. This is a reliable way to fit baking into a busy schedule and deepen flavor.
Hungry for More?
If you enjoyed this loaf, try experimenting with different hydration levels and baking vessels. Once you’re comfortable with this method, you’ll find it an easy gateway into more advanced loaves that use the same principles: long fermentation, gentle handling, and steam during the first bake. Come back and make it again — the routine is simple, but the results make every meal feel a little more deliberate and comforting.
Dutch Oven No-Knead Bread
Ingredients
Ingredients
- 3 cupsall-purpose flour
- 2 tspactive dry yeast
- 2 tspsalt
- 1 1/2 cuplukewarm water
Instructions
Instructions
- In a large bowl, combine 3 cups all-purpose flour, 2 teaspoons active dry yeast, and 2 teaspoons salt; stir to mix the dry ingredients evenly.
- Make a shallow well in the center of the dry mixture and add 1 1/2 cups lukewarm water (about 100–110°F). Use a wooden spoon to slowly stir from the center outward until the ingredients are fully combined and a shaggy, sticky dough forms. Do not knead.
- Cover the bowl with plastic wrap or a clean kitchen towel and let the dough rest at room temperature for 1–2 hours, until it has almost doubled in size.
- About 30 minutes before you plan to bake (while the dough is rising or when it has nearly doubled), place the dutch oven with its lid inside your oven and preheat the oven to 450°F. Preheating the pot for at least 30 minutes ensures it is thoroughly hot.
- When the dough has nearly doubled, generously flour a work surface or sprinkle about 1 tablespoon of flour onto the surface to prevent sticking. Using a rubber spatula or scraper, gently scrape the dough out of the bowl onto the floured surface.
- With floured hands and without kneading, shape the dough into a round loaf by folding the edges toward the center a few times to create surface tension, then gently pat it into a tight round. Avoid pressing or working the dough too much.
- Place the shaped dough seam-side down on a sheet of parchment paper (smooth side up) large enough to lift the dough.
- Wearing oven mitts, carefully remove the preheated dutch oven from the oven. Lift the parchment with the dough and place it into the hot dutch oven. Replace the lid.
- Bake covered at 450°F for 30 minutes. After 30 minutes, remove the lid and continue baking for an additional 10 minutes to brown and crisp the crust.
- Using oven mitts, remove the dutch oven from the oven and transfer the bread (on the parchment) to a cooling rack or cutting board. Allow the bread to cool for about 10 minutes before slicing and serving.
Equipment
- Equipment
- Dutch Oven
Notes
The nutritional data is for 1 slice of toast if sliced in 12 slices.
This recipe makes one large loaf which is enough for 10-12 people.