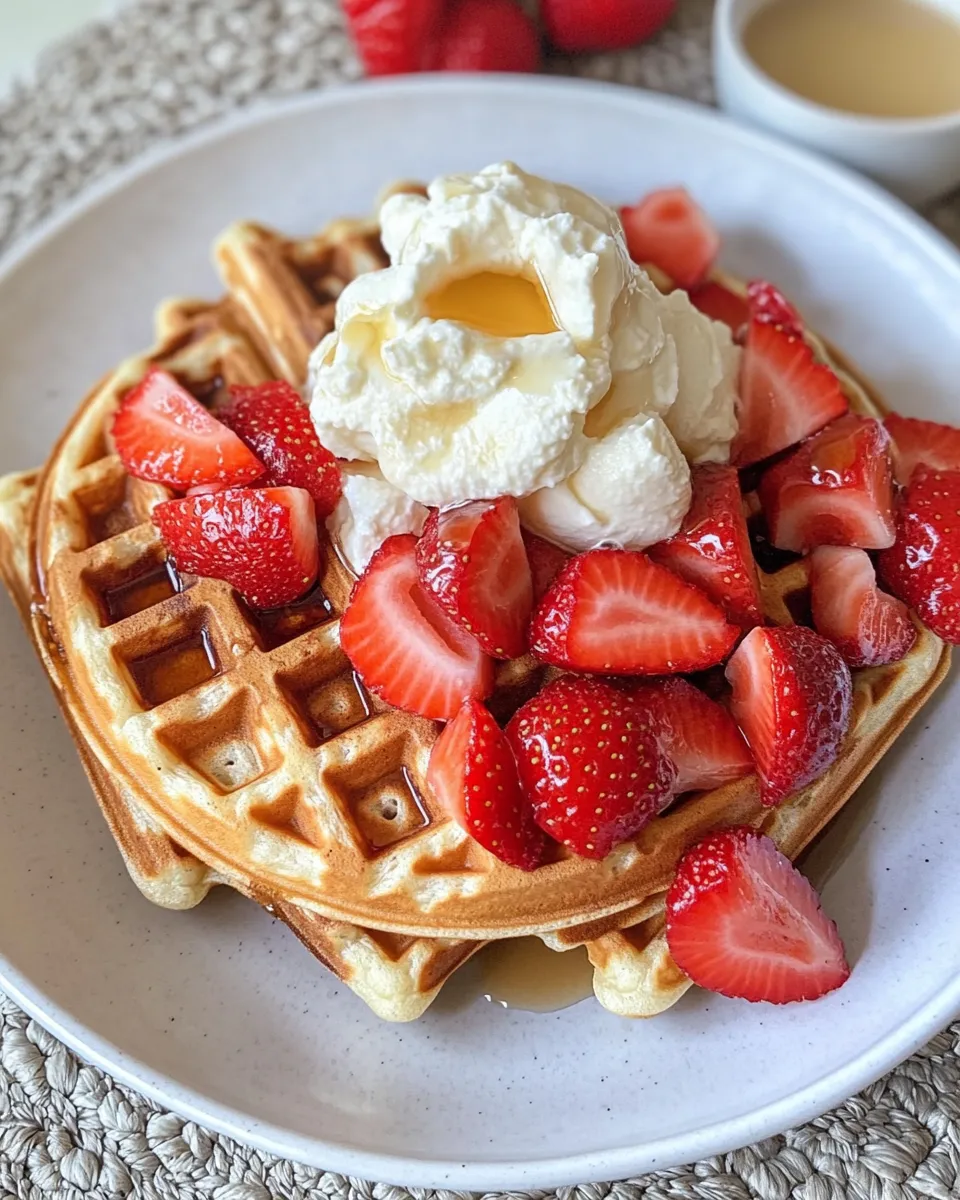
There’s something about a hot Belgian waffle straight from the iron that makes a slow morning feel intentional. Crispy edges, a soft interior, and deep pockets for butter and syrup — it’s comfort and technique in one pan. Over the years I’ve learned a few practical habits that keep these waffles consistently good without adding fuss.
This recipe blends all-purpose and whole wheat flour for texture and a touch of nuttiness, uses buttermilk for tang and lift, and leans on room-temperature ingredients so batter behaves predictably. Follow the steps closely and you’ll end up with waffles that are golden, tender, and ready to dress up however you like.
I’ll walk you through the shopping list, the exact method, sensible swaps, and storage tips so you can batch-make waffles for busy mornings or a relaxed brunch. No fluff — just useful, tested guidance to help you get the best from your waffle iron every time.
Shopping List

- 1 cup all-purpose flour — provides structure; balances whole wheat for tenderness.
- 1 cup whole wheat flour — adds flavor and a nutty crumb; use a medium grind for best texture.
- 1 teaspoon baking powder — primary leavening to help lift the batter.
- 1/2 teaspoon baking soda — reacts with buttermilk for extra rise and browning.
- 1 teaspoon salt — enhances flavor; measure precisely for balance.
- 3 tablespoons light brown sugar — adds subtle caramel notes and helps with crust color.
- 3 large eggs at room temperature — binders and enrich the batter; room temp eggs whip and combine more evenly.
- 1/4 cup unsalted butter, melted and slightly cooled — fat for richness and crisp edges; slightly cooled to avoid cooking the eggs.
- 2 cups buttermilk at room temperature — acidifies batter for tenderness and reacts with baking soda.
- 1 teaspoon pure vanilla extract — adds fragrant sweetness; use pure extract for best flavor.
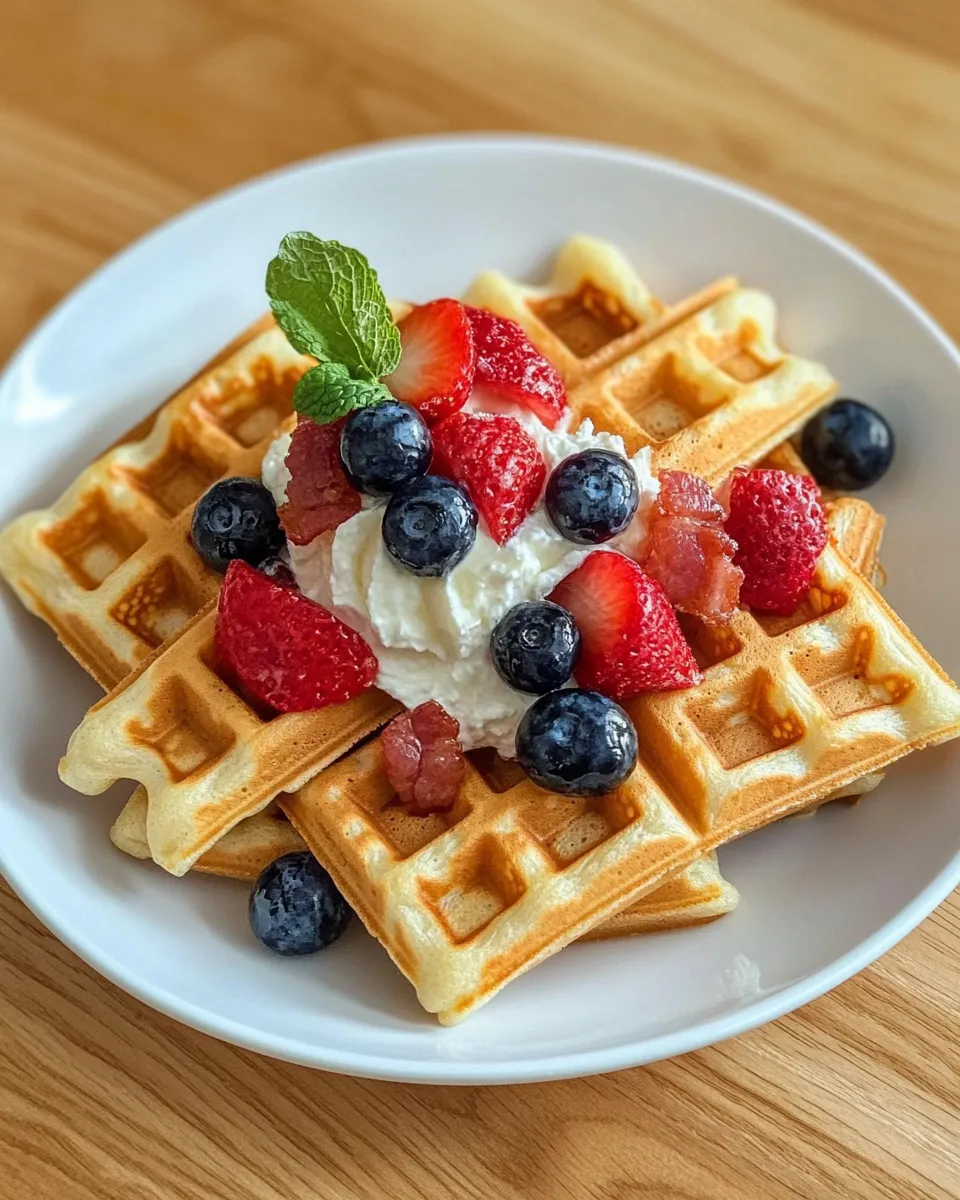
- Berries — bright, fresh topping; choose seasonal varieties.
- Whipped cream and maple syrup, for serving, if desired — classic finishing touches; optional but recommended.
Method: Belgian Waffles
- Preheat the waffle iron according to the manufacturer’s directions.
- In a large bowl, whisk together 1 cup all-purpose flour, 1 cup whole wheat flour, 1 teaspoon baking powder, 1/2 teaspoon baking soda, 1 teaspoon salt, and 3 tablespoons light brown sugar. If the brown sugar has clumps, use clean hands or a fork to break them up, then whisk again.
- In a medium bowl, beat 3 large eggs until combined. Stir in 1/4 cup melted unsalted butter (slightly cooled), then whisk in 2 cups buttermilk and 1 teaspoon pure vanilla extract until the wet mixture is uniform.
- Pour the wet ingredients into the dry ingredients and gently stir with a spatula or whisk until just combined. Small lumps are fine—do not overmix.
- Lightly spray or grease the preheated waffle iron following the manufacturer’s guidance. Pour the recommended amount of batter for your waffle iron onto the center of the grid (enough to cover without overflowing). Close the iron and cook until the waffle is golden and releases easily from the iron.
- Remove the waffle and serve immediately, or keep cooked waffles warm in a 200°F oven until ready to serve.
- Serve with berries, whipped cream, and maple syrup, if desired.
Reasons to Love Belgian Waffles
Belgian Waffles hit a sweet spot: they’re special enough for guests but quick enough for a weekend breakfast. The deeper pockets hold syrup and toppings instead of letting them run off the plate. That concentrated surface area means more crunchy edges without drying the center.
Using both all-purpose and whole wheat flour gives you the best of both worlds — structure and tenderness plus a pleasant, slightly nutty taste. Buttermilk keeps the crumb tender and helps develop a better browning reaction. The result is a waffle that stands up to bold toppings without turning soggy five minutes later.
Finally, this recipe scales well. Make a double batch, keep cooked waffles warm, or freeze extras for fast weekday breakfasts. They reheat quickly and still taste homemade.
What to Use Instead
If you need swaps, these keep the spirit of the recipe while accommodating pantry limits or dietary needs.
- Buttermilk — if you don’t have buttermilk, you can make a quick substitute by adding 2 tablespoons white vinegar or lemon juice to 2 cups of milk and letting it sit 5–10 minutes. It won’t be identical but will provide the necessary acidity for the baking soda.
- Whole wheat flour — if whole wheat isn’t available, replace with an additional 1 cup all-purpose flour for a lighter crumb. The waffles will be less nutty but still good.
- Unsalted butter — for a dairy-free option, use a neutral oil like vegetable or light olive oil in the same amount (1/4 cup), though texture and flavor will differ slightly.
- Light brown sugar — swap with granulated sugar if needed, but expect less depth of flavor; for a similar effect, use dark brown sugar if you want a molasses note.
Essential Tools for Success

- Waffle iron — size and style vary; know the recommended batter amount for your model to avoid overflow.
- Mixing bowls — one large for dry, one medium for wet; keeping them separate avoids overworking the batter.
- Measuring cups and spoons — accurate measurements matter, especially for leaveners and salt.
- Spatula or whisk — a rubber spatula is ideal for folding the batter gently.
- Wire rack and baking sheet — use these to hold waffles in a 200°F oven so they stay crisp rather than steaming on a plate.
- Cooling rack — gives airflow under cooked waffles if you’ll keep them for a short time before serving.
Easy-to-Miss Gotchas
These are small issues that cause inconsistent waffles. Watch for them so your batch turns out right every time.
- Cold ingredients: Using cold eggs or buttermilk makes the batter tighter and can reduce volume — bring eggs and buttermilk to room temperature first.
- Overmixing: Stir until just combined. Overworking develops gluten and yields tough waffles.
- Too much batter: Every waffle iron is different. Pouring the wrong amount leads to overflow and a mess. Start with the manufacturer’s recommendation and adjust by small increments.
- Skipping the cool-down for melted butter: If the melted butter is too hot it can cook the eggs partially; let it cool slightly before adding.
- Piling cooked waffles: Stacking waffles directly on top of each other traps steam and softens crusts. Use a single layer on a rack or keep them warm separately.
Seasonal Twists
Waffles are a great base for seasonal produce. Change toppings to match what’s fresh and you’ll get new flavor profiles without changing the batter.
- Spring: Top with macerated strawberries, a dollop of ricotta, and a sprinkle of lemon zest for brightness.
- Summer: Use ripe peaches or berries, a smear of Greek yogurt or whipped cream, and a drizzle of warm honey or maple syrup.
- Autumn: Sauté sliced apples with butter, brown sugar, and cinnamon; finish with toasted pecans and a splash of maple.
- Winter: Try poached pears, spiced compote, or a smear of chestnut or pumpkin butter for holiday warmth.
Insider Tips
Small adjustments make a big difference in texture and consistency.
- Rest the batter briefly: Letting the mixed batter sit 5–10 minutes relaxes the flour and yields a slightly smoother texture. Don’t rest so long that baking powder loses effectiveness (avoid over 30 minutes).
- Control steam: Keep cooked waffles on a wire rack in a warm oven set to 200°F if you’re making several. This preserves crispness better than stacking on a plate.
- Watch color, not time: Waffle irons vary. Learn the visual cues — deep golden edges and dry surfaces — rather than relying solely on a timer.
- Test one first: If you’re trying a new iron or making substitutions, cook one waffle first to confirm batter volume and doneness, then tweak.
- Make batter cooler for crispier waffles: Slightly cooler batter can encourage crisper edges; if you want ultra-crisp waffles, refrigerate the batter for 15–20 minutes before cooking.
Storage Pro Tips

Waffles store and reheat very well when you follow a few simple steps.
- Short-term (same day): Keep cooked waffles in a single layer on a wire rack in a 200°F oven for up to an hour. This maintains crispness without drying them out.
- Freezing: Cool waffles completely on a wire rack, then freeze in a single layer on a baking sheet. Once frozen, transfer to a zip-top bag with parchment between layers to prevent sticking. Freeze up to 2 months.
- Reheating from frozen: Reheat frozen waffles directly in a toaster or toaster oven until hot and crisp — this is better than microwaving, which makes them soggy. For a conventional oven, reheat at 375°F on a wire rack for 8–12 minutes.
- Label and date: Mark bags with the date so you use older batches first. Thawed waffles lose crispness faster than reheated-from-frozen ones.
FAQ
Q: Can I make the batter ahead of time?
A: You can make the batter up to 30 minutes ahead and keep it covered at room temperature. Any longer and the baking powder begins to lose lift; refrigerate if you need to wait longer, though expect a slight change in rise.
Q: Why aren’t my waffles crisp?
A: Common causes are overcrowding the iron, stacking cooked waffles, or using batter that’s too warm and creates too much steam. Use a hot iron, cook on a wire rack, and avoid stacking.
Q: My waffles are dense — what happened?
A: Overmixing develops gluten and yields density. Also check your leavening: old baking powder or baking soda won’t give proper lift. Measure accurately and mix gently.
Q: Can I substitute milk for buttermilk?
A: Yes — see the What to Use Instead section for a quick buttermilk substitute using milk + acid. Plain milk alone won’t react with the baking soda and will change texture slightly.
Q: How do I prevent waffles from sticking to the iron?
A: Make sure the iron is fully preheated and follow the manufacturer’s greasing recommendations. If your waffles stick, reduce the amount of oil or use a nonstick spray designed for high heat and clean the grids between batches if residue builds up.
The Last Word
This Belgian Waffles recipe balances convenience and taste. The combination of flours and buttermilk produces waffles that are crisp, flavorful, and resilient under toppings. Stick to the method, pay attention to temperature and batter consistency, and you’ll have dependable results every time.
Keep a stash in the freezer for fast breakfasts, experiment with seasonal toppings, and treat the first waffle as a test that allows you to fine-tune batter volume for your iron. Enjoy — and don’t be afraid to make these your own.

Belgian Waffles
Ingredients
Ingredients
- 1 cupall-purpose flour
- 1 cupwhole wheat flour
- 1 teaspoonbaking powder
- 1/2 teaspoonbaking soda
- 1 teaspoonsalt
- 3 tablespoonslight brown sugar
- 3 large eggsat room temperature
- 1/4 cupunsalted buttermelted and slightly cooled
- 2 cupsbuttermilkat room temperature
- 1 teaspoonpure vanilla extract
- Berrieswhipped cream and maple syrup for serving, if desired
Instructions
Instructions
- Preheat the waffle iron according to the manufacturer's directions.
- In a large bowl, whisk together 1 cup all-purpose flour, 1 cup whole wheat flour, 1 teaspoon baking powder, 1/2 teaspoon baking soda, 1 teaspoon salt, and 3 tablespoons light brown sugar. If the brown sugar has clumps, use clean hands or a fork to break them up, then whisk again.
- In a medium bowl, beat 3 large eggs until combined. Stir in 1/4 cup melted unsalted butter (slightly cooled), then whisk in 2 cups buttermilk and 1 teaspoon pure vanilla extract until the wet mixture is uniform.
- Pour the wet ingredients into the dry ingredients and gently stir with a spatula or whisk until just combined. Small lumps are fine—do not overmix.
- Lightly spray or grease the preheated waffle iron following the manufacturer's guidance. Pour the recommended amount of batter for your waffle iron onto the center of the grid (enough to cover without overflowing). Close the iron and cook until the waffle is golden and releases easily from the iron.
- Remove the waffle and serve immediately, or keep cooked waffles warm in a 200°F oven until ready to serve.
- Serve with berries, whipped cream, and maple syrup, if desired.
Equipment
- Waffle Iron
- Large Bowl
- Medium Bowl
- Whisk
- Spatula
- Measuring Cups
- Measuring Spoons
- Oven (optional)