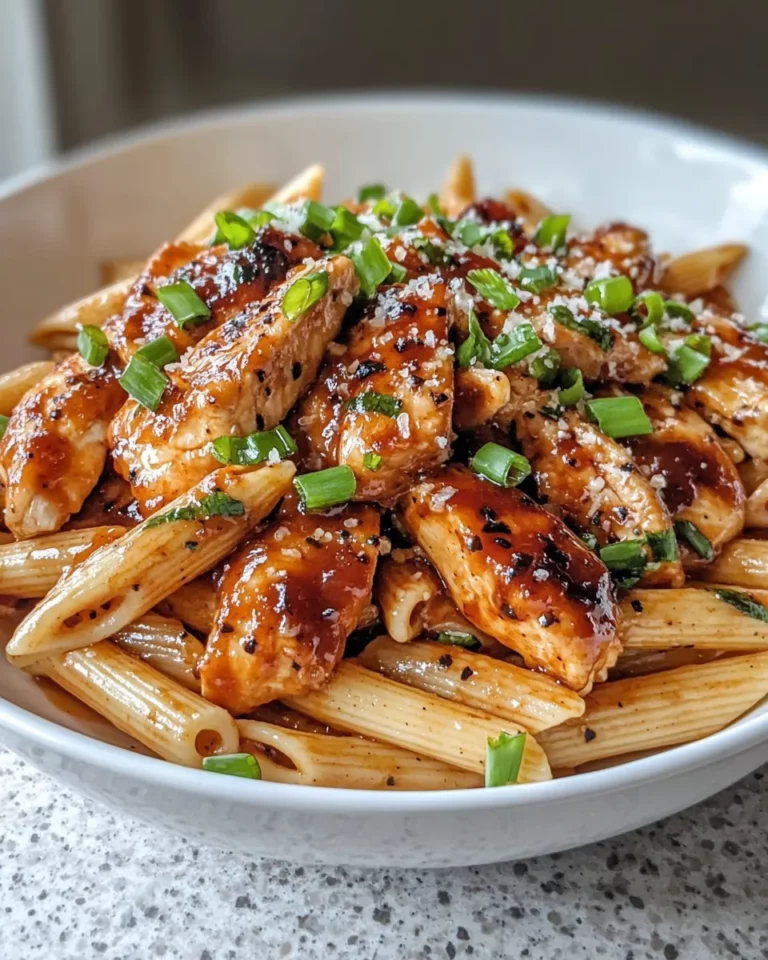
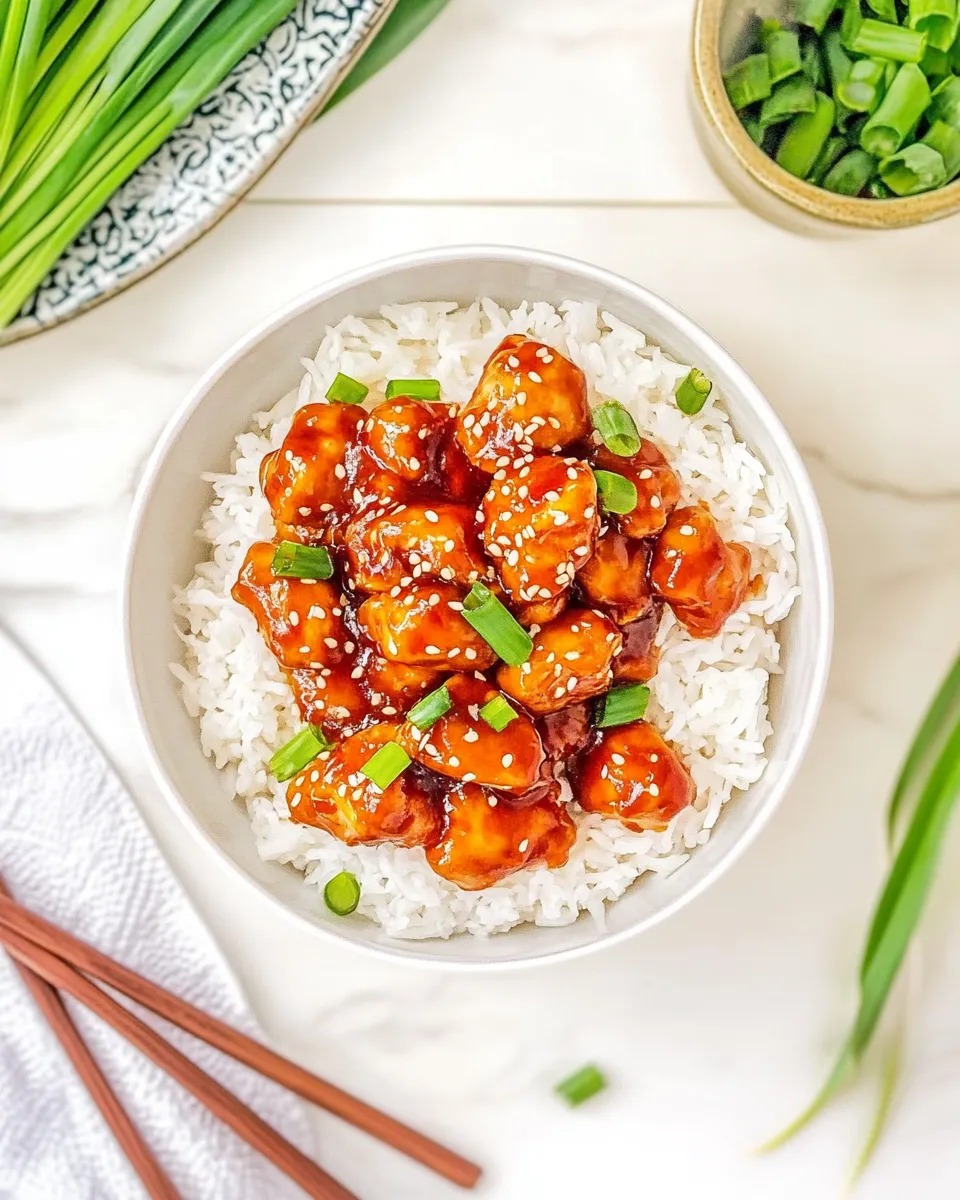
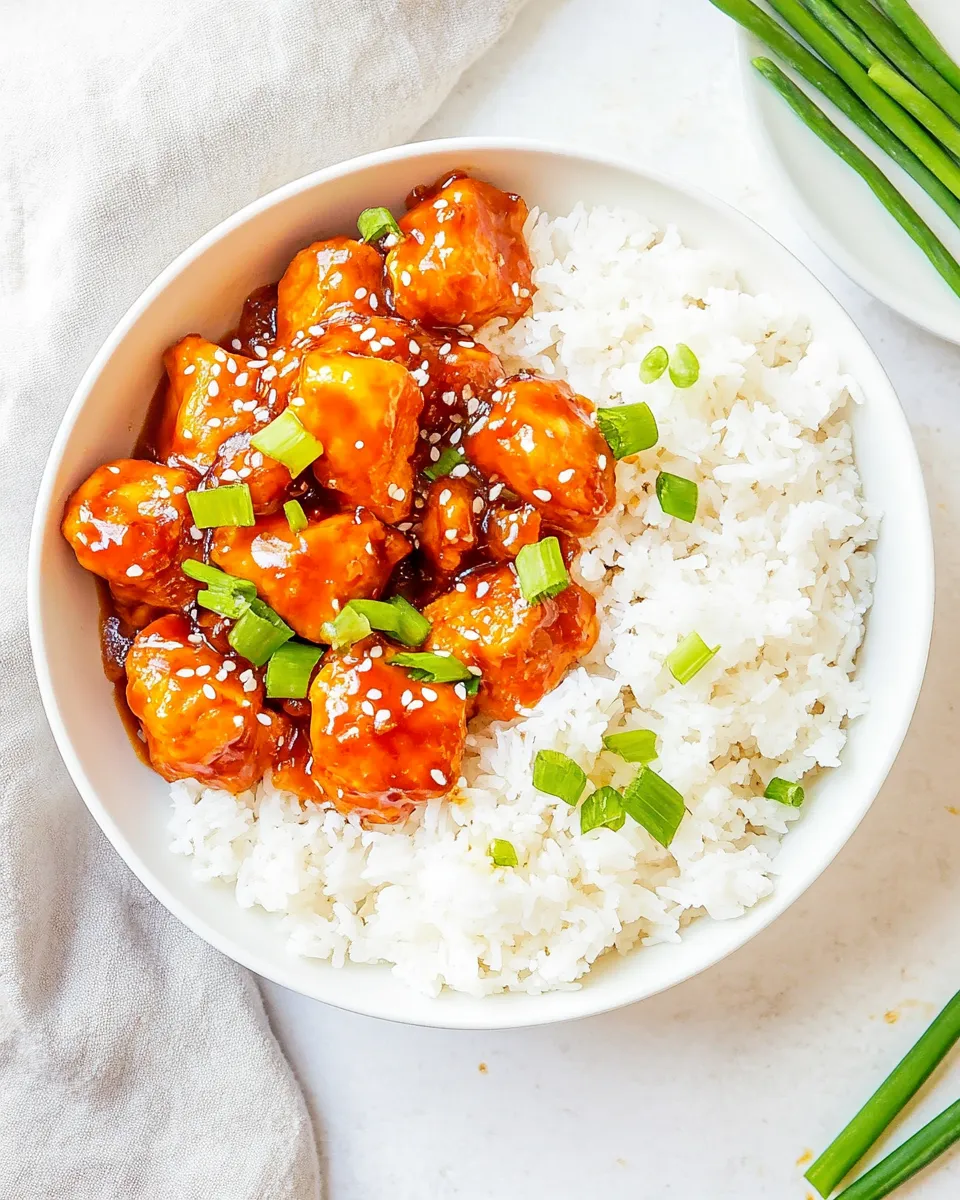
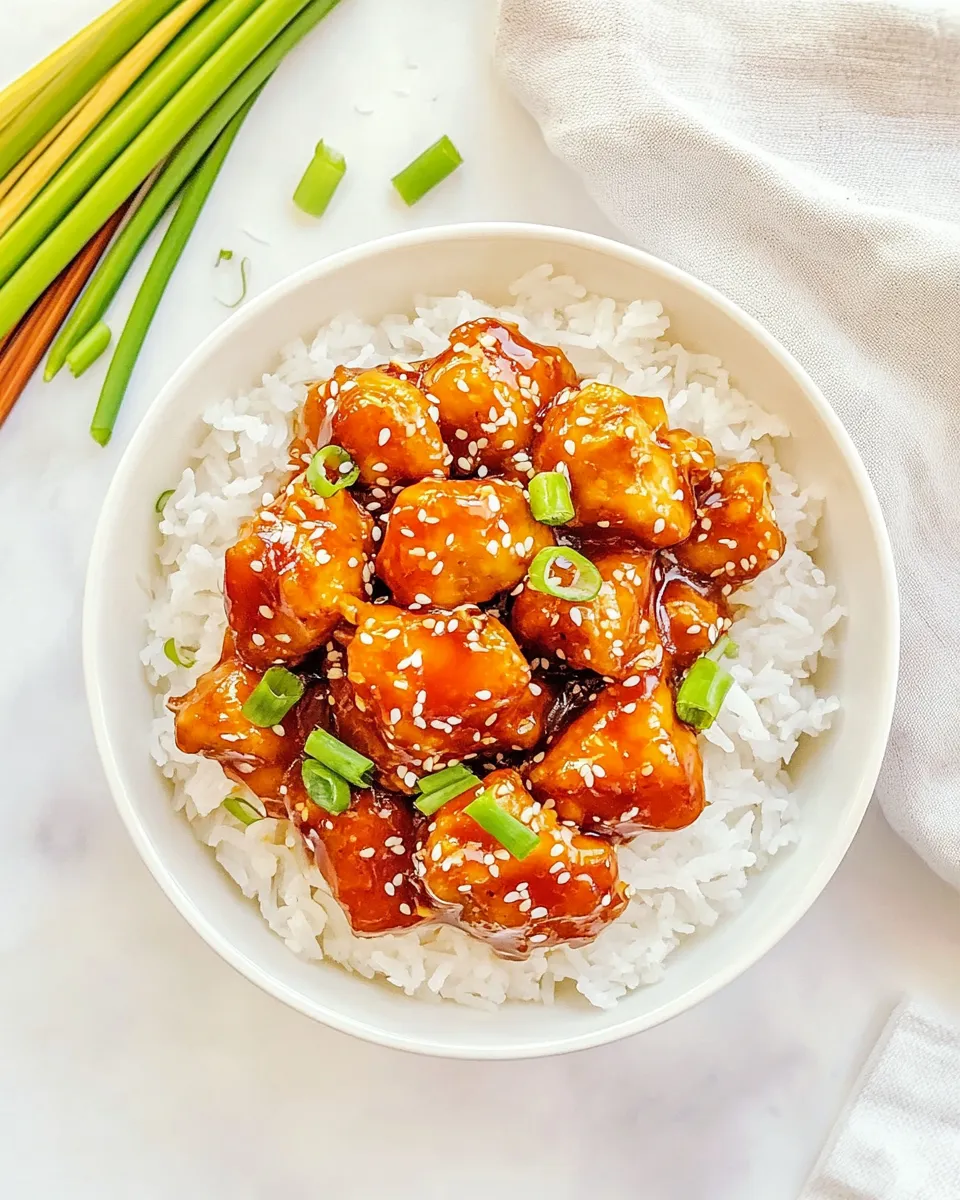
I make this Better-Than-Takeout Mongolian Chicken on busy weeknights and when friends pop over unexpectedly. It hits the same sweet-salty notes as the restaurant version but with fresher ginger and garlic, a glossy sauce that clings to every bite, and a texture that comes from a simple cornstarch coating. You don’t need a wok or any exotic pantry items—just a hot skillet and a few pantry staples.
This recipe is built to be straightforward and forgiving. There are clear moments where you can pause—coating the chicken, simmering the sauce, or finishing with a quick garnish—so it’s easy to time alongside rice or steamed vegetables. I like to make the sauce slightly ahead, cook the rice, then bring everything together so the meal feels fast but tastes like I spent hours on it.
Below you’ll find the exact ingredients and the step-by-step method I follow every time. I also include swaps, troubleshooting tips, and reheating advice so leftovers are never disappointing. If you want crispier chicken or a looser sauce, you’ll find the adjustments listed under Common Errors and What to Use Instead.
What You’ll Need
Simple tools and a little planning make this recipe sing. Use a large skillet so the chicken can brown in a single layer; if it crowds, do it in batches. Have your garlic and ginger ready before you heat the pan—this recipe moves quickly once the oil is hot.
Ingredients
- 1 to 1 ¼ pounds boneless skinless chicken breasts, diced into bite-sized pieces — the main protein; dice evenly so pieces cook at the same rate.
- 4 tablespoons cornstarch, divided — one portion coats the chicken for a light crust and the remainder thickens the sauce.
- 2 tablespoons olive oil — for sautéing the chicken; neutral oils work too.
- 2 to 4 cloves garlic, finely minced — adds aromatic sharpness; adjust to taste.
- 1 teaspoon ground ginger, or about 2 teaspoons freshly grated, or to taste — warm, slightly peppery flavor; fresh ginger brightens the sauce.
- ½ cup low-sodium soy sauce — the salty backbone; low-sodium keeps the dish balanced.
- ½ cup honey — provides the sweet counterpoint to soy; melts into the glossy finish.
- ⅓ cup chicken broth, I use reduced sodium — deglazes the pan and rounds out the sauce; use reduced sodium to control salt.
- 1 tablespoon toasted sesame oil — finishing oil for toasty depth; a little goes a long way.
- 1 tablespoon water — used to make the cornstarch slurry for thickening.
- Salt, as desired and to taste — only add at the end if needed since soy sauce is salty.
- Black pepper, as desired and to taste — a few grinds to brighten the finish.
- Green onions and/or sesame seeds for garnishing, optional and to taste — fresh garnish lifts the dish and adds a textural pop.
Build Better-Than-Takeout Mongolian Chicken Step by Step
- In a large bowl or a gallon-size zip-top bag, add the diced chicken and 3 tablespoons cornstarch. Toss or shake until the chicken pieces are evenly coated. Set aside.
- Heat a large skillet over medium-high heat. Add the 2 tablespoons olive oil. When the oil is hot, add the coated chicken (work in batches if needed so pieces don’t crowd the pan) and sauté for about 5 minutes, stirring and flipping frequently, until the chicken is cooked through and lightly browned. Remove the chicken with a slotted spoon and set it on a plate.
- Reduce the heat to medium. Add the finely minced garlic (2 to 4 cloves, to taste) and the ginger (1 teaspoon ground ginger or about 2 teaspoons freshly grated, to taste) to the same skillet. If the pan looks dry, add a little more olive oil. Sauté, stirring constantly, about 30–60 seconds until fragrant but not browned.
- Add the 1/2 cup low-sodium soy sauce, 1/2 cup honey, 1/3 cup chicken broth, and 1 tablespoon toasted sesame oil to the skillet. Whisk to combine and bring the mixture to a gentle simmer.
- In a small bowl, stir together the remaining 1 tablespoon cornstarch and 1 tablespoon water until fully dissolved to make a slurry. Pour the slurry into the skillet and whisk nearly constantly for about 2–3 minutes, until the sauce thickens slightly and becomes glossy.
- Return the cooked chicken to the skillet and stir to coat each piece evenly with the sauce. Cook 1–2 minutes more to heat through and allow the sauce to cling to the chicken. Taste and add salt and black pepper as desired.
- Transfer to a serving dish, garnish with green onions and/or sesame seeds if using, and serve immediately (rice or another starch is recommended to soak up the sauce).
- Store leftovers airtight in the refrigerator for up to 5 days or in the freezer for up to 3 months. Reheat as needed (about 30–60 seconds in the microwave).
What Sets This Recipe Apart
There are a few small choices here that make a big flavor difference. Coating the chicken with cornstarch before cooking creates a thin crust that helps the sauce adhere—no limp, watery pieces. Using honey instead of brown sugar or molasses keeps the sauce bright and glossy. Toasted sesame oil is added to the sauce (not used as the primary cooking oil) so you get its aroma without burning it.
The balance of low-sodium soy sauce and a measured amount of chicken broth gives savory depth without overwhelming saltiness. The method is intentionally fast: high heat for browning, then a gentle simmer to bring the sauce together. Those small temperature shifts preserve texture and keep the sauce from tasting over-reduced.
What to Use Instead
- Chicken: swap for boneless skinless thighs if you prefer juicier meat; adjust cooking time slightly (thighs may take a minute or two longer).
- Oil: use neutral oil (canola, vegetable) for high-heat searing if you don’t have olive oil.
- Soy sauce: tamari or coconut aminos can stand in for soy to reduce gluten, but taste and salt levels will differ—start with the same amount then adjust.
- Honey: maple syrup or agave can be used for a similar sweetness, but the flavor will shift slightly.
- Chicken broth: vegetable broth works well for a vegetarian version when using tofu or seitan.
Equipment Breakdown
Use tools you already own. The important pieces are:
- Large skillet (12-inch preferred) — provides space to brown the chicken without crowding.
- Slotted spoon — removes chicken while leaving rendered oil and bits in the pan.
- Small bowl and whisk — for the cornstarch slurry and to emulsify the sauce.
- Sharp knife and cutting board — even dice makes cooking times consistent.
You don’t need a wok, but a heavy-bottomed pan or nonstick skillet helps control sticking and makes cleanup easier.
Common Errors (and Fixes)
- Chicken steams instead of browns — Fix: don’t overcrowd the pan. Work in batches so pieces have room and the surface gets dry and hot.
- Sauce too thin — Fix: whisk in the cornstarch slurry a little at a time and simmer 2–3 minutes; if still thin, mix another 1/2 teaspoon cornstarch with a teaspoon of water and add sparingly.
- Sauce too thick or gummy — Fix: whisk in a splash of chicken broth or water off heat until you reach a glossy, clingy consistency.
- Bitter or burnt garlic/ginger — Fix: reduce heat slightly when adding aromatics; they only need 30–60 seconds to release fragrance.
- Too salty — Fix: use low-sodium soy sauce and taste before adding extra salt; a squeeze of fresh lime or a small drizzle of honey can help balance minor saltiness.
Dietary Swaps & Alternatives
Whether you need gluten-free, vegetarian, or lower-sugar options, this recipe adapts well.
- Gluten-free: replace low-sodium soy sauce with tamari or a certified gluten-free soy alternative. Ensure any added condiments are gluten-free.
- Vegetarian: use extra-firm tofu, pressed and patted dry, tossed with cornstarch and cooked until crisp. Substitute vegetable broth for chicken broth.
- Lower sugar: reduce the honey to 1/3 cup and add a splash of rice vinegar for brightness; the sauce will be less sweet but still balanced.
- Lower fat: use a nonstick skillet and reduce oil slightly; cornstarch coating gives texture even with less oil.
If You’re Curious
Why cornstarch? It creates a light coating that crisps and thickens the sauce without the heaviness of flour or batter. The two-stage use of cornstarch—first to coat the chicken, then as a slurry—ensures both texture and a shiny glaze.
Why honey not sugar? Honey dissolves quickly and contributes to the glossy finish; sugar would work, but honey gives a subtle floral note that lifts the sauce. Toasted sesame oil is used for flavor rather than cooking, so add it with the liquid ingredients to preserve its aroma.
Storage & Reheat Guide
Leftovers keep well, but texture changes slightly. Store cooled chicken in an airtight container in the refrigerator for up to 5 days, or freeze for up to 3 months. When freezing, spread the cooled chicken in a shallow layer to freeze faster and repackage into freezer-safe containers or bags.
To reheat: microwave portions for 30–60 seconds until warmed through. For best texture, reheat in a skillet over medium-low heat with a splash of water or broth to loosen the sauce and avoid drying out the chicken. Stir gently until heated through and the sauce is glossy again.
Handy Q&A
- Can I use chicken thighs? Yes. Thighs are juicier; they may need an extra minute or two in the skillet.
- My sauce separates—what happened? Likely added too much heat or added oil at the wrong time. Reduce heat and whisk constantly; add a small cornstarch slurry if needed.
- Can I double the recipe? Yes, but brown the chicken in batches so nothing steams.
- Any rice or side pairing recommendations? Plain steamed rice, jasmine, or a quick scallion fried rice are classic. Steamed broccoli or snap peas add color and crunch.
- Is this freezer-friendly? Yes—freeze in airtight containers for up to 3 months. Thaw in the refrigerator overnight before reheating.
Final Thoughts
This Better-Than-Takeout Mongolian Chicken is one of those dependable recipes that delivers bright flavor with minimal fuss. The technique—cornstarch coating, quick sear, then a glossy honey-soy finish—lets you customize texture and sweetness to your taste. Make a double batch if you want easy lunches for the week; it reheats beautifully when gently warmed and loosened with a splash of broth.
If you try it, start with the lower end of garlic and ginger, then taste and nudge up as you like. Garnish with green onions and sesame seeds for contrast, and serve it over steaming rice to sop up that irresistible sauce. Enjoy—and come back for more simple weeknight wins.

Better-Than-Takeout Mongolian Chicken
Ingredients
Ingredients
- 1 to 1 1/4 poundsboneless skinless chicken breasts diced into bite-sized pieces
- 4 tablespoonscornstarch divided
- 2 tablespoonsolive oil
- 2 to 4 clovesgarlic finely minced
- 1 teaspoonground ginger or about 2 teaspoons freshly grated, or to taste
- 1/2 cuplow-sodium soy sauce
- 1/2 cuphoney
- 1/3 cupchicken broth I use reduced sodium
- 1 tablespoontoasted sesame oil
- 1 tablespoonwater
- Salt as desired and to taste
- Black pepper as desired and to taste
- Green onions and/or sesames seeds for garnishing optional and to taste
Instructions
Instructions
- In a large bowl or a gallon-size zip-top bag, add the diced chicken and 3 tablespoons cornstarch. Toss or shake until the chicken pieces are evenly coated. Set aside.
- Heat a large skillet over medium-high heat. Add the 2 tablespoons olive oil. When the oil is hot, add the coated chicken (work in batches if needed so pieces don’t crowd the pan) and sauté for about 5 minutes, stirring and flipping frequently, until the chicken is cooked through and lightly browned. Remove the chicken with a slotted spoon and set it on a plate.
- Reduce the heat to medium. Add the finely minced garlic (2 to 4 cloves, to taste) and the ginger (1 teaspoon ground ginger or about 2 teaspoons freshly grated, to taste) to the same skillet. If the pan looks dry, add a little more olive oil. Sauté, stirring constantly, about 30–60 seconds until fragrant but not browned.
- Add the 1/2 cup low-sodium soy sauce, 1/2 cup honey, 1/3 cup chicken broth, and 1 tablespoon toasted sesame oil to the skillet. Whisk to combine and bring the mixture to a gentle simmer.
- In a small bowl, stir together the remaining 1 tablespoon cornstarch and 1 tablespoon water until fully dissolved to make a slurry. Pour the slurry into the skillet and whisk nearly constantly for about 2–3 minutes, until the sauce thickens slightly and becomes glossy.
- Return the cooked chicken to the skillet and stir to coat each piece evenly with the sauce. Cook 1–2 minutes more to heat through and allow the sauce to cling to the chicken. Taste and add salt and black pepper as desired.
- Transfer to a serving dish, garnish with green onions and/or sesame seeds if using, and serve immediately (rice or another starch is recommended to soak up the sauce).
- Store leftovers airtight in the refrigerator for up to 5 days or in the freezer for up to 3 months. Reheat as needed (about 30–60 seconds in the microwave).
Equipment
- large bowl or gallon-size zip-top bag
- Large Skillet
- Slotted Spoon
- Small Bowl
- Whisk