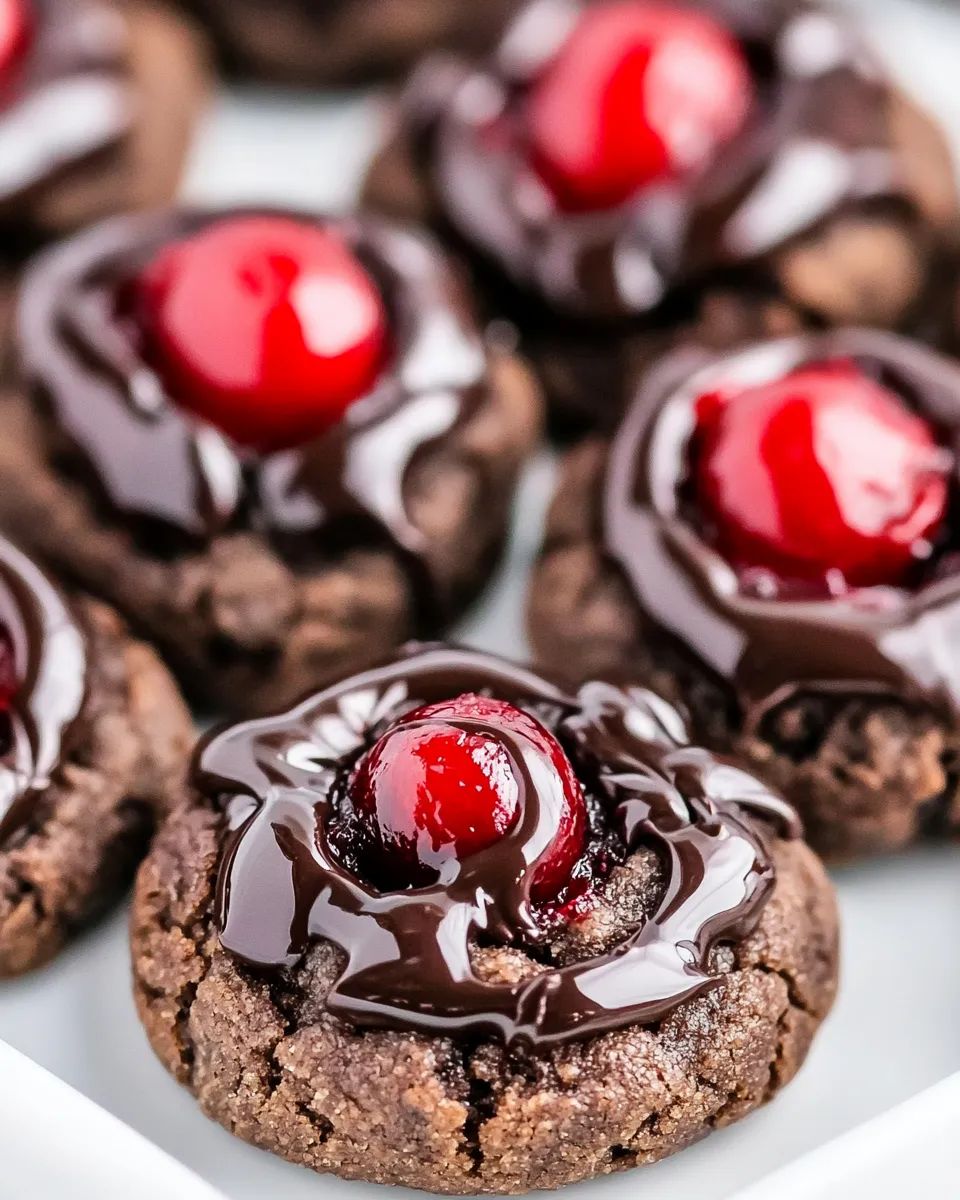
These cookies are a simple, satisfying bake that pairs deep cocoa with bright cherry centers and a chocolate drizzle on top. They come together without any fancy techniques, but they deliver on texture and nostalgia: tender chocolate cookies with a jammy cherry pop in the middle. You can make a big batch quickly, and they store well for gifting or snacking.
I like this recipe because it balances straightforward method with reliable results. The dough creams up nicely thanks to room-temperature butter, and the thumbprint well makes it easy to portion the cherry filling. A quick chocolate drizzle finishes the cookies and adds a glossy, professional touch.
Below you’ll find the ingredient rundown, step-by-step instructions (kept exactly as written in the recipe), tips, and practical notes for swaps and storage. I’ll point out the common mistakes to avoid so your batch turns out great every time.
Ingredient Rundown

Ingredients
- 1 cup butter (room temperature) — for creaming; soft but not melted gives the best texture.
- 2 cups white sugar — sweetens and helps with browning and structure.
- 2 eggs — binders that add moisture and structure.
- 2 teaspoon vanilla extract — flavor boost; use pure vanilla if you have it.
- 3 cups flour — the bulk of the cookie; provides structure.
- 1 cup unsweetened cocoa powder — gives the deep chocolate flavor and color.
- ½ teaspoon salt — balances sweetness and enhances flavor.
- ½ teaspoon baking soda — a small lift for the cookies.
- ½ teaspoon baking powder — works with baking soda for proper rise.
- 21 ounces cherry pie filling — the filling component; two cherries from this filling go in each cookie.
- 2 ounces Chocolate Almond Bark or chocolate melting wafers — for the finishing drizzle and sheen.
Chocolate Cherry Thumbprint Cookies — Do This Next
- Preheat oven to 350 degrees Fahrenheit. Prepare a baking sheet by greasing it or lining it with parchment paper.
- In a large mixing bowl, cream 1 cup butter (room temperature) and 2 cups white sugar together until light and fluffy.
- Add 2 eggs, one at a time, mixing well after each addition. Add 2 teaspoons vanilla extract and mix until combined.
- In a separate bowl, combine 3 cups flour, 1 cup unsweetened cocoa powder, ½ teaspoon salt, ½ teaspoon baking soda, and ½ teaspoon baking powder.
- Gradually add the dry ingredients to the butter mixture and mix until just combined and a dough forms.
- Roll the dough into 1 ½-inch balls. Place the balls on the prepared baking sheet.
- Press your thumb (or the back of a small spoon) into the center of each dough ball to create a well for the filling.
- Place two cherries from the 21 ounces cherry pie filling into the well of each cookie.
- Bake at 350 degrees Fahrenheit for 10–12 minutes. Remove from oven and cool on the baking sheet for 2 minutes, then transfer cookies to a wire rack to finish cooling.
- Melt 2 ounces Chocolate Almond Bark (or chocolate melting wafers) according to the package directions. Drizzle the melted chocolate over the cooled cookies.
- Let the chocolate set completely before serving. Store any leftover cookies in an airtight container.
What Sets This Recipe Apart
It’s the combination of cocoa-heavy dough and a glossy cherry center that makes these cookies stand out. The dough is rich but not overly dense, and the method—rolling into uniform balls, pressing wells, and filling with two cherries each—keeps the presentation consistent. The brief bake time preserves a soft interior while letting the cookie edges set, creating that perfect contrast between tender cookie and syrupy fruit.
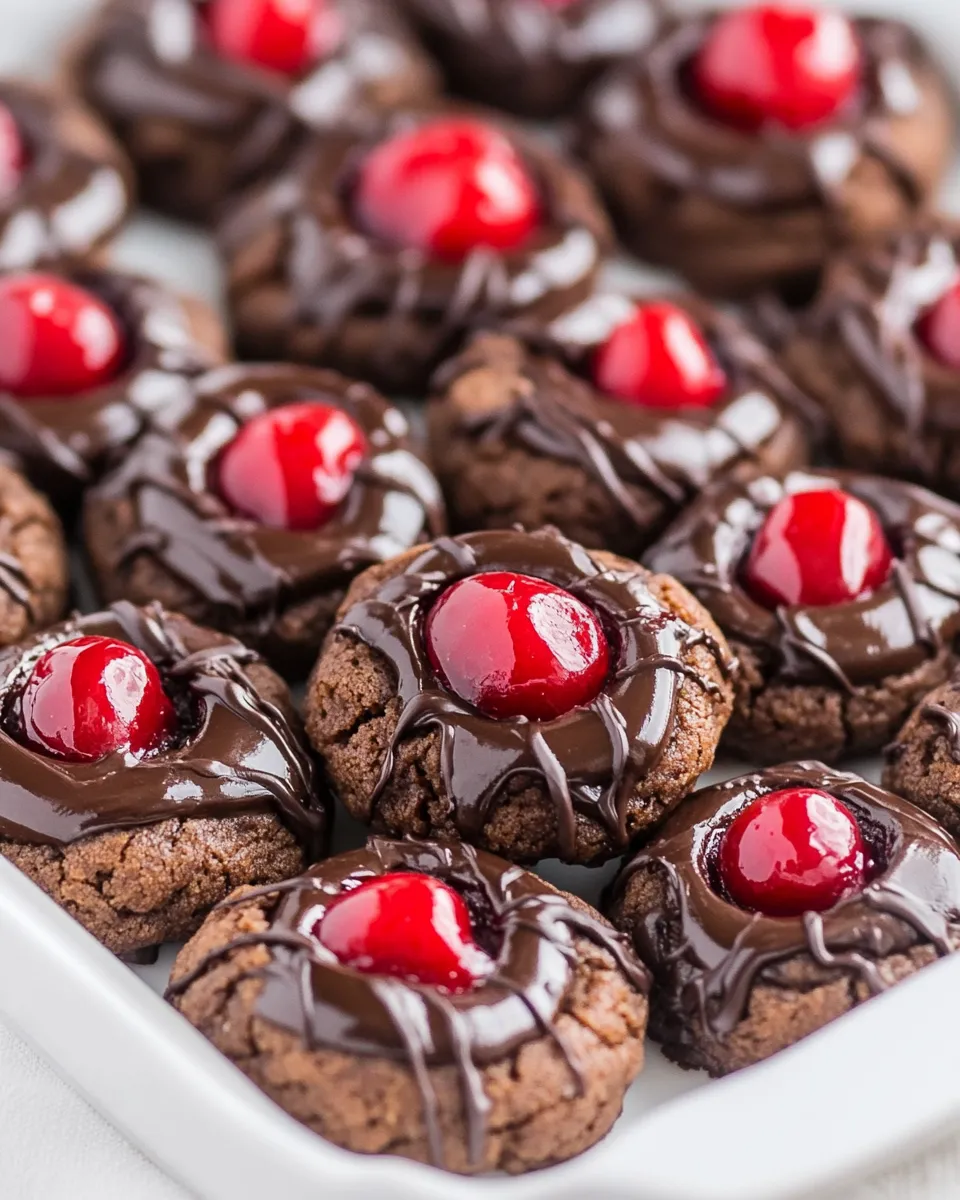
Another distinguishing element is the final chocolate drizzle. It’s optional but worth the tiny extra effort. The drizzle ties the flavors together and gives a finished look that feels considered. Because you use a melting bark or wafers, the drizzle sets smoothly and won’t smear in transit if you’re packing these for a bake sale or gift box.
If You’re Out Of…
- Butter: If you can’t use butter, a firm baking fat like margarine can work in a pinch, but texture and flavor will differ.
- Cherry pie filling: If you don’t have canned pie filling, a thick preserves or jam can substitute; choose a cherry preserve for closest result. Fresh cherries can work if macerated with a little sugar, though they will be less saucy.
- Chocolate Almond Bark or wafers: If you don’t have melting wafers, use any chocolate you can melt—chop into small pieces and melt slowly over a double boiler, then drizzle.
- Unsweetened cocoa powder: Replace with natural unsweetened cocoa only; do not swap with sweetened mixes.
Tools & Equipment Needed
- Mixing bowls — at least two: one for wet and one for dry ingredients.
- Hand mixer or stand mixer — for creaming butter and sugar until light; you can do it by hand, but it takes longer.
- Measuring cups and spoons — accurate measuring matters for texture.
- Baking sheet(s) — rimless or rimmed; line with parchment for easy cleanup.
- Parchment paper or silicone mat — prevents sticking and promotes even baking.
- Wire rack — for cooling so the cookies don’t steam and soften on the hot sheet.
- Small spoon or thumb — for making the wells; a melon baller or the end of a wooden spoon works too.
- Small microwave-safe bowl or double boiler — for melting the chocolate bark or wafers.
Mistakes Even Pros Make
- Using too-warm butter: If the butter is melted, the dough spreads too much. Softened but still solid butter gives the right crumb.
- Overmixing after adding flour: That causes dense cookies. Mix until just combined and stop.
- Making wells too deep: If the well is too large the cookie loses structure; press to create a shallow cup just wide enough for the two cherries.
- Filling hot cookies: Adding filling before the cookies cool can cause the cherries to sink or the filling to melt into the cookie. Let them cool on the sheet for the recommended 2 minutes, then move to a rack.
- Skipping the two-minute rest on the baking sheet: Transferring immediately can cause the cookie to fall apart. The short rest helps them set slightly first.
- Drizzling warm chocolate: If the chocolate is too hot it can melt the cherry filling or make a mess. Cool it slightly so it flows but isn’t piping hot.
Variations for Dietary Needs
- Gluten-free: Use a 1:1 gluten-free flour blend that’s formulated for baking. Expect a slightly different texture; chill dough briefly if it feels too soft.
- Dairy-free: Swap the butter for a firm plant-based baking stick that behaves like butter. Texture will vary, but structure can be similar.
- Lower-sugar option: This recipe centers on white sugar for structure; reducing sugar will change spread and texture. If you must reduce sugar, do it cautiously and test a small batch first.
- Nut-free: The recipe as written is nut-free; if you substitute almond bark, choose a nut-free melting chocolate to keep them safe for nut-free households.
Chef’s Notes
Portioning and uniformity
Rolling the dough into uniform 1 ½-inch balls keeps baking even. If you want precise size, use a small cookie scoop. Aim for consistent spacing on the sheet so air circulates and cookies bake evenly.
Cherry placement
Two cherries fit neatly in the well and give a clean look. If the pie filling has large syrup, spoon a little out before placing the cherries so the cookie doesn’t get soggy.
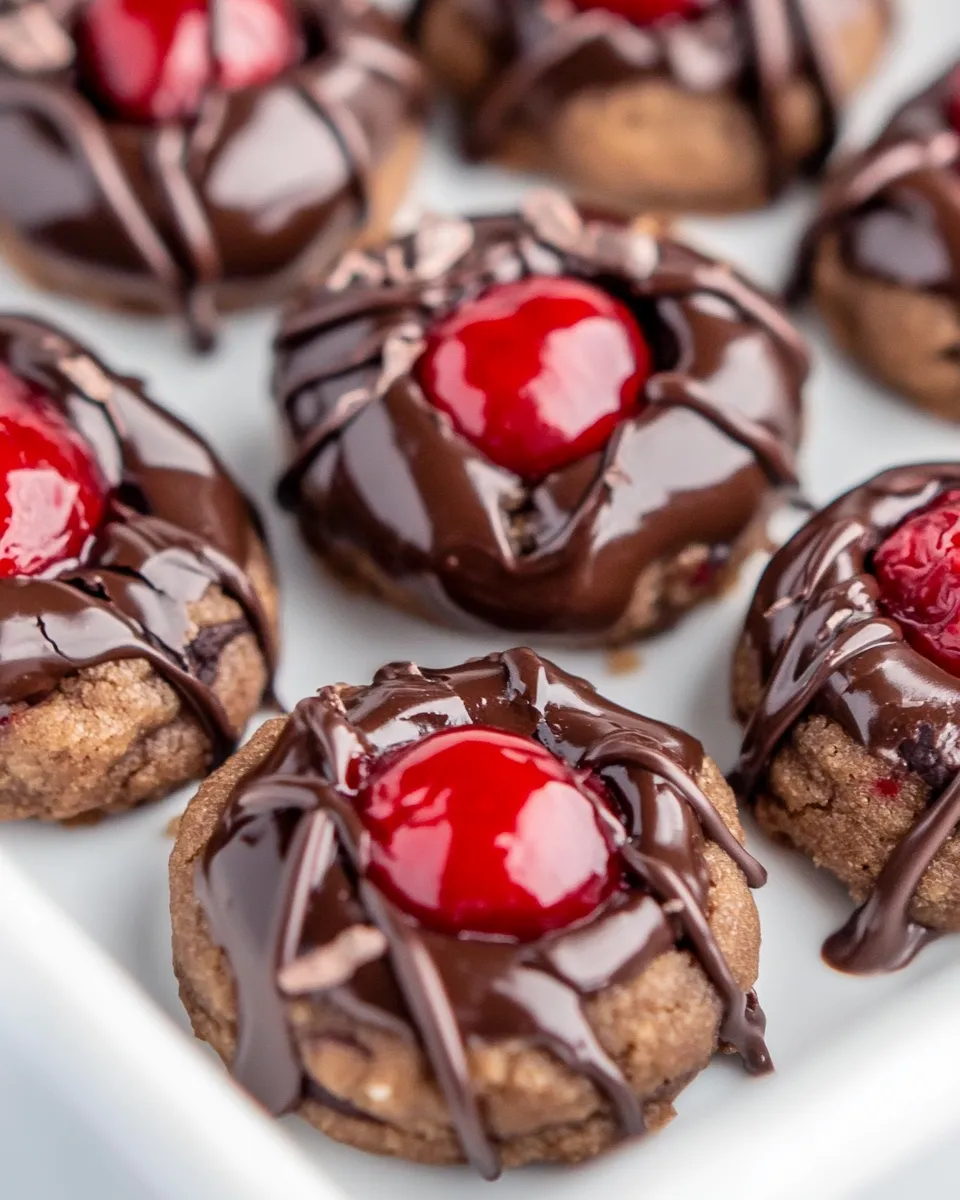
Chocolate drizzle technique
Melt the almond bark or wafers until smooth. Use a fork or a small piping bag (a zip-top bag with a tiny corner snipped) to drizzle. Let cookies sit at room temperature until the chocolate sets, or speed set in the fridge for 10–15 minutes.
Best Ways to Store
Once the chocolate has fully set, store cookies in an airtight container at room temperature for up to 3–4 days. If you need to keep them longer, layer parchment between stacks and refrigerate; they’ll keep for up to a week refrigerated. For longer storage, freeze baked cookies in a single layer until firm, then pack in a freezer container with parchment between layers. Thaw at room temperature before serving. If refrigerated or frozen, allow the chocolate to come to room temperature so it regains shine.
Top Questions & Answers
- Q: Can I use fresh cherries instead of pie filling?
A: You can, but fresh cherries won’t have the same syrupy body as pie filling. Pit and halve them, and consider tossing with a touch of sugar to bring moisture. They may release juice during baking, so place them carefully to avoid overly wet cookies. - Q: Why does the dough sometimes spread too much?
A: Usually because the butter was too warm or you overworked the dough. Chill the dough for 15–20 minutes if it feels overly soft before rolling into balls. - Q: My cookies come out flat. What happened?
A: Likely too much butter, too-warm butter, or the baking soda/baking powder not measured correctly. Check your measuring technique and make sure leaveners are fresh. - Q: Can I make the dough ahead of time?
A: Yes. Refrigerate for up to 48 hours or freeze the dough balls for up to a month. Thaw chilled dough in the fridge before baking; frozen balls can be baked from frozen with an extra minute or two.
Final Bite
These Chocolate Cherry Thumbprint Cookies are reliable, approachable, and memorable. They hit that satisfying balance: a chocolate base that’s rich but tender, a cherry center that adds brightness, and a chocolate drizzle that finishes the look. Follow the simple steps, keep an eye on butter temperature, and you’ll have a batch that’s perfect for a holiday platter, a bake sale, or an everyday treat. Happy baking—make a test batch, adjust the small details to your oven, and then enjoy sharing them.

Chocolate Cherry Thumbprint Cookies
Ingredients
Ingredients
- 1 cupbutterroom temperature
- 2 cupswhite sugar
- 2 eggs
- 2 teaspoonvanilla extract
- 3 cupsflour
- 1 cupunsweetened cocoa powder
- 1/2 teaspoonsalt
- 1/2 teaspoonbaking soda
- 1/2 teaspoonbaking powder
- 21 ouncescherry pie filling
- 2 ouncesChocolate Almond Barkor chocolate melting wafers
Instructions
Instructions
- Preheat oven to 350 degrees Fahrenheit. Prepare a baking sheet by greasing it or lining it with parchment paper.
- In a large mixing bowl, cream 1 cup butter (room temperature) and 2 cups white sugar together until light and fluffy.
- Add 2 eggs, one at a time, mixing well after each addition. Add 2 teaspoons vanilla extract and mix until combined.
- In a separate bowl, combine 3 cups flour, 1 cup unsweetened cocoa powder, ½ teaspoon salt, ½ teaspoon baking soda, and ½ teaspoon baking powder.
- Gradually add the dry ingredients to the butter mixture and mix until just combined and a dough forms.
- Roll the dough into 1 ½-inch balls. Place the balls on the prepared baking sheet.
- Press your thumb (or the back of a small spoon) into the center of each dough ball to create a well for the filling.
- Place two cherries from the 21 ounces cherry pie filling into the well of each cookie.
- Bake at 350 degrees Fahrenheit for 10–12 minutes. Remove from oven and cool on the baking sheet for 2 minutes, then transfer cookies to a wire rack to finish cooling.
- Melt 2 ounces Chocolate Almond Bark (or chocolate melting wafers) according to the package directions. Drizzle the melted chocolate over the cooled cookies.
- Let the chocolate set completely before serving. Store any leftover cookies in an airtight container.
Equipment
- Oven
- Baking Sheet
- Parchment Paper
- Mixing Bowl
- Small Bowl
- Wire Rack
- Spoon
Notes
Can you make the dough ahead?
Yes, you can make it a day ahead and refrigerate it. Allow it to warm up at room temperature before you form the balls.
What other kind of filling can you use?
You can use jam or make chocolate thumbprints with a chocolate filling. If you use those, wait to add the filling until after the cookies are baked. You can also use other fruit pie fillings that go with chocolate.
Can you melt chocolate chips for the drizzle instead of almond bark?
I recommend using chocolate almond bark or chocolate wafer melts because they melt better and have a better consistency for drizzling.
Can you use white chocolate for the drizzle?
Yes, white chocolate almond bark would work great if you want to switch it up!