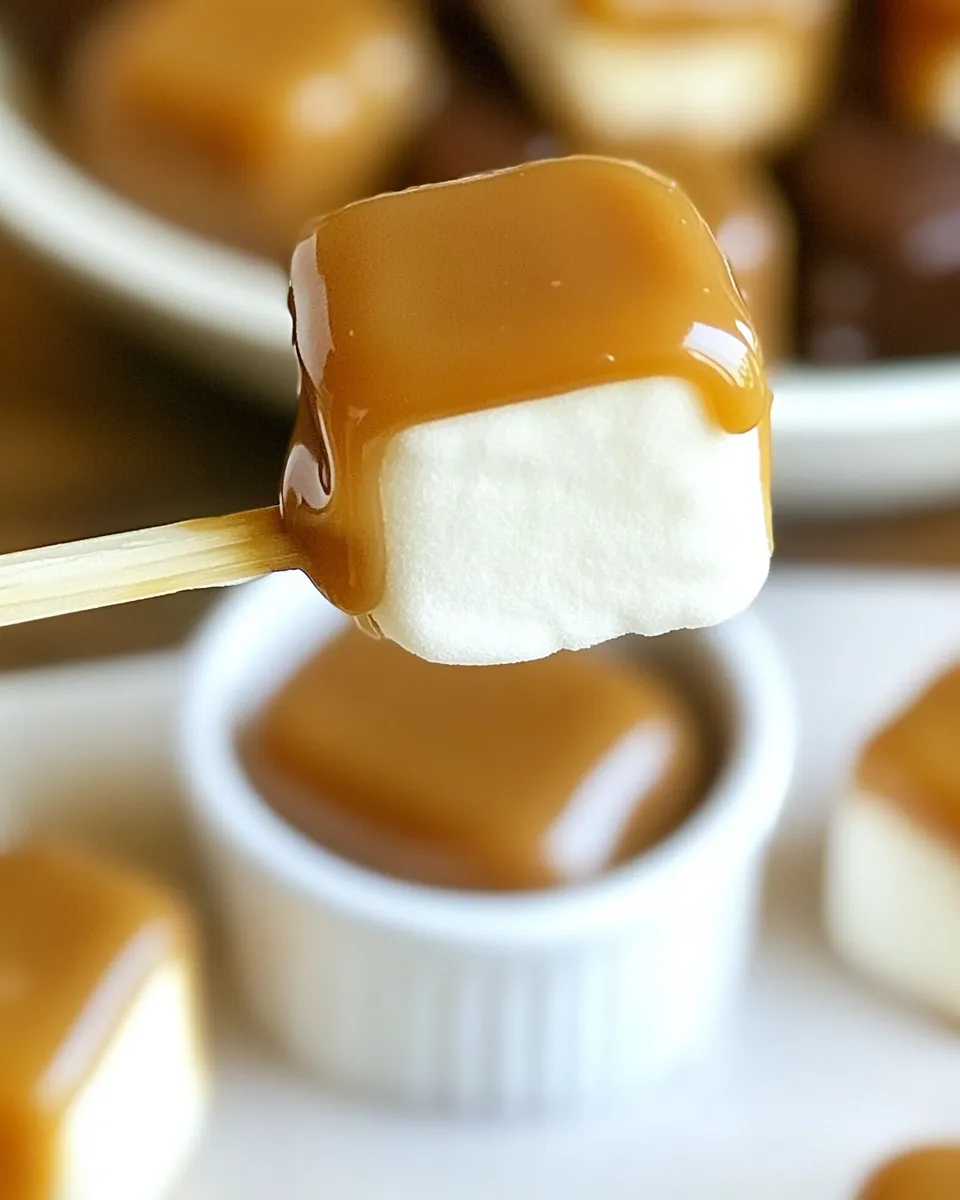
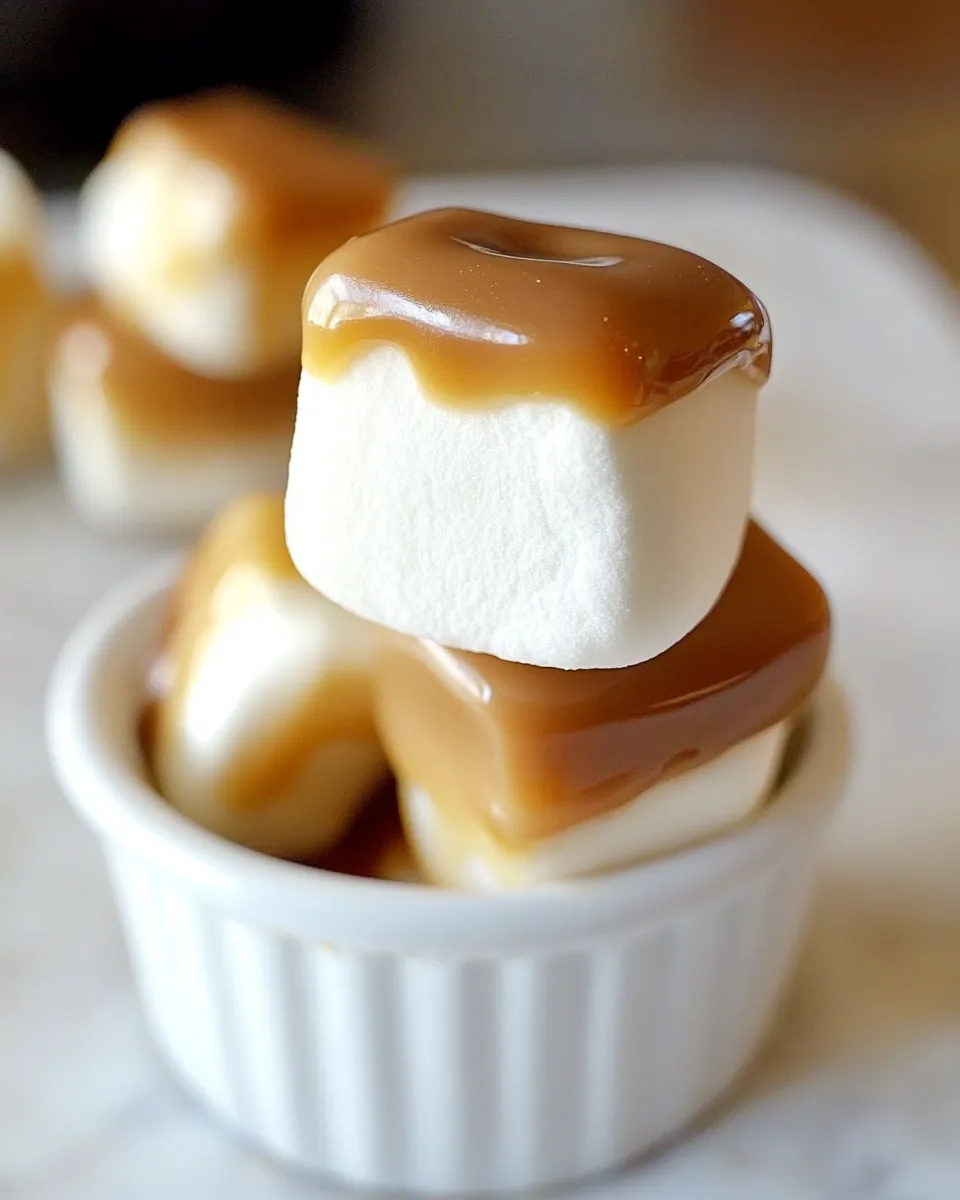
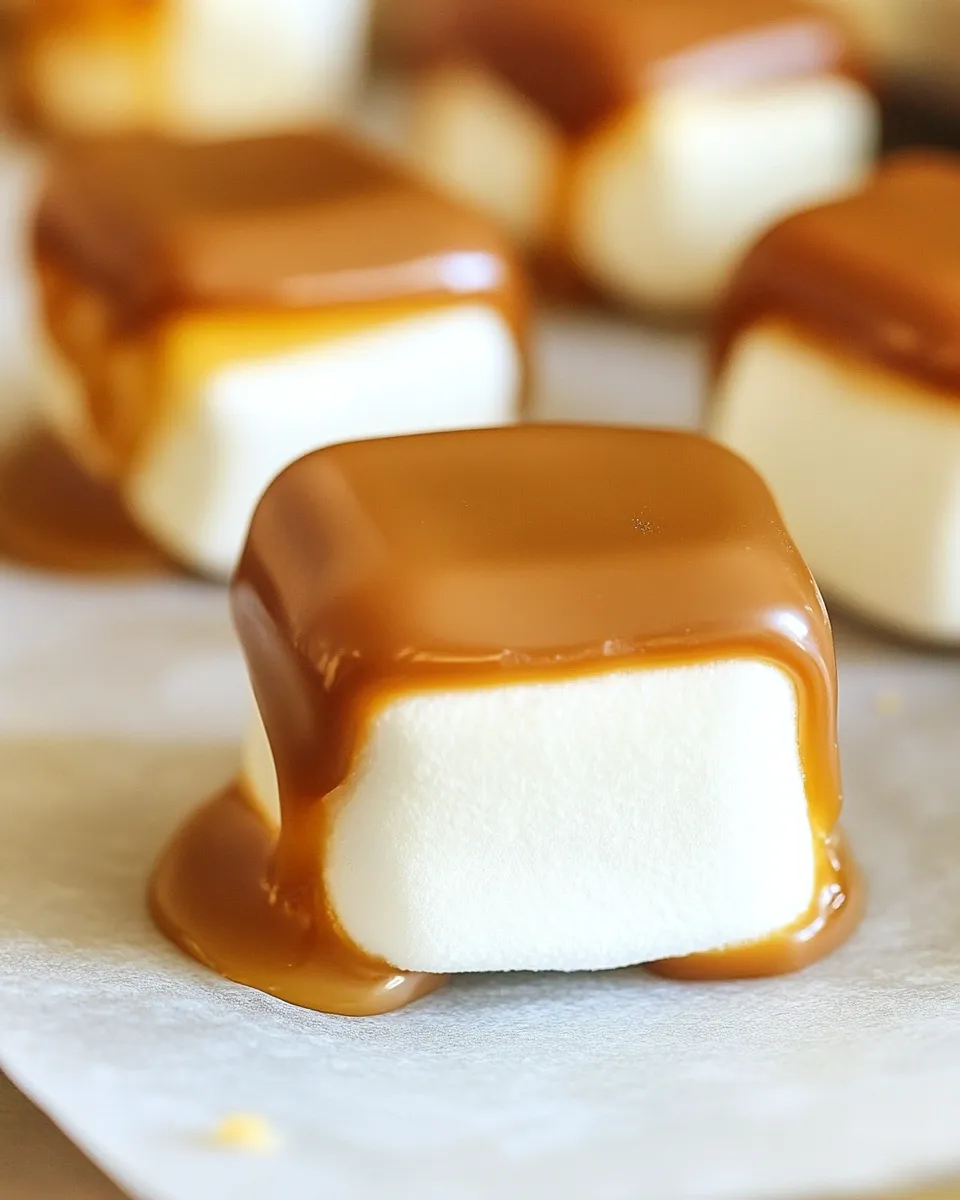
I make these whenever I want something playful, a little nostalgic and decidedly indulgent. They start with large, pillowy marshmallows that get a crisp, chewy base of salted caramel and end up cloaked in glossy dark chocolate with a graham-cracker crunch. The contrast in textures — soft marshmallow, firm caramel, snap of chocolate, and crumbly graham — is what keeps people coming back for another one.
This is a straightforward recipe to pull together, and it scales cleanly. The timeline is driven by short chilling steps and a couple of quick melting moments, so you can plan them between other baking tasks or make them as an after-dinner treat. The caramel is made in two small batches so you never run dry while dipping.
Below I’ve laid out exactly what to gather, step-by-step instructions, gear, troubleshooting and seasonal serving ideas. If you’re gifting these or setting up a dessert platter, I’ve included how to store and transport them too. Let’s get practical and make something delicious.
What You’ll Gather
Work surface prepped, a baking sheet lined, and your chocolate and caramel ready to go. Chill the marshmallows briefly so the caramel sets quickly and cleanly. Keep a spare batch of caramel warm in case you need it while dipping.
Ingredients
- 16 oz bag of large marshmallows — the main canvas; use the larger size for better proportions with caramel and chocolate.
- batches of Six-Minute Salted Caramel Sauce (link to recipe in post) — provides the chewy, salty-sweet base; two batches ensure you have enough while dipping.
- 8 ounces dark chocolate, melted — for the coating; pick a chocolate you like to eat straight for the best flavor.
- 2 teaspoons coconut or canola oil — thins the melted chocolate for smoother dipping and a shinier finish.
- 1/4 cup crushed graham cracker crumbs — adds texture and a toasty flavor contrast; press on while chocolate is wet so they stick.
Dark Chocolate Salted Caramel Dipped Marshmallows Cooking Guide
- Line a large baking sheet with parchment paper or a silicone baking mat. Arrange the 16 oz bag of large marshmallows in a single layer with a little space between each. Place the sheet in the freezer for 15 minutes.
- While the marshmallows chill, make two batches of the Six-Minute Salted Caramel Sauce according to the linked recipe. Keep the caramel at a pourable temperature (warm or room temperature); if one batch isn’t enough while dipping, use the second batch as needed.
- Remove the chilled marshmallows from the freezer. Dip the bottom end of each marshmallow into the caramel, let excess drip off, then set the marshmallow back onto the prepared sheet. Repeat until all marshmallows have caramel on their bottoms.
- Return the pan to the freezer and let the caramel set for about 15 minutes, until firm to the touch.
- While the caramel sets, melt the chocolate: place the 8 ounces dark chocolate and 2 teaspoons coconut or canola oil in a microwave-safe bowl. Heat in 30-second increments, stirring between each, until the chocolate is completely melted and smooth. Set aside.
- Remove the pan from the freezer. Holding each marshmallow by the top or using a fork, dip each marshmallow into the melted chocolate to coat as desired, letting excess chocolate drip back into the bowl. Return each dipped marshmallow to the lined sheet.
- Drizzle any remaining melted chocolate over the tops of the marshmallows, then immediately sprinkle the 1/4 cup crushed graham cracker crumbs over the chocolate so the crumbs stick.
- Allow the chocolate to fully set before serving—leave at room temperature until firm or chill briefly in the refrigerator until set.
Top Reasons to Make Dark Chocolate Salted Caramel Dipped Marshmallows
- They’re a crowd-pleaser: familiar, easy to pop in your mouth, and rich enough to satisfy a sweet tooth.
- Quick to assemble: active time is short; the resting and setting are mostly hands-off.
- Customizable: swap dark chocolate for milk or white, or add different toppings like toasted coconut or chopped nuts.
- Great for gifting: packaged in a small box with parchment, they look special but don’t take a pastry chef’s skills.
- Perfect for parties or dessert tables: small, elegant, and mess-free compared with a saucy slice or plated dessert.
No-Store Runs Needed
If you keep a few pantry basics, you can make these without a last-minute store trip. Here’s what I check before I start so I don’t have to run out mid-recipe:
- Marshmallows — often the item people forget; pick up a large bag when you spot them.
- Dark chocolate — a baking bar or good-quality chips will work.
- Neutral oil (coconut or canola) — used sparingly to smooth the chocolate.
- Graham crackers — crush whole crackers by hand or in a bag with a rolling pin.
- Tools: parchment, a baking sheet, a bowl for melting, and a fork or skewer for dipping.
Kitchen Gear Checklist
- Baking sheet — lined with parchment paper or a silicone mat so the marshmallows don’t stick.
- Freezer or refrigerator — for the short chilling steps.
- Microwave-safe bowl or double boiler — to melt the dark chocolate safely.
- Small bowl or shallow dish — useful when dipping caramel and collecting drips.
- Forks, skewers, or dipping tools — to hold marshmallows while coating.
- Measuring spoons and cups — to measure oil and crushed graham crackers precisely.
Steer Clear of These
- Don’t skip chilling the marshmallows. Cold marshmallows let the caramel set quickly and prevent sticky, sloppy drips.
- Avoid overheating the chocolate. Melt it slowly in 30-second bursts and stir — scorched chocolate shows as a grainy texture.
- Don’t let the caramel be too hot when dipping — it will melt the marshmallow surface and make an uneven seal.
- Don’t skip the oil in the chocolate. Two teaspoons helps keep the coating smooth and shiny for dipping.
- Avoid overloading with crumbs. A light sprinkle of graham crumbs adds texture; too much masks the chocolate flavor and falls off.
Spring to Winter: Ideas
These are versatile and seasonally adaptable. In spring and summer, serve them slightly chilled alongside fresh berries and a bowl of whipped cream. For autumn, pair them with hot apple cider or drizzled with a touch of spiced caramel. In winter they’re perfect on a holiday platter with peppermint bark, or skewered on cups of hot chocolate and whipped cream as an edible stirrer.
They also work well as a sweet finish for outdoor gatherings: keep them in a cool box until serving and set out small plates and napkins. For gifting in cooler months, pack them in layered tissue and an insulated box so the chocolate and caramel stay firm in transit.
Behind the Recipe
I love recipes that balance simple ingredients and clear technique. This one is less about culinary fireworks and more about timing and texture. The marshmallow gives the soft, airy mouthfeel; the salted caramel gives chew and salt that brightens the sweetness; the dark chocolate adds bittersweet depth; and the graham crumbs round it out with a toasty crunch.
The two small batches of caramel are a practical touch — caramel cools and thickens fast, so making a backup ensures you’ll have a warm, pourable batch while you’re mid-dip. The freeze step is short and crucial: it lets the caramel set quickly so the chocolate dipping step doesn’t drag out or smear.
Make Ahead Like a Pro
- Make the caramel ahead and keep it refrigerated for up to a week. Warm gently until pourable before using.
- Assemble fully (caramel + chocolate + crumbs) and store the dipped marshmallows in a single layer in an airtight container. Separate layers with parchment.
- At room temperature they’ll keep for 2–3 days. In a cool spot or fridge, they last up to a week, though refrigeration can soften the chocolate’s snap.
- For gifting, assemble on the day of delivery if possible. If you must ship, use insulated boxes and cold packs, and aim for next-day delivery.
Handy Q&A
Can I use mini marshmallows?
Mini marshmallows will work, but proportions change: the caramel and chocolate coating will be thinner and the result is bite-sized. You’ll need to adjust dipping technique and may prefer to spoon caramel instead of dipping.
What if my chocolate seizes?
If it becomes grainy and stiff, stop heating. Stir in a small teaspoon of warm oil or a few drops of neutral-flavored oil to loosen it. If that fails, start fresh with a new batch of chocolate and keep heat low.
Is there a non-microwave method for melting the chocolate?
Yes. Use a double boiler: simmer a small pot of water and set a heatproof bowl over it, making sure the bowl doesn’t touch the water. Stir the chocolate until smooth, then add the oil.
Can I add flavorings to the chocolate?
Sure. A pinch of espresso powder enhances dark chocolate flavor; a little orange zest folded into the warm chocolate adds brightness. Add sparingly so the chocolate still sets properly.
Do I need to temper the chocolate?
No. Tempering creates a glossy, long-lasting snap, but the added oil and quick setting on parchment make tempering unnecessary for casual serving. If you’re making these for display or shipping in warm climates, consider tempering for extra stability.
Save & Share
If you try these, save this page as a reference and tag the recipe in your notes with any tweaks you make. They’re a small, shareable treat — package a few in a cellophane bag with a twist-tie or in a small box with parchment. If you’re sharing on social media, a quick photo of the cross-section (caramel, marshmallow, chocolate) tells the whole story.
Enjoy making them. They’re uncomplicated, comforting, and a little bit fancy — the perfect combination for a homemade treat that feels special without fuss.
Dark Chocolate Salted Caramel Dipped Marshmallows
Ingredients
Ingredients
- 1 16 oz bag of large marshmallows
- 2 batches of Six-Minute Salted Caramel Sauce (link to recipe in post)
- 8 ouncesdark chocolate melted
- 2 teaspoonscoconut or canola oil
- 1/4 cupcrushed graham cracker crumbs
Instructions
Instructions
- Line a large baking sheet with parchment paper or a silicone baking mat. Arrange the 16 oz bag of large marshmallows in a single layer with a little space between each. Place the sheet in the freezer for 15 minutes.
- While the marshmallows chill, make two batches of the Six-Minute Salted Caramel Sauce according to the linked recipe. Keep the caramel at a pourable temperature (warm or room temperature); if one batch isn’t enough while dipping, use the second batch as needed.
- Remove the chilled marshmallows from the freezer. Dip the bottom end of each marshmallow into the caramel, let excess drip off, then set the marshmallow back onto the prepared sheet. Repeat until all marshmallows have caramel on their bottoms.
- Return the pan to the freezer and let the caramel set for about 15 minutes, until firm to the touch.
- While the caramel sets, melt the chocolate: place the 8 ounces dark chocolate and 2 teaspoons coconut or canola oil in a microwave-safe bowl. Heat in 30-second increments, stirring between each, until the chocolate is completely melted and smooth. Set aside.
- Remove the pan from the freezer. Holding each marshmallow by the top or using a fork, dip each marshmallow into the melted chocolate to coat as desired, letting excess chocolate drip back into the bowl. Return each dipped marshmallow to the lined sheet.
- Drizzle any remaining melted chocolate over the tops of the marshmallows, then immediately sprinkle the 1/4 cup crushed graham cracker crumbs over the chocolate so the crumbs stick.
- Allow the chocolate to fully set before serving—leave at room temperature until firm or chill briefly in the refrigerator until set.
Equipment
- Baking Sheet
- Parchment Paper
- silicone baking mat
- freezer
- Microwave-safe Bowl
- Fork
- Refrigerator
Notes
*When dipping the marshmallows in the caramel, don't let too much caramel drip off before transferring it to the baking sheet. The caramel will make a little pool around the bottom of the marshmallow when cooled, making it easy to peel off the silicon sheet.
*If you don't like dark chocolate, you can use milk chocolate or semi-sweet chocolate, but the marshmallows may be cloying sweet with a sweeter chocolate.
*This is a recipe for sweet teeth 🙂 The salt and dark chocolate help balance out the sweetness, but even with those ingredients the end result is a very sweet treat.