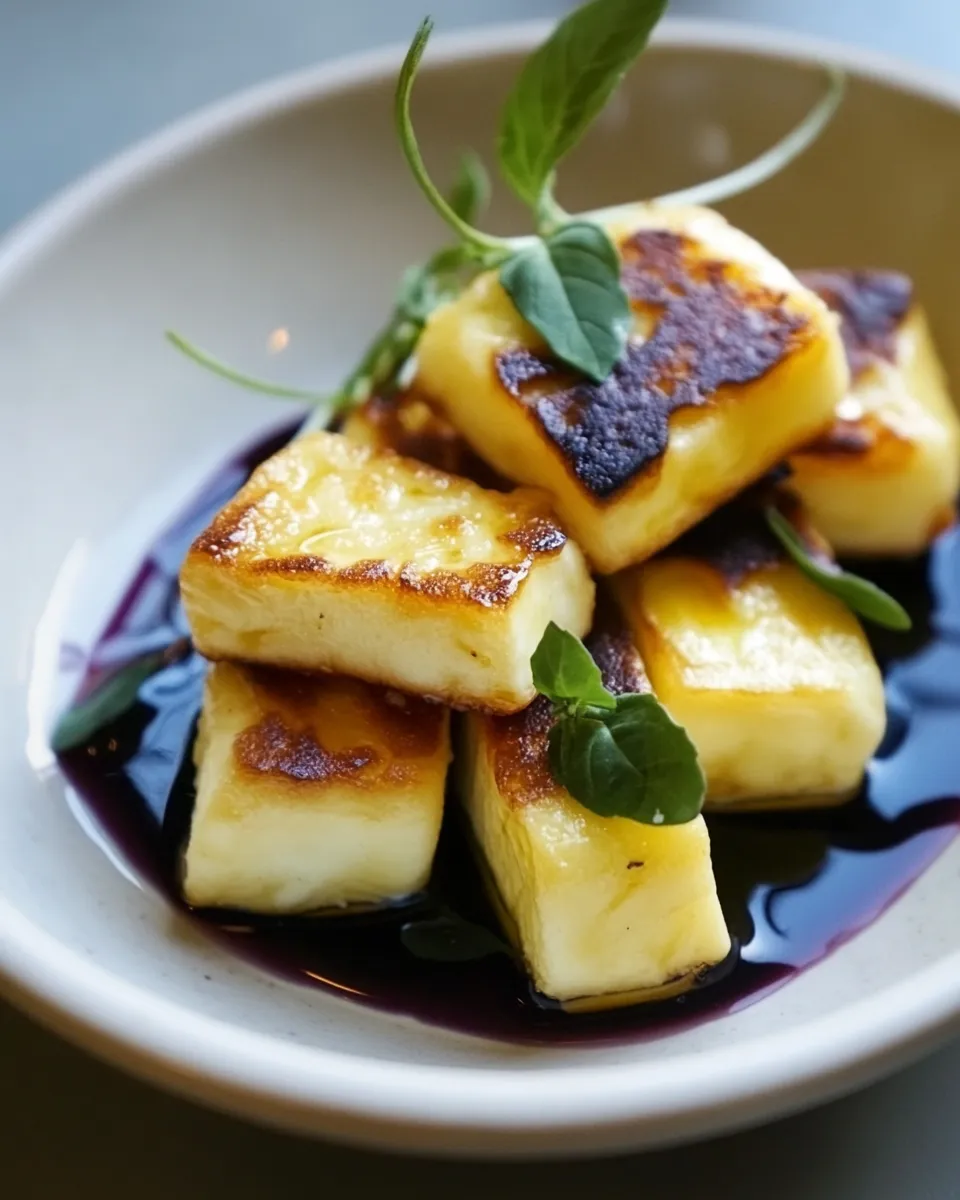
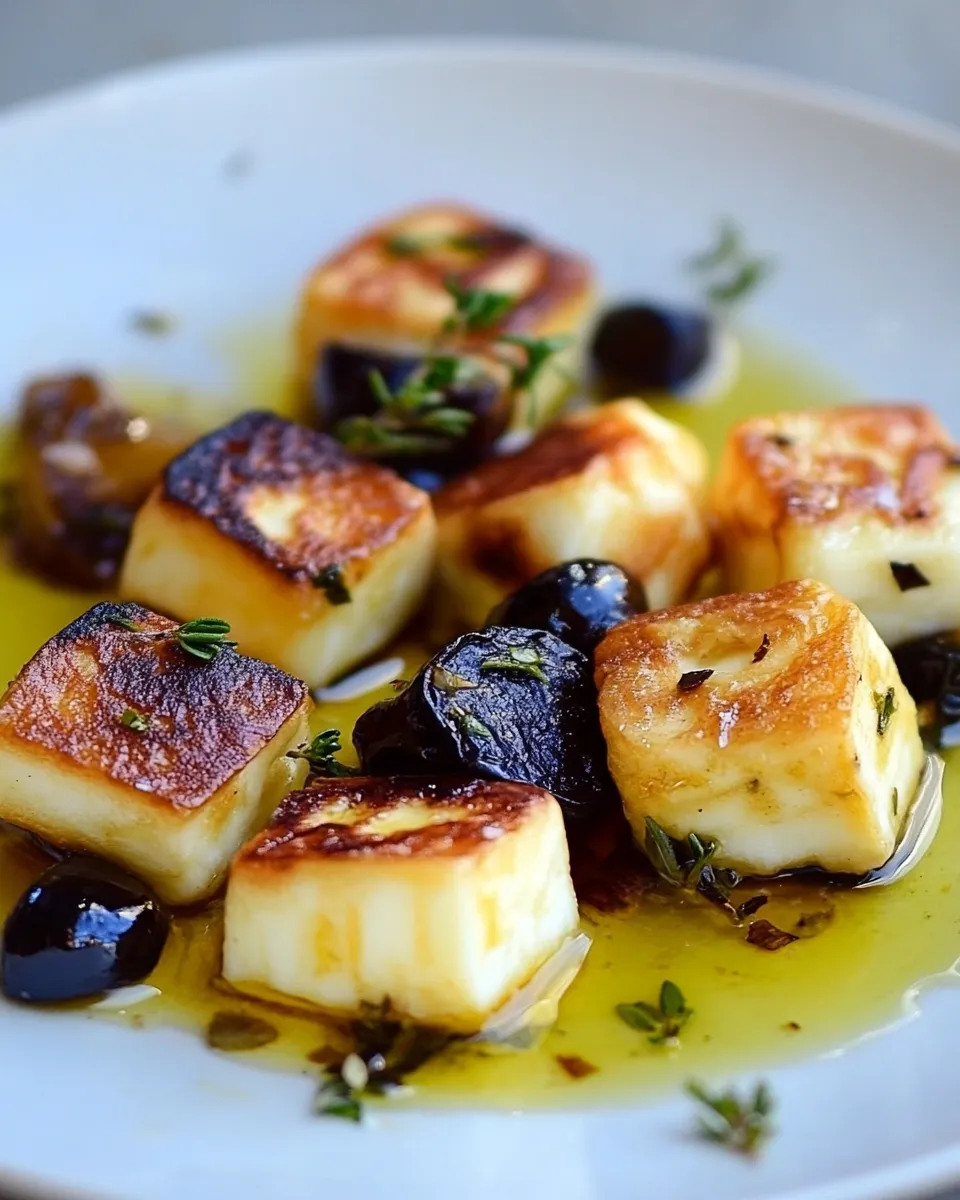
Crunchy, salty, and impossibly satisfying — fried halloumi is one of those small cooking joys that transforms a simple slab of cheese into something you want to eat with your hands. It browns beautifully, holds its shape, and gets a toasty exterior while staying springy inside. I reach for it when I need a fast appetizer, a salad topper, or a quick vegetarian main that feels indulgent without fuss.
In this post I’ll walk you through every practical step: what to buy, how to handle the cheese, the exact pan technique, and a few finishing touches that lift it beyond “just fried cheese.” No complicated marinades, no long lists of ingredients — just a few deliberate moves that deliver consistent results.
Follow the directions as given and you’ll have golden, crackly cubes of halloumi in under 15 minutes. I’ve also included troubleshooting advice, flavor twists, and storage notes so you can make this again and again with confidence.
What You’ll Gather
Before you heat the pan, gather everything in one place. Halloumi benefits from dry surface contact, a hot skillet, and a little oil to promote even browning. Keep your finishing ingredients nearby so you can dress the cheese while it’s still warm.
I like to set a layer of paper towels on a baking sheet or plate for drying the cheese and a clean bowl for the finished cubes. That small bit of prep saves time at the stove and helps you avoid crowding the pan.
Ingredients
- 8ounces (225 – 250g)halloumi — the star; a firm, salty cheese that holds its shape when fried.
- 1 1/2tablespoonsolive oil for frying,plus 1-2 tablespoons of olive oil for dressing the fried cheese — oil for browning and a little extra to finish for gloss and flavor.
- a few generous grinds of black pepper — adds warmth and contrast to the salty cheese.
- bigpinchof red pepper flakes — brings bright heat; adjust to taste.
Mastering Fried Halloumi Cheese: How-To
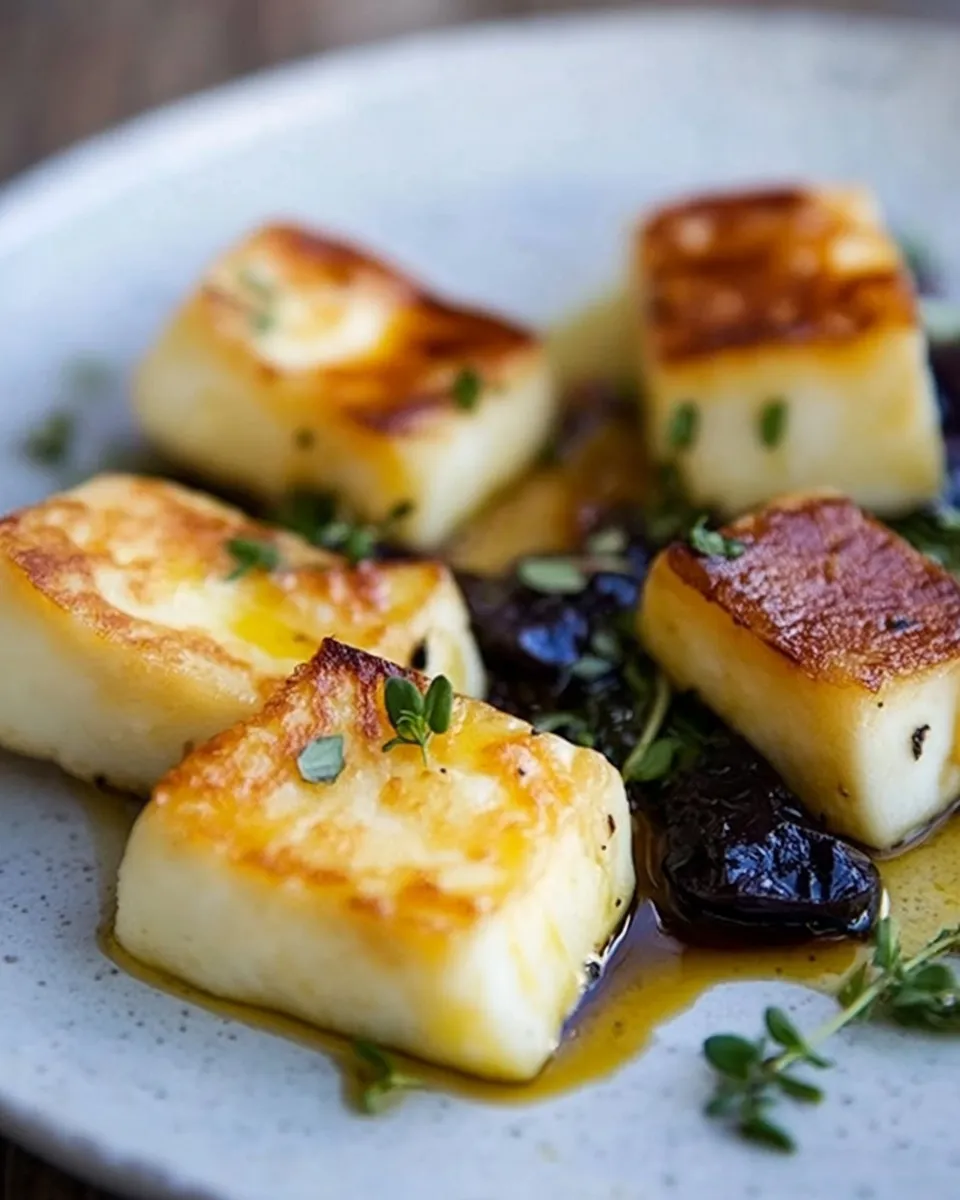
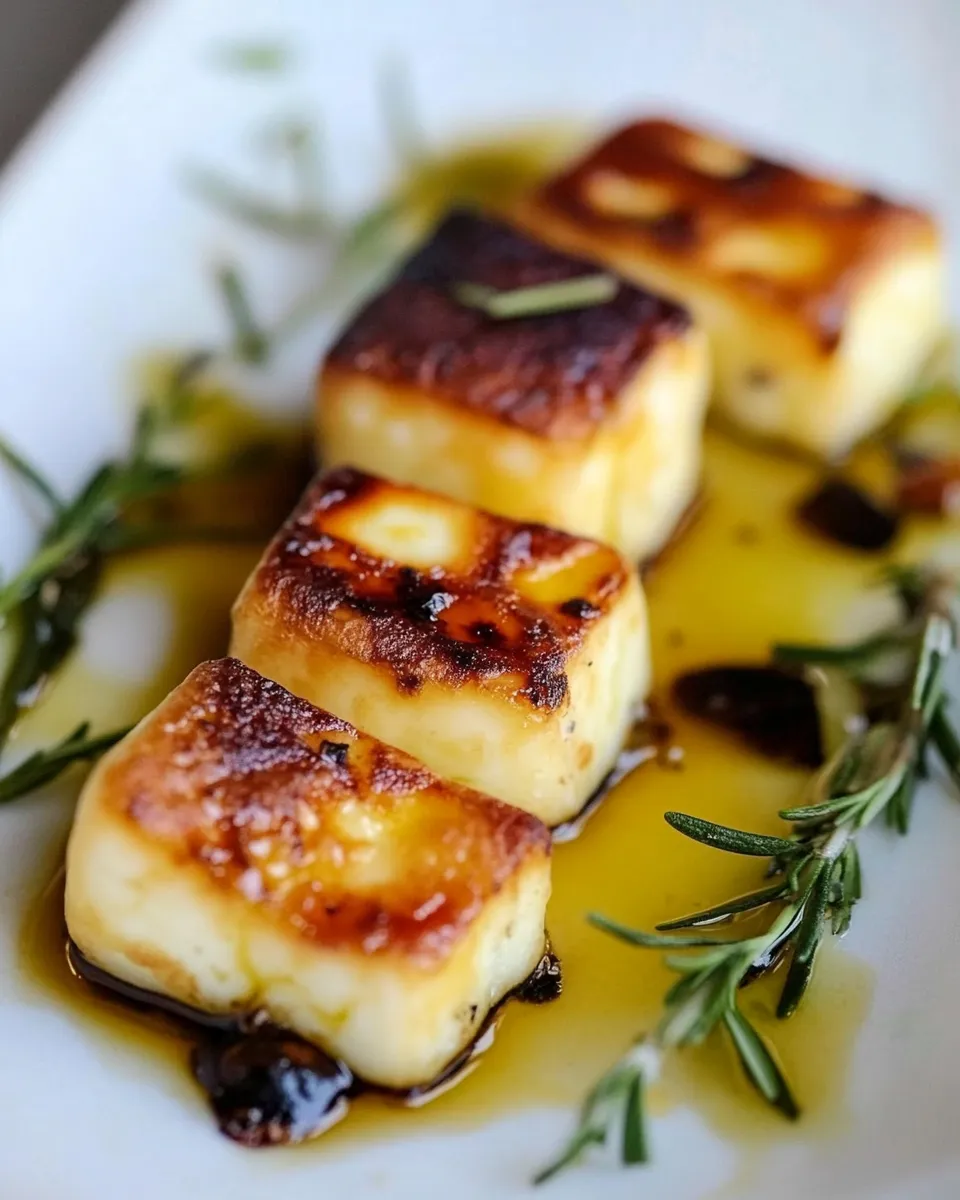
- Drain the halloumi. Slice the slab in half horizontally, then cut each half into batons and slice the batons into cubes.
- Pat the halloumi cubes very dry with paper towels.
- Place a heavy skillet over medium heat and add 1 1/2 tablespoons olive oil. Heat until the oil is hot and shimmering.
- Add the halloumi cubes in a single layer (work in batches if needed to avoid crowding). Cook without stirring for a few minutes, until the bottoms are well browned.
- Turn the cubes with a spatula and brown the other sides. They do not need to be perfectly browned on every side; a nice golden color is sufficient.
- Transfer the fried halloumi and any oil in the pan to a bowl.
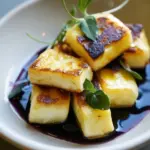
- Grind a few generous grinds of black pepper over the cheese, add a big pinch of red pepper flakes, and pour the remaining 1–2 tablespoons olive oil over the cheese. Stir to coat and serve warm or at room temperature.
Reasons to Love Fried Halloumi Cheese
There are plenty of reasons to fall for this simple preparation. Halloumi is forgiving: it tolerates high heat and short cook times, so it’s quick and hard to overdo. The contrast between a golden crust and a springy interior creates textural interest that pairs well with crisp vegetables, slick olive oil, and acidic elements like lemon or tomatoes.
It’s also versatile. Use it as a snack with a squeeze of lemon, toss it into a grain bowl, or add it to a sandwich for a salty, chewy centerpiece. If you need a vegetarian protein that behaves like meat on the pan, fried halloumi is an excellent go-to.
Flavor-Forward Alternatives
If you want to tweak the finished flavor, there are small, effective swaps that keep the technique identical:
- Finish with lemon zest and juice for brightness instead of extra oil.
- Use smoked paprika or a sprinkle of ground cumin with the red pepper flakes for a smoky, earthy profile.
- Toss with chopped fresh herbs like mint or parsley just before serving for a fresh contrast to the salty cheese.
- Drizzle a small amount of honey or pomegranate molasses for a sweet‑savory play that pairs beautifully with halloumi’s saltiness.
Essential Tools for Success
You don’t need fancy gear — just a few reliable items that make the technique easier and the results predictably good.
- Heavy skillet (cast iron or stainless steel) — provides steady heat and good browning.
- Spatula with a flat edge — for turning cubes without tearing them.
- Paper towels — for patting the cheese dry; moisture is the enemy of a crisp exterior.
- Mixing bowl — to catch the hot cheese and oil before seasoning.
Notes on pans
Cast iron holds heat well and gives a great sear; stainless steel works equally well if your burner gets the oil hot. Avoid nonstick if you want deep crust development — nonstick prevents sticking, but it also reduces the surface browning that makes fried halloumi sing.
Troubleshooting Tips
- Cheese sticks to the pan: The oil wasn’t hot enough. Let the oil shimmer before adding halloumi and don’t move the cubes too soon.
- Halloumi tears when flipped: Give it time. If the cheese hasn’t developed a solid crust, it will be fragile. Wait until the bottom is well browned.
- No browning, just soft: Your pan temperature is too low. Turn the heat up a touch and make sure you’re not crowding the pan.
- Too salty: Halloumi can be briny. Serve with cooling elements (yogurt, cucumbers, or lemon) or cut the halloumi into smaller pieces to balance the bite across a salad or grain base.
Seasonal Spins
Fried halloumi is a great blank canvas that changes with the seasons. In spring, toss the cheese with peas, mint, and lemon for brightness. Summer calls for roasted cherry tomatoes, basil, and a drizzle of balsamic. In autumn, pair the warm cubes with roasted beets, walnuts, and a mustardy vinaigrette. Winter is a chance to lean into heartier pairings: sautéed greens, farro, and a splash of sherry vinegar make a comforting plate.
Think about texture and contrast: bright, acidic components and crunchy elements turn fried halloumi into a composed dish rather than a standalone snack.
If You’re Curious
Wondering why halloumi behaves this way? It’s made with a high melting point due to the way it’s made and often includes cooking curds in a final hot whey or brine stage. That structure helps it brown rather than melt. Because of the salt content and firmness, it’s ideal for quick pan frying or grilling.
If you’re experimenting: try searing thicker slices versus cubes. Cubes brown faster and provide more surface area per bite; slices give you a contrast of a crisp edge and a springy center and are excellent for sandwiches.
Keep It Fresh: Storage Guide
Leftover fried halloumi keeps reasonably well if stored properly. Cool the cheese to room temperature, then transfer to an airtight container and refrigerate for up to 2–3 days. Reheat gently in a skillet over medium-low heat — avoid the microwave if you can, as it softens the crust.
If you plan to store halloumi before frying, keep it in its original brine if possible, or tightly wrapped in the fridge. Pat dry right before cooking. Do not freeze fried halloumi — the texture degrades.
Top Questions & Answers
- Can I use less oil? Yes, but use at least enough to coat the pan so the cheese can brown. Too little oil risks uneven cooking and sticking.
- Can I grill halloumi instead? Absolutely. Thick slices on a hot grill for a couple minutes per side develop similar char and texture.
- Is halloumi vegetarian? Some brands use animal rennet; check the label if you avoid animal rennet.
- Can I serve this cold? Yes. It’s excellent at room temperature; just toss with the finishing oil and seasonings before serving.
See You at the Table
Frying halloumi is a small technique that pays big dividends. With one skillet, a hot surface, and a little patience, you’ll turn a simple piece of cheese into something lively and versatile. Keep the ingredients minimal, follow the steps, and feel free to experiment with finishing flavors until you find your favorite combination.
Make a batch for guests, tuck it into salads for added texture, or let it shine on its own with a lemon wedge and good bread. Enjoy — and come back when you want more quick, reliable recipes that make weeknights better.
Fried Halloumi Cheese
Ingredients
Ingredients
- 8 ounces 225 - 250 ghalloumi
- 1 1/2 tablespoonsolive oil for frying plus 1-2 tablespoons of olive oil for dressing the fried cheese
- a few generous grinds of black pepper
- bigpinchof red pepper flakes
Instructions
Instructions
- Drain the halloumi. Slice the slab in half horizontally, then cut each half into batons and slice the batons into cubes.
- Pat the halloumi cubes very dry with paper towels.
- Place a heavy skillet over medium heat and add 1 1/2 tablespoons olive oil. Heat until the oil is hot and shimmering.
- Add the halloumi cubes in a single layer (work in batches if needed to avoid crowding). Cook without stirring for a few minutes, until the bottoms are well browned.
- Turn the cubes with a spatula and brown the other sides. They do not need to be perfectly browned on every side; a nice golden color is sufficient.
- Transfer the fried halloumi and any oil in the pan to a bowl.
- Grind a few generous grinds of black pepper over the cheese, add a big pinch of red pepper flakes, and pour the remaining 1–2 tablespoons olive oil over the cheese. Stir to coat and serve warm or at room temperature.
Equipment
- Skillet
- Spatula
- Paper Towels
- Bowl
Notes
Notes:
I don’t recommend refrigerating the cheese once fried. It tends to get firm and loses what makes it so special. It tastes so good when it’s freshly made – and it’s so easy – that you can easily make them before serving, and let them sit at room temperature until ready to serve.
Any leftover oil can be reused for another cooking project, such as salad dressing or marinating.
Halloumi cheese (sometimes called haloumi or halumi) is found in Arabic, Turkish, and Greek markets. I also found some recipes online (below) in case you want to try your hand at making your own.