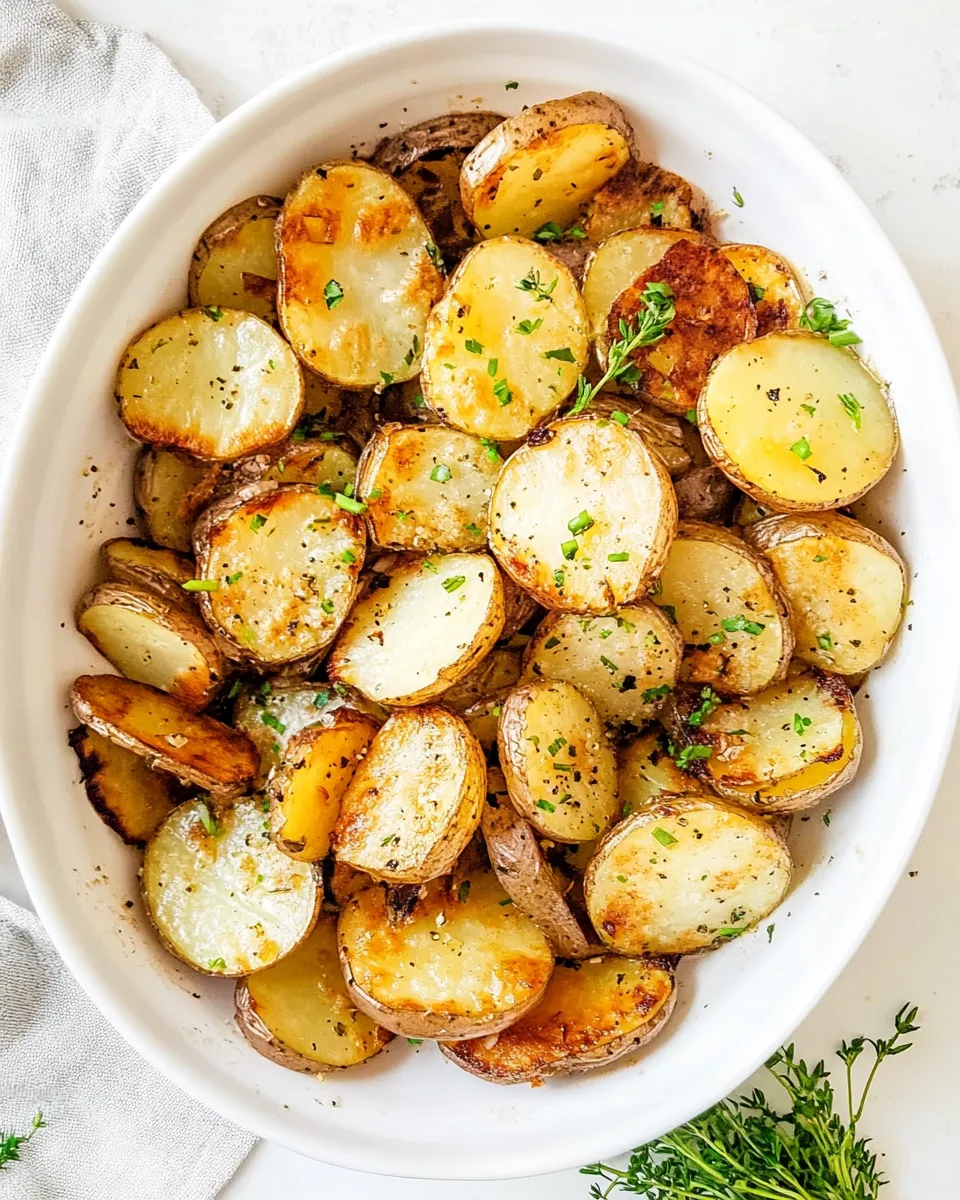
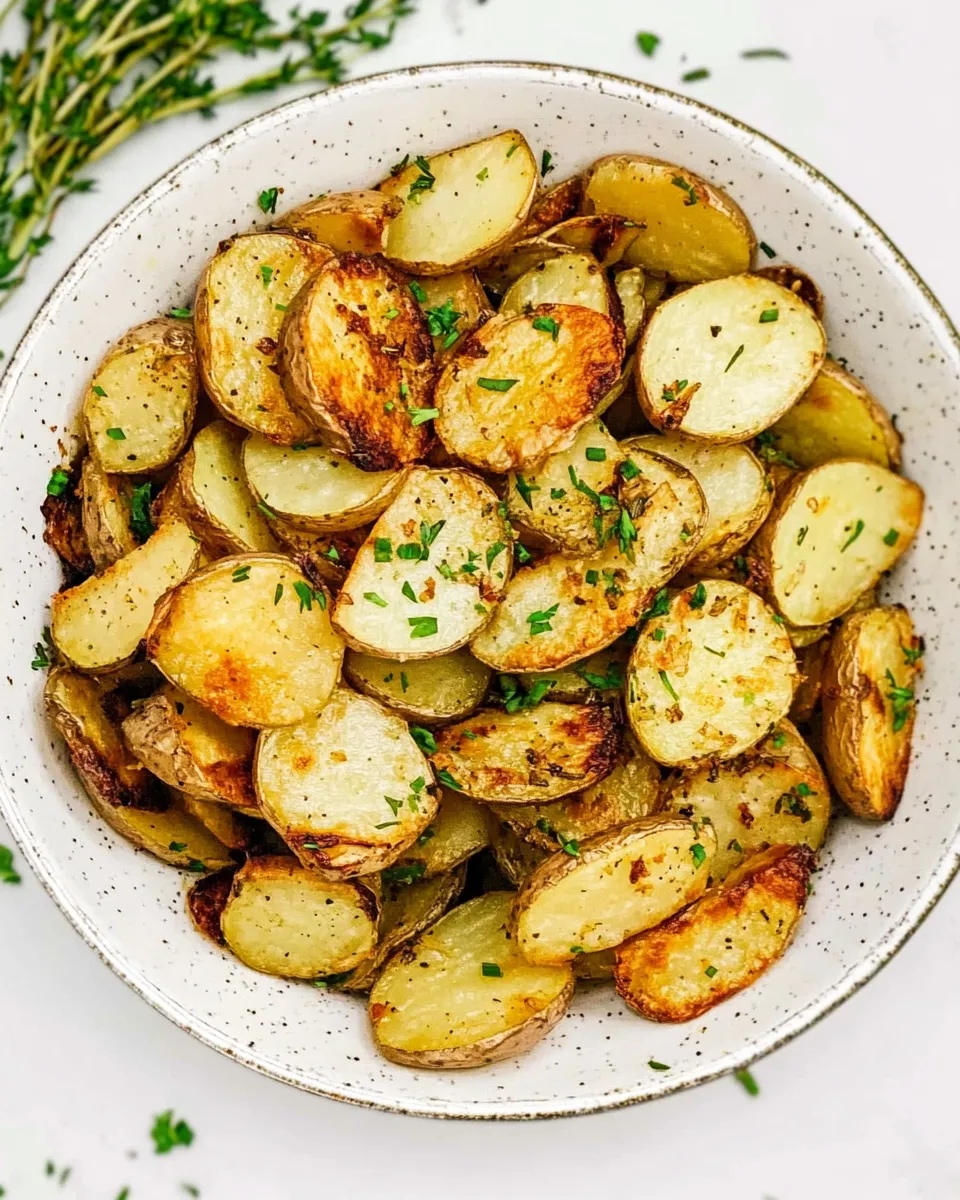
I love a simple skillet recipe that asks for little fuss and rewards you with golden, crispy bites and a sweet, caramelized edge. This Fried Potatoes and Onions recipe is exactly that: straightforward, dependable, and forgiving. It’s the kind of dish you make when you want something homey and satisfying without reaching for a bag of frozen hash browns.
The method is short and clear — slice, heat, season, and tend the pan until the potatoes are fork-tender and browned. The ingredient list is minimal, and the technique relies more on attention and timing than on special equipment. That makes this a great weeknight side or a base for a hearty breakfast plate.
Below I walk you step-by-step through the exact process I use, explain common pitfalls and how to avoid them, offer texture-friendly substitutions, and give ideas for customization. Read the instructions once, then cook with confidence.
Gather These Ingredients
- ¼ cup vegetable oil — provides the hot surface for browning; canola, extra virgin olive, or avocado oil will also work.
- 1 large sweet yellow onion — sliced thin (you should end up with 1 ½ cups) for sweetness and caramelized flavor.
- 1 ½ lbs russet potatoes — washed, dried and sliced into ¼ inch rounds. I used Yukon Gold potatoes. Peel if you prefer, but keeping the skins adds texture and nutrients.
- 1 teaspoon kosher salt — seasons the potatoes and helps draw out moisture for better browning.
- ½ teaspoon fresh cracked black pepper — adds a clean, warming note.
- ½ teaspoon garlic powder — an easy way to add savory depth without fresh garlic burning in the pan.
- 1 tablespoon fresh chopped chives — optional garnish that brightens the finished dish.
Fried Potatoes and Onions Made Stepwise
- Prepare the ingredients: slice 1 large sweet yellow onion thinly (you should end up with about 1 1/2 cups), wash and dry 1 1/2 lb russet potatoes and slice them into 1/4-inch rounds (peel them only if you prefer), and measure 1/4 cup vegetable oil, 1 teaspoon kosher salt, 1/2 teaspoon fresh cracked black pepper, 1/2 teaspoon garlic powder, and 1 tablespoon fresh chopped chives (optional).
- Heat a 10–12-inch nonstick skillet over medium-high heat. Add the 1/4 cup vegetable oil and heat until it shimmers and moves easily in the pan (but does not smoke).
- Carefully add the sliced potatoes and the sliced onion to the hot oil in a single layer as much as possible; overcrowding will slow browning.
- Immediately sprinkle the potatoes and onions evenly with 1 teaspoon kosher salt, 1/2 teaspoon fresh cracked black pepper, and 1/2 teaspoon garlic powder.
- Cook uncovered, using a spatula to flip and stir the potatoes and onions often so they brown evenly without burning. Adjust the heat up or down as needed to maintain steady browning. Continue for about 15–20 minutes.
- Check doneness by piercing a potato slice with a fork; the potatoes are done when they are fork-tender and nicely browned.
- Remove the skillet from the heat. Sprinkle with the 1 tablespoon fresh chopped chives, if using, and serve hot.
Why Fried Potatoes and Onions is Worth Your Time
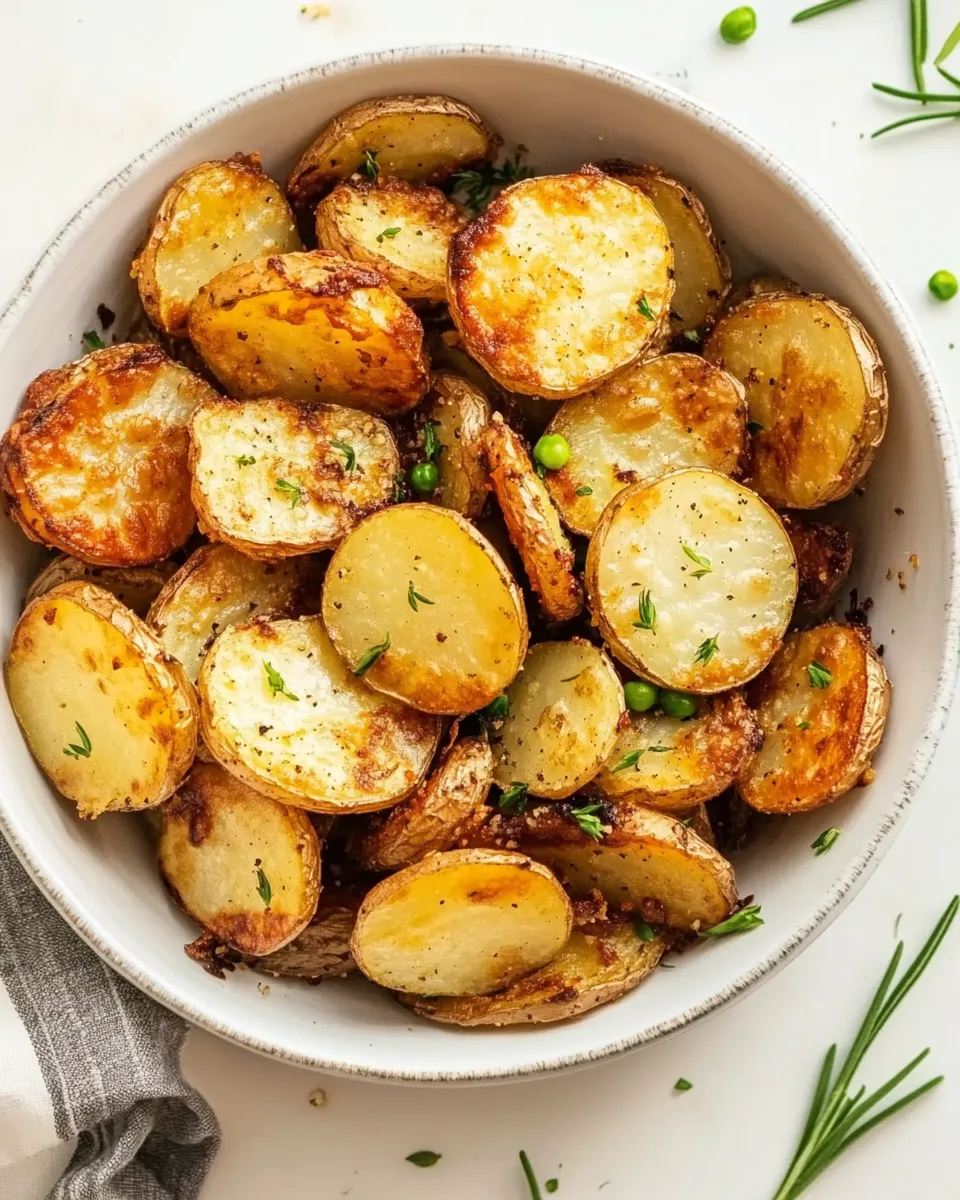
Because good fried potatoes are comfort food at its best. A few simple ingredients transform into crunchy, golden slices with sweet pockets of onion and a savory undercurrent from garlic powder and pepper. You get contrast — crisp edges and tender interiors — which makes every bite interesting.
The technique teaches control. You learn how to manage heat, how much oil is really necessary, and how patience pays off in color and texture. It’s also remarkably versatile: serve it alongside eggs for breakfast, with roasted meats for dinner, or use it as a base for a grain bowl or skillet hash.
Texture-Safe Substitutions
If texture is a priority — whether you want fluffier interiors or firmer bites — choose your swaps carefully.
- Potato type — Yukon Golds give creamier, buttery interiors; russets (the recipe) brown beautifully and crisp up well. Waxy potatoes (like red potatoes) will stay firmer and less fluffy.
- Oil — vegetable or canola maintain a neutral flavor and high smoke point. Extra virgin olive oil will add fruitier notes but can darken faster; use medium heat if you pick it.
- Onion — sweet yellow onions caramelize nicely. If you prefer a milder result, use white or even a mild red onion; they will be less sweet and more structured.
- Chives — omit if you want less bite, or use parsley for an herb with a softer texture.
Cook’s Kit
- 10–12 inch nonstick skillet — the size and coating make flipping and release easy.
- Sharp chef’s knife and cutting board — consistent 1/4-inch potato rounds cook evenly.
- Heatproof spatula — for stirring and turning without scratching the pan.
- Tongs (optional) — handy for flipping individual slices if you like precision.
- Measuring spoons and cup — keep the seasoning and oil consistent.
Pitfalls & How to Prevent Them
Common issues are easy to fix once you know what to look for.
- Soggy potatoes — usually caused by overcrowding or wet potatoes. Prevent this by drying potatoes thoroughly and cooking in a single layer as much as possible.
- Burnt edges, raw centers — heat that’s too high browns the outside before the inside cooks. Lower the heat slightly and give the pan time; you can cover briefly to coax through doneness, but it will steam and lose some crispness.
- Onions that burn — thin slices can scorch. Stir more often and adjust the heat. If onions are browning too fast, push them to the cooler side of the pan while potatoes finish.
- Under-seasoned finished dish — taste as you go. The initial salt draws moisture and seasons early; add a small finishing pinch if needed after testing a cooked piece.
Customize for Your Needs
Use this recipe as a platform. Here are focused, practical ways to tailor it:
- Low-sodium — reduce kosher salt to taste and finish with a squeeze of lemon or a sprinkle of fresh herbs instead of more salt.
- Extra-crisp — par-cook slices in the microwave for 2–3 minutes on a plate to remove a little interior moisture, then finish in the skillet at medium-high heat for a crisp exterior.
- Make it a meal — stir in cooked beans, crumbled sausage, or diced bell pepper near the end of cooking to add protein and color.
- Herb and spice variations — add smoked paprika, thyme, or rosemary while cooking for different flavor directions; add delicate herbs at the end.
- Allergy-friendly — the recipe is naturally dairy-free and vegan if you avoid animal add-ins; choose a neutral oil and keep chives optional.
Author’s Commentary
I rely on this approach for weeknight dinners and lazy weekend breakfasts alike. The rhythm of tending the skillet is comforting — a quick flip, a patient moment, then the payoff of browned edges. I often double the batch if I’m feeding company, and I don’t shy away from leaving the skins on the potatoes; they add character and save time.
Small choices make a noticeable difference. A dry potato and a hot pan that’s shimmering (but not smoking) create the Maillard magic. And if you’re tempted to rush it with higher heat, resist: gentle, steady browning wins every time.
Shelf Life & Storage
Store cooled fried potatoes and onions in an airtight container in the refrigerator for up to 3–4 days. To keep them from getting too soft, let them cool to room temperature before sealing the container, but don’t leave them out more than two hours.
Reheat in a skillet over medium heat with a teaspoon of oil to refresh the crisp edges. Microwave warming works in a pinch but will soften them. For larger batches, reheat on a rimmed baking sheet in a 400°F oven for 8–12 minutes to regain texture.
Your Questions, Answered
Q: Can I peel the potatoes? A: Yes. The recipe notes you can peel if you prefer, but keeping the skins adds texture and nutrients.
Q: Will fresh garlic work instead of garlic powder? A: Fresh garlic can burn at higher heat. If you want fresh garlic, add it toward the end of cooking and watch carefully.
Q: Can I double the ingredients? A: Yes, but use a larger skillet or two pans. Overcrowding will steam the potatoes instead of browning them.
Q: How do I know when the potatoes are done? A: Pierce a slice with a fork. They’re done when fork-tender and nicely browned.
Hungry for More?
If you enjoyed this, try pairing the potatoes with fried or poached eggs for a simple hash, or toss them into a frittata for a weekend brunch. They also make a solid bed for roasted chicken or a crunchy contrast to braised greens.
Keep practicing the technique: consistent slices, the right amount of oil, and patient heat control will make every batch better than the last. Happy cooking — and enjoy the simple pleasure of perfectly fried potatoes and onions.
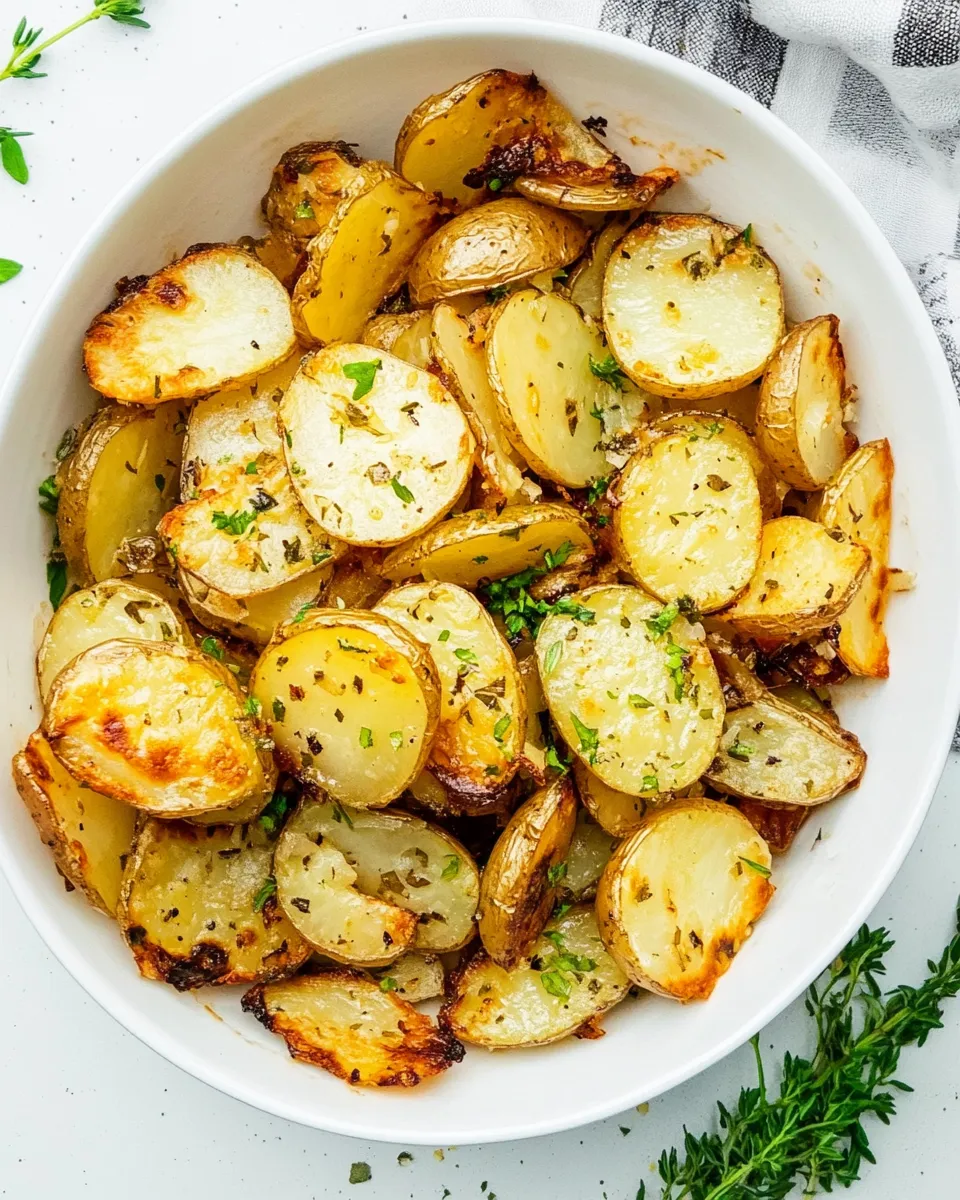
Fried Potatoes and Onions
Ingredients
Ingredients
- 1/4 cupvegetable oil you can substitute canola oil, extra virgin olive oil or avocado oil
- 1 large sweet yellow onion sliced thin (you should end up with 1 1/2 cups)
- 1 1/2 lbsrusset potatoes washed, dried and sliced into 1/4 inch rounds. I used Yukon Gold potatoes. Also if you prefer you can peel the potatoes, but I like to leave the peels on
- 1 teaspoonkosher salt
- 1/2 teaspoonfresh cracked black pepper
- 1/2 teaspoongarlic powder
- 1 tablespoonfresh chopped chives optional garnish
Instructions
Instructions
- Prepare the ingredients: slice 1 large sweet yellow onion thinly (you should end up with about 1 1/2 cups), wash and dry 1 1/2 lb russet potatoes and slice them into 1/4-inch rounds (peel them only if you prefer), and measure 1/4 cup vegetable oil, 1 teaspoon kosher salt, 1/2 teaspoon fresh cracked black pepper, 1/2 teaspoon garlic powder, and 1 tablespoon fresh chopped chives (optional).
- Heat a 10–12-inch nonstick skillet over medium-high heat. Add the 1/4 cup vegetable oil and heat until it shimmers and moves easily in the pan (but does not smoke).
- Carefully add the sliced potatoes and the sliced onion to the hot oil in a single layer as much as possible; overcrowding will slow browning.
- Immediately sprinkle the potatoes and onions evenly with 1 teaspoon kosher salt, 1/2 teaspoon fresh cracked black pepper, and 1/2 teaspoon garlic powder.
- Cook uncovered, using a spatula to flip and stir the potatoes and onions often so they brown evenly without burning. Adjust the heat up or down as needed to maintain steady browning. Continue for about 15–20 minutes.
- Check doneness by piercing a potato slice with a fork; the potatoes are done when they are fork-tender and nicely browned.
- Remove the skillet from the heat. Sprinkle with the 1 tablespoon fresh chopped chives, if using, and serve hot.
Equipment
- 10-12 inch nonstick skillet
- Spatula
Notes
If you’re using a cast iron skillet, you may need to turn the temperature of your stove down more than if you’re using a nonstick skillet. You might also want to add a bit of extra oil or some butter in addition to the oil the recipe already calls for.
You may need to continue to adjust the temperature of your stove as your onions and potatoes cook. This is completely normal. Just keep an eye on your skillet and adjust as needed.