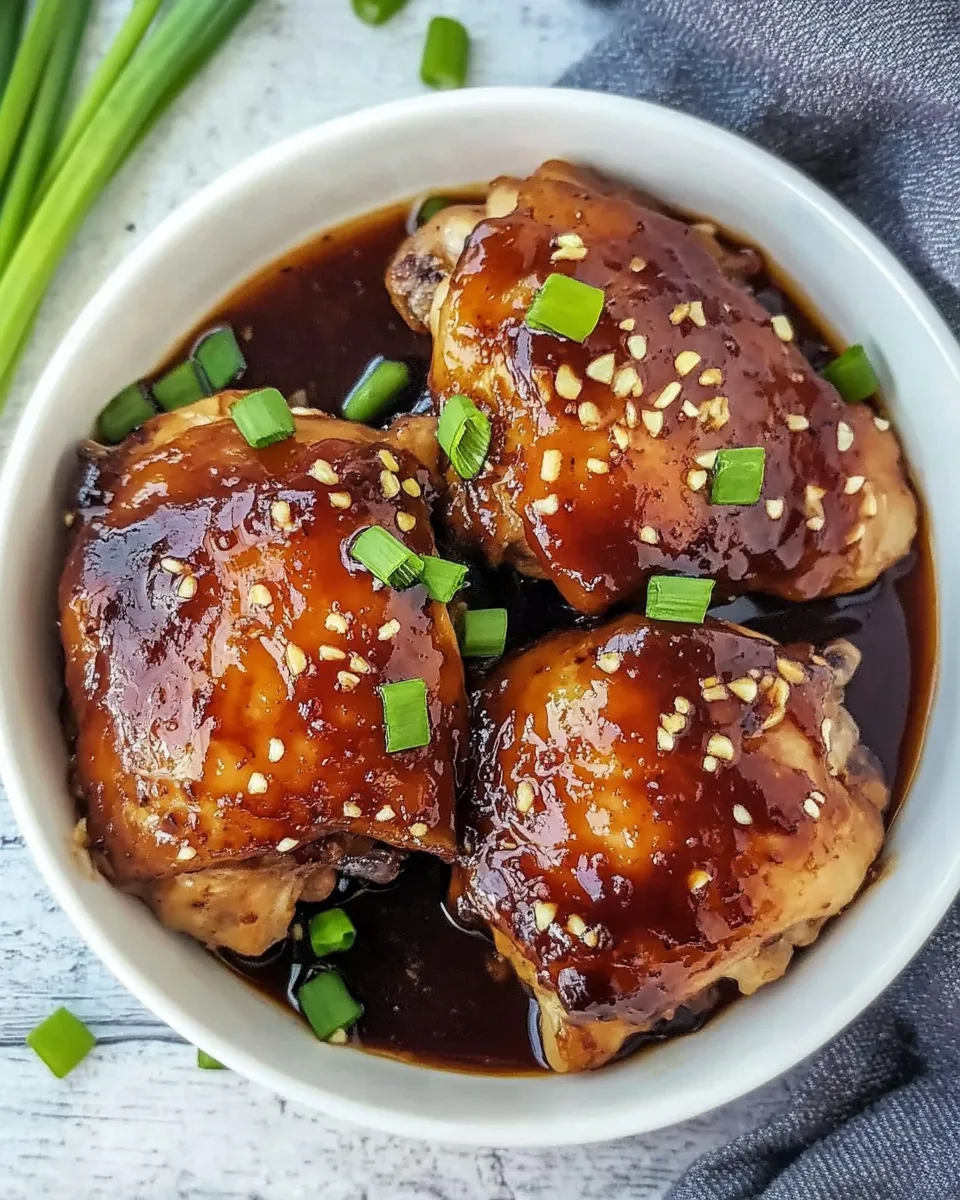
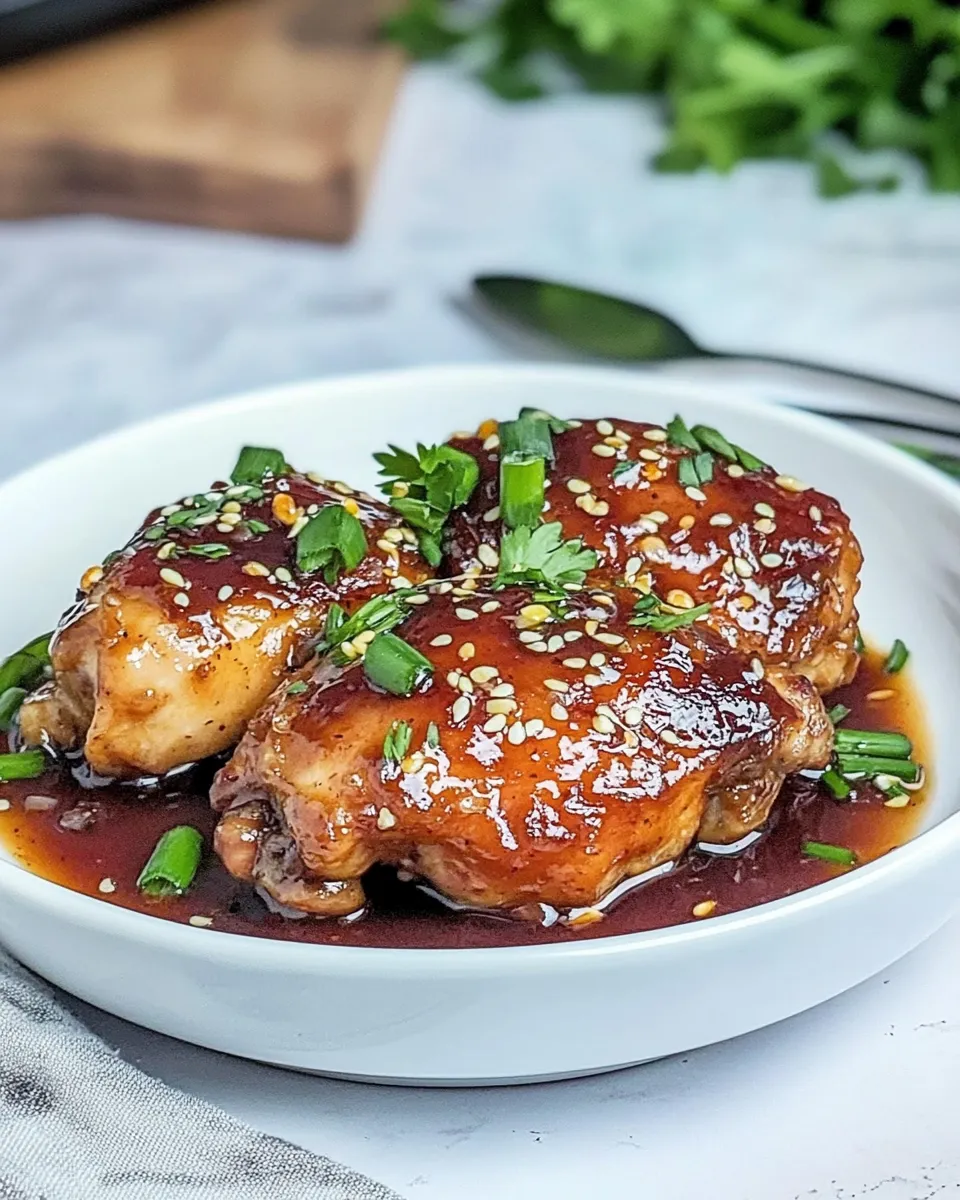
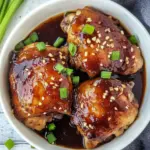
There’s an honest comfort to this recipe: a sticky, shiny sauce, tender chicken that practically falls off the bone, and a cooking flow that doesn’t demand babysitting. I reach for this dish on hectic weeknights and when friends drop by unexpectedly. The Instant Pot does the heavy lifting, and a quick broil at the end gives the skin the caramelized finish everyone notices first.
This post is practical and focused — what to buy, how to execute, and how to troubleshoot if something goes sideways. I include notes on equipment, sensible swaps for different diets, and storage so you can plan leftovers confidently. No fluff, just real kitchen-tested advice to get you straight to dinner.
If you’ve got a 30–40 minute window after the Instant Pot does its thing, the broiler adds that glossy, slightly-charred finish that turns ordinary into celebrated. Read through once, prep your mise en place, and the rest of the work is nearly automatic. Let’s get into the details.
Ingredient Checklist
- 1 1/2lbs. chicken thighs bone in and skin on — the bones add flavor and the skin crisps under the broiler; keep them for the best texture and moisture.
- 1 tablespoon sesame oil — adds a toasty, nutty base note to the sauce; use toasted sesame oil if available for richer flavor.
- 1/2 cup low sodium soy sauce or gluten free Tamari sauce — the salty backbone; low-sodium keeps the sauce balanced when reduced.
- 3/4 cup water — thins the sauce for pressure cooking so flavors distribute evenly without overpowering.
- 1/2 cup honey — provides sweetness and helps the sauce caramelize during broiling; use regular honey for best texture.
- 1 tablespoon garlic minced — fresh minced garlic gives bright aromatics; jarred minced garlic will work, but fresh is better.
- 1 tablespoon freshly grated ginger — adds warmth and brightness; use a microplane or fine grater for even distribution.
- 1/2 teaspoon red pepper flakes — gives a subtle heat that balances the honey; adjust up or down to taste.
- 2 tablespoons cornstarch — thickens the sauce into a glossy coating for the chicken.
- 2 tablespoons water — mixed with cornstarch to make a slurry so it incorporates smoothly without lumps.
- 1 tbsp sesame seeds — garnish for visual crunch and extra sesame flavor.
- chopped green onion — fresh finish; slice thinly so it scatters evenly over the plated chicken.
Instant Pot Honey Garlic Chicken Thighs: From Prep to Plate
- In a medium bowl whisk together the sauce ingredients: 1 tablespoon sesame oil, 1/2 cup low sodium soy sauce (or Tamari), 3/4 cup water, 1/2 cup honey, 1 tablespoon minced garlic, 1 tablespoon freshly grated ginger, and 1/2 teaspoon red pepper flakes until smooth and combined.
- Optional — marinate or freeze: If you want to marinate, place the 1 1/2 lbs. bone-in, skin-on chicken thighs in a container or zip-top bag with the sauce and refrigerate for a few hours. If you want to freeze for later, place the chicken and sauce in a freezer-safe zip-top bag and freeze. (If you marinate or freeze, proceed to step 3 when ready to cook.)
- When ready to cook, pour the sauce into the Instant Pot. Add the chicken thighs in one layer, skin-side up if possible.
- Close the Instant Pot lid, set the valve to Sealing, and cook on High Pressure for 15 minutes.
- After the cook time ends, allow the pressure to naturally release for 10–15 minutes, then carefully move the valve to Venting to release any remaining pressure and open the lid.
- While the pressure releases (or immediately after opening), turn on your oven broiler and line a baking sheet with parchment paper.
- Carefully transfer the cooked chicken thighs from the Instant Pot to the prepared baking sheet.
- In a small bowl, whisk together the cornstarch and the 2 tablespoons water until fully combined to make a slurry.
- Press the Sauté button on the Instant Pot. Add the cornstarch slurry to the pot with the remaining sauce, stir continuously, and simmer for 2–3 minutes until the sauce thickens and becomes glossy.
- Turn off the Instant Pot and let the sauce stand for a minute to finish thickening.
- Brush the thickened sauce over the chicken thighs (or spoon sauce over them), then place the baking sheet under the broiler and broil 2–5 minutes per side until the skin is browned and slightly crisp—watch closely to prevent burning.
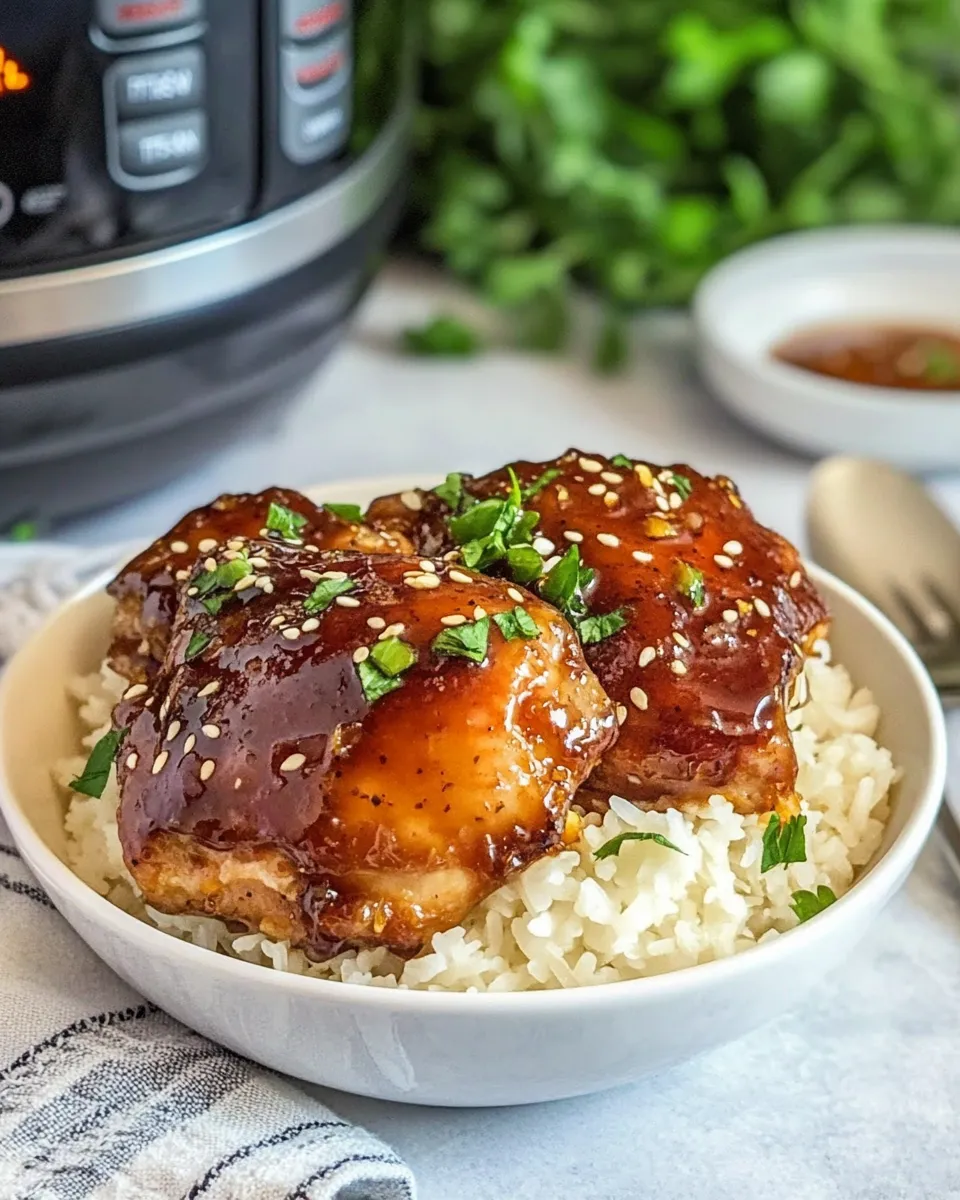
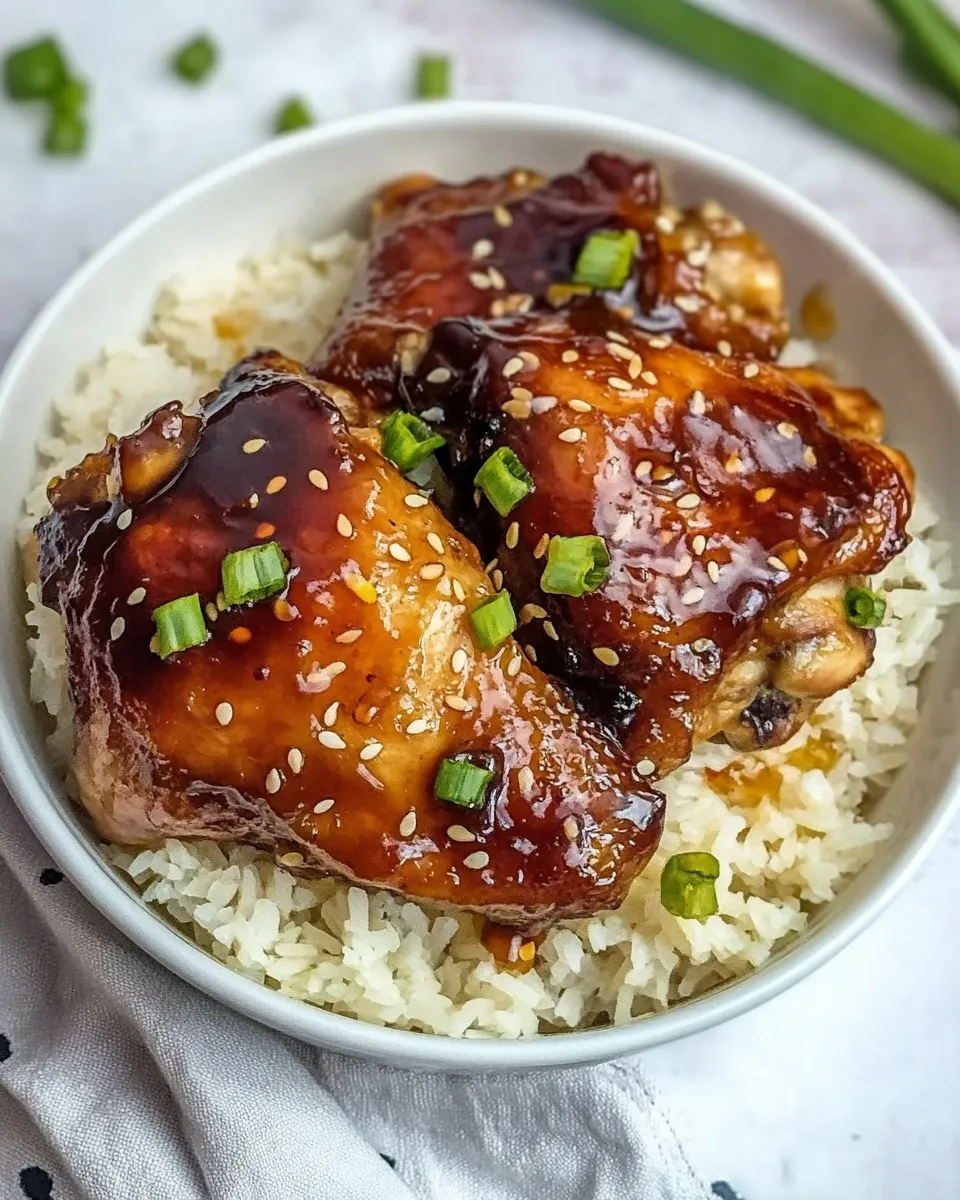
- Serve the chicken with the remaining sauce spooned over the thighs. Garnish with sesame seeds and chopped green onions.
Why It’s My Go-To
This recipe hits three essential marks: fast hands-on time, deep flavor, and reliable texture. The Instant Pot steams the thighs close to perfection every time — the meat becomes tender without drying out. The honey-soy-ginger-garlic combination gives you sweet, savory, and aromatic layers that are familiar but elevated by the broil at the end.
It’s also flexible: you can prep it in the morning and refrigerate, or freeze it raw in sauce for a no-fuss meal down the line. The sauce reduces quickly and turns glossy, so a little goes a long way. I keep the pantry staples for this dish on hand because it’s a fast win for both family dinners and guests.
Vegan & Vegetarian Swaps
To recreate a similar flavor profile without chicken, swap in firm tofu, tempeh, or large roasted cauliflower steaks. Press extra-firm tofu and cut into thick slabs; marinate as directed and either air-fry, bake, or pan-sear before finishing under the broiler or in a hot oven to caramelize the sauce.
Notes on timing: tofu and vegetables won’t need pressure cooking with that same liquid volume — you can make the sauce, pan-sear or bake the substitute, then toss with the reduced sauce and broil briefly for gloss and char. For a fully plant-based dish, use Tamari and check that your honey substitute (like maple syrup) is acceptable for your diet.
Equipment & Tools
- Instant Pot or electric pressure cooker — the core appliance; any model with a Sauté and High Pressure setting will work.
- Mixing bowl and whisk — for combining the sauce ingredients smoothly.
- Small bowl for cornstarch slurry — keeps the slurry lump-free before adding to the pot.
- Baking sheet and parchment paper — for broiling the thighs and catching drips.
- Pastry brush or spoon — to glaze the thighs with thickened sauce before broiling.
- Tongs — useful for transferring hot thighs safely to and from the Instant Pot.
Problems & Prevention
Issue: Sauce is too thin
Prevention: Make sure you whisk the cornstarch with the 2 tablespoons water into a smooth slurry before adding it to the hot sauce. Use the Sauté function and simmer for the full 2–3 minutes; if it’s still thin, give it another minute. Turn off the pot and wait briefly—residual heat continues to thicken the sauce.
Issue: Skin won’t crisp
Prevention: Transfer the thighs to a hot broiler and give them your full attention. Keep them skin-side up initially and broil until the skin is browned, then flip if needed. Don’t skip the broiler — pressure cooking makes the meat tender, but the skin needs dry, direct heat to crisp.
Issue: Too salty
Prevention: Use low sodium soy sauce or Tamari as called for. If the sauce finishes too salty after reducing, dilute slightly with a tablespoon or two of water before glazing, or increase honey by a small amount cautiously to balance.
Issue: Sauce clumps when thickening
Prevention: Make sure the cornstarch and water are fully combined into a smooth slurry before adding. Stir continuously when adding to the hot pot and keep the heat at Sauté, not boiling furiously. If lumps form, strain quickly or whisk vigorously to smooth them out.
Make It Diet-Friendly
Low-sodium: Stick with low-sodium soy sauce or Tamari. You can also reduce the soy sauce by 1–2 tablespoons and add a splash of rice wine vinegar for brightness.
Lower-sugar: Use less honey (try 1/3 cup) and increase grated ginger and garlic slightly to keep flavor. Maple syrup can be substituted but changes the flavor character slightly.
Gluten-free: Use gluten-free Tamari in place of soy sauce; all other ingredients are naturally gluten-free.
Lower-carb / Keto: Replace honey with a keto-friendly sweetener that handles heat (erythritol + a touch of molasses mimicry is possible but changes flavor). Keep in mind the sauce will behave differently with syrups versus sugar-based sweeteners.
Recipe Notes & Chef’s Commentary
Timing: If you marinate, you’ll get extra depth but it’s not necessary. The Instant Pot infuses flavor quickly, so even a short 30-minute rest helps. If you’re freezing raw in sauce, freeze flat so thawing is faster and more even.
Layering flavor: Fresh ginger and garlic make a difference. Grating the ginger finely ensures its flavor distributes without fibrous bits. If you use jarred garlic or ginger, reduce the quantity slightly and taste early.
Broiling tips: Keep the baking sheet on the top rack and watch every 30 seconds once the skin begins to brown. Broilers vary wildly — what takes 2 minutes in one oven might take 5 in another.
Serving notes: Spoon extra sauce onto the plate instead of drowning the thighs. The glaze shines when it’s glossy and not clotted; rewarm gently if it thickens too much before serving.
Shelf Life & Storage
Refrigerator: Store cooked thighs and sauce in an airtight container for 3–4 days. Keep sauce separate if you want to maintain crispiness when reheating.
Freezer: You can freeze raw thighs in the sauce for up to 3 months in a freezer-safe bag (lay flat). Thaw overnight in the fridge before cooking. Cooked thighs freeze well too; freeze in a single layer on a sheet, then transfer to a bag to avoid squishing.
Reheating: Reheat in a 350°F oven until warmed through to help revive crispiness. If using a microwave, reheat briefly then finish under the broiler or in a hot skillet to restore texture.
Reader Questions
Q: Can I use boneless, skinless thighs? A: Yes. They’ll cook a bit faster and won’t have the same broiled skin texture. Reduce pressure time by 2–3 minutes and check internal temperature.
Q: Can I double the recipe? A: You can double the sauce and chicken, but keep the thighs in a single layer if possible for best results. If stacked, they’ll still cook but may not brown as evenly. Ensure your Instant Pot isn’t overfilled beyond its max fill line.
Q: Is the cornstarch necessary? A: It’s what creates the glossy, clingy sauce you brush on the thighs. Without it, you’ll have a thinner sauce. If you prefer a lighter finish, skip the slurry and reduce some sauce separately in a small saucepan to concentrate flavors.
Bring It Home
This Instant Pot Honey Garlic Chicken Thighs recipe is about reliable flavor with minimal fuss. Prep, pressure, a quick sauce-thicken, and a fast broil is all you need for a dish that looks and tastes like you spent more time on it than you did. It’s forgiving, friendly to leftovers, and easy to adapt to different diets.
Make a batch, keep extra sauce for the week, and you’ve got a foundation for bowls, salads, or a standout dinner with a side of steamed rice and quick greens. If you try it, tell me how you broiled it—high and fast, or low and patient—and what you served alongside. Enjoy the sticky, savory, slightly-spicy goodness.
Instant Pot Honey Garlic Chicken Thighs
Ingredients
Ingredients
- 1 1/2 lbs.chicken thighsbone in and skin on
- 1 tablespoonsesame oil
- 1/2 cuplow sodium soy sauce or gluten free Tamari sauce
- 3/4 cupwater
- 1/2 cuphoney
- 1 tablespoongarlicminced
- 1 tablespoonfreshly grated ginger
- 1/2 teaspoonred pepper flakes
- 2 tablespoonscornstarch
- 2 tablespoonswater
- 1 tbspsesame seeds
- chopped green onion
Instructions
Instructions
- In a medium bowl whisk together the sauce ingredients: 1 tablespoon sesame oil, 1/2 cup low sodium soy sauce (or Tamari), 3/4 cup water, 1/2 cup honey, 1 tablespoon minced garlic, 1 tablespoon freshly grated ginger, and 1/2 teaspoon red pepper flakes until smooth and combined.
- Optional — marinate or freeze: If you want to marinate, place the 1 1/2 lbs. bone-in, skin-on chicken thighs in a container or zip-top bag with the sauce and refrigerate for a few hours. If you want to freeze for later, place the chicken and sauce in a freezer-safe zip-top bag and freeze. (If you marinate or freeze, proceed to step 3 when ready to cook.)
- When ready to cook, pour the sauce into the Instant Pot. Add the chicken thighs in one layer, skin-side up if possible.
- Close the Instant Pot lid, set the valve to Sealing, and cook on High Pressure for 15 minutes.
- After the cook time ends, allow the pressure to naturally release for 10–15 minutes, then carefully move the valve to Venting to release any remaining pressure and open the lid.
- While the pressure releases (or immediately after opening), turn on your oven broiler and line a baking sheet with parchment paper.
- Carefully transfer the cooked chicken thighs from the Instant Pot to the prepared baking sheet.
- In a small bowl, whisk together the cornstarch and the 2 tablespoons water until fully combined to make a slurry.
- Press the Sauté button on the Instant Pot. Add the cornstarch slurry to the pot with the remaining sauce, stir continuously, and simmer for 2–3 minutes until the sauce thickens and becomes glossy.
- Turn off the Instant Pot and let the sauce stand for a minute to finish thickening.
- Brush the thickened sauce over the chicken thighs (or spoon sauce over them), then place the baking sheet under the broiler and broil 2–5 minutes per side until the skin is browned and slightly crisp—watch closely to prevent burning.
- Serve the chicken with the remaining sauce spooned over the thighs. Garnish with sesame seeds and chopped green onions.
Equipment
- Instant Pot
- oven broiler
- Baking Sheet
- Parchment Paper
- Small Bowl
- Whisk
Notes
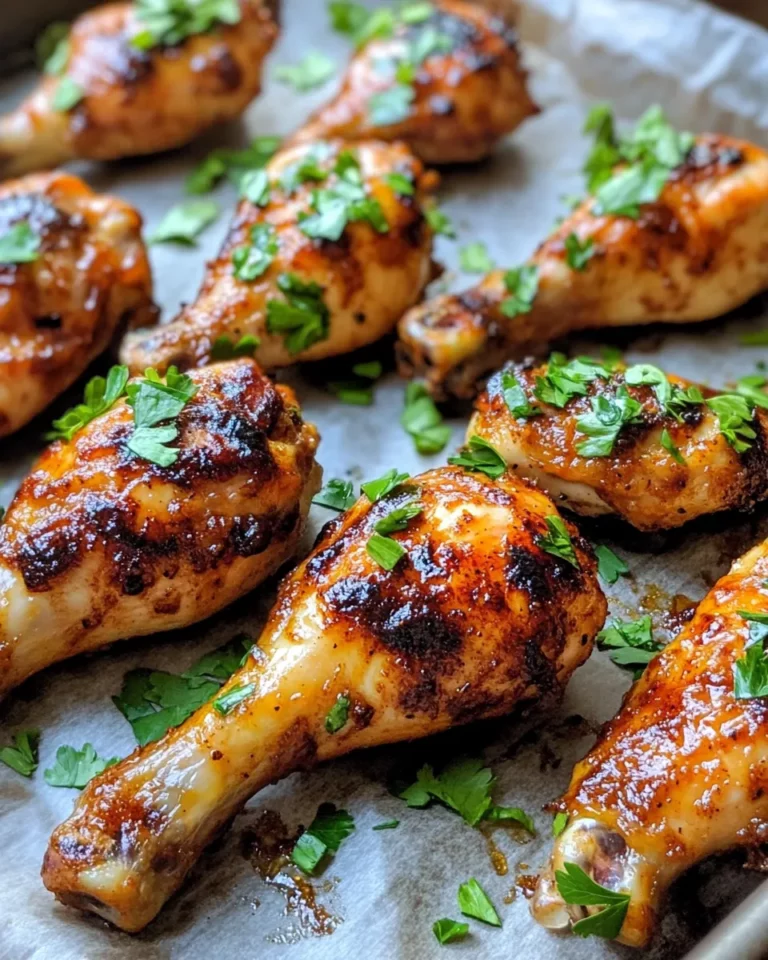
You can also make this recipe with chicken drumsticks, the cooking time stays the same.