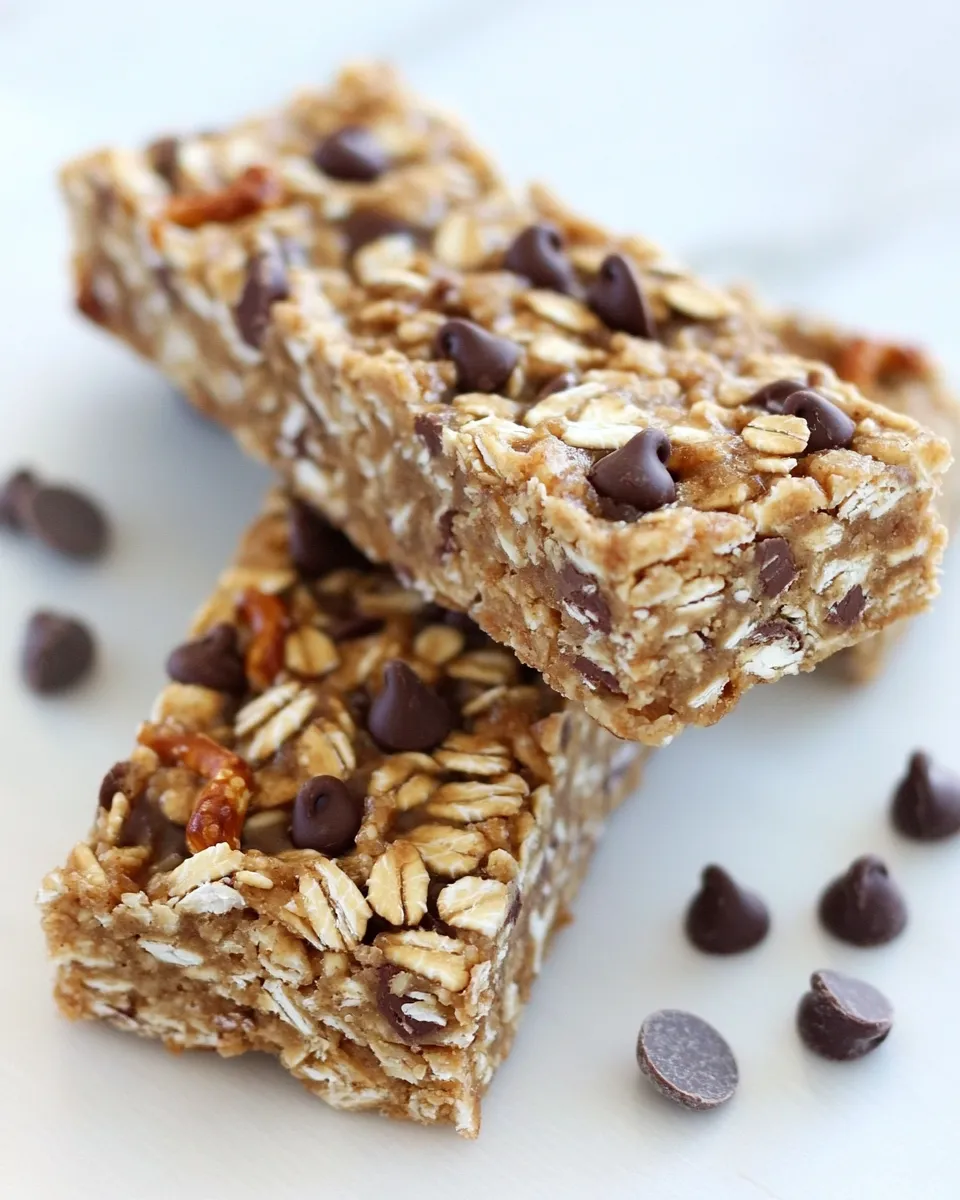
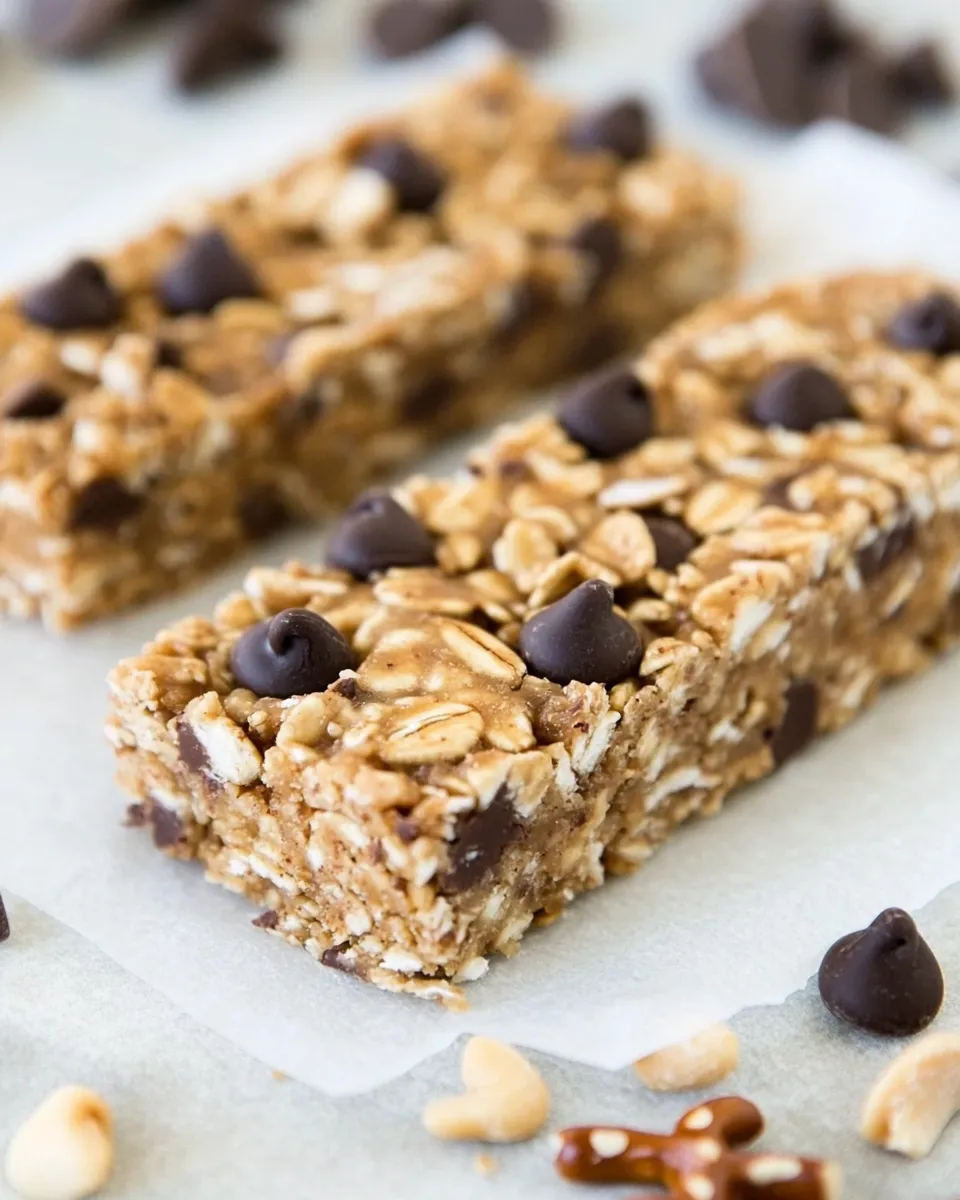
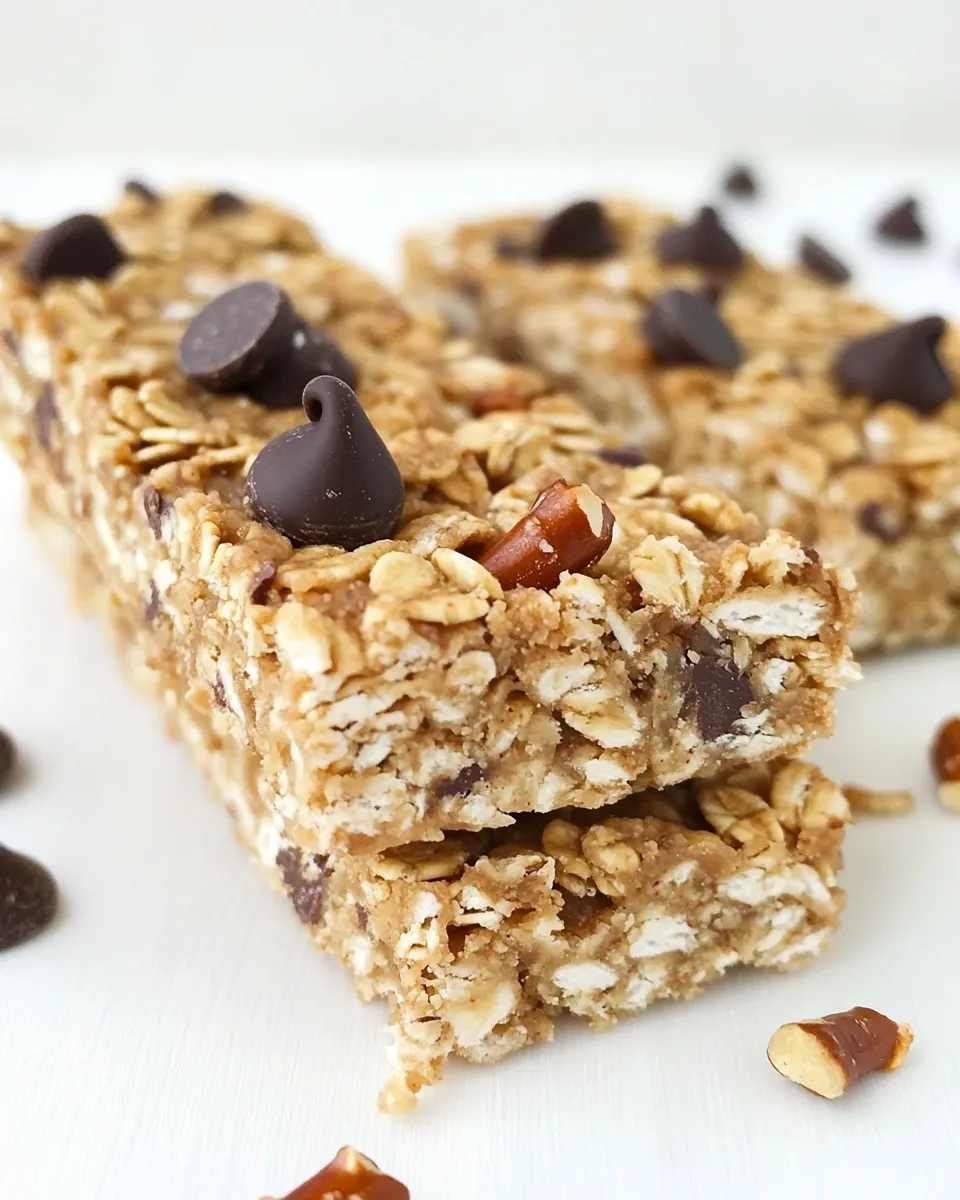
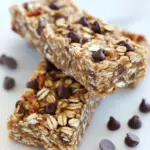
These granola bars are my go-to when I need something that travels well, satisfies a salty-sweet craving, and comes together in one pan without turning on the oven. They’re sturdy enough for backpacks and lunchboxes, and quick enough for a last-minute dessert tray. The texture is walk-the-line crunchy and chewy — thanks to the pretzels and quick oats — while the peanut butter and chocolate chips keep everything comforting.
I like making a double batch on a Sunday and keeping a stack in the fridge for hurried mornings. They slice cleanly when chilled and hold up at room temperature for snacking during the day. The recipe is forgiving but benefits from a few small habits: press firmly, chill well, and don’t overcook the sugar-butter mixture.
Below you’ll find ingredient notes, exact step-by-step directions, troubleshooting tips, and a handful of flavor swaps I actually use. Practical, honest, and tested — no fluff, just a reliable bar you’ll make again.
Ingredient Notes
Short notes on the components and why each one matters. Read this before you assemble so you can prep and swap with confidence.
The base is a hot binder of butter, brown sugar, honey, and creamy peanut butter. That mix melts together to coat the oats and cereal and then sets up firm in the fridge. Quick oats provide chew without long soaking. Crispy rice cereal lightens the texture so the bars aren’t dense. Chopped pretzels add crunch and the crucial salty contrast to the peanut butter and brown sugar. Mini chocolate chips finish the top with melty pockets of chocolate; pressing them in after pressing the mixture yields neat bars with chocolate on every piece.
Ingredients
- 1/4cupunsalted butter — melts into the binder and adds richness; use unsalted so you control salt level.
- 1/4cupbrown sugar — sweetens and helps the bars set when combined with butter and honey.
- 1/4cuphoney — adds stickiness and chew; also contributes to shelf life when chilled.
- 1/4cupcreamy peanut butter — the flavor anchor and main binder; creamy ensures even mixing.
- 1teaspoonvanilla extract — rounds and brightens the sweet flavors; stir in off heat.
- 2cupsquick oats — provides body and chew; quick oats integrate easily without long soaking.
- 1/2cupcrispy rice cereal — lightens texture and adds snap.
- 3/4cupchopped pretzels — for crunch and salt; chop to bite-size pieces so they distribute evenly.
- 1/4cupmini chocolate chips — sprinkled and pressed on top for chocolate pockets on each bar.
Directions: No-Bake Peanut Butter Pretzel Chocolate Chip Granola Bars
- Cut an 8 x 8 inch square of parchment paper and place it in the bottom of an 8 x 8 inch baking pan (press the paper into the corners so it lies flat).
- In a large saucepan, combine the butter, brown sugar, honey, and creamy peanut butter. Heat over medium-low, stirring occasionally, until the mixture starts to bubble.
- Once it begins bubbling, continue cooking for 2 minutes while stirring constantly. Remove the pan from the heat and stir in the vanilla extract.
- Add the quick oats, crispy rice cereal, and chopped pretzels to the hot mixture. Stir until all dry ingredients are well coated and evenly combined.
- Pour the mixture into the prepared pan and press it firmly and evenly into an even layer.
- Sprinkle the mini chocolate chips over the top, then gently press them into the surface so they stick to the bars.
- Refrigerate the pan for at least 30 minutes, or until the mixture is firm.
- Use the parchment to lift the slab from the pan, cut into bars, and serve. Store the bars in the refrigerator; they will keep up to about a week.
Why This Recipe Works
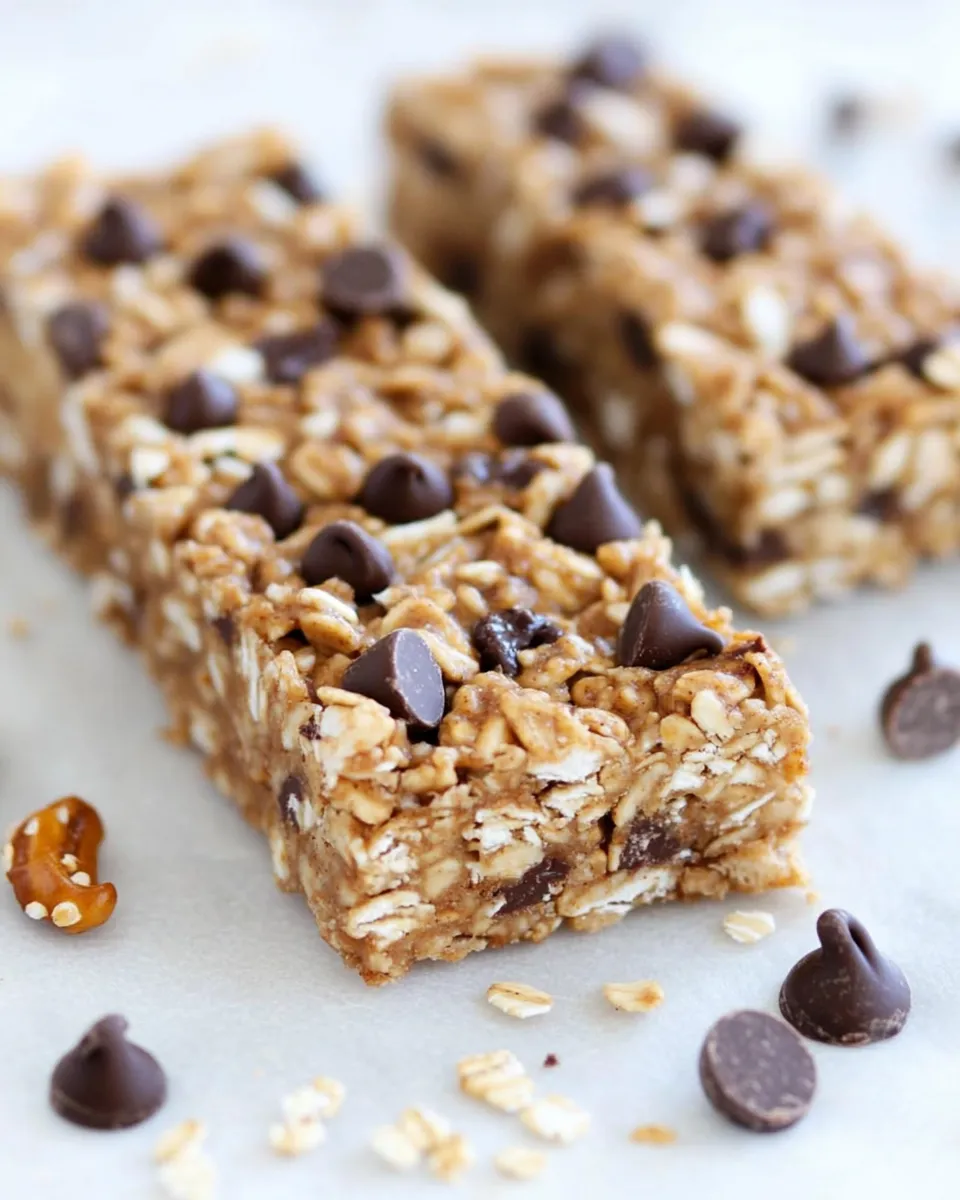
This recipe balances binders, bulk, and texture. The butter, brown sugar, honey, and peanut butter form a syrupy binder that gels as it cools; that’s what holds everything together without baking. Quick oats and crispy rice cereal are the dry matrix that the binder clings to. Pretzels bring crunch and salt, which is essential; without that contrast, the bars would be one-note sweet. Mini chocolate chips are added after pressing so they stay visible and don’t completely melt into the mixture — that keeps each bar pretty and satisfying.
The key is temperature control. Heat long enough to dissolve the sugar into the butter and honey and to make the mixture cohesive, but don’t overcook it or it will harden into a brittle texture when chilled. Pressing firmly distributes the binder and removes air pockets so bars slice cleanly. Chilling until fully firm gives predictable slices and prevents crumbling.
Ingredient Flex Options
Keep the structure and you can swap freely within categories.
- Nut butter: You can use almond or sunflower butter in place of creamy peanut butter for a different flavor or to avoid peanuts. Texture will be the same if the spread is smooth.
- Sweetener: Maple syrup can replace honey 1:1 for a different flavor profile. Brown sugar supplies molasses notes; don’t omit it entirely unless you add a similar brown sugar substitute.
- Grain: If you only have rolled oats, pulse them briefly in a food processor for a texture closer to quick oats — but don’t blitz to powder.
- Crunch: Swap the crispy rice cereal for crushed corn flakes or crushed pretzel sticks for a slightly different bite.
- Chocolate: Use regular-size chips if you prefer fewer, larger pockets of chocolate — though they won’t distribute as evenly on top.
Before You Start: Equipment
Minimal tools are needed but the right ones make assembly fast and neat.
- An 8 x 8 inch baking pan — the recipe is scaled for this size; using a larger pan will make thinner bars.
- Parchment paper — essential for lifting the slab cleanly from the pan so you can slice neatly.
- A medium to large saucepan — choose one with a heavy bottom so the butter-sugar mixture heats evenly.
- A sturdy spatula or wooden spoon — for thorough mixing and pressing into the pan.
- Sharp knife and cutting board — chill the slab fully before cutting to prevent smearing.
Avoid These Mistakes
Common missteps and how to steer clear of them.
- Underheating the binder: If the butter, sugar, honey, and peanut butter don’t bubble briefly and cook for the extra 2 minutes, the sugar won’t dissolve properly and the bars can crumble under pressure.
- Overcooking the binder: Letting it cook too long at high heat will make a mixture that sets too hard, producing brittle, rock-hard bars instead of chewy ones.
- Not pressing firmly: If you don’t compact the mixture well, bars will fall apart. Use the bottom of a measuring cup or a piece of parchment to press evenly and firmly.
- Skipping the chill: Slicing before the slab is fully firm makes messy, sticky cuts. If you’re in a rush, freeze for 15–20 minutes to speed things up, but don’t slice when warm.
- Adding chips too early: Stirring chips into the hot mix will melt them; sprinkle and press on top so the chips stay intact and pretty.
Seasonal Flavor Boosts
These are easy, small additions that lift the bars for holidays or seasons without changing the method.
- Fall: Stir a pinch (1/4 teaspoon) cinnamon into the binder or scatter toasted pumpkin seeds over the top before chilling for a nutty, autumn twist.
- Winter: Fold in 2–3 tablespoons chopped dried cranberries with the oats for bright, tart bites that pair well with peanut butter.
- Spring: Add 1–2 tablespoons lemon zest to the binder for a bright lift that plays nicely with honey.
- Summer: Use mini white chocolate chips and scatter freeze-dried raspberry powder on top for a bright, picnic-friendly bar.
Cook’s Notes
Timing
The active cooking time is about 10 minutes. Most of the time is passive chilling. Plan for at least 30 minutes of refrigeration so the bars can firm up completely. If you need them sooner, pop the pan into the freezer for 15–20 minutes but watch so they don’t become too hard to cut cleanly.
Texture
If you prefer chewier bars, press them thicker by using a smaller pan or pack more mixture into the same pan. For crisper, thinner bars, use a slightly larger pan. Quick oats give chew; if you want more chew, experiment with half quick oats and half old-fashioned oats (pulse briefly).
Cutting
Run a knife under hot water and dry it between cuts for cleaner edges. For uniform bars, score the slab with the edge of a spatula before fully chilling, then cut after chilling.
Leftovers & Meal Prep
These bars keep well and are ideal for meal prep. Store them in an airtight container in the refrigerator; they will keep up to about a week. If you need longer storage, freeze individual bars in parchment and transfer them to a freezer-safe bag for up to 2 months. Thaw in the fridge or at room temperature for 30–60 minutes before serving.
For packed lunches, wrap bars individually in parchment or beeswax wrap to prevent sticking. If you’re prepping for a road trip or picnic and expect warm weather, keep bars in a cooler — the chocolate will soften at room temperature but the bars will hold shape if not exposed to direct heat.
Popular Questions
Answers to the questions I get most often when I post these on Instagram or on the blog.
- Can I leave out the chocolate chips? Yes. They’re mostly visual and a flavor accent. Without them you’ll have a purely peanut butter–pretzel bar. You might want to stir a tablespoon of cocoa into the binder if you want chocolate flavor without chips.
- Are these gluten-free? Not as written, because the pretzels and quick oats may contain gluten. Use certified gluten-free oats, rice cereal, and pretzels to make them gluten-free.
- Why did my bars crumble? Usually the binder wasn’t heated long enough for the sugar to dissolve and bind. Return to low heat briefly, mix to re-coat, press into the pan, and chill well.
- Can I bake these? The recipe is designed to set without baking. Baking would dry them out and change texture; it’s not recommended.
- Can I double the recipe? Yes. Use a larger pan (9 x 13) or two 8 x 8 pans. Keep the same relative proportions and press firmly in each pan.
Final Bite
If you want a snack that’s quick to pull together, portable, and satisfies that sweet-and-salty itch, these No-Bake Peanut Butter Pretzel Chocolate Chip Granola Bars hit the mark. They’re straightforward, forgiving, and exactly the kind of recipe I reach for when I need reliable snacks for the week. Make them once and you’ll see how small adjustments — a different nut butter, a sprinkle of spice, a handful of seeds — let you tailor them to your pantry and mood.
No-Bake Peanut Butter Pretzel Chocolate Chip Granola Bars
Ingredients
Ingredients
- 1/4 cupunsalted butter
- 1/4 cupbrown sugar
- 1/4 cuphoney
- 1/4 cupcreamy peanut butter
- 1 teaspoonvanilla extract
- 2 cupsquick oats
- 1/2 cupcrispy rice cereal
- 3/4 cupchopped pretzels
- 1/4 cupmini chocolate chips
Instructions
Instructions
- Cut an 8 x 8 inch square of parchment paper and place it in the bottom of an 8 x 8 inch baking pan (press the paper into the corners so it lies flat).
- In a large saucepan, combine the butter, brown sugar, honey, and creamy peanut butter. Heat over medium-low, stirring occasionally, until the mixture starts to bubble.
- Once it begins bubbling, continue cooking for 2 minutes while stirring constantly. Remove the pan from the heat and stir in the vanilla extract.
- Add the quick oats, crispy rice cereal, and chopped pretzels to the hot mixture. Stir until all dry ingredients are well coated and evenly combined.
- Pour the mixture into the prepared pan and press it firmly and evenly into an even layer.
- Sprinkle the mini chocolate chips over the top, then gently press them into the surface so they stick to the bars.
- Refrigerate the pan for at least 30 minutes, or until the mixture is firm.
- Use the parchment to lift the slab from the pan, cut into bars, and serve. Store the bars in the refrigerator; they will keep up to about a week.
Equipment
- 8 x 8-inch baking pan
- Parchment Paper
- Large Saucepan
- Spatula or wooden spoon