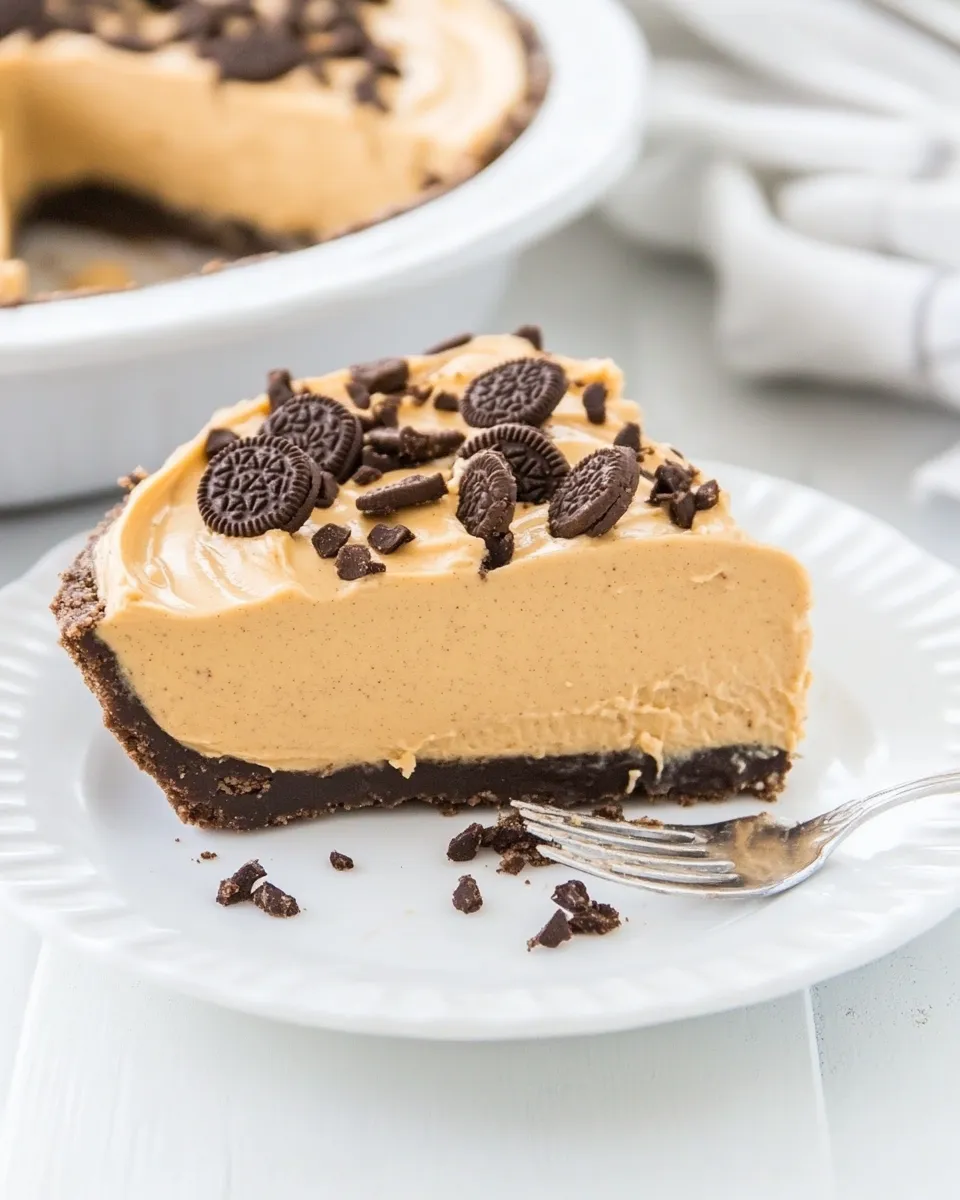
This pie is one of those simple, unfussy desserts that looks like it took all day but really takes less time and no oven at all. It layers silky peanut butter filling into an Oreo crust and finishes with crunchy peanuts and tiny chocolate chips. If you like the peanut-butter-and-chocolate combo, this is an easy winner.
There are only a few moving parts: a crust, a whipped peanut-butter filling, and a short chill. Nothing to temper, nothing to roll, and no delicate piping. It holds up in the refrigerator and slices cleanly once set, so it’s a great pick for potlucks or for a make-ahead treat.
I test this when I need something quick for guests or when I want something I can assemble between errands. The texture is smooth and light, the crust gives a chocolaty crunch, and the topping adds little pops of salt and chocolate in every bite. Read on for ingredients, step-by-step directions, sensible swaps, and my best troubleshooting tips.
Ingredients at a Glance
- ¾ cup creamy peanut butter — use Jif, Skippy, etc.; avoid “natural” peanut butter that separates for a firmer, more consistent filling.
- 4 ounces brick-style cream cheese, softened — full-fat is recommended so the pie sets up properly and tastes rich.
- 1 cup confectioners’ sugar — smooths and sweetens the peanut butter mixture without grittiness.
- one 8-ounce container frozen whipped topping, thawed — provides the light, airy texture; thaw completely before mixing.
- one 9-inch Oreo crust (6-ounce storebought or scratch) — either a storebought Oreo crust or a baked-from-scratch Oreo crust works; follow the crust directions below.
- ⅓ cup honey roasted peanuts — adds crunch and a touch of honeyed salt; salted peanuts may be substituted.
- 3 tablespoons mini semi-sweet chocolate chips — mini chips distribute evenly across the surface and add chocolate pops without overwhelming the filling.
No-Bake Peanut Butter Silk Oreo Pie: Step-by-Step Guide
- If using a storebought 9-inch Oreo crust, do not bake it and set it aside. If using a scratch 9-inch Oreo crust, bake it for 10 minutes, then cool completely before filling.
- Make sure the 8-ounce frozen whipped topping is thawed and the 4-ounce brick-style cream cheese is softened.
- In a large bowl, combine 3/4 cup creamy peanut butter, the softened cream cheese, and 1 cup confectioners’ sugar. Beat with a handheld electric mixer on low to medium-low speed, scraping the bowl as needed, until the mixture is smooth and well combined.
- Add the thawed whipped topping to the peanut butter mixture. Beat on medium speed (or gently fold with a spatula) until the filling is smooth and uniform, stopping to scrape the bowl as necessary (about a few minutes).
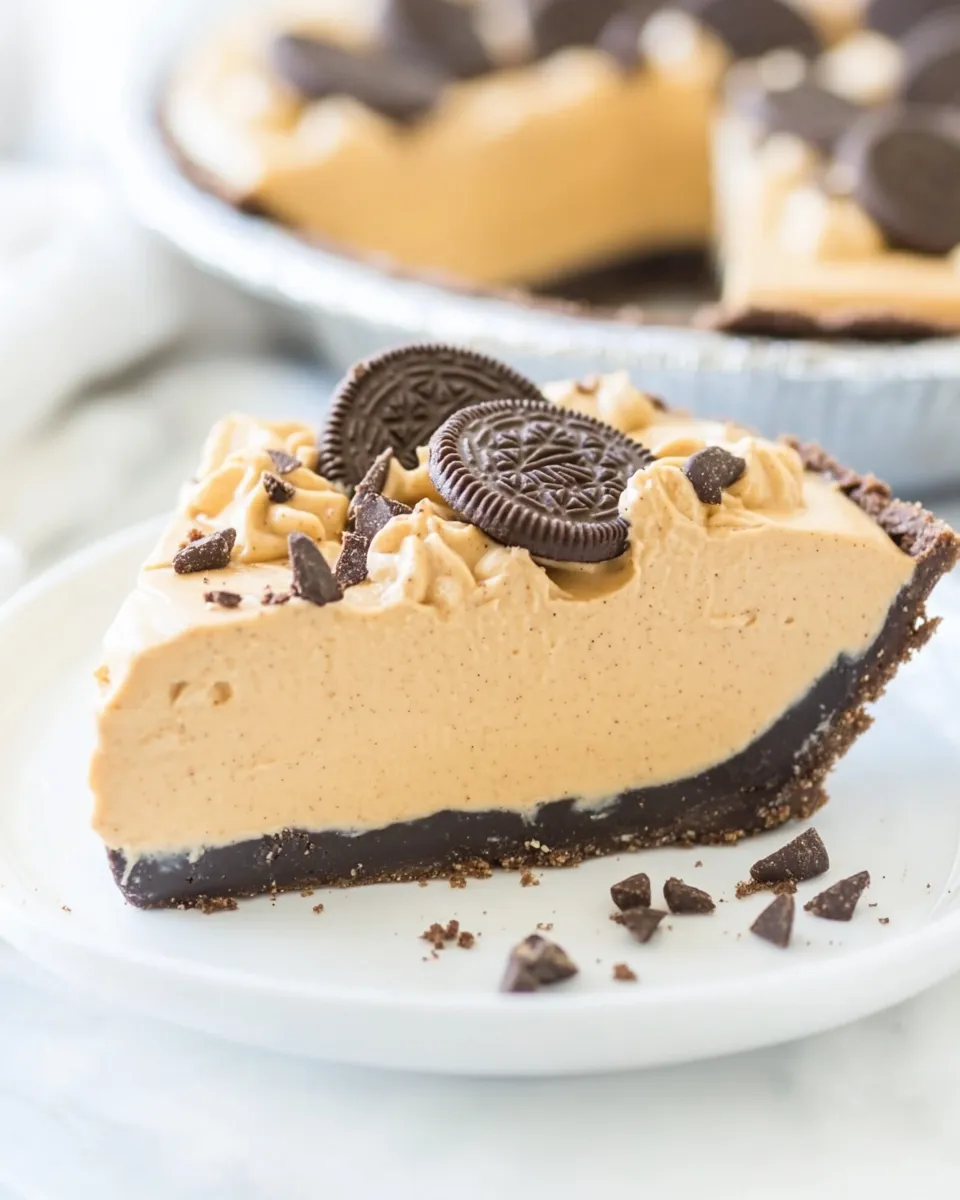
- Turn the filling into the prepared 9-inch Oreo crust and spread it evenly.
- Evenly sprinkle 1/3 cup honey roasted peanuts and 3 tablespoons mini semi‑sweet chocolate chips over the top.
- Cover the pie and refrigerate until set, at least 4 hours (overnight is better). Keep chilled until serving.
Why You’ll Love This Recipe
It’s fast to assemble. Once the crust and cream cheese are ready, the mixing takes only minutes. No baking means you can make it on a warm day without heating up your kitchen.
The texture balances light and rich. The frozen whipped topping keeps the filling airy, while the cream cheese and peanut butter give it structure and a silkiness that stands up to slicing.
The flavor profile is familiar and crowd-pleasing: chocolate from the Oreo crust, creamy peanut butter, a hint of sweetness from confectioners’ sugar, and crunchy, savory-sweet peanuts on top. Tiny chocolate chips add studded bites without dominating the experience.
Finally, it’s forgiving. If you need to prep ahead or travel with it, it’s stable when chilled and travels better than many cream-based desserts.
Substitutions by Category
Below are sensible swaps organized by component. Use them when you need to accommodate what’s in the pantry without changing the pie’s character.
Crust
If you don’t have a storebought Oreo crust, a homemade Oreo crust made from crushed Oreo cookies and melted butter works—bake it for 10 minutes and cool completely before filling, following step 1.
Peanut Butter & Nuts
Stick with a creamy, stabilized peanut butter (brands like Jif or Skippy) for the best texture. If you need a milder swap, a smooth almond butter could work, though it will change the flavor. The recipe notes that salted peanuts may be substituted for honey roasted peanuts if you prefer less sweetness on top.
Whipped Topping
The recipe uses an 8-ounce frozen whipped topping, thawed. If you want to avoid packaged topping, a stabilized whipped cream (heavy cream whipped with a bit of powdered sugar and gelatin or a commercial stabilizer) can deliver similar volume and texture, but plan for the extra step.
Sweetener and Chocolate
Confectioners’ sugar is recommended for smoothness; swapping granulated sugar will not dissolve properly and will affect mouthfeel. Mini semi‑sweet chocolate chips are ideal for even distribution; regular chips work too, but they’re larger and will concentrate chocolate in fewer bites.
Setup & Equipment
Minimal equipment is required.
- Large mixing bowl — big enough to comfortably beat the peanut butter, cream cheese, and sugar together.
- Handheld electric mixer — recommended for achieving a smooth filling quickly; you can fold by hand, but it takes longer.
- Spatula — for scraping the bowl and smoothing the filling into the crust.
- 9-inch pie plate or pan with Oreo crust — make sure the crust is the standard 9-inch size so filling volume is correct.
- Refrigerator — the pie needs at least 4 hours to set.
Steer Clear of These
Common mistakes that affect texture or presentation:
Don’t use natural peanut butter that separates. The oil separation can cause a greasy, loose filling that won’t set well.
Don’t try to speed up chilling by freezing the pie. Rapid freezing can change texture and make the filling icy. Stick to refrigerating for at least four hours; overnight is best.
Avoid adding extra liquid. The recipe proportions are tuned for a firm, sliceable filling. Adding milk or cream will loosen it and prevent proper setting.
Don’t overbeat once the whipped topping is added. Mix until uniform; overbeating can deflate the whipped topping and yield a denser filling.
Make It Fit Your Plan
Feeding a crowd: double the recipe and use two pies or assemble in a 9×13-inch pan—note the texture will be similar but cutting squares instead of slices works better for serving large groups.
Make-ahead timing: assemble the pie a day ahead for the best texture; this gives the filling time to firm up and the flavors time to marry. Keep it tightly covered in the refrigerator.
Serving size and storage: a standard 9-inch pie yields 8–10 slices. Store covered in the refrigerator for up to 3 days. For longer storage, you can freeze it (wrap tightly) for up to one month, then thaw overnight in the refrigerator before serving.
Cook’s Commentary
I make this pie when I want something impressive with minimal effort. The peanut butter and cream cheese mixture becomes remarkably smooth and light when beaten properly; it’s a reminder that texture comes from technique as much as ingredients.
Flavor-wise, the honey roasted peanuts on top give pleasant contrast: a little sweet, a little salty. If you prefer a more restrained top note, use salted peanuts as the ingredient list mentions—still great.
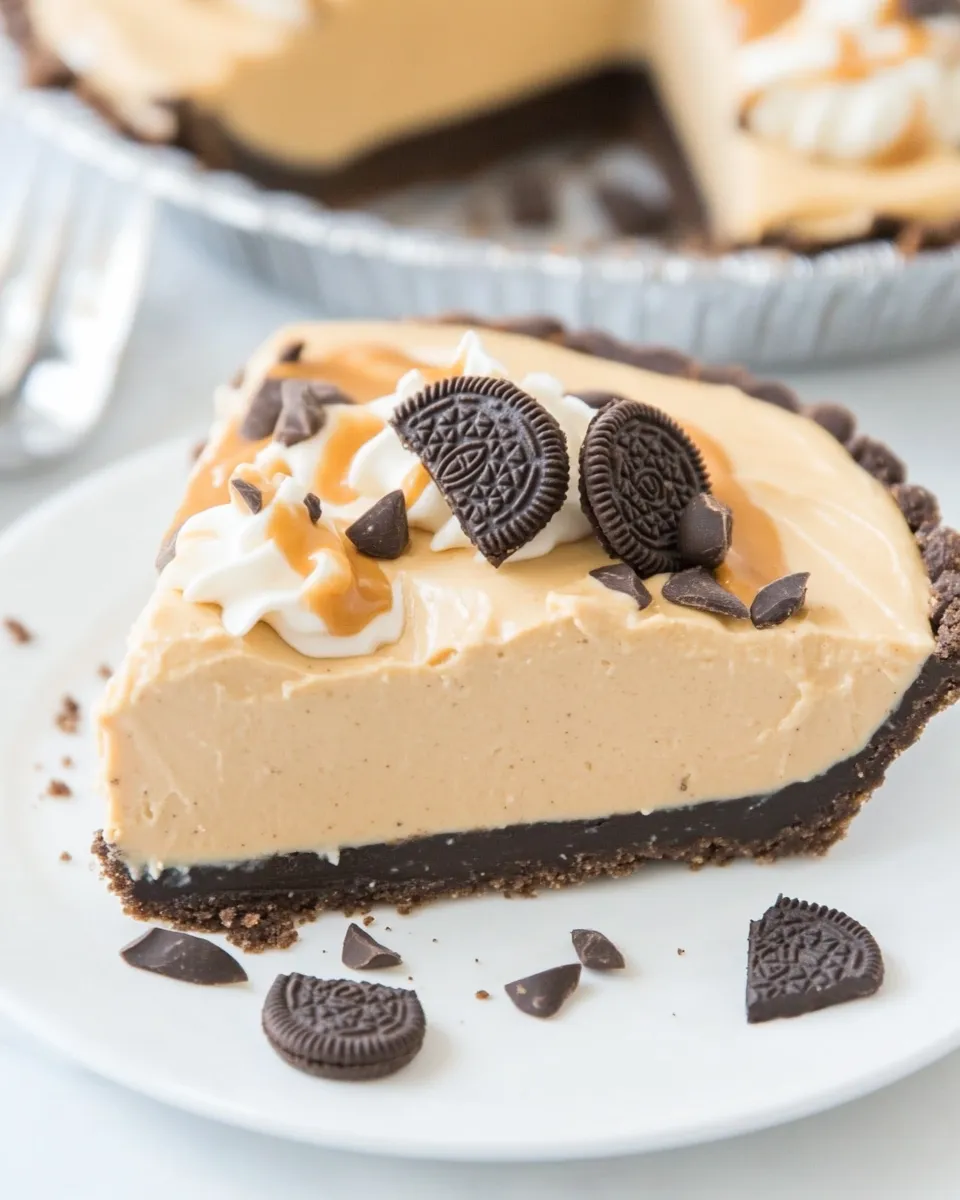
For a prettier finish, you can press a few whole peanuts and a small handful of mini chips into the center and create a simple swirl with the spatula. It’s decorative without being fussy.
Make Ahead Like a Pro

Assemble the pie, cover it tightly with plastic wrap, and refrigerate it for at least 4 hours, preferably overnight. This not only sets the filling but also lets flavors meld.
If you need to prepare elements in advance: soften the cream cheese and measure the confectioners’ sugar ahead of time; keep the thawed whipped topping covered in the refrigerator and fold it into the peanut butter mixture just before filling the crust.
Transporting tip: keep the pie chilled in an insulated carrier or cooler with ice packs. It travels well if kept cold; bring it out only shortly before serving so it maintains its texture.
Your Top Questions
Q: Can I use natural peanut butter?
A: The recipe calls for a non-natural creamy peanut butter (like Jif or Skippy) because natural peanut butter separates and can make the filling greasy and loose. If you must use natural, stir thoroughly and reduce any added oil, but know the texture may differ.
Q: Do I have to use frozen whipped topping?
A: The 8-ounce frozen whipped topping (thawed) gives volume and lightness. You can substitute a stabilized homemade whipped cream, but it requires extra steps and a stabilizer so it keeps structure—otherwise the pie may not set the same.
Q: Can I make this gluten-free?
A: Use a gluten-free chocolate cookie crust in place of the Oreo crust. The filling itself is naturally gluten-free, but always check labels on chips and toppings for cross-contamination.
Q: How long will leftovers keep?
A: Covered in the refrigerator, the pie will keep 3 days with good texture. Freezing is possible for up to a month, but thaw overnight in the refrigerator to avoid a soggy or icy texture.
Q: My filling seemed grainy; what happened?
A: Graininess usually comes from under-beating the confectioners’ sugar with the cream cheese and peanut butter or from using granulated sugar by mistake. Make sure the confectioners’ sugar is sifted if clumpy and beat until smooth before adding the whipped topping.
Before You Go
This pie is reliable and satisfying—exactly the kind of dessert I reach for when I want a finish that feels special without complicated effort. Follow the steps in order, use the specified ingredients, and give it time to chill. You’ll be rewarded with a slice that’s creamy, slightly salty, and lightly chocolatey.
If you make it, I’d love to hear how you topped it or any tiny tweaks you made. Share a photo or a note—small changes can lead to delicious new favorites.

No-Bake Peanut Butter Silk Oreo Pie
Ingredients
Ingredients
- 3/4 cupcreamy peanut butter use Jif, Skippy, etc. and not something that’s ‘natural’ and can separate
- 4 ouncesbrick-style cream cheese softened (use full fat so pie sets up)
- 1 cupconfectioners’ sugar
- one 8-ounce container frozen whipped topping thawed
- one 9-inch Oreo crust (6-ounce storebought or scratch
- 1/3 cuphoney roasted peanuts salted peanuts may be substituted
- 3 tablespoonsmini semi-sweet chocolate chips
Instructions
Instructions
- If using a storebought 9-inch Oreo crust, do not bake it and set it aside. If using a scratch 9-inch Oreo crust, bake it for 10 minutes, then cool completely before filling.
- Make sure the 8-ounce frozen whipped topping is thawed and the 4-ounce brick-style cream cheese is softened.
- In a large bowl, combine 3/4 cup creamy peanut butter, the softened cream cheese, and 1 cup confectioners’ sugar. Beat with a handheld electric mixer on low to medium-low speed, scraping the bowl as needed, until the mixture is smooth and well combined.
- Add the thawed whipped topping to the peanut butter mixture. Beat on medium speed (or gently fold with a spatula) until the filling is smooth and uniform, stopping to scrape the bowl as necessary (about a few minutes).
- Turn the filling into the prepared 9-inch Oreo crust and spread it evenly.
- Evenly sprinkle 1/3 cup honey roasted peanuts and 3 tablespoons mini semi‑sweet chocolate chips over the top.
- Cover the pie and refrigerate until set, at least 4 hours (overnight is better). Keep chilled until serving.
Equipment
- Large Bowl
- handheld electric mixer
- Spatula
- Oven