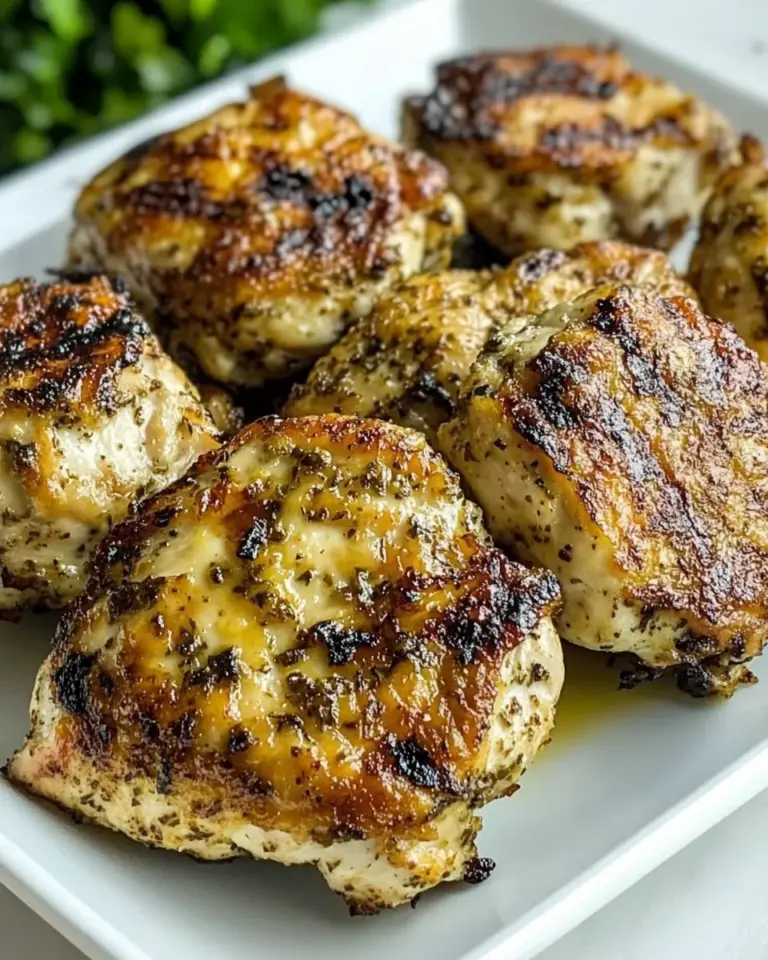
These oven baked buffalo wings are the sort of recipe I turn to when I want big flavor with minimal fuss. They crisp up in the oven, pick up glossy, tangy sauce, and are ready fast enough for game day or a weeknight splurge. No deep-frying, no complicated batters—just a few pantry staples and a reliable method.
I love that the texture is the win: baking powder helps the skin blister and brown, and flipping halfway through gives even crisping. The sauce is classic—Frank’s Original Red Hot plus melted salted butter—with an optional touch of brown sugar to tame the heat. They finish sticky, shiny, and irresistible.
Below you’ll find the exact ingredient list and step-by-step directions I use every time. I also included equipment notes, common mistakes to avoid, and sensible storing and reheating tips so your wings stay crisp after day two.
Gather These Ingredients

Ingredients
- 1 ½ – 2 pounds fresh chicken wings & drumettes, wing tips removed (about 20 fresh) — the main player; buy fresh if you can and pat very dry for best crisping.
- 1 Tablespoon baking powder — helps the skin dry and crisp in the oven; not baking soda.
- 1 teaspoon Kosher salt — seasons the wings; adjust if using a coarser or finer salt.
- ¼ teaspoon ground black pepper — basic seasoning; freshly cracked gives more bite.
- ½ cup Frank’s Original Red Hot Sauce — the classic buffalo base; gives tang and heat.
- 6 Tablespoons salted butter, melted — enriches and rounds the sauce; room temperature or warm is fine for mixing.
- 1-2 teaspoons brown sugar, optional — optional for balance; adds a mellow sweetness if you prefer a milder sauce.
Oven Baked Buffalo Wings: How It’s Done
- Preheat the oven to 425°F. Line a rimmed baking sheet with foil and set a wire rack on the sheet.
- Pat the 1 ½–2 pounds fresh chicken wings & drumettes (wing tips removed) completely dry with paper towels. If time allows, place the wings uncovered on a plate or rack in the refrigerator overnight to dry further.
- In a zip-top bag, add 1 Tablespoon baking powder, 1 teaspoon Kosher salt, and ¼ teaspoon ground black pepper. Add the wings to the bag, seal, and shake until the wings are evenly coated. Arrange the coated wings in a single layer on the wire rack.
- Bake the wings at 425°F for 25 minutes. Remove the pan, flip each wing, then return to the oven and bake an additional 15 to 20 minutes, or until the skin is crispy and the wings are cooked through.
- While the wings bake (or immediately after removing them), stir together ½ cup Frank’s Original Red Hot Sauce, 6 Tablespoons salted butter (melted), and 1–2 teaspoons brown sugar (optional) in a small bowl until combined.
- Place the hot wings in a large bowl, pour the sauce over them, and toss to coat evenly (or brush the sauce onto the wings). Serve immediately.
Why You’ll Keep Making It

This recipe hits three things most of us want from wings: crisp skin, punchy sauce, and easy cleanup. Baking at a high temperature with a little baking powder gives that crackly skin you expect from frying but without the oil bath.
The sauce is minimal and true to style—balanced heat, buttery mouthfeel, and just enough brightness to keep you reaching for another. Because it’s so straightforward, you can scale it up for a crowd or halve it for a cozy night in.
And the method is forgiving. If you need to dry the wings longer, do it; if the sauce needs less heat, use less Frank’s; if you like things sweeter, add the brown sugar. It’s reliable and adaptable—two reasons this is a repeat in my kitchen.
Quick Replacement Ideas

- Swap Frank’s Original Red Hot Sauce for a different cayenne-based hot sauce if you want a different flavor profile; note heat levels vary.
- If you prefer dairy-free, use a vegan butter substitute in place of the salted butter.
- For a milder finish, omit the brown sugar or reduce the hot sauce and increase butter slightly—just remember quantities in the original sauce are balanced for flavor.
- Make them “naked” by tossing in a dry rub after baking instead of saucing—keep in mind no additional wet ingredients are specified in the recipe.
Equipment & Tools
Essentials
- Rimmed baking sheet — prevents drips and makes cleanup easier when covered with foil.
- Wire rack that fits the sheet — elevates the wings so air circulates and fat drips away for crisp skin.
- Zip-top bag — the easiest way to evenly coat the wings with baking powder and seasonings.
- Mixing bowl — for tossing the finished wings with sauce or for brushing.
Helpful but optional
- Instant-read thermometer — useful if you want to check that the thickest part of a drumette reaches a safe temperature.
- Small saucepan or microwave-safe bowl — for melting the butter if you prefer not to microwave directly in the sauce bowl.
- Tongs — for flipping wings on the rack and tossing in sauce without scalding your hands.
Don’t Do This
- Don’t skip drying the wings. Excess moisture steams the skin and prevents crisping. Pat with paper towels and, if you can, air-dry in the fridge.
- Don’t substitute baking soda for baking powder. They behave differently and sodium bicarbonate can give an off taste and color.
- Don’t overcrowd the rack. Wings need space so hot air circulates; pile them and they steam instead of crisp.
- Don’t wait to sauce cold wings. Toss them while hot so the sauce adheres and melds into the skin.
Seasonal Spins
Buffalo wings are a blank slate for seasonal touches. In spring, add thinly sliced scallions or a scatter of fresh herbs after saucing to add brightness. In summer, pair them with a crisp slaw or chilled cucumber salad for contrast.
Autumn invites sweeter, smoky notes—consider glazing with a touch of maple syrup mixed into the sauce (small amounts only). In winter, warm spices like smoked paprika or a dash of chipotle powder in the dry coating bring depth without changing the method.
Behind-the-Scenes Notes

Why baking powder? It’s not a flavor trick—baking powder raises the pH at the skin surface and draws moisture out, encouraging browning and crispness. The salt in the coating seasons the meat while it dries.
The two-stage bake matters. The first 25 minutes cooks the wings through and begins browning. Flipping exposes other surfaces directly to heat and helps render fat evenly. The final 15–20 minutes finish both texture and color.
Keep your wire rack clean and stable; a wobbly rack can tip and shift the wings mid-bake. Foil on the sheet is for quick cleanup; if you have a disposable liner that withstands 425°F, that works too.
Storing, Freezing & Reheating
Storing: Cool wings to room temperature no longer than two hours, then transfer to an airtight container and refrigerate. They keep well for 3–4 days.
Freezing: You can freeze cooked, sauced wings. Arrange them in a single layer on a tray to flash-freeze, then move to a freezer-safe bag or container. They’ll keep for up to 2 months. Thaw overnight in the refrigerator before reheating.
Reheating for crispness: Oven reheat works best. Preheat to 375–400°F, arrange wings on a wire rack over a sheet, and heat for 10–15 minutes until warmed through and the skin crisps again. If you must microwave, do so in short bursts and then finish briefly in a hot oven or under a broiler to restore texture.
Reheating from frozen: Place on a rack and bake at 375°F for 25–35 minutes, or until heated through, flipping once. Times vary with thickness and whether the wings are sauced or not.
Oven Baked Buffalo Wings FAQs
- Can I use frozen wings? — The recipe specifies fresh wings; if you start with frozen, thaw completely and pat dry before proceeding. Dryness before coating is critical for crisp skin.
- Do I need to remove wing tips? — The source ingredient lists wings & drumettes with wing tips removed. If your wings include tips, you can remove them or roast them too, but the recipe quantities assume tips are removed.
- What if my wings aren’t crispy? — Make sure they were very dry before coating. Also check that the rack allowed airflow and the oven reached 425°F. Slightly longer baking or a quick broil at the end can help, but watch carefully so they don’t burn.
- Can I make the sauce ahead? — Yes. Mix the hot sauce and melted butter ahead and bring to room temperature before tossing with hot wings. If chilled, rewarm slightly so it spreads easily.
- Is the brown sugar required? — No. It’s optional in the provided ingredient list. Use it if you want a sweeter glaze; omit for a sharper, classic buffalo tang.
Final Bite
This is the oven method I trust when I want the classic buffalo experience with less fuss and no frying. The combination of baking powder, high heat, and a hot-butter sauce gives you that nostalgic sticky, spicy finish without a lot of fuss. Make the wings for a party, a weeknight treat, or when you simply want something shareable and satisfying.
If you try them, start exactly with the ingredients and steps above the first time, then tweak the sauce balance to suit your family. Tell me which tweak became a new favorite—I’m always curious which small change turns a good recipe into a go-to.

Oven Baked Buffalo Wings
Ingredients
Ingredients
- 1 1/2 – 2 poundsfresh chicken wings & drumettes wing tips removed (about 20 fresh)
- 1 Tablespoonbaking powder
- 1 teaspoonKosher salt
- 1/4 teaspoonground black pepper
- 1/2 cupFrank's Original Red Hot Sauce
- 6 Tablespoonssalted butter melted
- 1-2 teaspoonsbrown sugar optional
Instructions
Instructions
- Preheat the oven to 425°F. Line a rimmed baking sheet with foil and set a wire rack on the sheet.
- Pat the 1 ½–2 pounds fresh chicken wings & drumettes (wing tips removed) completely dry with paper towels. If time allows, place the wings uncovered on a plate or rack in the refrigerator overnight to dry further.
- In a zip-top bag, add 1 Tablespoon baking powder, 1 teaspoon Kosher salt, and ¼ teaspoon ground black pepper. Add the wings to the bag, seal, and shake until the wings are evenly coated. Arrange the coated wings in a single layer on the wire rack.
- Bake the wings at 425°F for 25 minutes. Remove the pan, flip each wing, then return to the oven and bake an additional 15 to 20 minutes, or until the skin is crispy and the wings are cooked through.
- While the wings bake (or immediately after removing them), stir together ½ cup Frank's Original Red Hot Sauce, 6 Tablespoons salted butter (melted), and 1–2 teaspoons brown sugar (optional) in a small bowl until combined.
- Place the hot wings in a large bowl, pour the sauce over them, and toss to coat evenly (or brush the sauce onto the wings). Serve immediately.
Equipment
- rimmed baking sheet
- Aluminum Foil
- Wire Rack
- Zip-top Bag
- Large Bowl
- Small Bowl
- Paper Towels
Notes
Storage:
These wings are best served the first day, but you can store them in a storage container in the fridge up to 3 days. Best reheated in the air fryer or oven until warm.