I love recipes that simplify mornings without sacrificing texture or flavor. Overnight steel cut oats are one of those quiet kitchen wins: they start on the stovetop with a quick boil and finish soft and creamy in the fridge. You get the chewy, nutty bite of steel-cut oats with minimal morning effort, and they hold up beautifully for several days.
There’s no trick here, just patience and a reliable method. I’ll walk you through the exact steps I use, point out the small decisions that make a big difference, and share swaps and storage tips so you can tailor this to your routine. This is about practical, dependable breakfast that feels homemade even when you’re short on time.
Read through the steps, set a timer, and you’ll have a jar of cozy oats waiting in the morning. I keep a few flavor combinations in rotation, but the base is so solid you can riff however you like: fruit, nuts, yogurt, a pinch of spice. Let’s get into it.
Ingredient List
- 1 cup uncooked steel-cut oats — The star: chewy, nutty texture; yields about three servings from this amount.
- 2 cups water — Helps hydrate the oats and prevents them from getting too dense; balances the milk for a lighter finish.
- 2 cups milk (of choice) — Adds creaminess and flavor; use dairy or any plant milk you prefer.
- ? teaspoon fine sea salt — Enhances flavor; add the amount shown here in the ingredient list (adjust slightly to taste).
Directions: Overnight Steel Cut Oats
- In a 2‑quart saucepan combine 1 cup uncooked steel‑cut oats, 2 cups water, 2 cups milk (of choice), and the fine sea salt amount shown in the ingredient list.
- Place the saucepan over high heat and bring the mixture to a boil, watching closely.
- Once the liquid reaches a boil, start a 2‑minute timer. Keep the mixture boiling but lower the heat if it starts to rise toward or spill over the pan. Stir frequently so the oats do not stick to the bottom.
- When the 2 minutes are up, remove the pan from the heat and let it sit undisturbed for 20 minutes to cool and continue absorbing liquid.
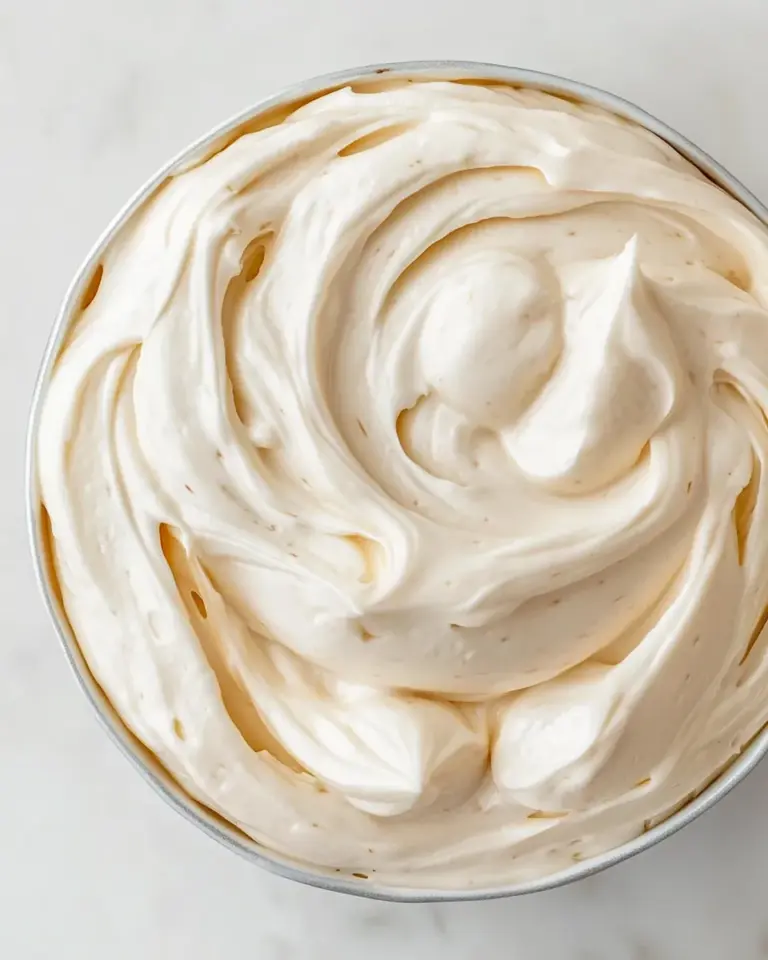
- After 20 minutes, transfer the oats to lidded jars or an airtight container. One cup of dry oats yields about three servings. Seal the containers and refrigerate overnight to allow the oats to soften further.
- To eat, enjoy the oats cold or warm. To warm on the stovetop, heat the oats in a small pan over low heat with a splash of milk and stir until heated through. To microwave, transfer to a heat‑safe bowl, add a splash of milk, and microwave 60–90 seconds (stirring once if desired).
- Store refrigerated and use within 5 days.
Why It’s Crowd-Pleasing
Steel-cut oats hold their shape and develop a pleasant chew that rolled oats don’t offer. That texture feels substantial and satisfying, which is why people who aren’t usually into “oatmeal” often like steel-cut versions.
The overnight method softens the oats without constant stirring or long simmering. You get the best of both worlds: a hands-off approach and a textured bowl that can be eaten cold or warmed. That flexibility makes it an easy grab-and-go breakfast for a family or a make-ahead option for one.
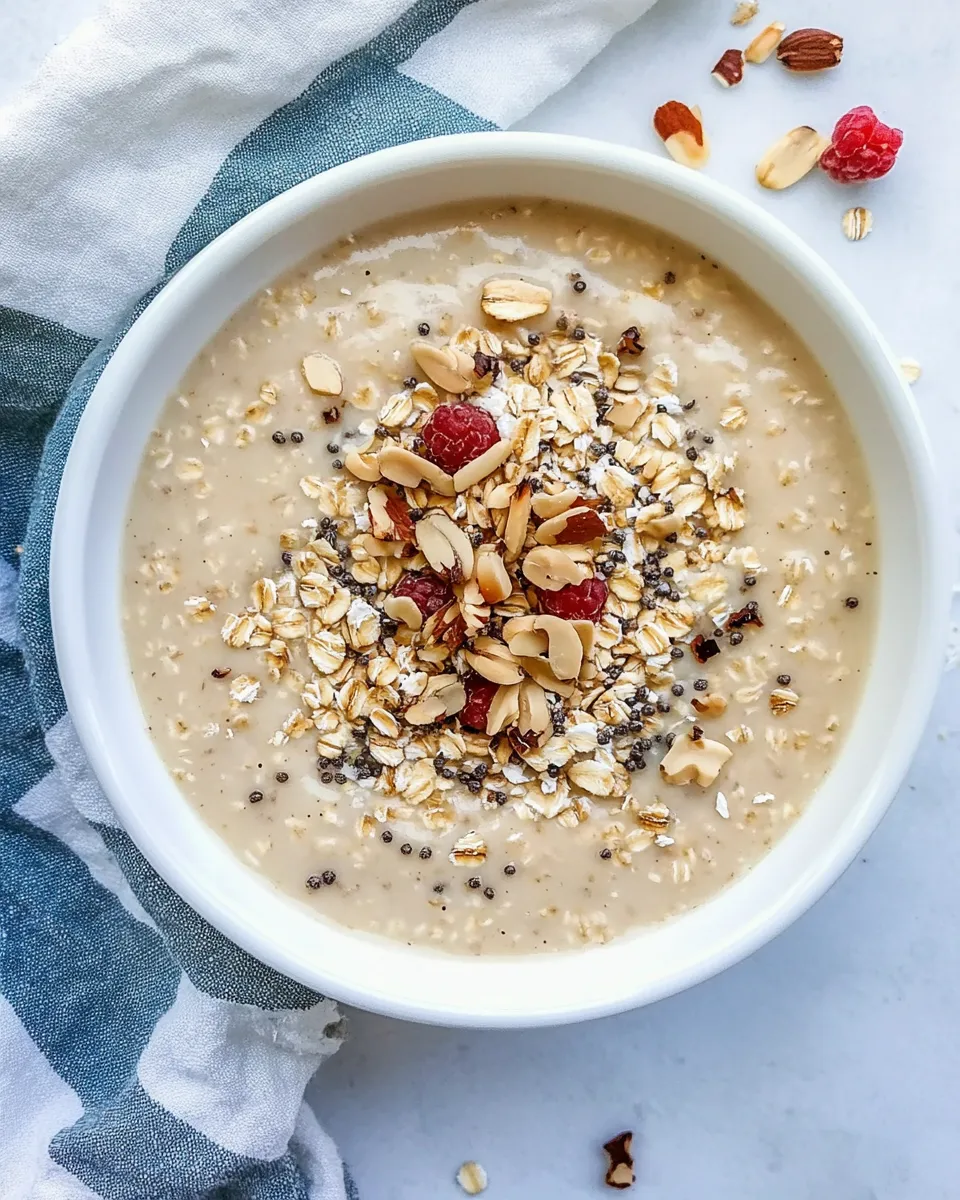
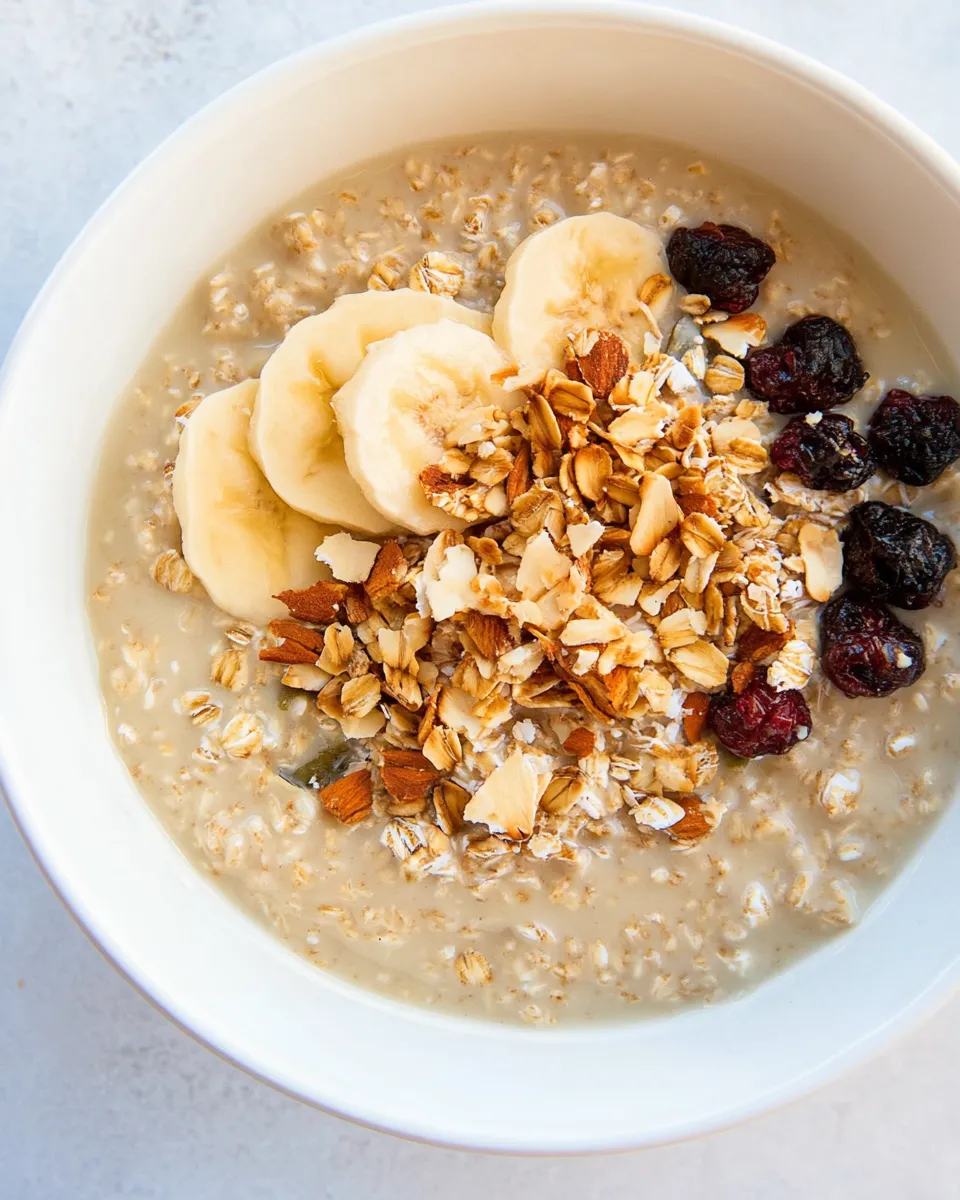
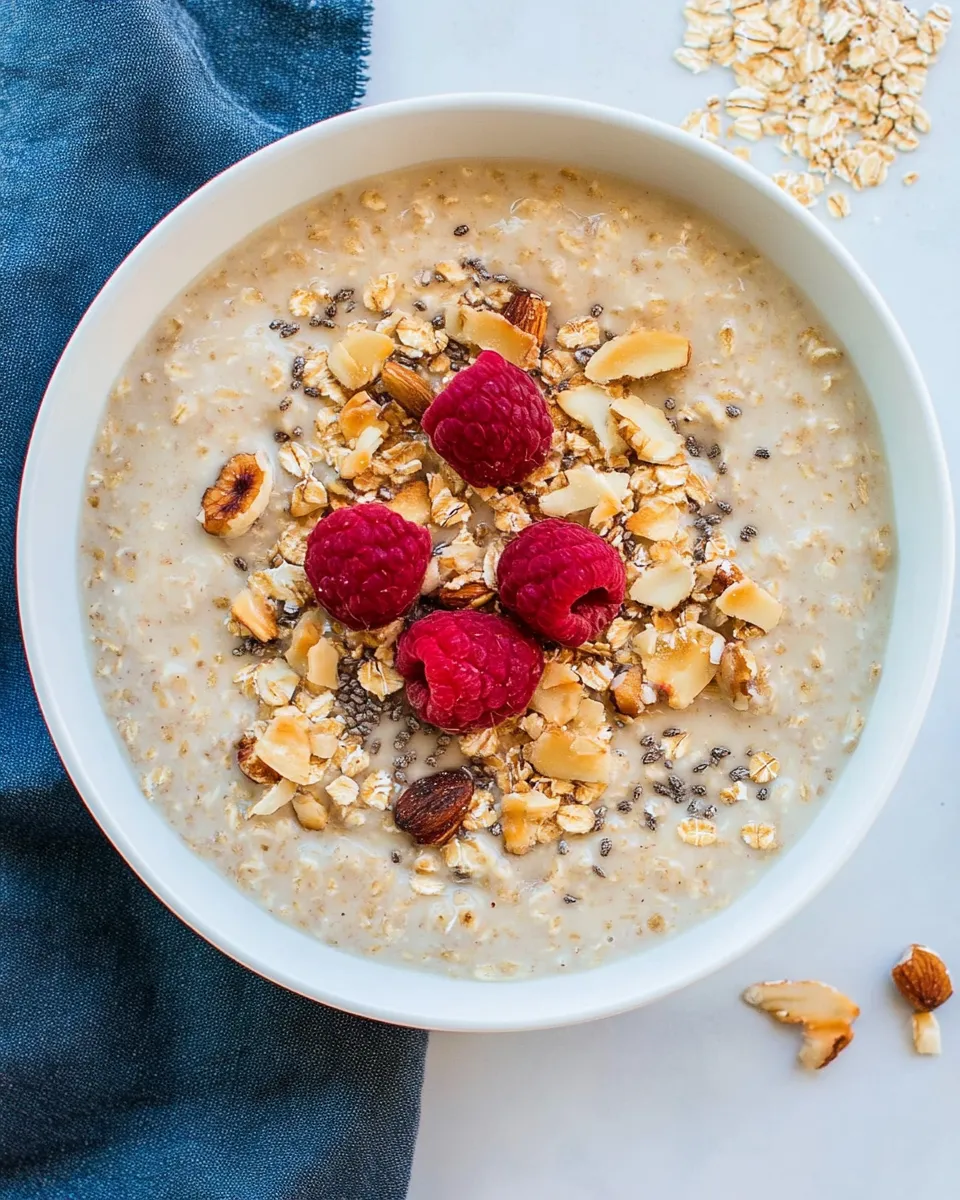
Finally, the neutral base is endlessly adaptable. Sweet, savory, fruity, or spiced — it soaks up flavors and toppings without losing its character. Serve it plain with a drizzle of honey or jazz it up with toasted nuts and citrus; both will please different palates.
Dairy-Free/Gluten-Free Swaps
Milk: Swap the 2 cups of milk for any nondairy milk you prefer — almond, oat, soy, pea, or cashew milk all work. Each one changes the flavor and creaminess slightly. Thicker plant milks (oat, soy, or cashew) will give a creamier final texture; lighter milks (almond, rice) will be a bit thinner, but a quick splash more at service solves that.
Steel-cut oats are naturally gluten-free, but cross-contamination can happen during processing. If you need this to be gluten-free, buy oats that are labeled “certified gluten-free.” That small label prevents surprises for anyone with celiac disease or strong gluten sensitivity.
Before You Start: Equipment

- 2-quart saucepan — The recipe is written for this size. It gives the oats room to boil without overflowing.
- Heatproof spatula or wooden spoon — For stirring during the brief boil and to scrape the pan if needed.
- Timer — Two minutes at boil, then 20 minutes off the heat are part of the method; a timer keeps things exact.
- Lidded jars or an airtight container — For refrigerating overnight. Mason jars are convenient for single servings.
- Small pan or microwave-safe bowl — For warming individual portions when you want them hot.
Errors to Dodge
- Leaving the pot unattended during the boil — Steel-cut oats foam and can spill quickly. Watch the pot and lower the heat if the liquid gets high.
- Boiling for less than two minutes — The two-minute active boil helps start the gelatinization. Skipping it makes the oats denser and less creamy after refrigeration.
- Stirring constantly or scraping aggressively — You need to stir frequently while boiling to prevent sticking, but aggressive scraping can make the oats gluey. Gentle, steady stirs are enough.
- Sealing warm containers — Let the mixture cool before sealing if the container traps steam. The recipe specifies a 20‑minute rest, then transfer; that’s important for both safety and texture.
Substitutions by Diet
Vegan: Use any plant-based milk instead of dairy milk. Add a little maple syrup, mashed banana, or a spoon of almond butter when serving for extra richness.
Low-sugar: Skip sweeteners in the cooking step. Rely on fresh fruit, cinnamon, or a tiny bit of vanilla at serving to keep the sugar low.
Higher-protein: Stir in plain Greek yogurt or a scoop of unflavored protein powder after refrigerating and before serving. If you use protein powder, thin the oats slightly with milk so the texture stays pleasant.
For nut allergies: Use oat, rice, or soy milk instead of nut-based milks, and avoid nut toppings. Toasted seeds like pumpkin or sunflower add crunch without nuts.
Insider Tips
- Use a wider saucepan if you have one — A wider surface helps control foaming and reduces the risk of boil-over.
- Your milk choice matters for texture — Full-fat dairy or richer plant milks produce creamier oats. If you prefer lighter oats, reduce milk to taste and add more at serving.
- Flavor infusions: Add a cinnamon stick or a split vanilla bean to the pot while boiling for subtle aroma. Remove before transferring to containers.
- Portion out while still warm — If you like single-serve jars, spoon the oats into jars after the 20-minute rest. They’ll settle perfectly overnight and are easy to grab in the morning.
- Adjust thickness after chilling — Refrigerated oats firm up. If you prefer a looser bowl in the morning, stir in a splash of milk before eating or when reheating.
Make Ahead Like a Pro
Follow the recipe through the 20-minute rest and transfer into jars or a container. Seal and refrigerate overnight — that’s the core of the make-ahead method. The oats keep well for up to five days when properly chilled.
For breakfasts all week: divide the cooked oats into individual jars while still warm. Add dry toppings only (nuts, seeds, granola) and keep wet toppings (yogurt, fresh fruit) separate so textures don’t become soggy. In the morning, add yogurt or fruit, or warm a jar briefly if you prefer hot cereal.
If you want to double the batch, use a larger pot and increase liquid and oats proportionally. Keep the boil time and the 20-minute resting period the same — those steps determine texture more than batch size does.
Frequently Asked Questions
- Can I use rolled oats instead? Rolled oats cook and absorb liquid much faster and will result in a different texture. This method is designed for steel-cut oats specifically.
- Why is the salt listed as “?” teaspoon? The ingredient list uses that placeholder; add the amount specified there. Salt is flexible — a small pinch enhances flavor without being noticeable.
- Can I make this on the stovetop in larger quantities and freeze? You can freeze portions, but the texture changes slightly after freezing and thawing. For best texture, refrigerate and eat within five days instead.
- Is it safe to leave the oats in the fridge overnight? Yes. Once the oats cool and are transferred to a sealed container, refrigeration prevents spoilage and allows the oats to soften safely.
- How do I reheat without overcooking? Warm gently on low with a splash of milk and stir until heated through. Microwaving in short bursts with a stir in between works well, too.
Time to Try It
Set aside 25 minutes tonight — two minutes active at the stove, then 20 minutes of rest — and put a jar in the fridge. You’ll wake up to breakfast that feels intentional and homemade without a wild morning scramble. Play with a few favorite toppings: toasted almonds, sliced banana, a spoonful of nut butter, or a scattering of berries. Keep a couple of jars ready at all times and mornings get a little bit easier.
Come back and tell me what you topped yours with. I keep a running list of combinations that readers love, and I’m always happy to share a few favorites based on what you have on hand.

Overnight Steel Cut Oats
Ingredients
Ingredients
- 1 cupuncooked steel-cut oats
- 2 cupswater
- 2 cupsmilk of choice
- ?teaspoonfine sea salt
Instructions
Instructions
- In a 2‑quart saucepan combine 1 cup uncooked steel‑cut oats, 2 cups water, 2 cups milk (of choice), and the fine sea salt amount shown in the ingredient list.
- Place the saucepan over high heat and bring the mixture to a boil, watching closely.
- Once the liquid reaches a boil, start a 2‑minute timer. Keep the mixture boiling but lower the heat if it starts to rise toward or spill over the pan. Stir frequently so the oats do not stick to the bottom.
- When the 2 minutes are up, remove the pan from the heat and let it sit undisturbed for 20 minutes to cool and continue absorbing liquid.
- After 20 minutes, transfer the oats to lidded jars or an airtight container. One cup of dry oats yields about three servings. Seal the containers and refrigerate overnight to allow the oats to soften further.
- To eat, enjoy the oats cold or warm. To warm on the stovetop, heat the oats in a small pan over low heat with a splash of milk and stir until heated through. To microwave, transfer to a heat‑safe bowl, add a splash of milk, and microwave 60–90 seconds (stirring once if desired).
- Store refrigerated and use within 5 days.
Equipment
- 2-quart saucepan
- small pan
- stove
- Microwave
- heat-safe bowl
- lidded jars or airtight container
Notes
Nutrition information is for 1/3 of this recipe, without any toppings. This was calculated using generic almond milk; other milks will change the nutrition. This information is just an estimate, not a guarantee.