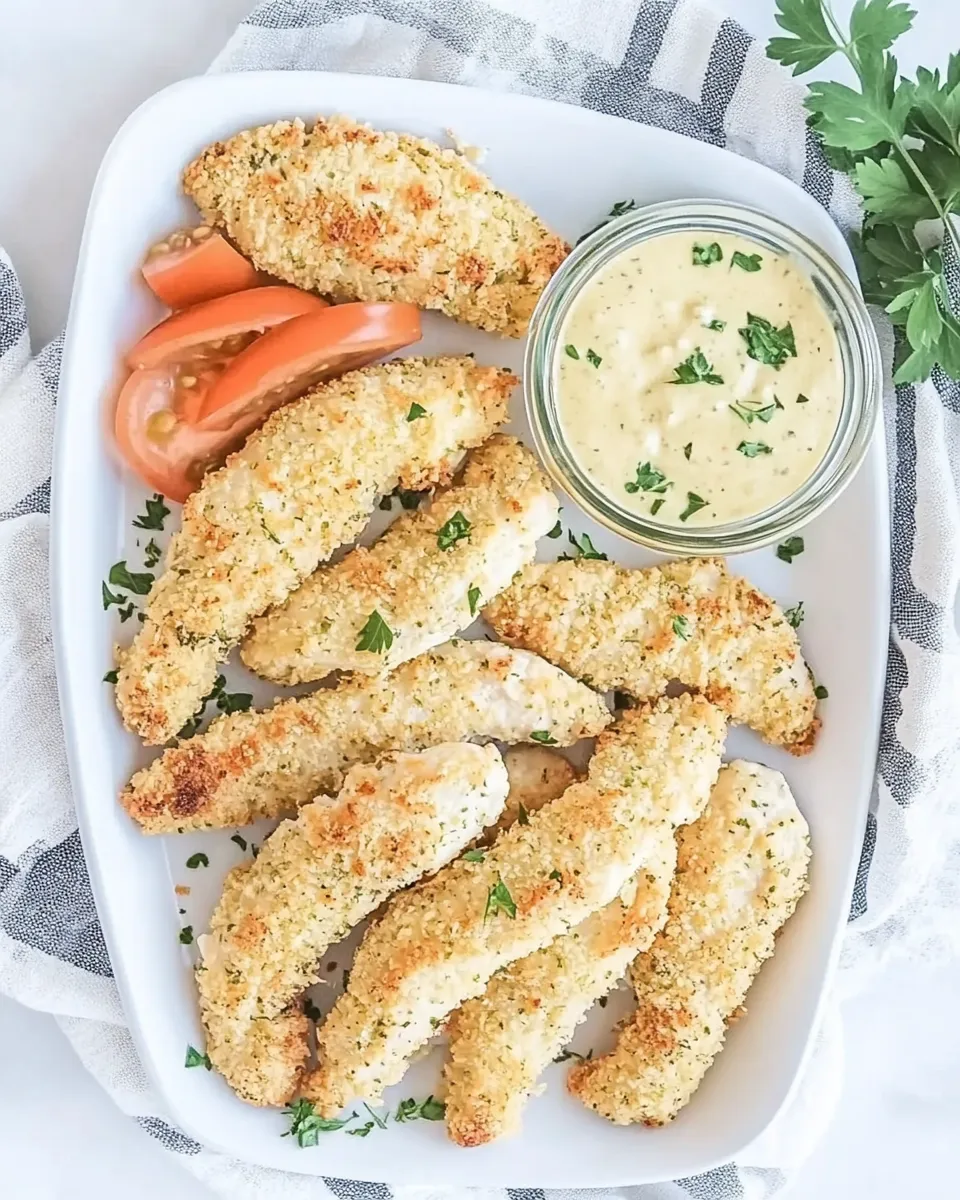
These Ranch Baked Chicken Tenders are my go-to weeknight win: crunchy outside, juicy inside, and riff-ready for whatever you have in the fridge. They bake up quickly, use pantry staples, and deliver that comforting, familiar ranch flavor without frying. I love that they feel a little special but demand very little fuss.
Whether you’re feeding picky kids, prepping a game-day platter, or packing protein-rich lunches, these tenders are dependable. They come together in three shallow-dish stations—flour, egg, and a parmesan-plus-breadcrumb ranch mixture—so the assembly is straightforward and kid-friendly if you want an extra pair of hands.
No elaborate equipment, no long marinades. Just simple steps that reward you with tender, well-seasoned chicken and a satisfyingly crisp crust. Below I break down what to buy, what to watch for, smart swaps for allergies or preferences, and how I tested this to get the best results.
What You’ll Need
Basic pantry ingredients and a couple of shallow dishes are all it takes. Keep the chicken pieces similar in size for even cooking, and make sure your rack is in the lower third of the oven for the crispiest bottom crust.
Ranch Baked Chicken Tenders, Made Easy
Ingredients
- 2 lbs chicken tenderloins — choose tenders of similar thickness so they cook evenly.
- 1/4 cup flour, all purpose — helps the egg adhere and gives a light base layer for the breadcrumbs.
- 2 eggs — beaten to bind the breadcrumb mixture to the chicken; room temperature eggs beat more evenly.
- 1/3 cup bread crumbs, unseasoned — the primary crunch element; unseasoned lets the ranch seasoning and parmesan shine.
- 1/3 cup freshly grated parmesan cheese — adds savory depth and browning to the crust; grate fresh for best texture.
- 2 tbspranch seasoning, (or one envelope) — ranch seasoning is the flavor driver; evenly mix into the breadcrumbs for consistent taste.
Note: the ingredient list above is the source of truth. I don’t change quantities—follow them for the intended balance of coating and seasoning.
Ranch Baked Chicken Tenders, Made Easy
Follow these directions exactly as written for consistent results. Work in an assembly-line: flour, egg, breadcrumbs. Keep the coated tenders spaced about an inch apart on the sheet so the air circulates and the crust crisps.
- Preheat the oven to 400°F and position a rack in the lower third of the oven.
- In a shallow dish, combine the bread crumbs, freshly grated parmesan cheese, and ranch seasoning; set this breading mixture aside.
- Place the all-purpose flour in a second shallow dish.
- Crack the eggs into a third shallow dish and beat them with a fork or whisk until smooth.
- Working one piece at a time, dredge a chicken tenderloin in the flour, shaking off any excess; dip it into the beaten eggs, letting excess egg drip off; then press it into the breadcrumb mixture to coat all sides. Transfer the coated tender to a baking sheet and place it about 1 inch from the next piece. Repeat until all tenders are coated.
- After all tenders are on the baking sheet, discard any leftover flour, egg, or breadcrumb mixtures.
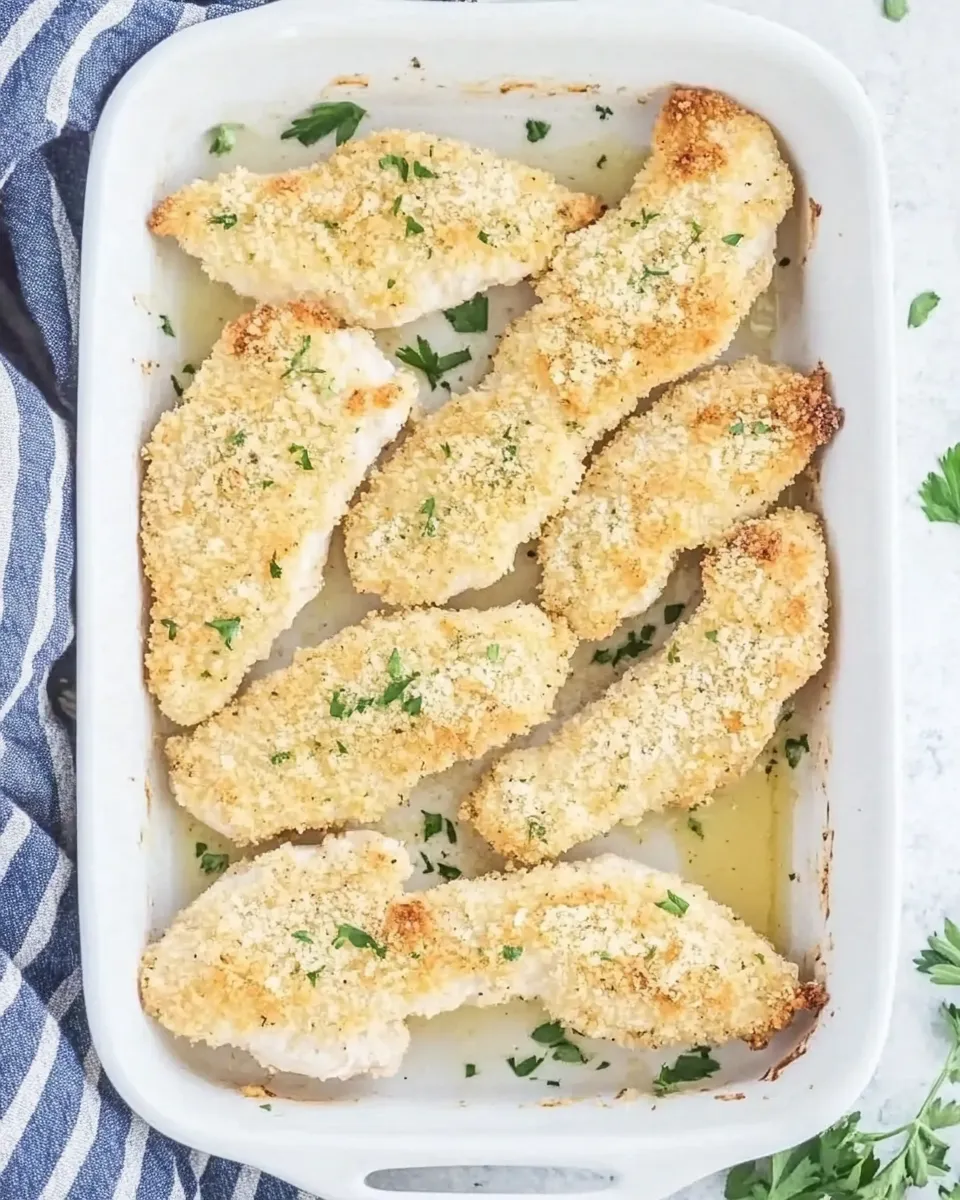
- Bake on the lower oven rack for 10–12 minutes, or until the thickest part of a tender reaches an internal temperature of 165°F.
- Remove the tenders from the oven and either serve immediately or place them on a wire cooling rack until ready to serve.
Why Ranch Baked Chicken Tenders is Worth Your Time
These tenders hit a sweet spot: they’re quick to prepare, reliable in texture, and widely liked. Baking them instead of frying saves time on cleanup and keeps the kitchen from getting smoky, but you still get a crisp exterior thanks to the breadcrumb-and-parmesan crust.
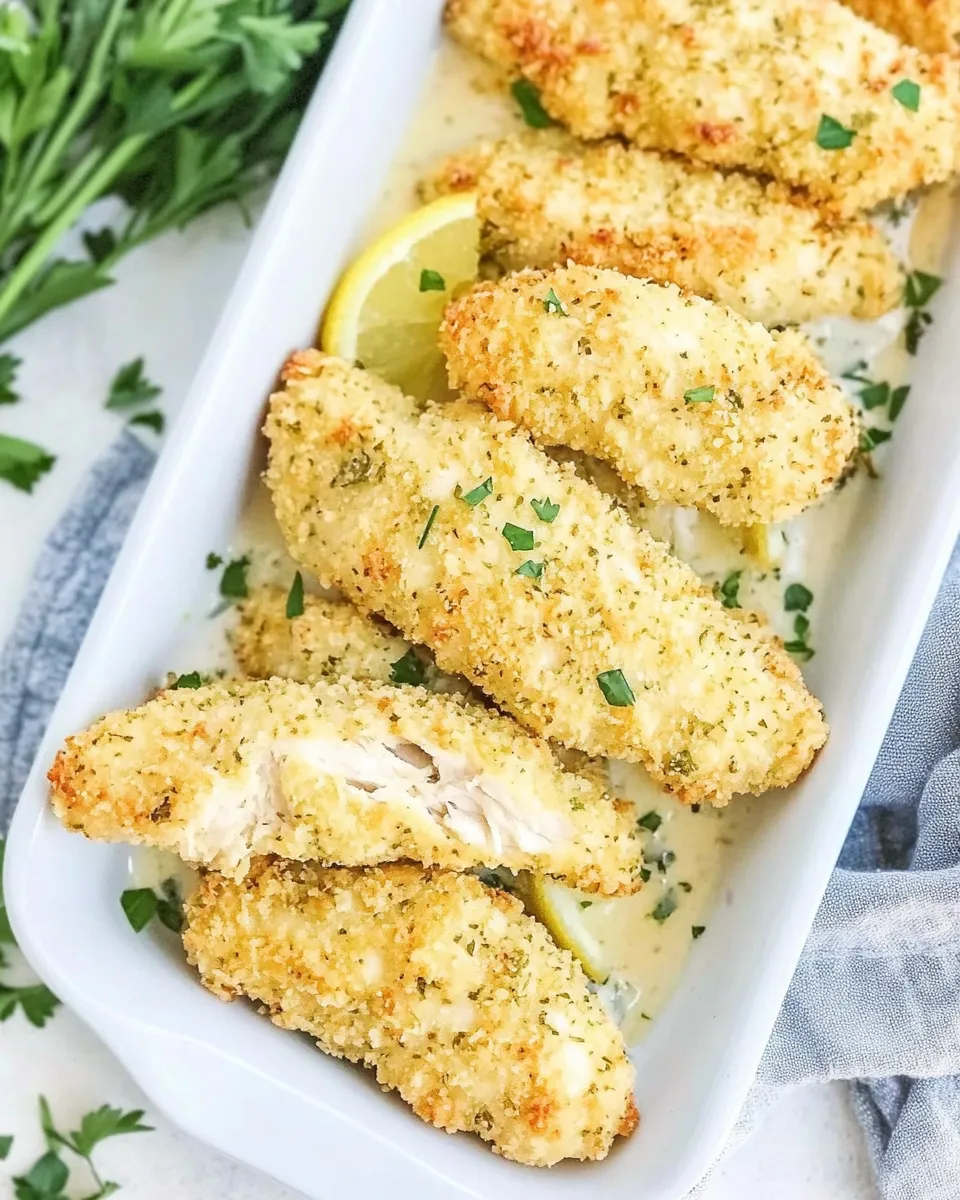
The seasoning does the heavy lifting. Ranch seasoning brings a tangy, herby profile that pairs beautifully with the salty richness of parmesan. That combination turns humble chicken tenderloins into something that feels like a treat without extra effort.
Finally, they’re versatile. Serve them as an appetizer with dipping sauces, slice them over salads, tuck them into sandwiches, or pack them for lunches. They behave well across meals and make it easy to get protein on the table with minimal planning.
Allergy-Friendly Substitutes
When you need swaps, aim to preserve the structure: a dry coating, a binder, and a crunchy element.
- Egg allergy: use a commercial egg replacer or a mixture of 1/4 cup aquafaba (chickpea liquid) per egg as a binder. Press the coating firmly so it sticks.
- Gluten-free: replace all-purpose flour with a 1:1 gluten-free flour blend and use gluten-free breadcrumbs or crushed gluten-free cereal for the crumbs.
- Dairy-free: swap parmesan for a dairy-free grated cheese or increase breadcrumbs slightly and add a pinch more ranch seasoning for flavor; choose a dairy-free ranch mix if available.
- Low-sodium: pick a low-sodium ranch seasoning or use half the packet and boost herbs like dried dill and garlic powder to taste.
Equipment at a Glance
Minimal equipment makes this recipe accessible:
- Baking sheet — a rimmed sheet to catch any juices.
- Wire cooling rack (optional but recommended) — keeps the bottom crust crisp if you transfer the tenders off the hot sheet.
- Three shallow dishes or pie plates — for flour, egg, and breadcrumb stations.
- Meat thermometer — the reliable way to confirm the thickest part reaches 165°F.
Avoid These Traps
Small mistakes can make or break the texture. Here are the ones I see most often and how to avoid them.
- Overcrowding the pan — if pieces touch, they steam instead of crisp. Space them about an inch apart.
- Skipping the parmesan or mixing it unevenly — parmesan adds browning and flavor; mix it evenly with the breadcrumbs so every bite has balance.
- Not checking internal temperature — color alone can be misleading; use a thermometer to verify 165°F at the thickest point.
- Leaving leftover wet mixtures on the counter — as the directions say, discard leftover flour, egg, or breadcrumb mixtures after coating to avoid cross-contamination.
Make It Fit Your Plan
Meal prep and scaling
Double the ingredients and bake tenders on two sheets in separate batches. For meal prep, cool completely on a wire rack, then refrigerate in an airtight container for up to 3 days. Reheat in a 375°F oven for 8–10 minutes to re-crisp.
Serving and pairing
For weeknight dinners, serve with a simple green salad and roasted potatoes. For finger-food situations, offer dipping sauces like ranch, honey mustard, barbecue, or a spicy mayo. Slice a couple of tenders and toss onto romaine with a vinaigrette for a quick salad upgrade.
What I Learned Testing
I tested these tenders across different breadcrumb types and oven positions. Unseasoned fine breadcrumbs mixed with freshly grated parmesan produced the most uniform crust. Panko gives a lighter, airier crunch but browns differently; if you use panko, watch the tenders closely in the last few minutes to avoid over-browning.
Placing the rack in the lower third helps the bottom of the tenders brown and crisp without burning the tops. I also learned that pressing the breadcrumb mixture into the tenders—rather than just rolling—creates a more consistent coating that stays on after baking.
Best Ways to Store
Store cooled tenders in an airtight container in the refrigerator for up to 3 days. For longer storage, freeze in a single layer on a baking sheet until solid, then transfer to a freezer bag for up to 2 months. Reheat from frozen at 375°F for 15–20 minutes, checking for an internal temperature of 165°F.
A tip for reheating: place tenders on a wire rack over a baking sheet so hot air circulates around them; this prevents sogginess and restores crunch.
Reader Questions
Q: Can I use chicken breasts instead of tenderloins?
A: Yes—slice larger breasts into even strips roughly the thickness of tenderloins so they cook in the same 10–12 minute window. Thicker pieces may need a couple more minutes; always check the internal temperature.
Q: My breadcrumb mixture seems too wet. What did I do wrong?
A: If the eggs are over-diluted or the parmesan is unusually moist, the crumbs can clump. Use fresh, dry breadcrumbs and freshly grated (not pre-packed) parmesan. Press and shake gently to remove excess egg before coating to avoid sogginess.
Q: Can I make these spicy?
A: Yes—stir a pinch of cayenne or a teaspoon of smoked paprika into the breadcrumb mixture to add heat and a smoky note. Adjust to your heat tolerance.
Time to Try It
Ready to make these tonight? Gather the ingredients, preheat the oven to 400°F, and set up three shallow dishes. Follow the steps in order, keep tidy and spaced, and use a thermometer so you don’t overcook. You’ll get a reliable, well-seasoned batch of tenders that are crisp, juicy, and flexible across meals.
Let me know how you serve them—did you pair them with a salad, stack them in a sandwich, or make them the star of a snack board? I’m always collecting variations that work in real life.

Ranch Baked Chicken Tenders
Ingredients
Ingredients
- 2 lbschicken tenderloins
- 1/4 cupflour all purpose
- 2 eggs
- 1/3 cupbread crumbs unseasoned
- 1/3 cupfreshly grated parmesan cheese
- 2 tbspranch seasoning (or one envelope)
Instructions
Instructions
- Preheat the oven to 400°F and position a rack in the lower third of the oven.
- In a shallow dish, combine the bread crumbs, freshly grated parmesan cheese, and ranch seasoning; set this breading mixture aside.
- Place the all-purpose flour in a second shallow dish.
- Crack the eggs into a third shallow dish and beat them with a fork or whisk until smooth.
- Working one piece at a time, dredge a chicken tenderloin in the flour, shaking off any excess; dip it into the beaten eggs, letting excess egg drip off; then press it into the breadcrumb mixture to coat all sides. Transfer the coated tender to a baking sheet and place it about 1 inch from the next piece. Repeat until all tenders are coated.
- After all tenders are on the baking sheet, discard any leftover flour, egg, or breadcrumb mixtures.
- Bake on the lower oven rack for 10–12 minutes, or until the thickest part of a tender reaches an internal temperature of 165°F.
- Remove the tenders from the oven and either serve immediately or place them on a wire cooling rack until ready to serve.
Equipment
- Oven
- Baking Sheet
- Shallow Dish
- wire cooling rack
- Fork or Whisk