I make this roasted tomato hummus whenever I want a change from the usual. The tomatoes bring a bright, slightly sweet tang that lifts the chickpeas and tahini in a way that feels both familiar and new. It’s quick to pull together once you have the tomatoes prepped, and the balance of garlic and lemon keeps the spread lively without overpowering the chickpea base.
There are no fancy steps here — just a food processor, a few pantry staples, and a little patience while the machine does its work. The texture is silky when you follow the method below, and the finished hummus keeps well in the fridge, which makes it great for snacks, lunches, or a simple party dip.
Make it your own by dialing the garlic and lemon to taste, or by sprinkling sumac at the end for a clean, citrusy finish. I’ll walk you through shopping, exact steps, troubleshooting, and pro tips so this version becomes your dependable go-to.
Shopping List

- Slow roasted tomatoes (or sun-dried tomatoes)
- 1 can (15.5 oz.) garbanzo beans (chickpeas)
- Garlic puree
- Tahini sauce
- Fresh lemon juice
- Olive oil
- Water
- Sea salt
- Optional: Sumac for sprinkling
- Pita, lavash, crackers, or fresh vegetables for serving
Ingredients
- 1/2 cup slow roasted tomatoes (or use scant 1/2 cup sun-dried tomatoes and a little water) — the star for sweet, concentrated tomato flavor; use the sun-dried option only if you rehydrate them slightly.
- 1 can (15.5 oz.) garbanzo beans (also called chickpeas) — provides the creamy body and protein; drain and rinse well.
- 2 T garlic puree (or less if you’re not a huge garlic fan) — gives a controlled, even garlic flavor without chopping fresh cloves.
- 1/4 cup tahini sauce — adds creaminess, depth, and a hint of sesame bitterness that balances the tomatoes.
- 3 T fresh lemon juice (see notes) — brightens the dip; you’ll add it in stages to control acidity.
- 2 T olive oil, plus more for drizzling on finished hummus if desired — enriches mouthfeel and helps emulsify.
- 1/4 cup water — used to loosen the texture; add gradually to reach the consistency you like.
- 1/2 tsp. sea salt, or to taste — start low and adjust after blending.
- Optional: Sumac for sprinkling on finished hummus — a tart, lemony garnish if you have it.
Directions: Roasted Tomato Hummus
- Drain the can of garbanzo beans in a colander and rinse well under cold water until no more foam appears; leave the beans in the colander to continue draining.
- Place the slow roasted tomatoes (or scant 1/2 cup rinsed sun-dried tomatoes with a little water) and the garlic puree (2 T, or less if you prefer) into the bowl of a food processor fitted with the steel blade.
- Process about 30 seconds (or slightly longer if using sun-dried tomatoes) until the tomatoes and garlic are broken down and evenly puréed.
- Add the drained beans to the food processor and process 1–2 minutes, stopping to scrape down the sides as needed, until the beans and tomato mixture are completely blended and smooth.
- Add the tahini (1/4 cup), 2 tablespoons of the lemon juice (reserve the remaining 1 tablespoon), the olive oil (2 T), half of the water (1/8 cup or 2 T), and the sea salt (1/2 tsp, or start with less if you prefer). Process 30–60 seconds more until the mixture is well blended.
- Check the hummus for thickness. If it’s too thick, add the remaining water (up to the remaining 2 tablespoons) a little at a time and process briefly after each addition until you reach your desired consistency.
- Taste and, if desired, add the reserved 1 tablespoon lemon juice and/or more salt; process a few seconds to incorporate any additions.
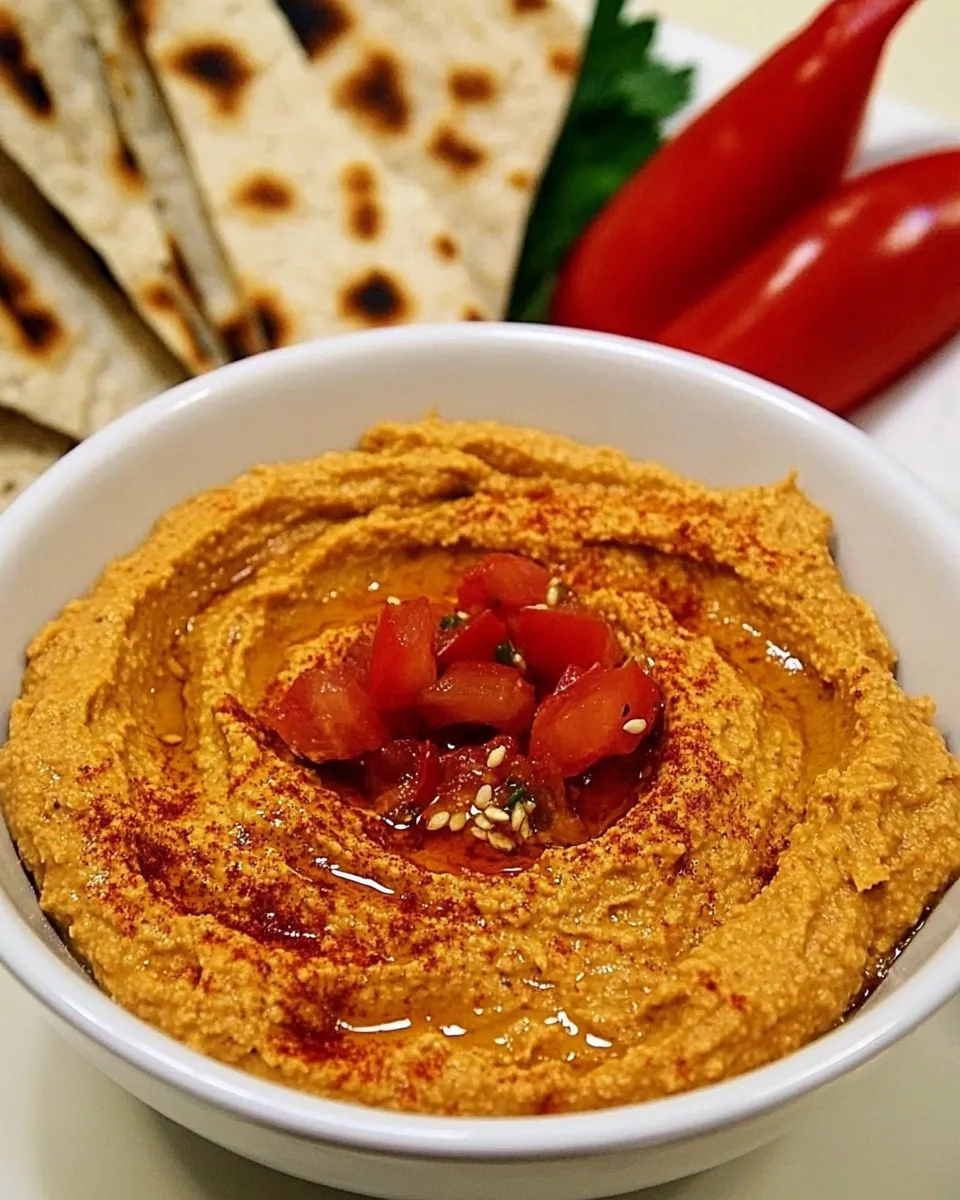
- Transfer the hummus to a serving bowl, drizzle a little extra olive oil on top if you like, and sprinkle sumac over the finished hummus if using.
- Store any leftover hummus in a container with a tight lid in the refrigerator; it will keep for several weeks.
- Serve with pita, lavash, crackers, or fresh vegetables (celery, carrots, red pepper strips).
Why This Recipe is a Keeper

This version is a keeper because it’s built on two strengths: a clear, repeatable method and bold, focused flavor. The roasted tomatoes add an umami-sweetness that makes each bite interesting, while the tahini and lemon maintain the classic hummus balance. The procedure is forgiving — small adjustments to garlic, lemon, and water let you tune it to your taste without ruining the result.
It’s also versatile. The finished dip is equally good spread on sandwiches, dolloped on grain bowls, or served as a snack with raw vegetables. Practicality matters to me: it stores well, gets better after a day or two in the fridge, and requires no special skills — just a food processor and a little attention.
Ingredient Swaps & Substitutions

- Slow roasted tomatoes → scant 1/2 cup sun-dried tomatoes + a little water — the recipe lists this exact alternative so you can use jarred sun-dried tomatoes if that’s what’s on hand.
- Garlic puree → reduce the amount if you prefer a milder garlic presence; the recipe already accounts for personal preference.
- Sea salt → start with less and increase to taste; the directions advise starting with 1/2 tsp and adjusting.
- Sumac → optional garnish only; leave it off if you don’t have it. The hummus stands on its own without additional spices.
Tools & Equipment Needed
- Food processor fitted with the steel blade — essential for that smooth, silky texture.
- Colander — for draining and rinsing the canned chickpeas.
- Measuring spoons and cups — to measure tahini, lemon juice, oil, and water accurately.
- Rubber spatula — to scrape down the sides of the processor bowl so everything blends evenly.
- Serving bowl and storage container with a tight lid — for serving and storing leftovers.
Things That Go Wrong
- Too thick and pasty — fix by adding the remaining water a teaspoon at a time and processing briefly until smooth.
- Too thin — stop adding water; chill the hummus for a little while and the texture will firm up. Also check your tahini; if it’s unusually thin, it can loosen the mixture.
- Grainy or not smooth — process longer. Stopping to scrape and then processing again usually solves graininess from chickpea skins or uneven blending.
- Overly garlicky or acidic — taste as you go. The recipe calls for adding lemon in stages and using a measured garlic puree so you can control strong flavors.
- Flat flavor — don’t skip the tahini or lemon. Both provide critical balance: tahini gives depth, lemon gives brightness. Adjust salt at the end to bring everything forward.
Make It Fit Your Plan
Meal-prep friendly: make a batch at the start of the week for lunches and snacks. It pairs well with raw vegetables for a low-carb snack, or use it as a spread in sandwiches and wraps. For entertaining, transfer to a shallow bowl, make a swirl in the surface, drizzle olive oil, and sprinkle sumac to look deliberate and pretty.
Diet notes: the ingredients are plant-based and naturally vegan, so this fits vegetarian and vegan plans easily. If you’re watching sodium, start with less sea salt and choose a low-sodium can of chickpeas.
Pro Perspective
Small decisions make a big difference here. Finely puree the tomatoes first; this builds a uniform base so the beans blend evenly. When you add the tahini, lemon, and oil, add only half the water at first so you can judge the texture properly — that step is in the directions because it prevents a watery hummus.
Always taste after processing. Heat, acidity, and salt should be in harmony. If it tastes muted, a squeeze of lemon or a pinch more salt wakes everything up. If it tastes sharp, a touch more tahini softens the edges. If you serve it the same day, let it chill for at least 30 minutes so the flavors mingle; overnight is even better.
Make Ahead Like a Pro
Store the hummus in an airtight container in the refrigerator as instructed; the directions note it will keep for several weeks. In my kitchen, I find the flavor improves after a day as the tomatoes and garlic meld with the chickpeas and tahini. For serving later, bring it to room temperature and give it a quick stir; if it’s slightly firm, a tablespoon of water or a light drizzle of olive oil stirred in will restore creaminess.
If you need to portion for a gathering, scoop into smaller bowls and finish each with a drizzle of oil and a sprinkle of sumac right before serving. It keeps presentation clean and prevents the garnish from becoming soggy.
Your Top Questions
- How long does this hummus keep? The directions say it will keep for several weeks refrigerated in a tight-lid container; always use clean utensils to scoop to preserve freshness.
- Can I use sun-dried tomatoes instead of slow roasted? Yes — the recipe explicitly offers the scant 1/2 cup sun-dried tomatoes option with a little water to rehydrate.
- What if I don’t like strong garlic? The recipe lists 2 T garlic puree and notes you can use less; start modest and add more only if you want it stronger.
- Do I have to use a food processor? A food processor with the steel blade is recommended for the smoothest texture; a high-powered blender can work, but you may need to scrape and add liquid carefully.
- Is sumac necessary? No. It’s optional and adds a lemony, tart finish. The hummus is delicious without it.
Time to Try It
If you have the ingredients on hand, this is an easy recipe to test tonight. Drain, pulse, blend, and taste — those four steps will get you to a wonderful spread. Follow the directions closely for the first couple of times so you learn how the texture and flavor should come together, then make adjustments for your preferred garlic, lemon, and salt levels. Let me know how it turns out, and if you add a twist (I love a quick garnish), tell me what worked.

Roasted Tomato Hummus
Ingredients
Ingredients
- 1/2 cup slow roasted tomatoes or use scant 1/2 cup sun-dried tomatoes and a little water
- 1 can 15.5 oz. garbanzo beans (also called chickpeas)
- 2 T garlic puree or less if you’re not a huge garlic fan
- 1/4 cup tahini sauce
- 3 T fresh lemon juice see notes
- 2 T olive oil plus more for drizzling on finished hummus if desired
- 1/4 cup water
- 1/2 tsp. sea salt or to taste
- Optional: Sumac for sprinkling on finished hummus
Instructions
Instructions
- Drain the can of garbanzo beans in a colander and rinse well under cold water until no more foam appears; leave the beans in the colander to continue draining.
- Place the slow roasted tomatoes (or scant 1/2 cup rinsed sun-dried tomatoes with a little water) and the garlic puree (2 T, or less if you prefer) into the bowl of a food processor fitted with the steel blade.
- Process about 30 seconds (or slightly longer if using sun-dried tomatoes) until the tomatoes and garlic are broken down and evenly puréed.
- Add the drained beans to the food processor and process 1–2 minutes, stopping to scrape down the sides as needed, until the beans and tomato mixture are completely blended and smooth.
- Add the tahini (1/4 cup), 2 tablespoons of the lemon juice (reserve the remaining 1 tablespoon), the olive oil (2 T), half of the water (1/8 cup or 2 T), and the sea salt (1/2 tsp, or start with less if you prefer). Process 30–60 seconds more until the mixture is well blended.
- Check the hummus for thickness. If it’s too thick, add the remaining water (up to the remaining 2 tablespoons) a little at a time and process briefly after each addition until you reach your desired consistency.
- Taste and, if desired, add the reserved 1 tablespoon lemon juice and/or more salt; process a few seconds to incorporate any additions.
- Transfer the hummus to a serving bowl, drizzle a little extra olive oil on top if you like, and sprinkle sumac over the finished hummus if using.
- Store any leftover hummus in a container with a tight lid in the refrigerator; it will keep for several weeks.
- Serve with pita, lavash, crackers, or fresh vegetables (celery, carrots, red pepper strips).
Equipment
- Colander
- Food Processor
- Serving bowl
- container with tight lid
Notes
Reserve 1 tablespoon of the lemon juice when adding ingredients; use it later to adjust flavor if desired.