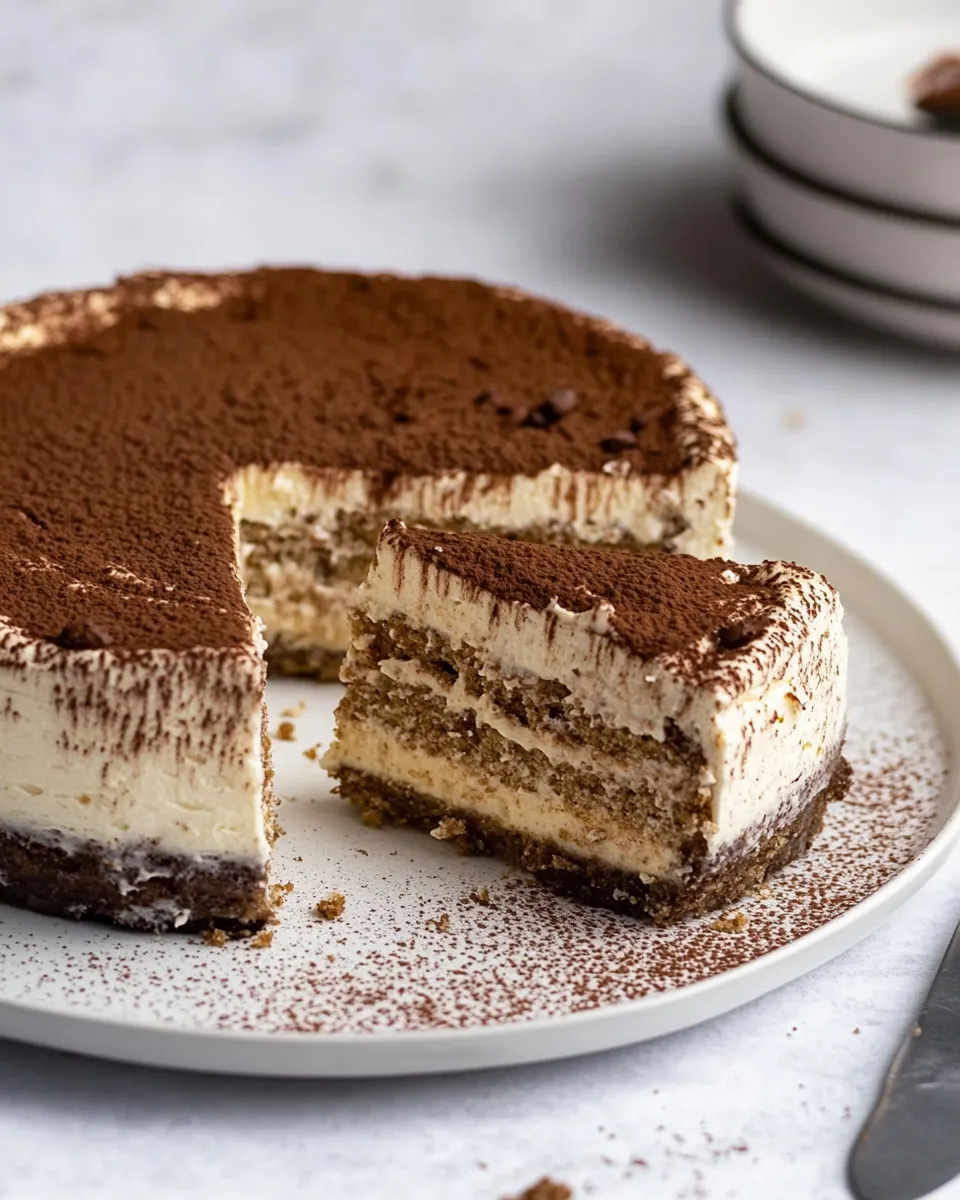
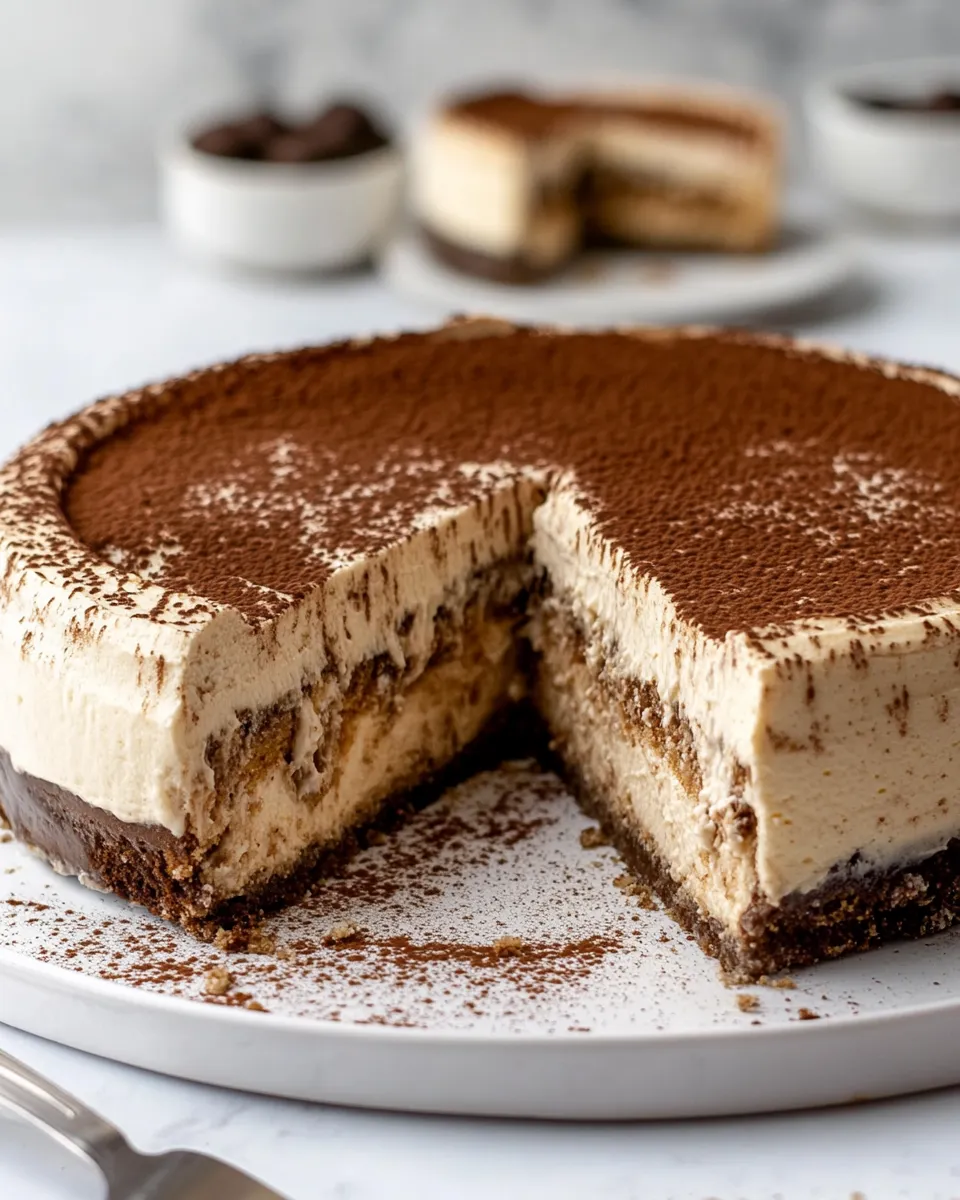
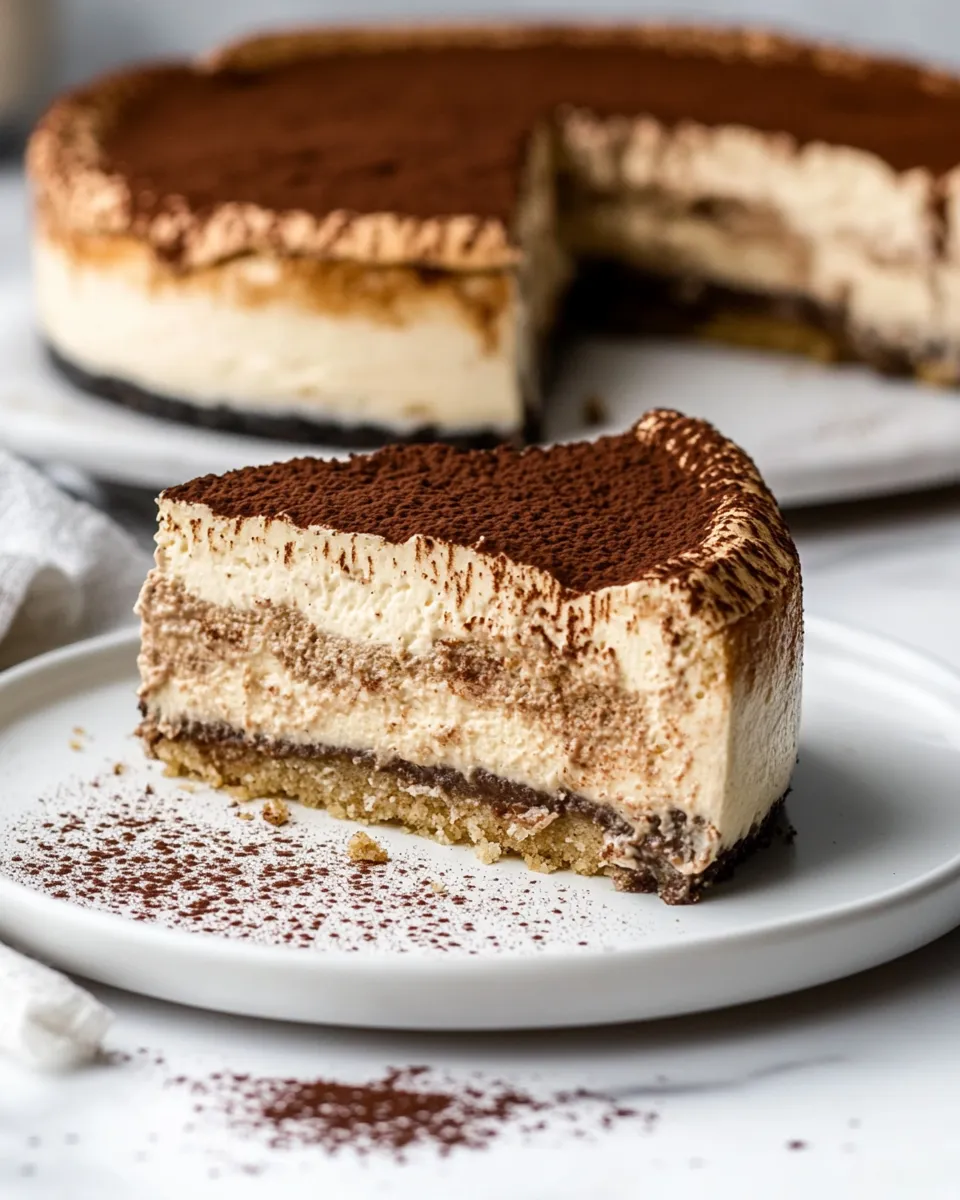
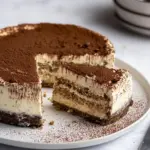
I love recipes that bridge two classics. This Tiramisu Cheesecake does exactly that: the creamy, tangy structure of a baked cheesecake with the coffee-scented layers and ladyfinger texture of tiramisu. It’s impressive to serve, forgiving in technique, and deliciously balanced between richness and bright coffee notes.
You’ll find this cake makes a great centerpiece for dinner parties or holiday tables because you can assemble it ahead and finish it just before guests arrive. The steps are straightforward, and the water-bath bake keeps the texture silky instead of cracked and dry.
Below I’ll walk you through what goes into the cake, take you step by step through the build, and share practical tips that make the process smoother. Read through once, then follow the steps—this is one you can absolutely nail on your first try.
What Goes Into Tiramisu Cheesecake

Ingredients
- 30 vanilla wafer cookies — Ground into the crust; they give sweetness and a tender crumb base.
- 6 lady fingers — Pulsed into crumbs with the wafers to add lightness and a hint of sponge texture to the crust.
- ¼ cup unsalted butter, melted — Binds the crumbs and firms the crust when baked.
- 3 (8-ounce) packages cream cheese, softened — The primary structure and tang of the cheesecake filling.
- 8 ounces mascarpone cheese, room temperature — Adds silkiness and the classic tiramisu flavor profile when combined with cream cheese.
- 1 cup granulated sugar — Sweetens the filling and helps create a smooth texture.
- ¼ cup strong brewed espresso — Adds concentrated coffee flavor to the batter.
- ¼ cup Kahlua (may be substituted for additional espresso if choosing not to use alcohol) — Provides depth and a boozy coffee note; optional per taste.
- 2 teaspoons vanilla extract — Rounds the flavors and complements the coffee.
- 4 large eggs, room temperature — Give structure and richness; room temperature eggs incorporate more evenly.
- 12–14 ladyfingers — The layer that gets a quick dip in coffee and softens inside the cake for tiramisu texture.
- ¾ cup brewed coffee — Used to quickly dip the ladyfingers so they carry coffee flavor without falling apart.
- 8 ounces mascarpone, cold — For the whipped mascarpone topping; start cold so it whips up light and stable.
- 1 ¼ cup heavy cream, chilled — Whipped into the mascarpone to make a fluffy topping.
- ½ cup powdered sugar — Sweetens the whipped topping and stabilizes it.
- ½ teaspoon vanilla extract — A small flavor lift in the topping.
Build Tiramisu Cheesecake Step by Step
- Preheat oven to 325°F. Spray the sides of a 10-inch springform pan with cooking spray and set the pan aside.
- In a food processor, pulse 30 vanilla wafer cookies and 6 ladyfingers until they form fine crumbs. Add 1/4 cup melted unsalted butter and pulse until the crumbs resemble damp sand.
- Pour the crumb mixture into the prepared springform pan. Press the crumbs evenly across the bottom (and slightly up the sides if desired) using the bottom of a flat glass or measuring cup. Bake the crust for 8 minutes. Remove from the oven and let the crust cool completely.
- In the bowl of a stand mixer fitted with the paddle attachment, beat 3 (8-ounce) packages cream cheese (softened) on medium-high speed for about 1 minute. Scrape down the sides and bottom of the bowl and beat 30 seconds more.
- Add 8 ounces mascarpone (room temperature) and 1 cup granulated sugar to the cream cheese. Mix on medium-low speed until just combined. Scrape the bowl and mix another 30 seconds.
- Add 4 large eggs (room temperature) and beat on low speed until combined, about 30 seconds to 1 minute. Scrape the bowl again.
- Add 1/4 cup strong brewed espresso, 1/4 cup Kahlua (or an additional 1/4 cup espresso if not using alcohol), and 2 teaspoons vanilla extract. Beat until just combined; the batter should be smooth and fairly runny.
- Wrap the outside of the springform pan with four sheets of 18-inch heavy-duty aluminum foil to seal it against water. Place the wrapped pan in a deep roasting pan or a baking pan with sides at least 2 inches tall.
- Pour half of the cheesecake batter into the springform pan and spread to an even layer.
- Quickly dip 12–14 ladyfingers, one at a time, into 3/4 cup brewed coffee (do not soak; just a quick dip) and arrange them in a single layer across the cheesecake batter to mostly cover it.
- Pour the remaining half of the cheesecake batter over the layer of dipped ladyfingers and smooth the top.
- Carefully pour very hot water into the roasting pan until it reaches about halfway up the sides of the wrapped springform pan to create a water bath.
- Bake on the center rack for 1 hour, then check the cheesecake by gently jiggling the pan (while it remains in the oven). The center should be set but still slightly jiggly—not liquid. If it still appears very liquid, bake an additional 15 minutes and check again.
- Once the cheesecake is set but still jiggly in the center, turn the oven off and leave the cheesecake inside with the oven door closed for about 1 hour to cool slowly.
- Remove the springform pan from the oven, unwrap and remove the foil, and transfer the cheesecake to the refrigerator. Chill for at least 6 hours (or overnight) until fully firm.
- Before removing the springform ring, run a knife around the edge to loosen the cake, then release and remove the ring. Return the cheesecake to the chilled base if needed.
- To make the topping, in a large bowl beat 8 ounces mascarpone (cold) until smooth. With the mixer running on low, slowly add 1 1/4 cups chilled heavy cream until incorporated and smooth. Scrape the sides and bottom of the bowl as needed.
- Add 1/2 cup powdered sugar and 1/2 teaspoon vanilla extract. Switch to the whisk attachment (or increase speed) and whip until the mixture is fluffy with medium-stiff peaks.
- Smooth or pipe the whipped mascarpone topping over the chilled cheesecake. Serve immediately after topping, or keep the finished cheesecake refrigerated until ready to serve.
Reasons to Love Tiramisu Cheesecake
This cake gives you the best of two worlds: dense, velvety cheesecake and the airy, coffee-softened ladyfingers of tiramisu. The filling balances cream cheese tang and mascarpone silkiness so it never tastes cloyingly sweet.
It’s make-ahead friendly. Bake the day before, chill overnight, and add the whipped mascarpone topping shortly before serving. The layered ladyfingers inside create pockets of tender, coffee-scented sponge that keep every bite interesting.
Finally, it’s showy without being finicky. The water bath and slow cool prevent cracks, and a simple pipe or spread of whipped mascarpone looks elegant with minimal effort.
Flavor-Forward Alternatives
Want to shift the profile without changing technique? Use the available espresso as your main coffee punch: swap the 3/4 cup brewed coffee dip for a slightly stronger brew if you prefer more coffee in each bite. If you’re skipping Kahlua, the recipe already allows an additional 1/4 cup espresso in its place—use that for deeper coffee intensity.
For a softer coffee note, shorten the dip time of the ladyfingers; for a bolder bite, give them the same quick dip but use stronger brew. Small adjustments like these change the experience without altering structure.
Setup & Equipment
- 10-inch springform pan — The recipe is written for this size; it yields the intended depth and bake time.
- Food processor — For quick, even crumb texture for the crust.
- Stand mixer with paddle and whisk attachments — Paddle for the filling and whisk for the topping to get optimal texture.
- Deep roasting pan or baking pan with 2″+ sides — Needed to create a stable water bath around the wrapped springform pan.
- Heavy-duty aluminum foil (18-inch sheets) — Wrap the pan tightly to prevent water from seeping in during the water bath bake.
- Flat-bottomed glass or measuring cup — For pressing the crust evenly.
Mistakes That Ruin Tiramisu Cheesecake
Overbaking is the most common problem. The center should be slightly jiggly when you check it; overbake and the cake will be dry and crumbly. Underbaking leaves it too runny to set properly even after chilling.
Soaking the ladyfingers is another killer—brief dips only. Ladyfingers that sit in coffee become soggy and fall apart in the batter, upsetting the texture.
Skipping the foil wrap or not sealing it well can let water into the pan during the water bath, which ruins the crust and can make the bottom soggy. Don’t rush the slow cooling step in the oven either; quick temperature changes increase the chance of cracks.
Variations by Season
In winter, serve slices with a flick of grated dark chocolate or a dusting of cocoa for visual drama and warmth. In spring and summer, a few fresh berries on the plate brighten the richness without overwhelming the coffee flavor.
Small seasonal touches at serving time let the core recipe stay intact while tailoring the experience to the moment.
Pro Tips & Notes
Ingredient & mixing tips
- Room temperature dairy and eggs — The cream cheese, mascarpone (for the batter), and eggs should be at room temperature so they combine smoothly and avoid lumps.
- Cold mascarpone for topping — Keep the mascarpone and heavy cream chilled before whipping so the topping reaches medium-stiff peaks without becoming grainy.
- Don’t overmix after adding eggs — Mix just until combined to avoid incorporating excess air, which can cause cracking or higher rise and fall.
Baking & assembly tips
- Seal the pan well — Wrap the outside with four sheets of heavy-duty foil as directed to protect against water intrusion.
- Water bath technique — Pour very hot water into the roasting pan carefully and slowly to avoid splashing into the wrapped springform pan.
- Slow cool in the oven — Leaving the cake in the turned-off oven for an hour helps prevent cracks and helps the center finish setting gradually.
Keep It Fresh: Storage Guide
Store the finished, topped cheesecake in the refrigerator, covered, to keep the whipped topping from absorbing other fridge odors. It keeps well for 3–4 days; textures mellow slightly each day but remain delicious.
If you need to freeze, freeze unfrosted: remove the ring, wrap the cake base tightly in plastic and then foil, and freeze for up to 1 month. Thaw overnight in the fridge before topping with the whipped mascarpone and serving.
Your Questions, Answered
Can I skip the alcohol? Yes. The recipe already allows substituting the 1/4 cup Kahlua with an additional 1/4 cup strong espresso, which keeps the coffee punch without booze.
How will I know when it’s done? Use the jiggle test: the center should be set but still slightly jiggly. If it’s liquid, bake another 15 minutes and check again.
Can I make it ahead? Absolutely. Bake, chill overnight, then add the whipped mascarpone topping the day you serve. It’s a great make-ahead dessert for entertaining.
Wrap-Up
This Tiramisu Cheesecake is a reliable, elegant dessert that rewards a little planning. Follow the order above, mind the quick dip of the ladyfingers, and respect the water bath and slow cool. You’ll get a glossy, crack-free cake with pockets of coffee-soaked ladyfingers and a light, fluffy mascarpone finish.
Make it for company or for yourself—either way, it’s worth the effort. If you make it, tell me how you adapted the coffee level or whether you used the Kahlua. I love hearing about tweaks that work in real kitchens.
Tiramisu Cheesecake
Ingredients
Ingredients
- 30 vanilla wafer cookies
- 6 lady fingers
- 1/4 cupunsalted buttermelted
- 3 8- ouncepackages cream cheese softened
- 8 ouncesmascarpone cheese room temperature
- 1 cupgranulated sugar
- 1/4 cupstrong brewed espresso
- 1/4 cupKahlua may be substituted for additional espresso if choosing not to use alcohol
- 2 teaspoonsvanilla extract
- 4 largeeggs room temperature
- 12-14 ladyfingers
- 3/4 cupbrewed coffee
- 8 ouncesmascarpone cold
- 1 1/4 cupheavy cream chilled
- 1/2 cuppowdered sugar
- 1/2 teaspoonvanilla extract
Instructions
Instructions
- Preheat oven to 325°F. Spray the sides of a 10-inch springform pan with cooking spray and set the pan aside.
- In a food processor, pulse 30 vanilla wafer cookies and 6 ladyfingers until they form fine crumbs. Add 1/4 cup melted unsalted butter and pulse until the crumbs resemble damp sand.
- Pour the crumb mixture into the prepared springform pan. Press the crumbs evenly across the bottom (and slightly up the sides if desired) using the bottom of a flat glass or measuring cup. Bake the crust for 8 minutes. Remove from the oven and let the crust cool completely.
- In the bowl of a stand mixer fitted with the paddle attachment, beat 3 (8-ounce) packages cream cheese (softened) on medium-high speed for about 1 minute. Scrape down the sides and bottom of the bowl and beat 30 seconds more.
- Add 8 ounces mascarpone (room temperature) and 1 cup granulated sugar to the cream cheese. Mix on medium-low speed until just combined. Scrape the bowl and mix another 30 seconds.
- Add 4 large eggs (room temperature) and beat on low speed until combined, about 30 seconds to 1 minute. Scrape the bowl again.
- Add 1/4 cup strong brewed espresso, 1/4 cup Kahlua (or an additional 1/4 cup espresso if not using alcohol), and 2 teaspoons vanilla extract. Beat until just combined; the batter should be smooth and fairly runny.
- Wrap the outside of the springform pan with four sheets of 18-inch heavy-duty aluminum foil to seal it against water. Place the wrapped pan in a deep roasting pan or a baking pan with sides at least 2 inches tall.
- Pour half of the cheesecake batter into the springform pan and spread to an even layer.
- Quickly dip 12–14 ladyfingers, one at a time, into 3/4 cup brewed coffee (do not soak; just a quick dip) and arrange them in a single layer across the cheesecake batter to mostly cover it.
- Pour the remaining half of the cheesecake batter over the layer of dipped ladyfingers and smooth the top.
- Carefully pour very hot water into the roasting pan until it reaches about halfway up the sides of the wrapped springform pan to create a water bath.
- Bake on the center rack for 1 hour, then check the cheesecake by gently jiggling the pan (while it remains in the oven). The center should be set but still slightly jiggly—not liquid. If it still appears very liquid, bake an additional 15 minutes and check again.
- Once the cheesecake is set but still jiggly in the center, turn the oven off and leave the cheesecake inside with the oven door closed for about 1 hour to cool slowly.
- Remove the springform pan from the oven, unwrap and remove the foil, and transfer the cheesecake to the refrigerator. Chill for at least 6 hours (or overnight) until fully firm.
- Before removing the springform ring, run a knife around the edge to loosen the cake, then release and remove the ring. Return the cheesecake to the chilled base if needed.
- To make the topping, in a large bowl beat 8 ounces mascarpone (cold) until smooth. With the mixer running on low, slowly add 1 1/4 cups chilled heavy cream until incorporated and smooth. Scrape the sides and bottom of the bowl as needed.
- Add 1/2 cup powdered sugar and 1/2 teaspoon vanilla extract. Switch to the whisk attachment (or increase speed) and whip until the mixture is fluffy with medium-stiff peaks.
- Smooth or pipe the whipped mascarpone topping over the chilled cheesecake. Serve immediately after topping, or keep the finished cheesecake refrigerated until ready to serve.
Equipment
- 10-inch springform pan
- Food Processor
- Stand mixer
- paddle attachment
- whisk attachment
- deep roasting pan
- Aluminum Foil
- Oven
- Mixing Bowl
- flat glass or measuring cup