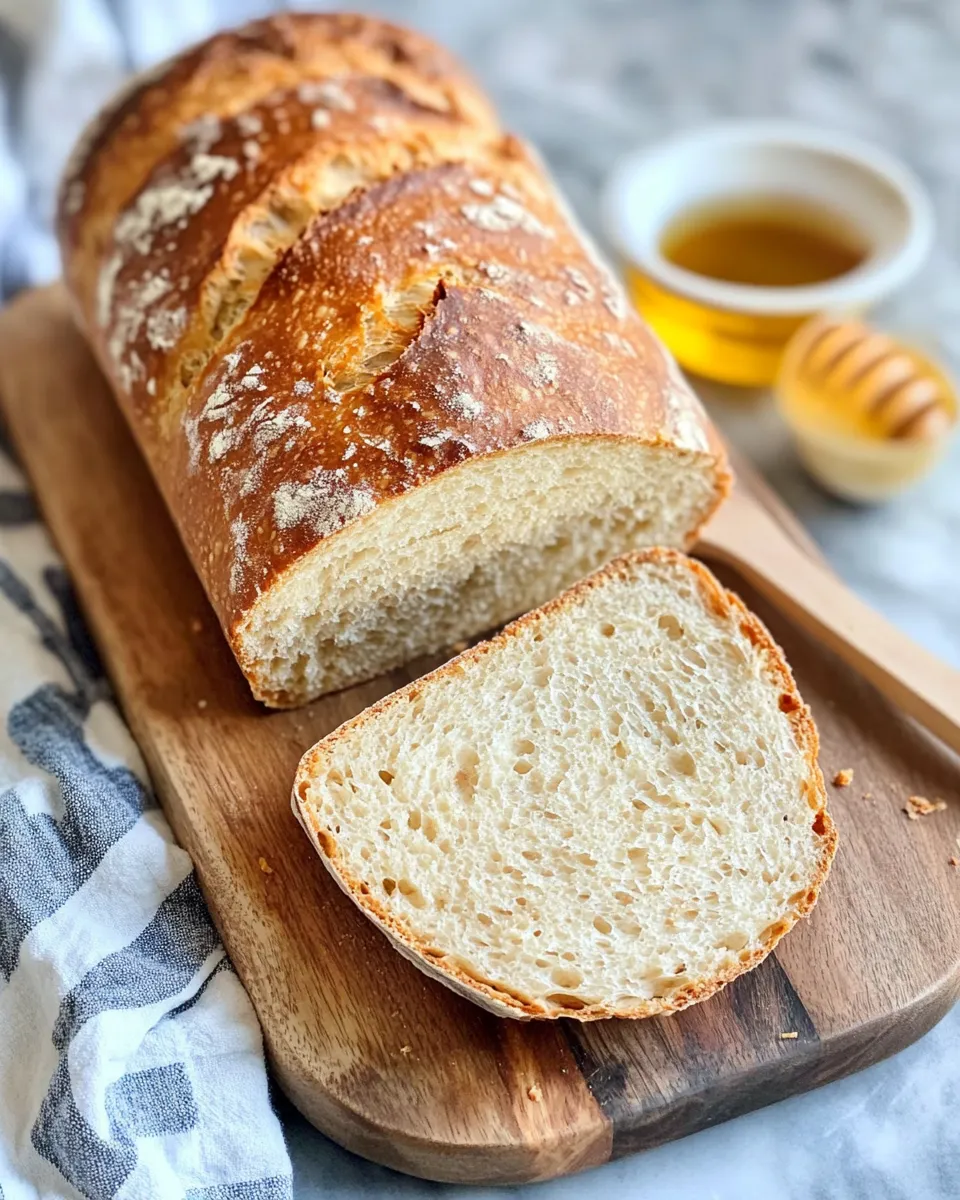
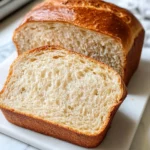
I bake a lot of bread, and this Whole Wheat Sandwich Bread is one I keep coming back to. It balances the nutty, wholesome flavor of whole wheat with enough strength and tenderness to make perfect slices for sandwiches, toast, and midweek snacking. There’s a rhythm to the process: a night for the biga, a night for the soaker, then a focused afternoon of assembly, folds, shaping and baking.
This recipe isn’t fussy, but it rewards attention to timing and feel. I’ll walk you through the ingredients, the step-by-step method straight from the source, and the practical tips that make the difference between a dense loaf and one with open, tender crumb. Bring patience and a digital thermometer if you have one—both pay off in reliably great loaves.
Ingredient Rundown
- 2cups(312g)bread flour — provides the protein structure needed for gluten development and is also used to dust the work surface.
- 1cup(240ml)warm water (100-110 degrees F) — hydrates the biga and activates the yeast; keep it in the warm range specified for best results.
- ½teaspoon(0.5teaspoon)instant or rapid-rise yeast — small amount for the preferment to develop flavor without overproofing quickly.
- 3cups(468g)whole-wheat flour, plus extra for kneading — gives the loaf its hearty character; extra for dusting/kneading helps control stickiness.
- ½cup(57g)wheat germ — concentrates whole-wheat flavor and adds a tender, slightly nutty finish.
- 2cups(480ml)whole milk — adds fat and softness to the soaker for a more tender crumb.
- ¼cup(85g)honey — sweetens gently and helps crust color and softness.
- 4teaspoonstable salt — balances flavor and strengthens gluten; measure carefully.
- 2tablespoonsinstant or rapid-rise yeast — used in the final dough for reliable bulk fermentation.
- 6tablespoonsunsalted butter, softened — enriches the dough for softness and improved shelf life.
- 2tablespoonsvegetable oil — contributes tenderness and helps with dough handling.
- Bread flour,for work surface — extra on the bench prevents sticking without over-flouring the dough.
How to Prepare (Whole Wheat Sandwich Bread)
- Make the biga (preferment): In a large bowl stir together 2 cups (312 g) bread flour, 1 cup (240 ml) warm water (100–110°F / 38–43°C) and ½ teaspoon instant/rapid‑rise yeast until a uniform mass forms, about 1 minute. Cover the bowl tightly with plastic wrap and let stand at room temperature 8 to 24 hours.
- Make the soaker: In a separate large bowl stir together 3 cups (468 g) whole‑wheat flour, ½ cup (57 g) wheat germ and 2 cups (480 ml) whole milk until a shaggy mass forms, about 1 minute. Lightly dust a work surface with the bread flour (from the ingredient list) and turn the soaker out onto it. Knead the soaker 2 to 3 minutes until it is smooth. Return the soaker to the bowl, cover tightly with plastic wrap and refrigerate 8 to 24 hours.
- Assemble the dough: Tear the chilled soaker into roughly 1‑inch pieces and place them in the bowl of a stand mixer fitted with the dough hook. Add the biga, ¼ cup (85 g) honey, 4 teaspoons table salt, 2 tablespoons instant/rapid‑rise yeast, 6 tablespoons softened unsalted butter and 2 tablespoons vegetable oil. Mix on low speed until a cohesive mass starts to form, about 2 minutes. Increase mixer speed to medium and knead until the dough is smooth and elastic, about 8 to 10 minutes.
- Brief hand knead and first rise: Turn the dough out onto a work surface dusted with bread flour and knead by hand 1 minute (use the extra whole‑wheat flour if the dough is very sticky). The dough will be soft and slack. Transfer it to a large clean lightly oiled bowl, cover tightly with plastic wrap and let rise at room temperature 45 minutes.
- Perform stretch‑and‑folds and second rise: Lightly flour your fingertips. Deflate the dough by gently pressing the center, then perform 8 folds in the bowl: lift one edge and fold it toward the center, rotate the bowl 90° and fold again — repeat until you have folded 8 times total. Cover the bowl and let the dough rise at room temperature until doubled in volume, about 45 minutes.
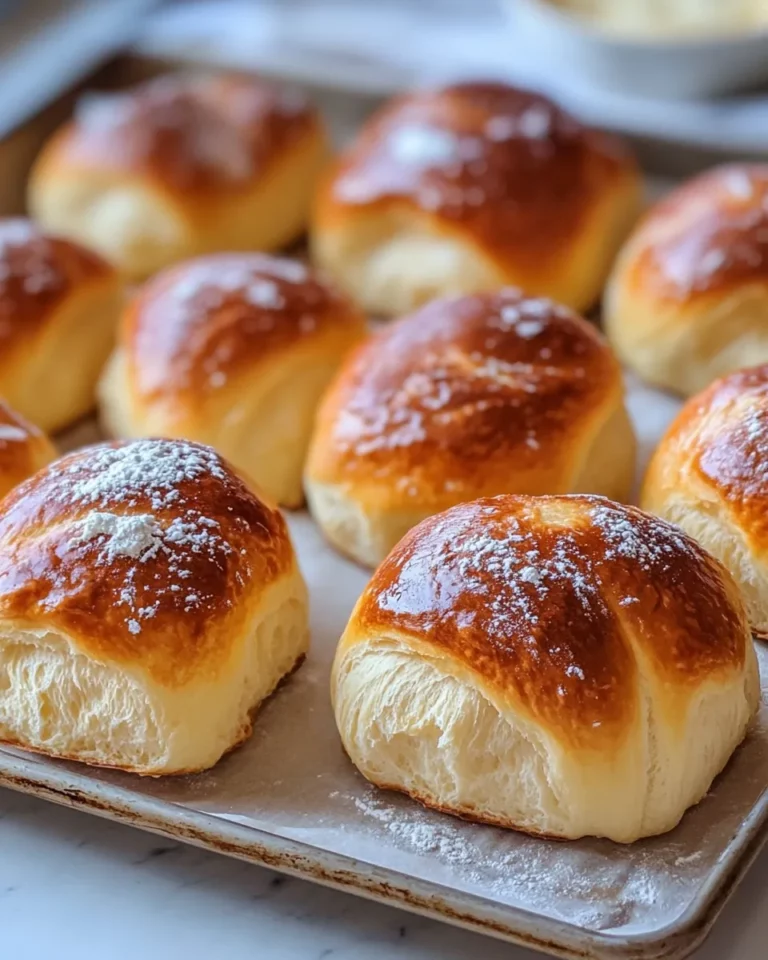
- Shape and final proof: Adjust oven racks to the middle and lowest positions and place a baking stone on the middle rack. Spray two 9×5‑inch loaf pans with nonstick spray. Turn the dough out onto a well‑floured work surface (use the bread flour for the surface) and divide into 2 equal pieces. Working with one piece at a time, pat it into an 8×17‑inch rectangle (short side nearest you). Roll the dough from the short side toward you into a tight cylinder, tucking the roll under itself as you go. Turn the loaf seam side up and pinch the seam closed, then place seam side down in a prepared loaf pan, pressing gently into the corners. Repeat with the second piece. Cover the loaves loosely with plastic wrap and proof at room temperature until almost doubled and the tops rise about 1 inch above the pan edge, 60 to 90 minutes.
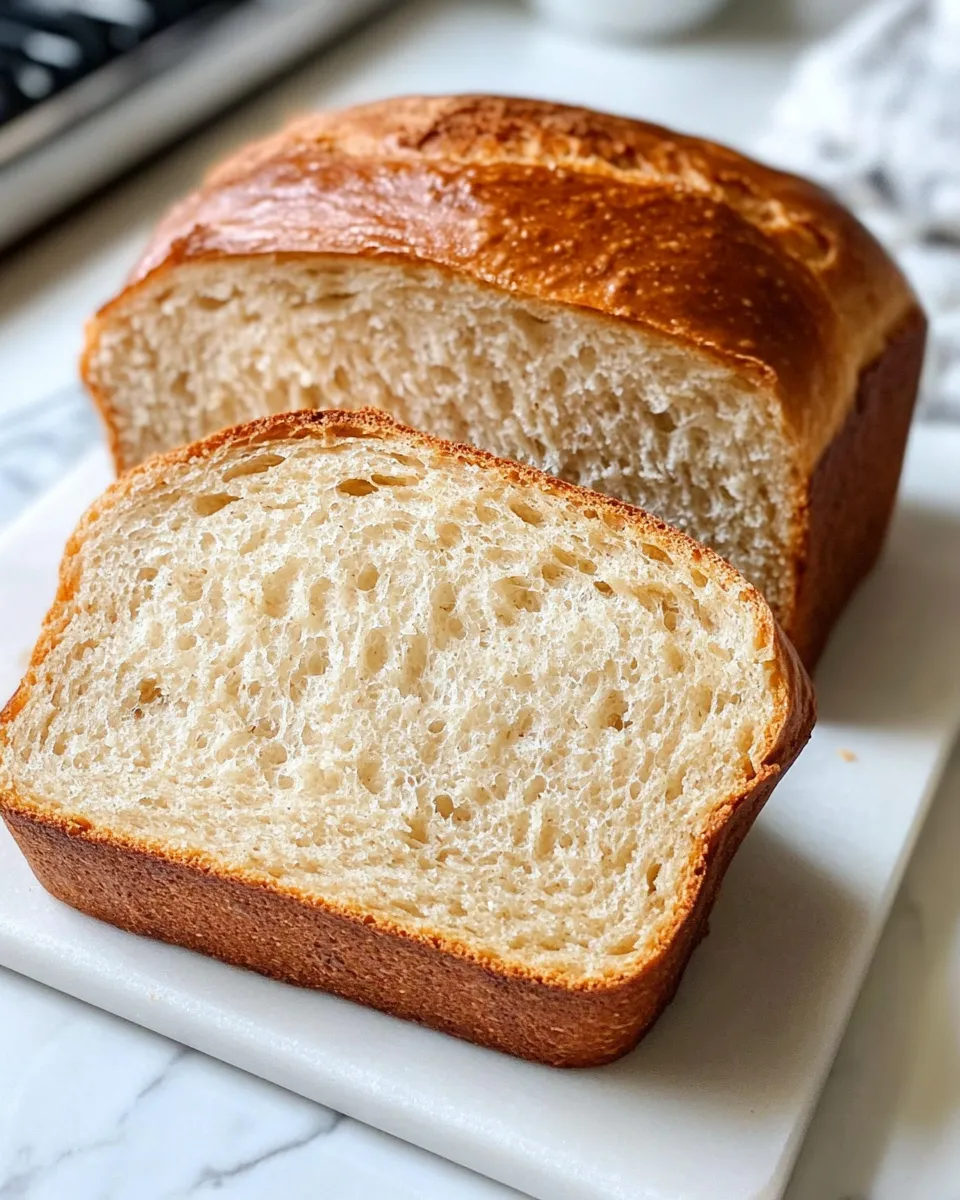
- Steam and bake: Place an empty metal baking pan (not glass) on the bottom oven rack. Bring 2 cups water to a boil on the stove. Just before baking, use a sharp serrated knife or single‑edge razor blade to make a single ¼‑inch‑deep slash lengthwise down the center of each loaf. Carefully pour the boiling water into the empty pan on the bottom rack to create steam, and immediately place the loaves on the preheated baking stone on the middle rack. Reduce the oven temperature to 350°F (177°C). Bake 40 to 50 minutes, rotating the loaves 180° and side to side halfway through, until the crust is dark brown and an instant‑read thermometer registers 200°F (93°C) in the center.
- Cool and store: Transfer the pans to a wire rack and let cool 5 minutes. Remove the loaves from the pans and return them to the wire rack; cool to room temperature, about 2 hours. Double‑wrap the cooled loaves in plastic wrap and store at room temperature up to 3 days, or wrap with an additional layer of aluminum foil and freeze up to 1 month.
Reasons to Love (Whole Wheat Sandwich Bread)
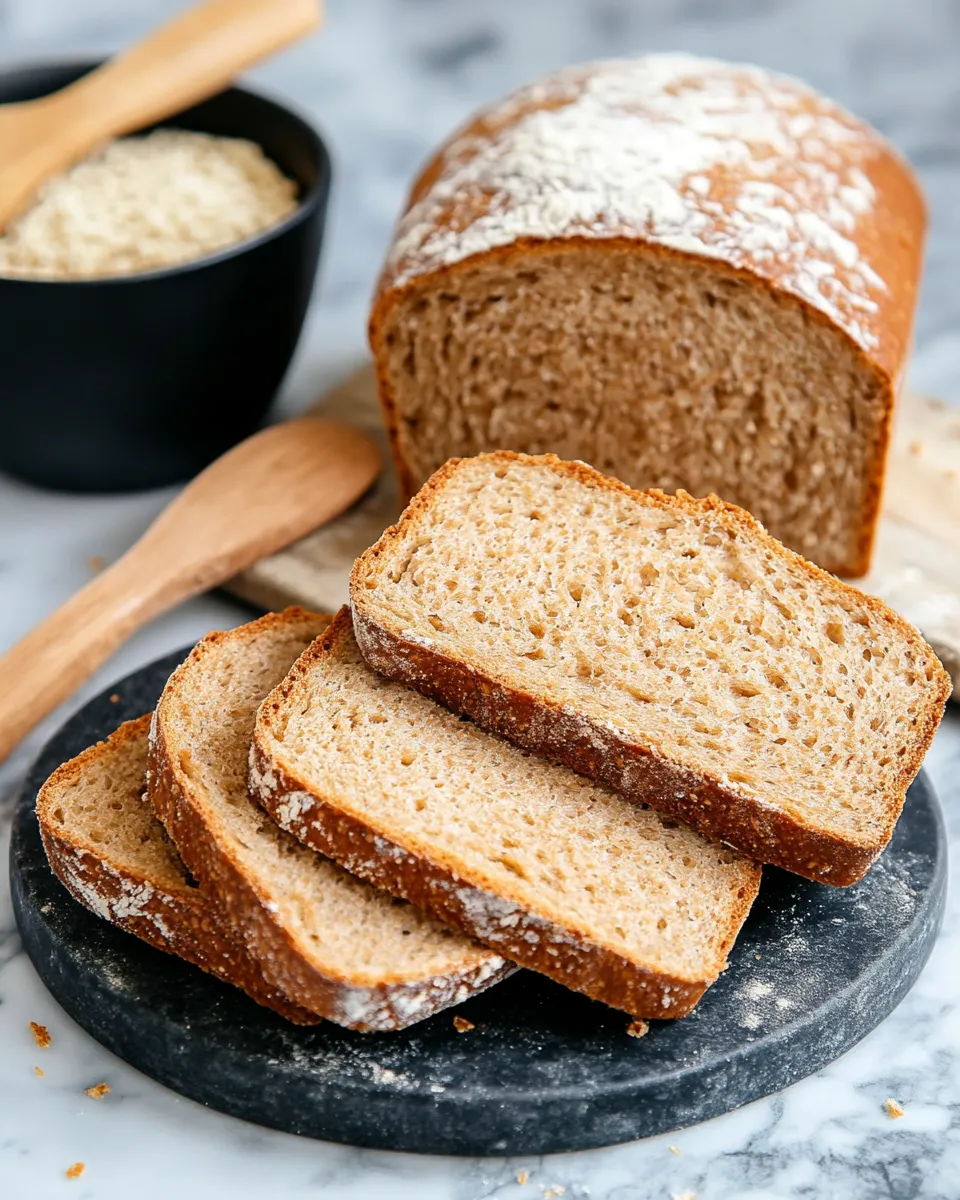
This loaf strikes a balance between nutrition and texture. The overnight biga and soaker build deep, complex flavor without any extra steps on the baking day. The milk, butter, and oil enrich the dough so you get a tender crumb rather than a heavy, dry loaf that whole-wheat can sometimes produce.
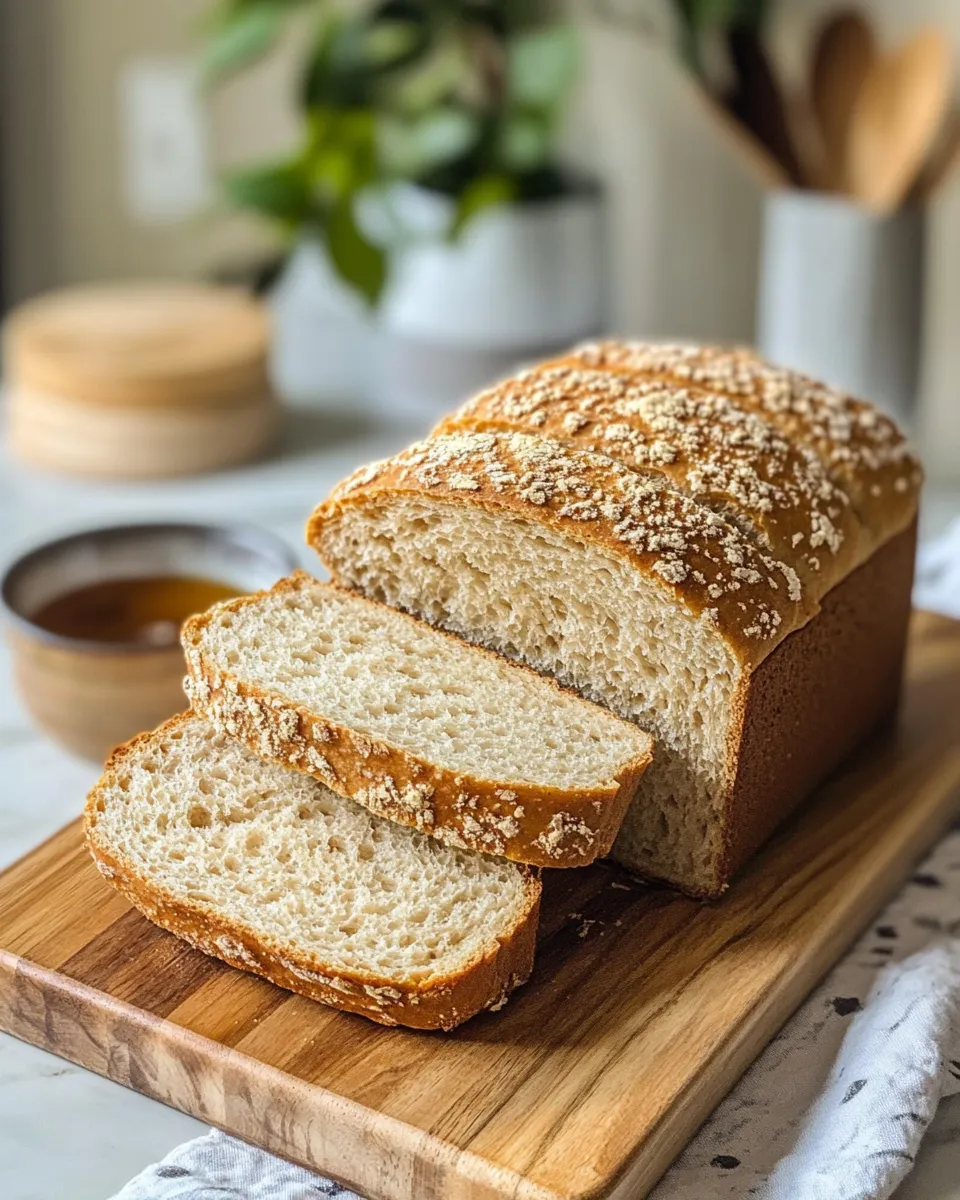
It slices cleanly for sandwiches and toasts with a fine, slightly open crumb that still holds up under spreads and fillings. The wheat germ and whole-wheat flour deliver that toasty, nutty character you want in a whole-grain loaf, while the preferments keep it from tasting flat or dense.
Flavor-Forward Alternatives
If you want to nudge the loaf’s profile without changing the recipe’s structure or precise ingredient list, work with technique and proportions already present. For example:
- Increase or decrease the ¼ cup honey to taste to shift sweetness level.
- Use the full-fat whole milk as written for a richer crumb, or use it slightly warmer to speed up fermentation on cool days.
- Finish the loaves after shaping by brushing the tops with a little softened butter (from the recipe) once they’re warm from the oven to soften the crust.
If you do decide to add new mix-ins or toppings—seeds, nuts, or dried fruit—add them sparingly and incorporate during the final mix stage so you don’t affect the dough’s gluten development and hydration dramatically.
Toolbox for This Recipe
- Large mixing bowls — for biga and soaker and the final dough.
- Stand mixer fitted with dough hook — speeds up kneading and ensures consistent gluten development.
- Digital thermometer — helpful for the biga water temperature and final internal bake temperature (200°F / 93°C).
- Baking stone and an empty metal pan for steam — the stone gives even heat; the pan creates steam to help oven spring.
- Two 9×5‑inch loaf pans — recipe is scaled for two loaves.
- Plastic wrap and a wire cooling rack — for proofing and cooling.
- Sharp serrated knife or razor blade — for scoring each loaf.
Easy-to-Miss Gotchas
- Timing the preferments: both the biga and soaker need 8–24 hours. Too short and you miss flavor; too long and they can over-acidify. Aim for about 12–18 hours if you’re unsure.
- Water temperature for the biga: keep it in the 100–110°F range. Cooler slows the prefement; hotter can kill the yeast.
- Sticky dough handling: the assembled dough will be soft and slack. Dust the surface, but avoid adding too much extra flour—use the extra whole‑wheat flour only if absolutely necessary.
- Steam pan must be metal, not glass. Pouring boiling water into glass pans risks thermal shock.
- Internal doneness: rely on the temperature target (200°F / 93°C) rather than just color—dark crust can build before the center is fully baked if the oven runs hot.
- Cooling time: resist the urge to slice hot loaves. The crumb finishes setting as it cools; slicing too early gives gummy texture.
In-Season Flavor Ideas
The loaf itself is versatile and pairs well with seasonal accompaniments. In autumn, toast a thick slice and top with warm preserves or spiced apple compote. In winter, use it for rich sandwiches with roasted vegetables or aged cheese. In spring and summer, keep slices simple—good butter and fresh tomatoes showcase the bread’s nutty flavor.
Notes on Ingredients
Bread flour provides the higher protein content necessary to develop a strong gluten network that holds the loaf together, especially important in a high whole-wheat formula. Whole-wheat flour and wheat germ bring flavor and micronutrients, but they also absorb more liquid; the long soaker softens bran flakes and gives the hydrated whole-wheat elements time to tenderize.
The two-stage yeast approach—small amount in the biga and more in the final dough—lets you harvest flavor from a slow preferment while still getting reliable rise during the main fermentation. Butter, oil and milk enrich the dough; they shorten gluten strands slightly and yield a softer, more tender crumb that makes for great sandwich slices.
Storing, Freezing & Reheating

Follow the recipe’s storage instructions for best texture retention. After the loaves cool completely to room temperature (about 2 hours), double‑wrap them in plastic wrap and store at room temperature up to 3 days. For longer storage, add a layer of aluminum foil over the plastic and freeze up to 1 month.
To reheat, thaw wrapped loaves in the foil at room temperature. For sliced pieces, toast directly from thawed or partially thawed; for whole loaves, unwrap and heat in a 300°F oven for 10–15 minutes to refresh the crust and interior without overbrowning.
FAQ
- Can I shorten the preferment times? You can reduce them slightly, but expect less developed flavor and aroma. The 8–24 hour window is there to build depth without risking over-fermentation.
- Do I have to use a stand mixer? No. The mixer makes the 8–10 minute knead easier, but you can knead by hand for longer—aim for the same smooth, elastic dough.
- What if my dough never doubles? Check room temperature—if it’s cool, the rise will slow. Slightly warmer proofing (not hot) speeds fermentation. Also confirm your yeast is fresh.
- Why use a baking stone? The stone provides steady radiant heat for even oven spring and crust development. A heavy sheet pan will work in a pinch, though results may vary.
- Can I use part white flour instead of all whole-wheat in the soaker? This exact method relies on the soaker’s whole-wheat bulk. Substituting white flour reduces whole-wheat character and will change hydration—proceed cautiously if you experiment.
That’s a Wrap
This Whole Wheat Sandwich Bread is one of those recipes that feels grown-up without being precious. The two-stage preferment method gives you real whole-wheat depth, while the enriched dough keeps slices soft and usable for everything from school sandwiches to elegant open-faced toast. Follow the timeline, pay attention to dough feel, and give the loaves the full cool-down time—they’ll reward you with great texture, flavor, and versatility.
Happy baking—save a slice for me. And if you try it, jot down any small adjustments you make; this formula takes well to gentle personalization and will become a staple once you dial it in for your kitchen.
Whole Wheat Sandwich Bread
Ingredients
Ingredients
- 2 cups 312 gbread flour
- 1 cup 240 mlwarm water (100-110 degrees F)
- 1/2 teaspoon 0.5 teaspooninstant or rapid-rise yeast
- 3 cups 468 gwhole-wheat flour, plus extra for kneading
- 1/2 cup 57 gwheat germ
- 2 cups 480 mlwhole milk
- 1/4 cup 85 ghoney
- 4 teaspoonstable salt
- 2 tablespoonsinstant or rapid-rise yeast
- 6 tablespoonsunsalted butter softened
- 2 tablespoonsvegetable oil
- Bread flour for work surface
Instructions
Instructions
- Make the biga (preferment): In a large bowl stir together 2 cups (312 g) bread flour, 1 cup (240 ml) warm water (100–110°F / 38–43°C) and ½ teaspoon instant/rapid‑rise yeast until a uniform mass forms, about 1 minute. Cover the bowl tightly with plastic wrap and let stand at room temperature 8 to 24 hours.
- Make the soaker: In a separate large bowl stir together 3 cups (468 g) whole‑wheat flour, ½ cup (57 g) wheat germ and 2 cups (480 ml) whole milk until a shaggy mass forms, about 1 minute. Lightly dust a work surface with the bread flour (from the ingredient list) and turn the soaker out onto it. Knead the soaker 2 to 3 minutes until it is smooth. Return the soaker to the bowl, cover tightly with plastic wrap and refrigerate 8 to 24 hours.
- Assemble the dough: Tear the chilled soaker into roughly 1‑inch pieces and place them in the bowl of a stand mixer fitted with the dough hook. Add the biga, ¼ cup (85 g) honey, 4 teaspoons table salt, 2 tablespoons instant/rapid‑rise yeast, 6 tablespoons softened unsalted butter and 2 tablespoons vegetable oil. Mix on low speed until a cohesive mass starts to form, about 2 minutes. Increase mixer speed to medium and knead until the dough is smooth and elastic, about 8 to 10 minutes.
- Brief hand knead and first rise: Turn the dough out onto a work surface dusted with bread flour and knead by hand 1 minute (use the extra whole‑wheat flour if the dough is very sticky). The dough will be soft and slack. Transfer it to a large clean lightly oiled bowl, cover tightly with plastic wrap and let rise at room temperature 45 minutes.
- Perform stretch‑and‑folds and second rise: Lightly flour your fingertips. Deflate the dough by gently pressing the center, then perform 8 folds in the bowl: lift one edge and fold it toward the center, rotate the bowl 90° and fold again — repeat until you have folded 8 times total. Cover the bowl and let the dough rise at room temperature until doubled in volume, about 45 minutes.
- Shape and final proof: Adjust oven racks to the middle and lowest positions and place a baking stone on the middle rack. Spray two 9×5‑inch loaf pans with nonstick spray. Turn the dough out onto a well‑floured work surface (use the bread flour for the surface) and divide into 2 equal pieces. Working with one piece at a time, pat it into an 8×17‑inch rectangle (short side nearest you). Roll the dough from the short side toward you into a tight cylinder, tucking the roll under itself as you go. Turn the loaf seam side up and pinch the seam closed, then place seam side down in a prepared loaf pan, pressing gently into the corners. Repeat with the second piece. Cover the loaves loosely with plastic wrap and proof at room temperature until almost doubled and the tops rise about 1 inch above the pan edge, 60 to 90 minutes.
- Steam and bake: Place an empty metal baking pan (not glass) on the bottom oven rack. Bring 2 cups water to a boil on the stove. Just before baking, use a sharp serrated knife or single‑edge razor blade to make a single ¼‑inch‑deep slash lengthwise down the center of each loaf. Carefully pour the boiling water into the empty pan on the bottom rack to create steam, and immediately place the loaves on the preheated baking stone on the middle rack. Reduce the oven temperature to 350°F (177°C). Bake 40 to 50 minutes, rotating the loaves 180° and side to side halfway through, until the crust is dark brown and an instant‑read thermometer registers 200°F (93°C) in the center.
- Cool and store: Transfer the pans to a wire rack and let cool 5 minutes. Remove the loaves from the pans and return them to the wire rack; cool to room temperature, about 2 hours. Double‑wrap the cooled loaves in plastic wrap and store at room temperature up to 3 days, or wrap with an additional layer of aluminum foil and freeze up to 1 month.
Equipment
- Large Bowl
- Plastic Wrap
- Stand Mixer with Dough Hook
- work surface
- baking stone
- two 9x5-inch loaf pans
- metal baking pan (for steam)
- serrated knife or razor blade
- Wire Rack
- stove
Notes
Nutritional values are based on one serving