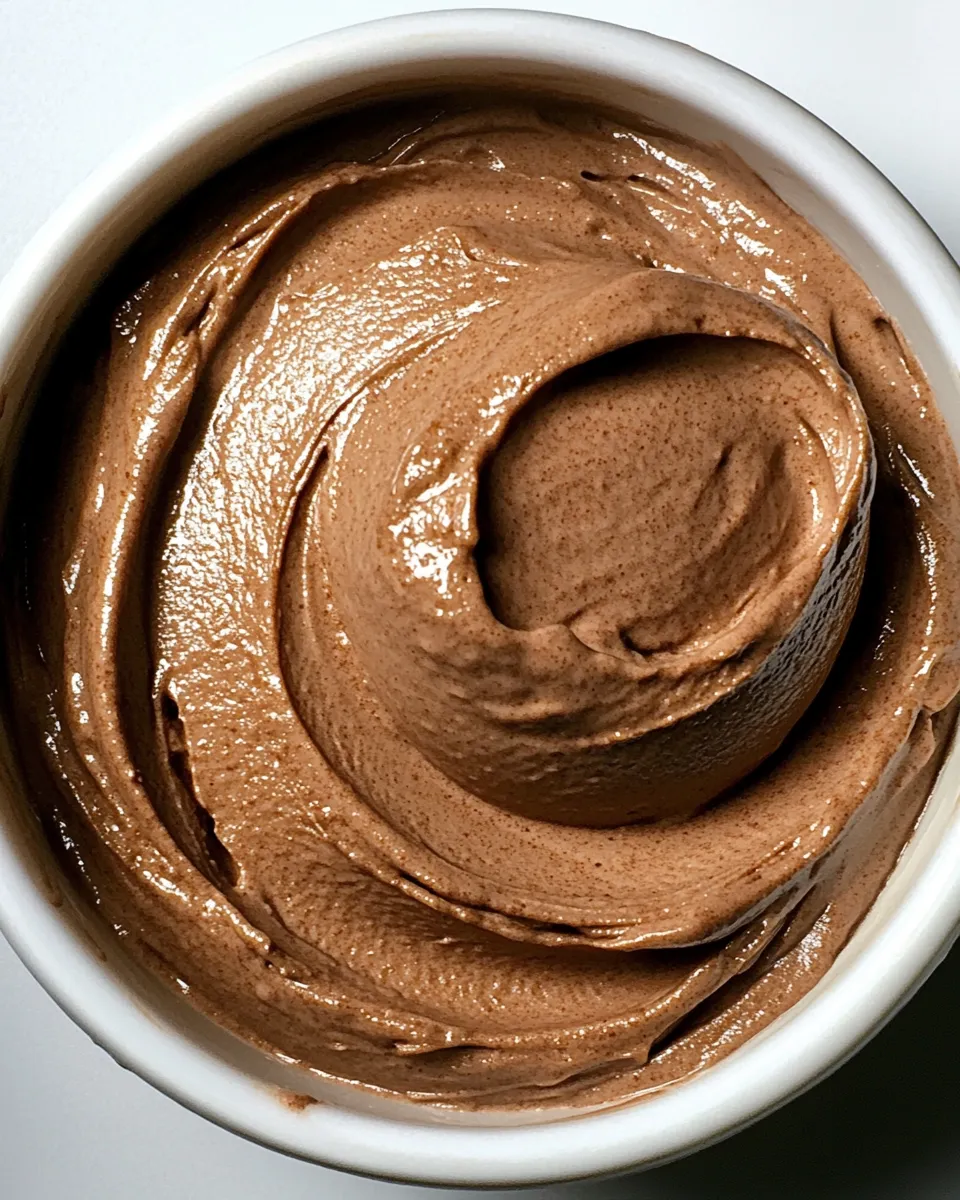
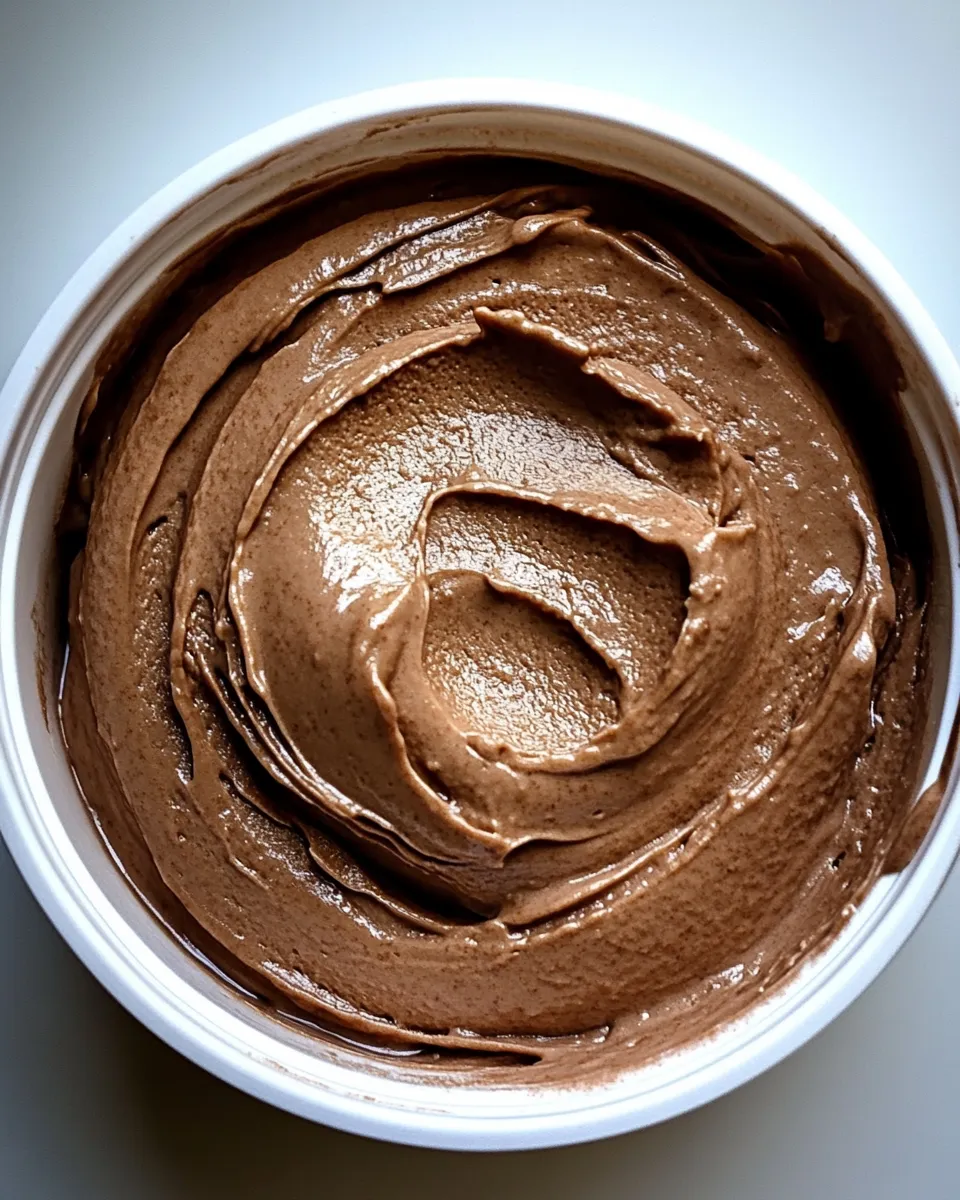
This chocolate mousse is one of those desserts that feels indulgent but fits into a low‑carb day with ease. It’s built from whipped cream or the thick cream from a chilled can of full‑fat coconut milk, cocoa powder, and a keto-friendly sweetener. The result is a rich, airy mousse that takes very little time and just a few ingredients.
I keep this recipe in my weeknight repertoire because it’s forgiving, fast, and versatile. Make it with dairy or go coconut for a dairy‑free option. A touch of instant coffee and a splash of vanilla deepen the chocolate without adding carbs.
Below you’ll find everything: what goes in the bowl, the exact step-by-step instructions, troubleshooting tips, storage guidance, and answers to the common questions I get when readers try it for the first time. No fluff—just practical notes so your mousse comes out perfect.
What’s in the Bowl
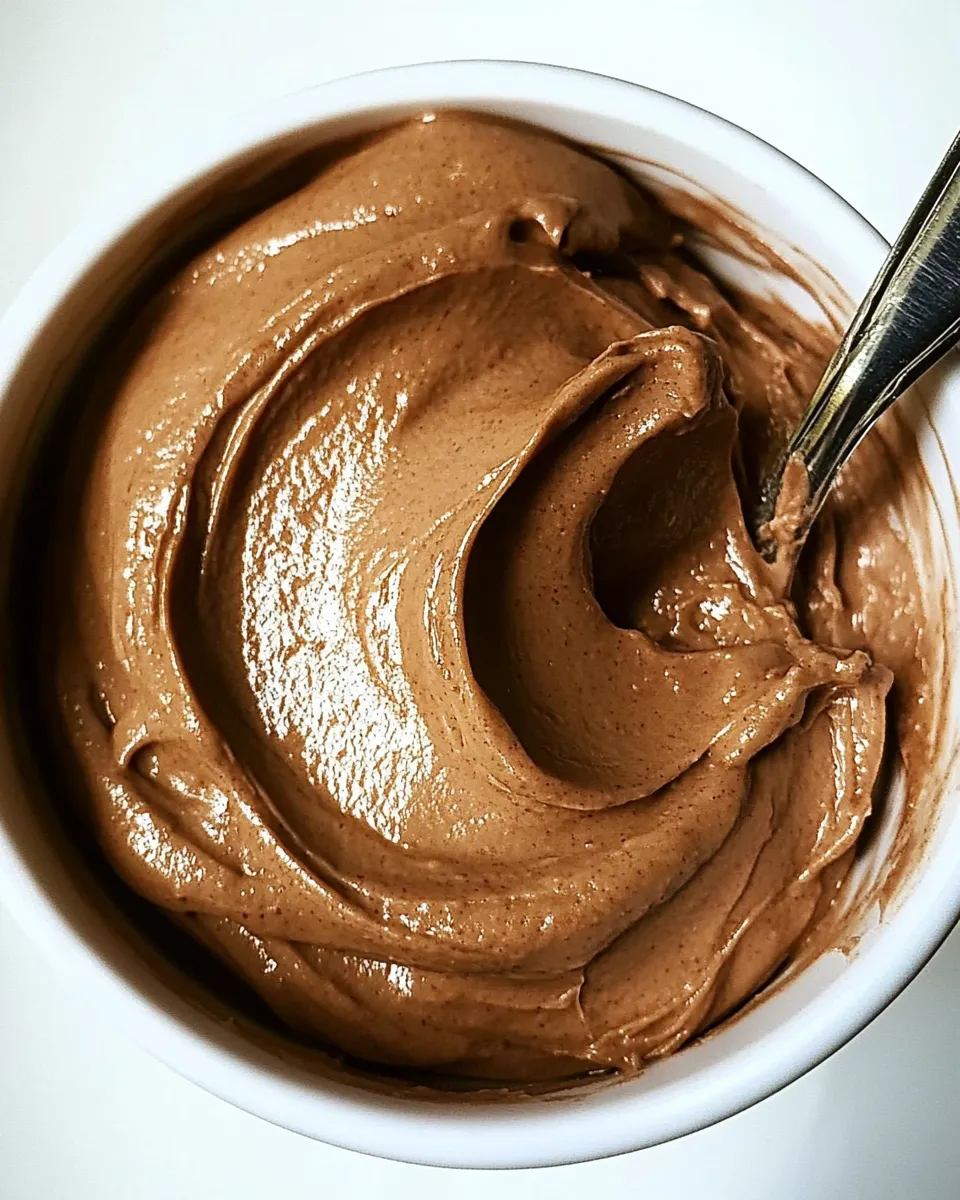
At its core this mousse is an emulsion of fat and air. The chilled heavy cream or the solid cream from full‑fat coconut milk traps air as it’s whipped; cocoa and sweetener fold in to make the flavor and the chocolate structure. The optional vanilla and instant coffee are small additions that punch up the chocolate without changing texture.
The choice between heavy cream and coconut milk changes the mouthfeel and flavor. Heavy cream gives a classic, silky French mousse texture and a neutral dairy base for the cocoa. Coconut cream makes it slightly denser and adds a mild coconut note—great if you want a dairy‑free dessert.
Ingredients
- 1 1/2 cups heavy cream OR 1 can full-fat coconut milk — Use very cold heavy cream for the lightest texture, or chill a full‑fat coconut milk can and scoop the solid cream for a dairy-free alternative.
- 1/4 cup unsweetened cocoa powder — Provides deep chocolate flavor; sift or whisk to avoid lumps.
- 1 tbsp dutch or additional regular cocoa powder — Dutch‑processed cocoa adds a smoother, less acidic chocolate note; use as labeled.
- 1/4 cup sweetener of choice (I used this monk fruit blend) — Pick your preferred keto sweetener; measure by volume as listed here.
- optional 1/2 tsp pure vanilla extract — Adds warmth and rounds the chocolate; optional but recommended for depth.
- optional 1/4 tsp instant coffee — Intensifies chocolate flavor without tasting like coffee; optional and used sparingly.
Keto Chocolate Mousse in Steps
- Chill a large mixing bowl and the beaters/whisk in the refrigerator for at least 15 minutes. Also chill your chosen liquid: keep heavy cream very cold in the fridge, or chill the unopened can of full‑fat coconut milk for at least 4 hours (overnight preferred) so the cream separates.
- If using coconut milk, open the chilled can and scoop only the thick solid cream from the top into the chilled bowl; discard or reserve the watery liquid. If using heavy cream, pour the cold heavy cream into the chilled bowl.
- In a separate small bowl, sift or whisk together the unsweetened cocoa powder, the Dutch (or additional) cocoa powder, the sweetener, and, if using, the instant coffee to break up any lumps.
- With a stand mixer or hand mixer on medium‑high, whip the cream until soft peaks form (peaks that gently fold over), about 2–4 minutes.
- Reduce the mixer speed to low and add the dry cocoa/sweetener mixture in two or three additions, scraping the bowl as needed so it incorporates evenly.
- Increase the mixer to medium‑high and whip until the mixture holds firm (stiff) peaks and has a smooth, mousse‑like texture. Do not overbeat.
- If using the optional vanilla extract, add it now and beat briefly on low speed just to combine.
- Spoon the mousse into serving dishes and chill in the refrigerator for at least 15–30 minutes if you want it firmer before serving.
Why I Love This Recipe
It hits the sweet spot of being both fast and decadent. From start to finish you can have bowls of mousse ready in under 20 minutes if you’ve already chilled the equipment and ingredients. For a last‑minute dessert, it’s reliable—no baking, no tempering, and very few moving parts.
It also scales well. Make a single serving in a ramekin or multiply the recipe for company. The texture is flexible: serve it soft right away or chilled for a firmer presentation. And because it’s built on cream and cocoa, the flavor is pure chocolate without unnecessary additives.
International Equivalents
Cocoa labeling and cream types vary internationally, so here are practical equivalents to look for where you shop:
- Cocoa powder: “Dutch‑processed” may be labeled differently (neutral, alkalized). If you can’t find Dutch, use two tablespoons of your regular unsweetened cocoa in place of the Dutch tablespoon—your flavor will be slightly more acidic but still excellent.
- Heavy cream: If your country sells “double cream” or “whipping cream,” choose the one with higher fat content closest to heavy cream for best whipping results.
- Full‑fat coconut milk: Some brands separate more clearly when chilled; buy a brand with minimal additives for the best solid cream layer.
Prep & Cook Tools
Keep the equipment simple. You’ll need:
- A large mixing bowl (metal or glass chills better than plastic).
- A stand mixer with whisk attachment or a hand mixer with beaters.
- A small bowl for the dry mixing (cocoa, sweetener, optional coffee).
- Spoons and serving dishes or ramekins.
Chilling the bowl and beaters is one of the few “prep” steps that directly affects texture. If you skip it, the cream will still whip but may take longer and produce a slightly different mouthfeel.
Troubles You Can Avoid
Common problems are straightforward and easy to fix.
- Runny mousse: This usually happens when the cream isn’t cold enough or if the coconut can wasn’t chilled long enough. Make sure heavy cream is very cold and coconut milk has had at least 4 hours in the fridge so the cream separates.
- Grainy texture: Lumpy cocoa or an overuse of powdered sweeteners that don’t dissolve can give a grainy mouthfeel. Sift or whisk the dry ingredients thoroughly and add them slowly.
- Overwhipped cream: Stop as soon as you reach stiff peaks. If you overdo it, the mixture can break and turn buttery. If that happens with heavy cream, you can sometimes gently fold in a little more cold cream to rescue it; with coconut cream it’s harder to recover.
- Not sweet enough: Taste after folding the dry mix in. Sweeteners vary in intensity—add a touch more if needed, but do it sparingly so you don’t oversweeten.
Allergy-Friendly Swaps
This recipe already includes the primary dairy vs dairy‑free option. Keep these swaps simple and within the ingredient list provided:
- Dairy-free: Use the chilled full‑fat coconut milk can and scoop the solid cream instead of heavy cream. The texture will be slightly different but still mousse‑like.
- Sweetener choices: The recipe specifies “sweetener of choice.” If you prefer monk fruit, that’s what I used; erythritol or stevia blends that measure like sugar will also work—measure by volume as listed.
- Skip coffee or vanilla: Both are optional; omit either if you have sensitivities. The mousse will still taste chocolatey and satisfying.
Flavor Logic
Why this combination works: cocoa powder provides the chocolate backbone while the additional tablespoon of Dutch or extra regular cocoa deepens the chocolate character and balances acidity. The cream supplies fat to carry flavor and produce that airy mouthfeel. Sweetener brings the sweetness without carbs. Vanilla rounds the edges; instant coffee amplifies cocoa without making the mousse taste like coffee.
Texture is about control: soft peaks let you fold in additions gently, and finishing at stiff peaks locks in the structure. Whipping too much collapses the emulsion; too little leaves it loose. That’s why the timing details matter.
How to Store & Reheat
Store the mousse in covered containers or airtight jars in the refrigerator for up to 3 days. If you made it with coconut cream, keep it chilled and consume within the same time frame. The mousse tastes best cold and slightly firm.
Do not attempt to reheat mousse—the texture will collapse. If you want a softer consistency after refrigeration, let a serving sit at room temperature for 10–15 minutes before serving rather than reheating.
Your Questions, Answered
Q: Can I double the recipe?
A: Yes. Whip in a larger chilled bowl and use a sturdy mixer. Add dry ingredients in increments as directed.
Q: Can I use liquid coconut milk?
A: Use only the solid cream from a chilled can of full‑fat coconut milk. The watery liquid will not whip properly and will give a runny result.
Q: My mousse is too sweet/not sweet enough—what now?
A: Sweetness is subjective and depends on your sweetener. Taste the cocoa/sweetener mix before adding to the whipped cream so you can adjust. If already mixed and too sweet, fold in a little more plain whipped cream or coconut cream to balance. If not sweet enough, add a small pinch more sweetener and fold gently.
Q: Do I have to chill the bowl and beaters?
A: No, but chilling speeds up whipping and helps the cream reach the correct texture. It’s a small extra step that pays off in consistency.
Time to Try It
Make sure your equipment and ingredients are chilled, measure the dry mix, and set a timer for the whipping stages so you stop at soft and then stiff peaks. Spoon into pretty bowls, chill briefly if you like it firmer, and enjoy a rich, low‑carb dessert that feels like a treat. If you try it, leave a note about which base you used—heavy cream or coconut—and whether you added vanilla or coffee. I love hearing what readers prefer.

Keto Chocolate Mousse
Ingredients
Ingredients
- 1 1/2 cupsheavy cream OR 1 can full-fat coconut milk
- 1/4 cupunsweetened cocoa powder
- 1 tbspdutch or additional regular cocoa powder
- 1/4 cupsweetener of choice I used thismonk fruit blend
- optional 1/2 tsp pure vanilla extract
- optional 1/4 tsp instant coffee
Instructions
Instructions
- Chill a large mixing bowl and the beaters/whisk in the refrigerator for at least 15 minutes. Also chill your chosen liquid: keep heavy cream very cold in the fridge, or chill the unopened can of full‑fat coconut milk for at least 4 hours (overnight preferred) so the cream separates.
- If using coconut milk, open the chilled can and scoop only the thick solid cream from the top into the chilled bowl; discard or reserve the watery liquid. If using heavy cream, pour the cold heavy cream into the chilled bowl.
- In a separate small bowl, sift or whisk together the unsweetened cocoa powder, the Dutch (or additional) cocoa powder, the sweetener, and, if using, the instant coffee to break up any lumps.
- With a stand mixer or hand mixer on medium‑high, whip the cream until soft peaks form (peaks that gently fold over), about 2–4 minutes.
- Reduce the mixer speed to low and add the dry cocoa/sweetener mixture in two or three additions, scraping the bowl as needed so it incorporates evenly.
- Increase the mixer to medium‑high and whip until the mixture holds firm (stiff) peaks and has a smooth, mousse‑like texture. Do not overbeat.
- If using the optional vanilla extract, add it now and beat briefly on low speed just to combine.
- Spoon the mousse into serving dishes and chill in the refrigerator for at least 15–30 minutes if you want it firmer before serving.
Equipment
- Mixing Bowl
- Stand mixer or hand mixer
- Whisk
- Sifter or fine-mesh sieve
Notes
Also be sure to try these popular
Keto Brownies
.