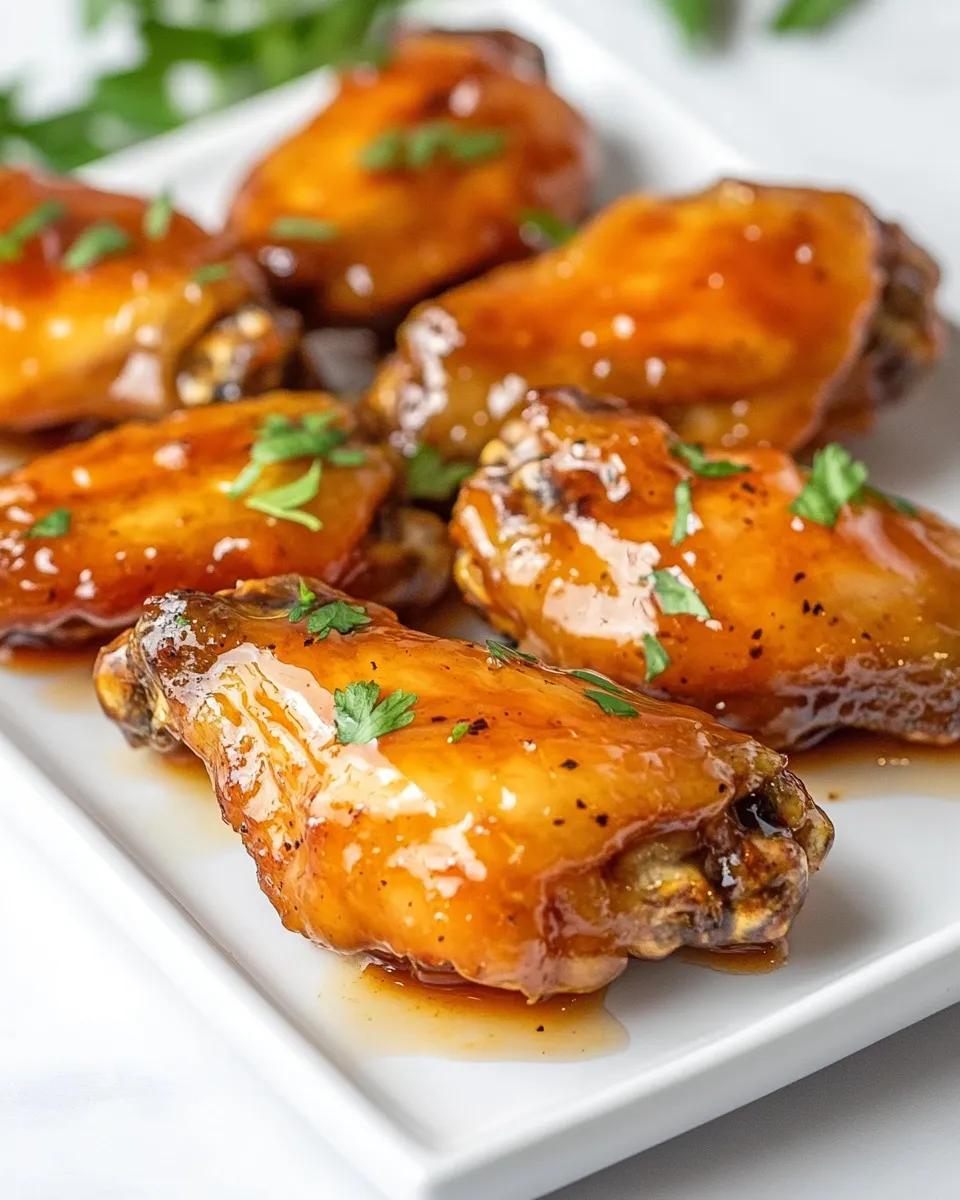
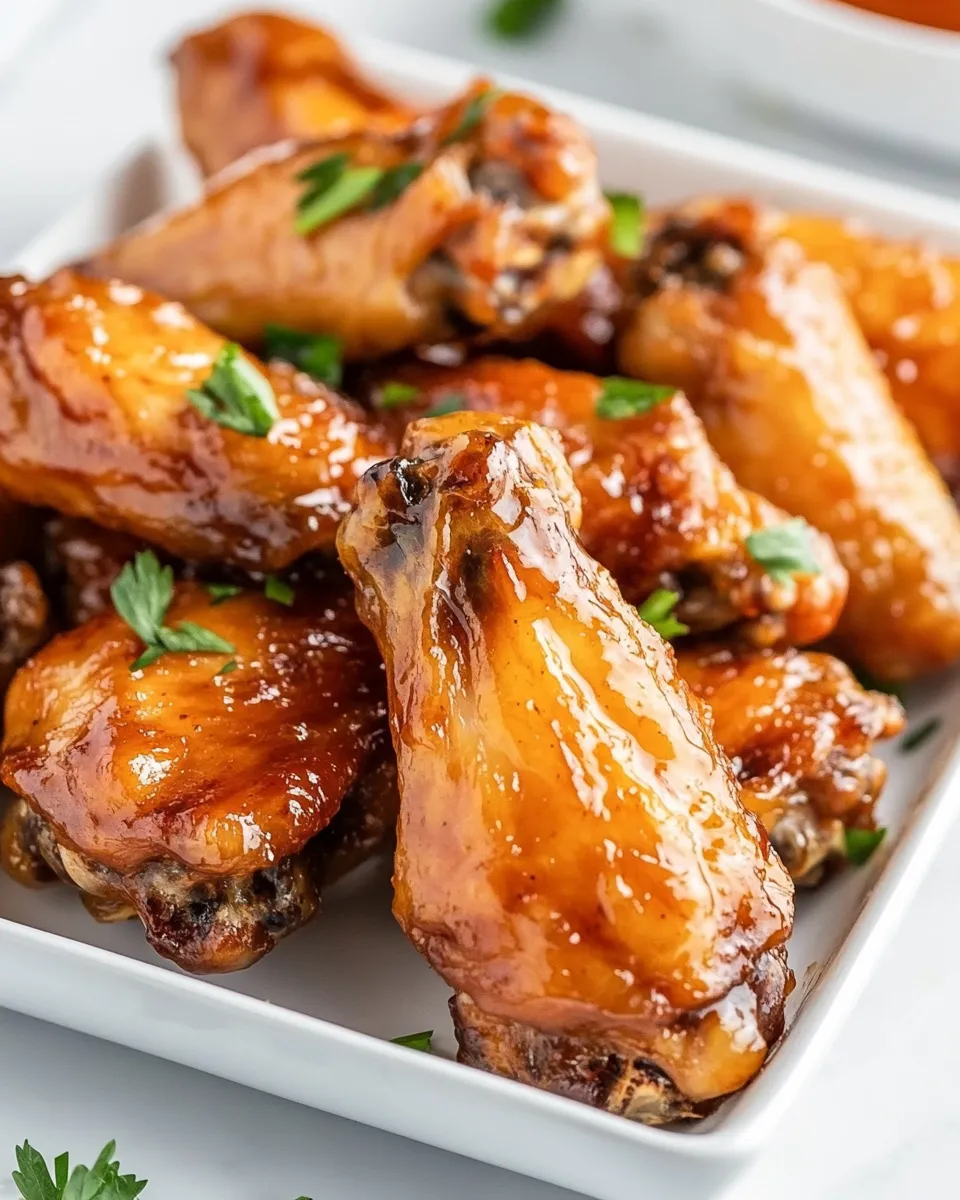
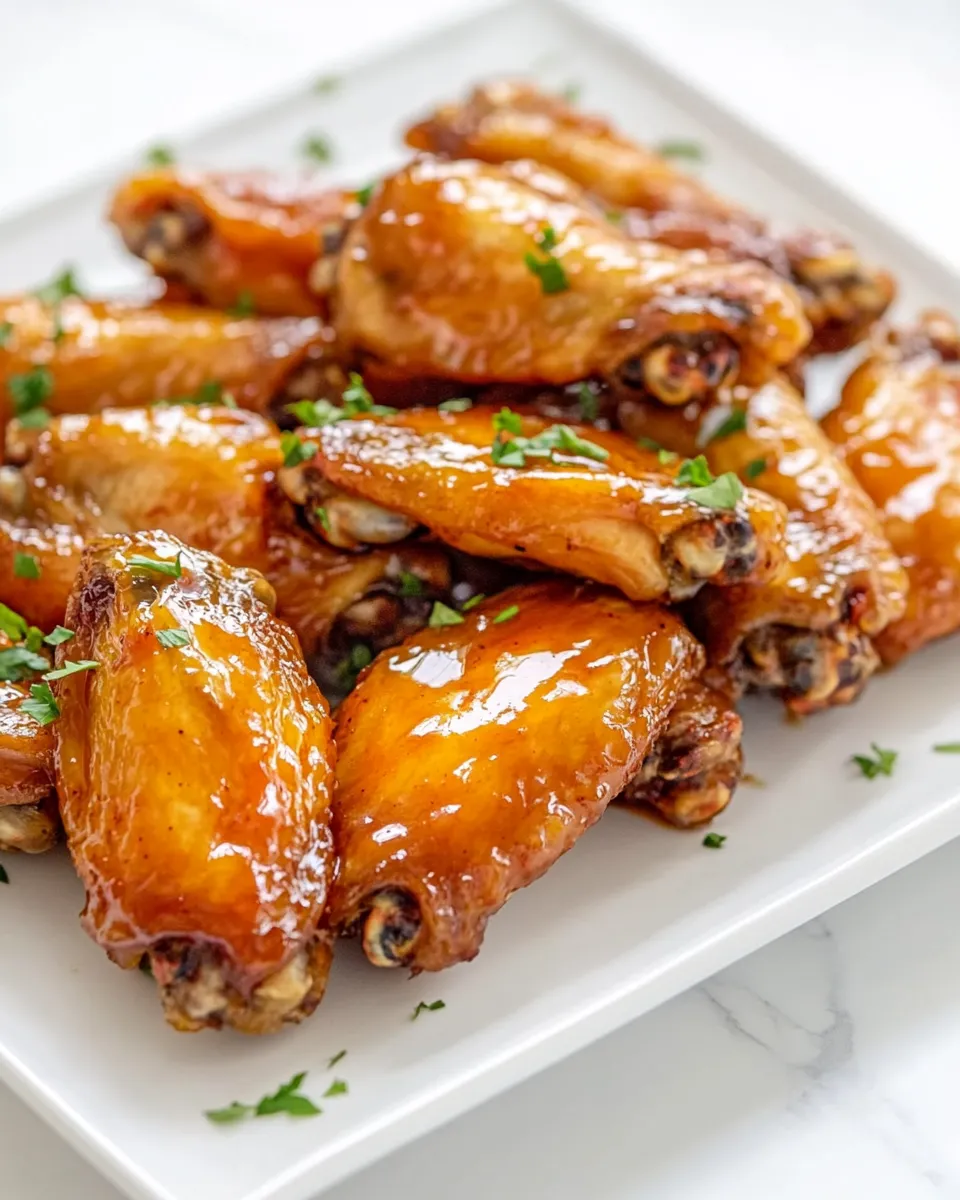
When a craving for sticky, sweet, and slightly spicy wings hits, this recipe answers it without drama. The sauce is straightforward — honey, soy, a pinch of cayenne and garlic — and the oven does most of the work, turning the glaze into a glossy, caramelized coating. These wings are all about bold flavor and forgiving technique.
I test recipes for the blog so you don’t have to babysit the pan. This one rewards a little patience (bake, baste, repeat) and gives you consistent results every time: crisp edges, tender meat, and a layered sauce that clings. It’s a recipe that works for weeknight dinners, game-day crowds, or a casual weekend batch.
Below you’ll find a clear ingredients list, step-by-step directions taken straight from the test kitchen playbook, troubleshooting notes, and simple serving ideas. If you want a dependable honey-glazed wing that feeds a crowd and keeps people coming back for more, read on.
What’s in the Bowl
In the mixing bowl you’ll pull together the glaze: honey for sweetness and shine, soy sauce for salt and depth, a little oil for mouthfeel, ketchup to anchor the pan sauce, fresh garlic for aromatics, and a touch of cayenne for heat. The combination reduces in the oven into a thick, sticky finish that clings to each wing.
The wings themselves are simply seasoned with salt and pepper before meeting the sauce. You’re relying on the oven and periodic basting to concentrate flavors and develop that caramelized exterior that makes these wings so addictive.
Ingredients
- 3 pounds whole chicken wings — gives you wing drumettes and flats once cut; ample amount for about 4–6 people as an appetizer.
- salt and pepper — basic seasoning to enhance the chicken; season generously for even flavor.
- 1 cup honey — the primary sweetener and glaze base; use a runny honey for easier mixing and coating.
- ½ cup soy sauce — provides savory, salty depth and helps balance the honey’s sweetness.
- 2 tablespoons vegetable or canola oil — adds gloss and helps the sauce coat the wings evenly.
- 2 tablespoons ketchup — contributes acidity, color, and a tomato backbone to the glaze.
- 3 medium garlic cloves, minced — fresh garlic gives a bright, savory lift; mince finely so it distributes through the sauce.
- ¼ teaspoon cayenne pepper — a small kick of heat; adjust to taste but keep the amount if you want the recipe as written.
Make Honey Glazed Chicken Wings: A Simple Method
- Preheat the oven to 350°F. Spray a 13×9-inch or larger casserole dish with nonstick spray.
- Cut the whole chicken wings into 3 sections each; discard the wing tip section. Pat the wings dry with paper towels and season all over with salt and pepper.
- In a medium bowl, whisk together 1 cup honey, ½ cup soy sauce, 2 tablespoons vegetable or canola oil, 2 tablespoons ketchup, the 3 minced garlic cloves, and ¼ teaspoon cayenne pepper until smooth.
- Place the seasoned wings in the prepared casserole (in as close to a single layer as practical). Pour the sauce over the wings and toss gently to coat evenly.
- Bake uncovered in the preheated oven until the wings are cooked through and the sauce is thickened and caramelized, about 45–60 minutes. Turn the wings and baste with the pan sauce every 15–20 minutes for even browning.
- If desired for extra caramelization, broil for the last 2–4 minutes—watch closely to prevent burning.
- Remove from the oven and let the wings rest about 5 minutes before serving.
Reasons to Love Honey Glazed Chicken Wings

These wings are dependable and crowd-pleasing. The glaze balances sweet, salty, and spicy notes without complicated steps or obscure ingredients. You get glossy, sticky wings with minimal active time — mix the sauce, toss, bake, baste, and eat.
They’re also flexible: the oven method scales cleanly (double the batch if you have a larger dish), and the simple ingredient list means you likely already have everything on hand. Plus, the leftovers reheat well if there are any.
If You’re Out Of…
If you run out of one of the sauce items, here are practical swaps that won’t derail the method. Keep quantities in mind: the glaze’s balance matters, so small tweaks are better than complete overhauls.
- If you’re out of ketchup: use a tablespoon of tomato paste diluted with a bit of water and a dash of vinegar to mimic the tang.
- If you don’t have soy sauce: a mix of Worcestershire sauce and a pinch of salt can provide umami and depth, but use it sparingly since it’s more assertive.
- If honey is low: combine half honey and half maple syrup or even agave to maintain sweetness and a sticky finish.
- If you only have skinless wings or very large wings: keep an eye on cook time. Skin helps with caramelization; without it, broil briefly at the end to encourage browning.
Gear Up: What to Grab
Nothing fancy is required. A 13×9-inch (or larger) casserole dish, a medium mixing bowl, a reliable whisk, and tongs or a spoon for turning and basting are the essentials. Nonstick spray keeps cleanup simple.
A wire rack set inside a baking sheet can be used if you prefer more airflow around the wings for extra crispiness, but following the recipe in a casserole dish will give you that glossy pan sauce that clings nicely.
Problems & Prevention
Sticky wings look great, but a couple of things can go sideways. Here’s how to avoid the common issues I see in the test kitchen.
- Problem: Sauce burning before wings are cooked through. Prevention: Bake at the specified temperature and baste, turning every 15–20 minutes so the sugars don’t stay in constant contact with high heat on one spot.
- Problem: Wings not caramelizing. Prevention: Make sure wings are dry before seasoning; excess moisture prevents browning. If needed, broil for the last 2–4 minutes but watch closely.
- Problem: Undersalted final dish (sweet but flat). Prevention: Season the wings before they meet the sauce, and rely on the soy sauce in the glaze to add savory balance.
- Problem: Sauce too thin. Prevention: Allow proper bake time; the sauce will thicken as moisture reduces. If you’re impatient, remove wings and simmer the pan sauce on the stovetop briefly to reduce, then pour back and toss.
Fresh Takes Through the Year
Spring
Add bright elements on the plate, like a quick slaw or a lemon wedge, to cut through the sweetness. The glaze plays well with herbs tossed on at the end — cilantro or parsley for freshness.
Summer
Serve these at a backyard cookout with grilled corn and chilled salads. For a smoky note, add a teaspoon of smoked paprika to the glaze or broil over coals for a few minutes for extra char.
Fall
When apples and squash are in season, a side of roasted sweet potatoes or an apple-fennel slaw pairs nicely. The warm spice of the glaze complements fall produce.
Winter
Turn these into a cozy game-night snack with a warm dipping sauce on the side (plain yogurt with a squeeze of lemon and salt works well) and roasted root vegetables to round out the plate.
Notes from the Test Kitchen
I tested several timings and the 45–60 minute window gives the most consistent result across varying wing sizes. Smaller wings tend to finish closer to 45 minutes, larger pieces toward 60. The key is periodic basting: it encourages even browning and keeps the glaze from pooling and burning.
Use fresh garlic minced finely; garlic powder changes the flavor profile and doesn’t distribute the same. The ketchup is a small but important ingredient — it stabilizes the sauce and adds a subtle acidity that balances the honey.
Finally, letting the wings rest 5 minutes after the oven lets the glaze set and keeps the sauce from running off the wings the moment they hit the plate.
Storage Pro Tips
Cool wings to room temperature (no longer than two hours at room temp), then store in an airtight container in the refrigerator for up to 3 days. To reheat without losing too much crisp, place on a baking sheet and reheat in a 350°F oven for 8–12 minutes, turning once, until warmed through. For quicker reheating, microwave briefly and then finish under the broiler for 1–2 minutes to revive the glaze.
If you want to freeze leftovers, arrange wings in a single layer on a tray and flash-freeze until firm, then transfer to a freezer bag. Freeze up to 2 months. Thaw overnight in the refrigerator and reheat in the oven as above.
Your Top Questions
Will the sauce burn? It can if left unattended under broil or if the pan sauce pools and gets high heat contact. Baste and rotate the wings every 15–20 minutes to prevent scorching.
Can I grill these instead? Yes. Toss wings in the sauce and cook over medium heat, flipping and basting frequently. Watch for flare-ups because the honey will caramelize quickly over direct flame.
Are the wings sticky when you serve them? Yes — that’s the point. The glaze sets into a lacquered coating. Resting for 5 minutes helps the sauce firm up so it doesn’t run off the wings immediately.
Bring It to the Table
Serve these Honey Glazed Chicken Wings straight from the baking dish or transfer to a platter with lemon wedges, a bowl of crunchy slaw, or pickles on the side to cut the richness. Hand out napkins, set out small plates for bones, and consider a cooling dip like plain Greek yogurt with a squeeze of lemon if heat needs taming.
They’re a reliable hit whether you’re feeding a family dinner or a crowd. The method is simple, the flavors are layered, and the result is wings that look as good as they taste — glossy, caramelized, and irresistible.

Honey Glazed Chicken Wings
Ingredients
Ingredients
- 3 poundswhole chicken wings
- salt and pepper
- 1 cuphoney
- 1/2 cupsoy sauce
- 2 tablespoonsvegetable or canola oil
- 2 tablespoonsketchup
- 3 mediumgarlic cloves minced
- 1/4 teaspooncayenne pepper
Instructions
Instructions
- Preheat the oven to 350°F. Spray a 13x9-inch or larger casserole dish with nonstick spray.
- Cut the whole chicken wings into 3 sections each; discard the wing tip section. Pat the wings dry with paper towels and season all over with salt and pepper.
- In a medium bowl, whisk together 1 cup honey, ½ cup soy sauce, 2 tablespoons vegetable or canola oil, 2 tablespoons ketchup, the 3 minced garlic cloves, and ¼ teaspoon cayenne pepper until smooth.
- Place the seasoned wings in the prepared casserole (in as close to a single layer as practical). Pour the sauce over the wings and toss gently to coat evenly.
- Bake uncovered in the preheated oven until the wings are cooked through and the sauce is thickened and caramelized, about 45–60 minutes. Turn the wings and baste with the pan sauce every 15–20 minutes for even browning.
- If desired for extra caramelization, broil for the last 2–4 minutes—watch closely to prevent burning.
- Remove from the oven and let the wings rest about 5 minutes before serving.
Equipment
- Oven
- 13x9-inch casserole dish
- nonstick spray