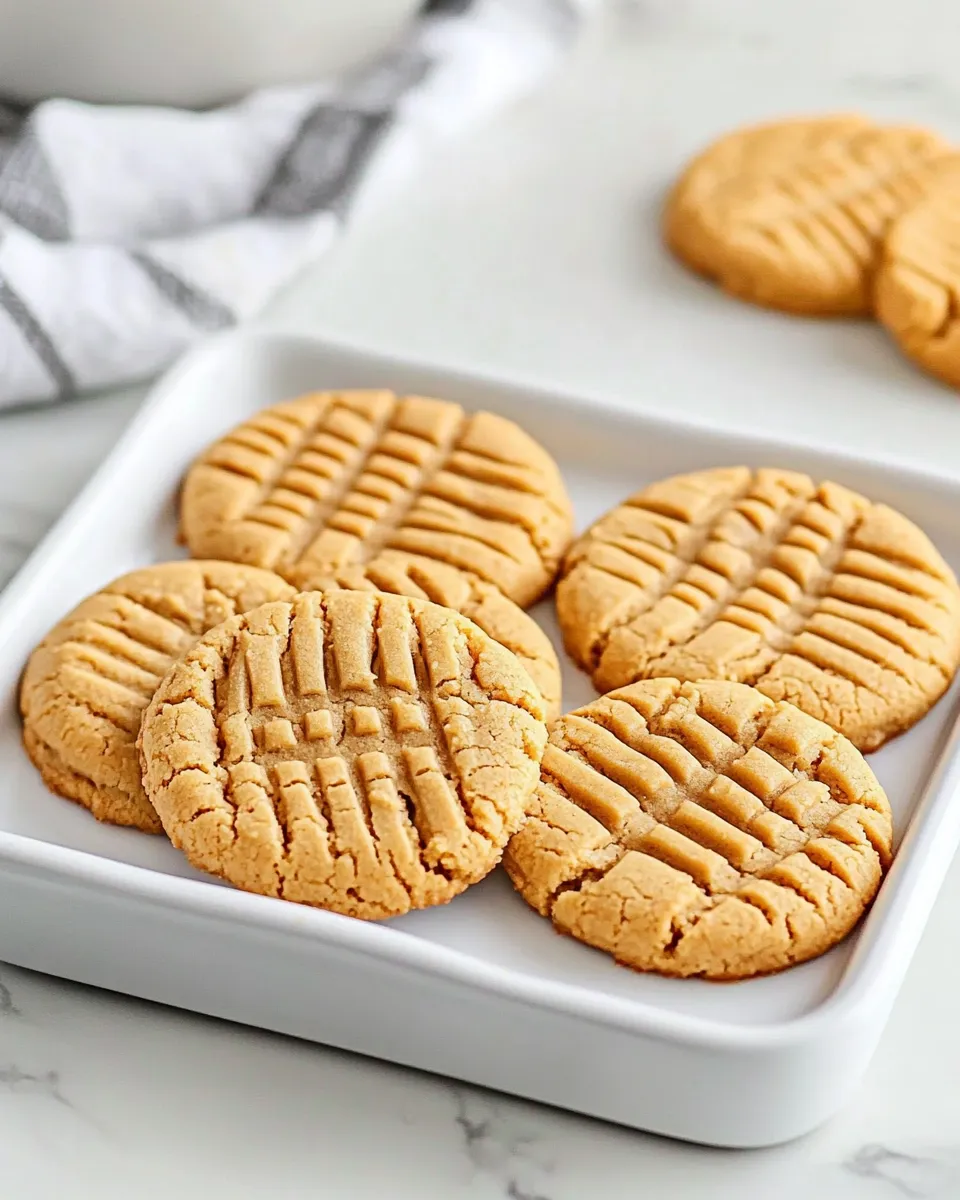
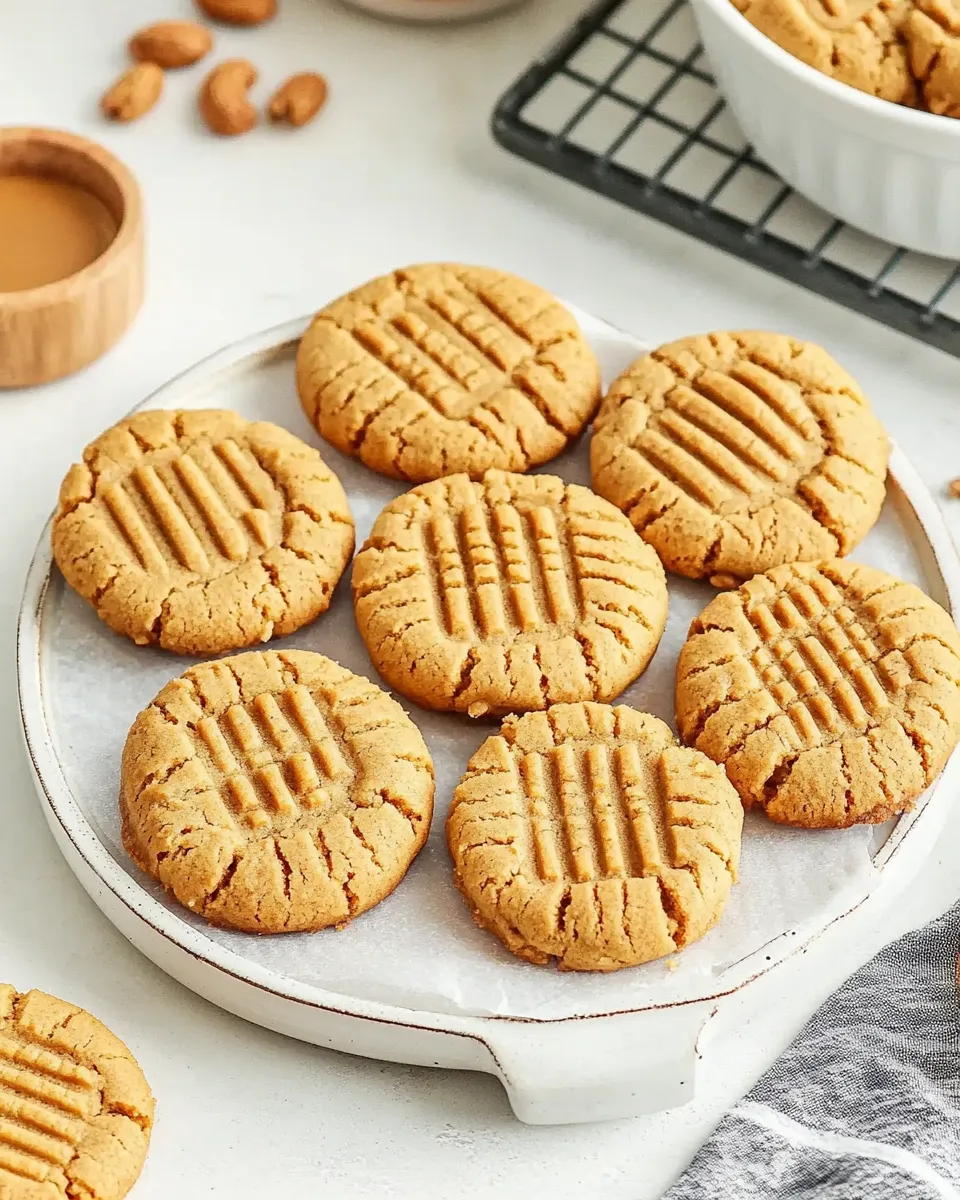
I bake a lot, and sometimes the simplest recipes are the ones I reach for over and over. These peanut butter cookies are exactly that: five ingredients, tiny fuss, and reliable results every time. They come together in minutes and still feel like a treat—soft in the middle with a slightly crisp edge, and that unmistakable peanut butter flavor front and center.
This recipe is the one I hand to friends who say they don’t bake. You’ll find it honest and straightforward: no creaming butter, no chilling dough for hours, no measuring dozens of things. If you have creamy peanut butter, an egg, a bit of sugar, baking soda, and vanilla, you can make a tray of warm cookies tonight.
Below I walk through what goes in, the exact method, small tweaks for allergies or weather, common problems and fixes, storage, and a few answers to reader questions. Practical, warm, and useful—just how I like to write about food.
What Goes Into 5-Ingredient Peanut Butter Cookies
Ingredients
- 1 cup creamy peanut butter — the base and main flavor; use a smooth, well-mixed jar for even texture.
- 1 egg — binds the dough and helps give structure while keeping the cookie tender.
- 2 Tbsp cane sugar, or other granulated sweetener — adds sweetness and a touch of crunch on the surface; adjust type, not amount, if needed.
- 1 tsp baking soda — gives a light lift and creates the characteristic crackle on top.
- 1 tsp vanilla extract — rounds and deepens the peanut flavor; don’t skip if you want a rich aroma.
Method: 5-Ingredient Peanut Butter Cookies
- Preheat the oven to 350°F (175°C). Line a baking sheet with parchment paper and set it aside.
- In a medium bowl combine 1 cup creamy peanut butter, 1 egg, 2 Tbsp cane sugar, 1 tsp baking soda, and 1 tsp vanilla extract. Using a hand mixer or a whisk, mix until fully combined—the dough will be thick and sticky.
- Scoop about 1 tablespoon of dough (or use a small cookie scoop) and roll into a ball. Place each ball on the prepared baking sheet, leaving about 2 inches of space between cookies.
- Use a fork to gently press a crisscross pattern into each ball, slightly flattening them. Smooth the edges with your finger if desired.
- Bake for 10 to 13 minutes, until the edges are set and the centers still look slightly soft (they will firm as they cool).
- Let the cookies cool on the baking sheet for about 5 minutes, then transfer them to a wire rack to cool completely.
Quick technique notes
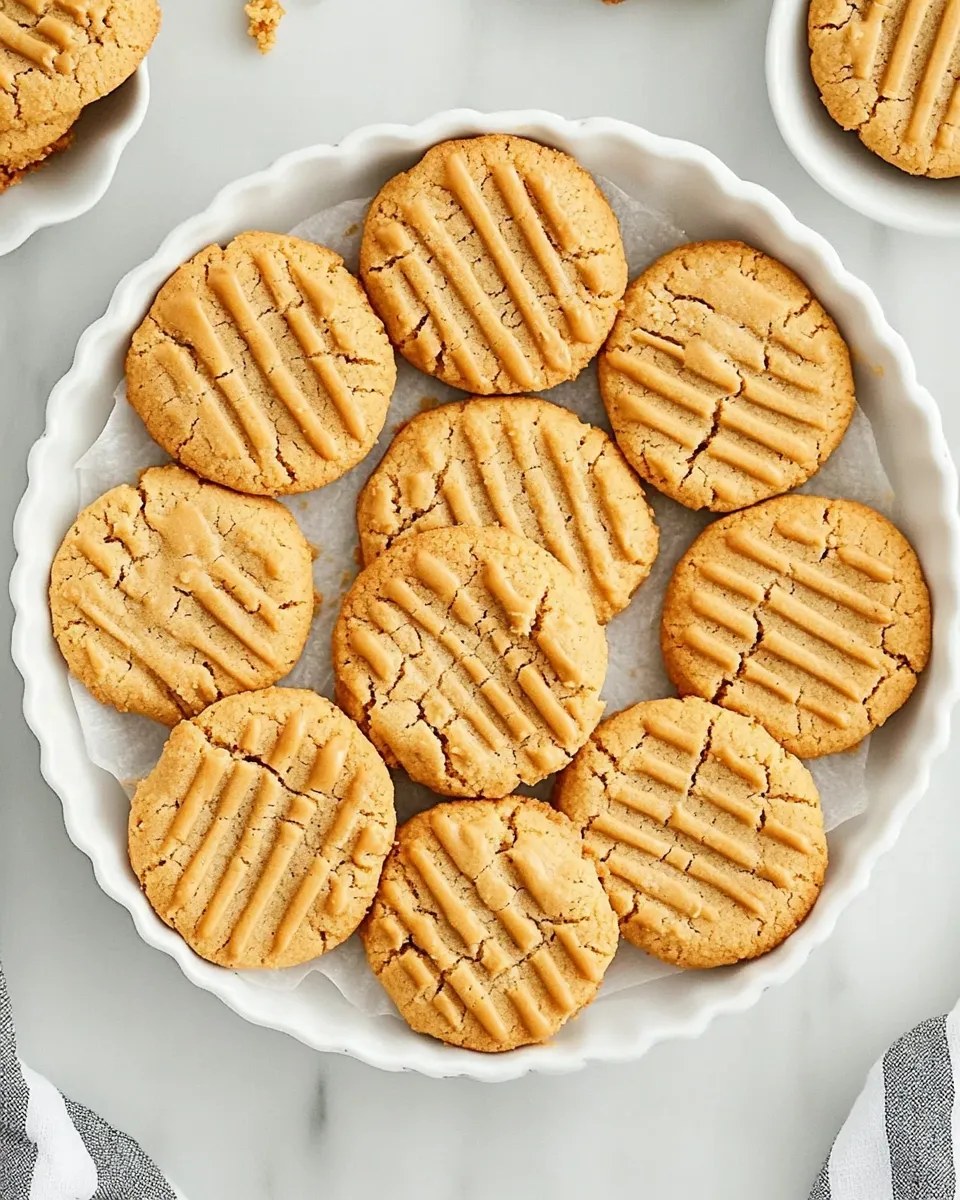
Work as shown: the dough is thick and sticky, so scooping with a cookie scoop keeps sizes consistent and your hands cleaner. Pressing the fork pattern isn’t about looks only—flattening the balls helps them bake evenly and achieve that classic peanut butter cookie silhouette.
Why It’s Crowd-Pleasing

There’s something instantly nostalgic about peanut butter cookies: the sweet-salty balance, the comforting peanut aroma, and that tender-but-slightly-crisp texture. These cookies hit those notes with a minimal ingredient list, which makes them accessible for almost anyone to make.
They’re fast to prep, and because every cookie tastes like pure peanut butter with a hint of vanilla, they satisfy both kids and grown-ups. They’re also portable and hold up well in lunchboxes, bake sale trays, or a small plate left on a neighbor’s doorstep. When people take the first bite, they almost always ask for the recipe—simple and memorable.
Allergy-Friendly Substitutes
If peanut allergies are a concern, you can usually substitute a seed butter—sunflower seed butter is a common swap and behaves similarly in this recipe. Be aware, though, that some seed butters can be thinner or saltier, so choose a thick, neutral one where possible.
For egg-free versions, a common substitute is a “flax egg” (1 tablespoon ground flaxseed mixed with 3 tablespoons water, let sit 5–10 minutes). That works in many recipes, but the texture will be slightly different—often a bit denser. I suggest testing one small batch before making a large tray if catering to an allergy.
If you want to avoid cane sugar specifically, any granulated sweetener that measures like sugar will usually work here (regular granulated sugar, coconut sugar). Avoid liquid sweeteners unless you adjust other components—the dough needs to stay thick.
Gear Up: What to Grab
- Mixing bowl (medium) — roomy enough to stir without splatter.
- Hand mixer or whisk — a hand mixer makes combining the peanut butter and egg effortless; a sturdy whisk works too.
- Cookie scoop or tablespoon — for uniform cookies and easier handling.
- Baking sheet — a rimmed sheet is best to catch any spread.
- Parchment paper — prevents sticking and makes cleanup instant.
- Fork — for the traditional crisscross pattern.
- Wire rack — helps cookies cool properly without becoming soggy underneath.
Watch Outs & How to Fix
Here are the common problems and quick fixes I’ve learned from lots of small batches.
- Cookies don’t spread enough: Make sure your peanut butter isn’t overly thick or dry. If you used a natural-style peanut butter, stir well before measuring; if it’s very dry, gently warming it for a few seconds can help. Also, ensure your baking sheet isn’t cold—room-temperature sheets bake more predictably.
- Cookies spread too much: Check your oven temperature with an oven thermometer. If your oven runs hot, cookies will thin out quickly. Also, overly oily peanut butter can cause more spread—switching brands or refrigerating the dough briefly will help.
- Cookies are flat and greasy: Often a sign of too much oil in the peanut butter or overmixing. Try a different brand of peanut butter (some have added oil) or chill the dough 10–15 minutes before baking.
- Centers are underdone after time is up: These cookies should look slightly soft in the center when you remove them; they finish setting on the hot sheet. If they consistently look raw, add a minute or two to bake time, but watch closely to avoid drying out.
- Cookies crumble or fall apart: Make sure you’re using a whole egg, not just whites—the yolk adds binding. Also, don’t overbake; that dries them and makes them brittle.
Warm & Cool Weather Spins
Weather affects baking more than people realize. In hot, humid kitchens, dough can feel looser and cookies may spread more. In cooler rooms, dough can be firmer and cookies may retain a taller, denser profile.
- Warm weather: If your kitchen is warm, chill the rolled dough balls for 10–15 minutes before pressing with the fork. That slight chill helps control spread. Bake on a light-colored sheet to avoid dark-bottomed cookies from high baking temps.
- Cool weather: If dough is stiff, let it sit at room temperature for a few minutes or microwave the peanut butter gently (5–8 seconds) to soften. Avoid overheating—just enough to make scooping easier.
- High humidity: Sometimes the dough picks up moisture. If it feels overly sticky, a quick chill solves it. If you live somewhere humid, baking earlier in the day helps because kitchens are often cooler in the morning.
If You’re Curious
Why baking soda? In a lean cookie like this—no butter or flour—baking soda isn’t trying to create a big rise; it’s giving a light lift and helping the cookie crack and set in an attractive way. It also affects browning, subtly deepening flavor at the edges.
Why the fork crisscross? Tradition, mostly, but it also flattens and evens out the cookie for uniform baking. It gives you a thin, tender center with crisp edges. If you like a thicker cookie, press less deeply or skip the fork; you’ll get a chewier bite.
Best Ways to Store
These cookies store well at room temperature. Once fully cooled, place them in an airtight container layered with parchment paper to prevent sticking. They’ll stay fresh for about 4–5 days at room temperature.
For longer storage, freeze baked cookies in a sealed freezer-safe container for up to 3 months. Thaw at room temperature. You can also freeze the dough balls (spaced on a tray, then transferred to a bag) and bake from frozen—add an extra minute or two to baking time.
Reader Questions
Q: Can I use crunchy peanut butter?
A: Yes. Crunchy peanut butter adds texture and a slightly different mouthfeel. The dough may be a touch chunkier, but the bake time is the same.
Q: Can I double the recipe?
A: Absolutely. Keep the same ratios and mix in a larger bowl. Work in batches on the sheet so cookies have space to bake evenly.
Q: Can I add chocolate?
A: You can press a few chocolate chips into each cookie before baking or sandwich cookies with ganache after cooling. Those are optional finishing touches; the cookie is great on its own.
Save & Share
If you try this recipe, please snap a picture and share it—friends and neighbors love a plate of these, and they’re the perfect “I made this for you” cookie. Bookmark or save this page for the next time you want a quick, comforting bake. If you have tweaks that worked well for you—different sweeteners, a successful egg substitute, or a favorite peanut butter brand—I’d love to hear about it in the comments. Happy baking.

The BEST 5-Ingredient Peanut Butter Cookies Recipe
Ingredients
Ingredients
- 1 cupcreamy peanut butter
- 1 egg
- 2 Tbspcane sugar or other granulated sweetener
- 1 tspbaking soda
- 1 tspvanilla extract
Instructions
Instructions
- Preheat the oven to 350°F (175°C). Line a baking sheet with parchment paper and set it aside.
- In a medium bowl combine 1 cup creamy peanut butter, 1 egg, 2 Tbsp cane sugar, 1 tsp baking soda, and 1 tsp vanilla extract. Using a hand mixer or a whisk, mix until fully combined—the dough will be thick and sticky.
- Scoop about 1 tablespoon of dough (or use a small cookie scoop) and roll into a ball. Place each ball on the prepared baking sheet, leaving about 2 inches of space between cookies.
- Use a fork to gently press a crisscross pattern into each ball, slightly flattening them. Smooth the edges with your finger if desired.
- Bake for 10 to 13 minutes, until the edges are set and the centers still look slightly soft (they will firm as they cool).
- Let the cookies cool on the baking sheet for about 5 minutes, then transfer them to a wire rack to cool completely.
Equipment
- Mixing Bowl
- Hand Mixer or Whisk
- Baking Sheet
- Parchment Paper
- Cookie scoop or tablespoon
- Cooling rack
- Fork