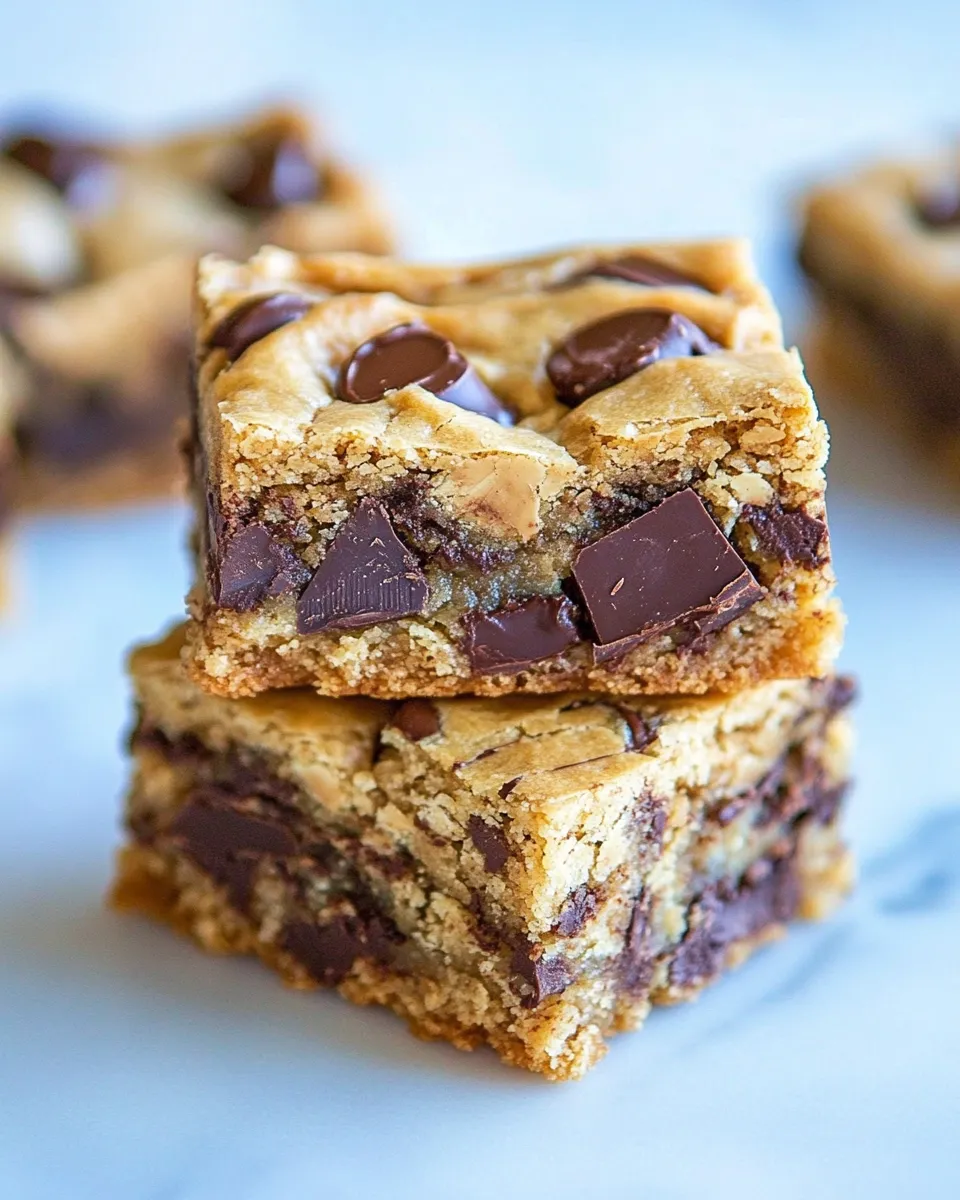
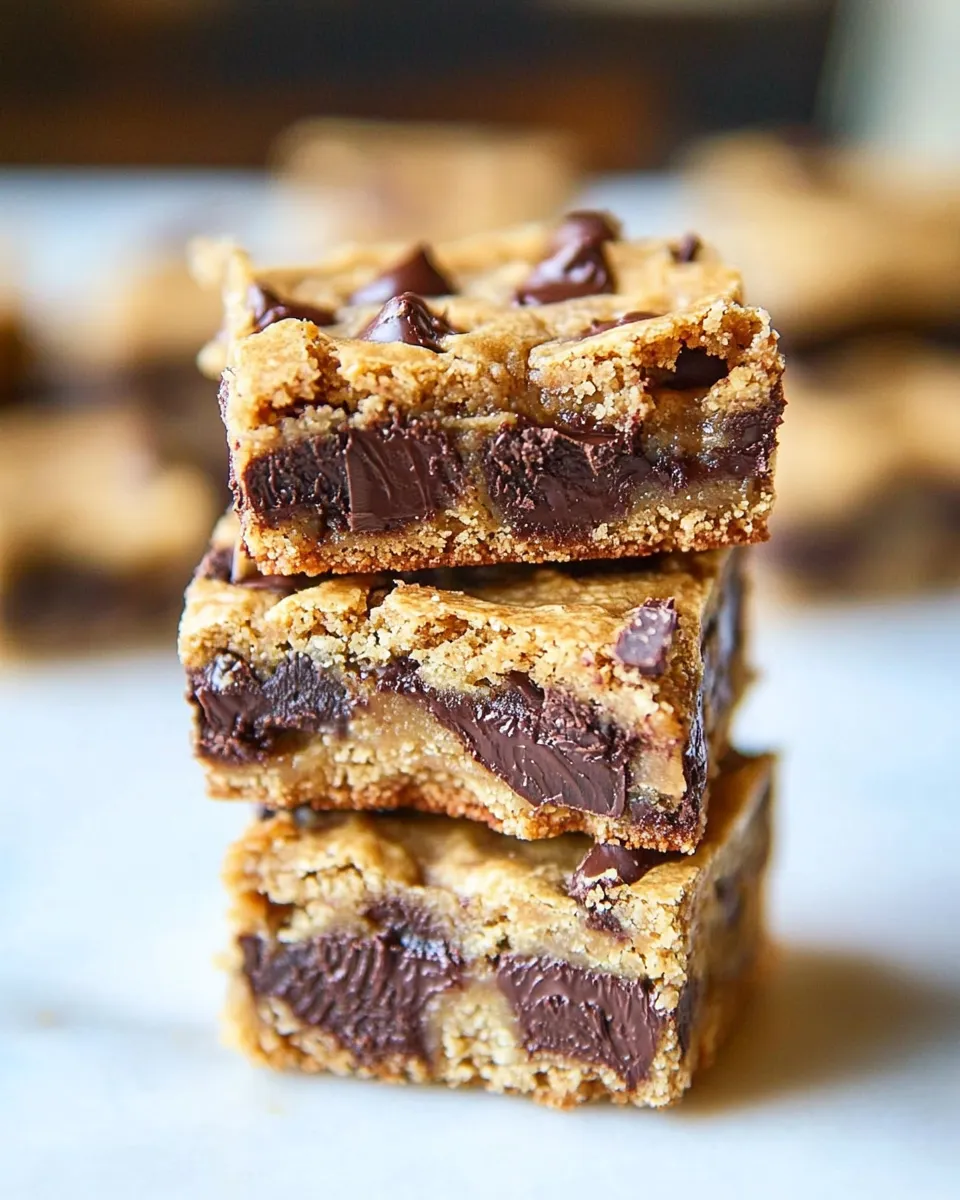
These Peanut Butter Chocolate Chunk Cookie Bars are the kind of bake that disappears faster than you expect. They sit between a cookie and a brownie in texture: chewy, a little cakey at the center, and studded with big, melty chocolate chunks. I love them for weeknight dessert duty because they’re straightforward, comforting, and reliably popular with both kids and grown-ups.
I keep this recipe on hand for days when I want something homey without fuss. The batter comes together in one bowl, with only a single pan to line and one bowl to wash. If you’re pressed for time, the method is forgiving; if you’re sharing, the bars travel and cut well.
Ingredients

- ½ cup unsalted butter, melted (1 stick) — provides richness and a tender crumb; cool slightly so it won’t scramble the egg when mixed.
- 1 large egg — binds the batter and helps the bars set while remaining soft.
- ¾ cup light brown sugar, packed — adds moisture and a mild caramel flavor that complements the peanut butter.
- ¼ cup granulated sugar — helps the edges set and balances the brown sugar sweetness.
- 1 tablespoon vanilla extract — brightens and rounds the flavor.
- ½ cup creamy peanut butter, heaping, like Jif or Skippy, do not use homemade — the main flavor driver; creamy peanut butter yields a smooth texture in the batter.
- 1 ¼ cups all-purpose flour — the structure for the bars; measure by spooning into the cup and leveling for best results.
- ½ teaspoon baking soda — a small lift so the bars rise slightly and remain tender.
- pinch salt, optional and to taste — enhances sweetness and balances flavors; add if your peanut butter is unsalted.
- 6 ½ ounces dark or semi-sweet chocolate, roughly chopped (I used Trader Joe’s Dark Chocolate Pound Plus Bar, 54%) — large chunks that melt into pockets of chocolate throughout the bars.
Your Shopping Guide
When you head to the store, this list is short and specific. Buy a standard 8×8-inch pan if you don’t have one; the size is key to the bake time and final texture. For peanut butter, the recipe calls for store-bought creamy (Jif or Skippy is recommended in the source); avoid homemade nut spreads here because they can change the fat and moisture balance.
Pick a chocolate bar you like eating straight. The recipe calls for 6½ ounces of dark or semi-sweet chocolate, roughly chopped — a single large bar usually covers this. If you prefer a slightly sweeter bar, choose semi-sweet; for deeper chocolate notes, choose dark. Use light brown sugar (packed) rather than dark for a lighter molasses flavor that won’t overpower the peanut butter.
Stepwise Method: Peanut Butter Chocolate Chunk Cookie Bars
- Preheat the oven to 350°F (175°C). Line an 8×8-inch baking pan with aluminum foil, letting the foil extend over the edges for easy removal, then spray the foil with cooking spray; set the pan aside.
- If your butter is not already melted, place the ½ cup (1 stick) unsalted butter in a microwave-safe bowl and microwave until melted, about 1 minute. Let the melted butter cool until warm but not hot (about 1–2 minutes) so it won’t scramble the egg.
- Add the 1 large egg, ¾ cup light brown sugar (packed), ¼ cup granulated sugar, and 1 tablespoon vanilla extract to the warm melted butter. Stir vigorously until the mixture is smooth and well combined, about 1 minute.
- Stir in the heaping ½ cup creamy peanut butter (store-bought, e.g., Jif or Skippy) until evenly incorporated.
- In the same bowl, add 1 ¼ cups all-purpose flour, ½ teaspoon baking soda, and a pinch of salt if using. Fold and stir just until the dry ingredients are incorporated—do not overmix.
- Fold in the 6 ½ ounces roughly chopped dark or semi-sweet chocolate until distributed throughout the batter.
- Turn the batter into the prepared 8×8 pan and spread it evenly, smoothing the top lightly with a spatula.
- Bake in the preheated oven for 18 to 22 minutes, until the center is just set and the top is lightly golden. A toothpick inserted into the center should come out with few crumbs; it may pick up melted chocolate if it hits a chunk.
- Remove the pan from the oven and allow the bars to cool completely in the pan for at least 30 minutes; they will firm up as they cool.
- Use the foil overhang to lift the bars from the pan, transfer to a cutting board, and slice into squares. Store extra bars in an airtight container at room temperature for up to 1 week or in the freezer for up to 3 months.
Reasons to Love Peanut Butter Chocolate Chunk Cookie Bars
- One-bowl prep: There’s minimal washing up and no separate creaming of butter and sugar, which saves time and keeps the kitchen tidy.
- Comforting, familiar flavors: Peanut butter paired with big chocolate chunks is a classic combo that almost everyone enjoys.
- Portable and shareable: Baked in an 8×8 pan, they slice into neat squares that are easy to pack for school lunches or take to a potluck.
- Forgiving bake: The bars don’t require perfect edges or an exact crumb; as long as the center is set, they’ll be delicious.
Ingredient Flex Options

This recipe is intentionally streamlined, so the main flavor levers are within the listed ingredients. Choose dark or semi-sweet chocolate per your taste — darker chocolate makes the bars feel richer, semi-sweet keeps them sweeter. The recipe includes an optional pinch of salt: add it if your peanut butter is unsalted or if you want the sweet-savory contrast that a little salt gives.
The directions specify creamy store-bought peanut butter; swapping brands with similar smooth, commercial peanut butter is fine. If you need a slightly firmer or softer finished bar, small variations in packing the flour when measuring can make a difference: spoon and level the flour for the most consistent outcome.
Gear Up: What to Grab
- 8×8-inch baking pan — the recipe timing is tuned to this size.
- Aluminum foil — for easy removal of the bars once cooled.
- Cooking spray — prevents sticking to the foil-lined pan.
- Microwave-safe bowl or small saucepan — to melt butter safely.
- Rubber spatula or spoon — for mixing the batter and smoothing the top.
- Knife and cutting board — to chop the chocolate and to cut the cooled bars.
- Toothpick — to test doneness in the center.
Missteps & Fixes
- If the center is too gooey after the full bake time: return the pan to the oven for an extra 2–4 minutes and check again. Cooling in the pan helps the bars set, so don’t panic immediately after pulling them out.
- If the bars are dry or crumbly: likely overbaked or too much flour was measured. Reduce bake time by a couple of minutes next time and check flour measuring technique (spoon into the cup and level).
- If chocolate sinks to the bottom: make sure the chocolate is in chunky pieces (as directed) and fold gently so the batter still supports them; very small, heavy chips can clump and sink.
- If the egg scrambles when mixed with melted butter: let the melted butter cool for 1–2 minutes until warm but not hot before adding the egg.
Dietary Swaps & Alternatives
For dairy-free needs, swap the unsalted butter for a solid plant-based butter substitute measured 1:1; note that this will subtly change the flavor. If you’re avoiding eggs, this recipe relies on the egg for structure and set — using an egg replacer can work but may change the texture noticeably. For nut allergies, this exact recipe centers on peanut butter, so choose a different base recipe; this one isn’t suited for simple nut-free swaps without reformulating the ingredient ratios.
Cook’s Notes
Measure accurately. This recipe has a straightforward ratio, so small measurement errors (especially with flour) will alter texture. Use the foil overhang — it’s the easiest way to lift the entire block of bars from the pan intact. Let the bars cool fully in the pan for at least 30 minutes; they firm up and slice much more cleanly when completely cool.
When chopping the chocolate, aim for varied chunk sizes. Larger chunks create pockets of melted chocolate, while smaller bits distribute more evenly. The provided ingredient already specifies roughly chopped chocolate, so follow that guidance for the best contrast in every bite.
Keep It Fresh: Storage Guide
- Room temperature: Store in an airtight container for up to 1 week. Place a sheet of parchment between layers if stacking to avoid sticking.
- Freezer: Wrap portions individually or store in a freezer-safe container for up to 3 months. Thaw at room temperature before serving.
Questions People Ask
- Can I use crunchy peanut butter? — The recipe specifies creamy peanut butter; crunchy will change texture and can introduce extra oil. If you use crunchy, expect slightly different mouthfeel but it will still bake.
- Are chocolate chips okay instead of chopping a bar? — Yes, chips work; the recipe calls for roughly chopped chocolate to create chunk pockets, so use chips if that’s what you have on hand.
- How do I know when they’re done? — The center should be just set, with a lightly golden top. A toothpick should come out with a few crumbs, and melted chocolate may stick if it hits a chunk.
- Can I double the recipe? — You can scale the ingredients, but use a larger pan and adjust baking time — start checking a few minutes earlier and watch for the center to set.
Save & Share
If you try these bars, save the recipe in your favorites and pass it along. They’re a reliable weeknight dessert, a crowd-pleasing potluck contribution, and a lovely thing to bake when you want something simple that tastes thoughtful. Leave a note about any small changes you tried so friends can replicate your version exactly.
Peanut Butter Chocolate Chunk Cookie Bars
Ingredients
Ingredients
- 1/2 cupunsalted butter melted (1 stick)
- 1 large egg
- 3/4 cuplight brown sugar packed
- 1/4 cupgranulated sugar
- 1 tablespoonvanilla extract
- 1/2 cupcreamy peanut butter heaping like Jif or Skippy, do not use homemade
- 1 1/4 cupsall purpose flour
- 1/2 teaspoonbaking soda
- pinchsalt optional and to taste
- 6 1/2 ouncesdark or semi-sweet chocolate roughly chopped (I used Trader Joe's Dark Chocolate Pound Plus Bar, 54%)
Instructions
Instructions
- Preheat the oven to 350°F (175°C). Line an 8x8-inch baking pan with aluminum foil, letting the foil extend over the edges for easy removal, then spray the foil with cooking spray; set the pan aside.
- If your butter is not already melted, place the ½ cup (1 stick) unsalted butter in a microwave-safe bowl and microwave until melted, about 1 minute. Let the melted butter cool until warm but not hot (about 1–2 minutes) so it won’t scramble the egg.
- Add the 1 large egg, ¾ cup light brown sugar (packed), ¼ cup granulated sugar, and 1 tablespoon vanilla extract to the warm melted butter. Stir vigorously until the mixture is smooth and well combined, about 1 minute.
- Stir in the heaping ½ cup creamy peanut butter (store-bought, e.g., Jif or Skippy) until evenly incorporated.
- In the same bowl, add 1 ¼ cups all-purpose flour, ½ teaspoon baking soda, and a pinch of salt if using. Fold and stir just until the dry ingredients are incorporated—do not overmix.
- Fold in the 6 ½ ounces roughly chopped dark or semi-sweet chocolate until distributed throughout the batter.
- Turn the batter into the prepared 8x8 pan and spread it evenly, smoothing the top lightly with a spatula.
- Bake in the preheated oven for 18 to 22 minutes, until the center is just set and the top is lightly golden. A toothpick inserted into the center should come out with few crumbs; it may pick up melted chocolate if it hits a chunk.
- Remove the pan from the oven and allow the bars to cool completely in the pan for at least 30 minutes; they will firm up as they cool.
- Use the foil overhang to lift the bars from the pan, transfer to a cutting board, and slice into squares. Store extra bars in an airtight container at room temperature for up to 1 week or in the freezer for up to 3 months.
Equipment
- 8x8 inch baking pan
- Aluminum Foil
- Cooking spray
- Microwave-safe Bowl
- Spatula
- toothpick
- Oven