I’ve tested countless doughs in my kitchen, and this one keeps coming back as the easiest, most dependable base for any pizza night. It balances chew, crisp, and flavor without demanding fancy ingredients or complicated timing. Whether you want thin and blistered or slightly puffy and soft, the method adapts to your oven and appetite.
This recipe gives you options for either active dry yeast or instant yeast, a straightforward kneading and rise process, and a flexible schedule—rise at room temperature for a quick dinner, or slow it in the fridge for more flavor. I write the steps so you can follow them precisely, but also include practical tips that save time and headaches.
Keep the ingredients simple, measure carefully, and warm the water to the right temperature for your yeast type. The rest is patience and a hot oven. Below you’ll find the ingredient breakdown, the exact process to follow, and notes on substitutions, equipment, storage, and troubleshooting—everything I wish I’d had the first few times I tried to get a perfect crust at home.
Ingredient Breakdown
Ingredients
- 2 tsp active dry yeast or instant yeast (see notes*) — provides the lift and fermentation. Use one type only; the method has options for both.
- 2 tsp granulated sugar — feeds the yeast and helps the crust brown.
- 1 1/2 cups warm water — heated to 110 – 115°F for active dry yeast, 120 – 130°F for instant yeast; temperature is important for reliable yeast activity.
- 3 Tbsp olive oil, plus more for brushing — adds flavor, tenderness, and keeps the dough from sticking during the first rise.
- 1 1/4 tsp salt — essential for flavor and for strengthening the dough’s gluten structure.
- 3 1/2 cups (17 oz) unbleached all-purpose flour or bread flour, then more as needed (scoop and level to measure) — the structure of the crust; bread flour gives more chew, AP flour is perfectly fine. Add small amounts more if the dough is too sticky.
Cooking (Pizza Dough): The Process
- Prepare ingredients and equipment: measure all ingredients. If using active dry yeast, heat 1/2 cup of the warm water to 110–115°F. If using instant yeast, heat 1 1/2 cups warm water to 120–130°F. Fit an electric stand mixer with the paddle attachment.
- For active dry yeast: in the mixer bowl whisk together 2 tsp active dry yeast, 2 tsp granulated sugar and the 1/2 cup warm water (110–115°F). Let rest 5–10 minutes until the mixture becomes foamy and bubbly.
- For instant yeast: do not proof. Add 2 tsp instant yeast and 2 tsp granulated sugar directly to the mixer bowl with 3 cups of the measured flour (see step 5) before adding the warm water.
- Add to the mixer bowl (with either yeast method): the remaining warm water (for active dry yeast add the remaining 1 cup; for instant yeast add all 1 1/2 cups total as noted in step 1), 3 Tbsp olive oil, and 1 1/4 tsp salt.
- Add 3 cups of the 3 1/2 cups (17 oz) unbleached all-purpose flour or bread flour to the mixer bowl. Mix on low speed with the paddle attachment just until the dough comes together and no large dry patches remain.
- Switch to the dough hook. Add the remaining 1/2 cup flour to the dough and begin kneading on low speed. If the dough is very sticky, add more flour 1–2 Tbsp at a time as needed (use sparingly) until the dough is not overly tacky.
- Continue kneading on low speed about 4 minutes, until the dough is soft, supple, and pulls away from the sides of the bowl (it may still stick slightly to the bottom). The dough should be slightly sticky but manageable.
- Lightly coat a large bowl with olive oil (or use olive oil cooking spray). Transfer the dough to the oiled bowl and turn it once to coat the top with oil.
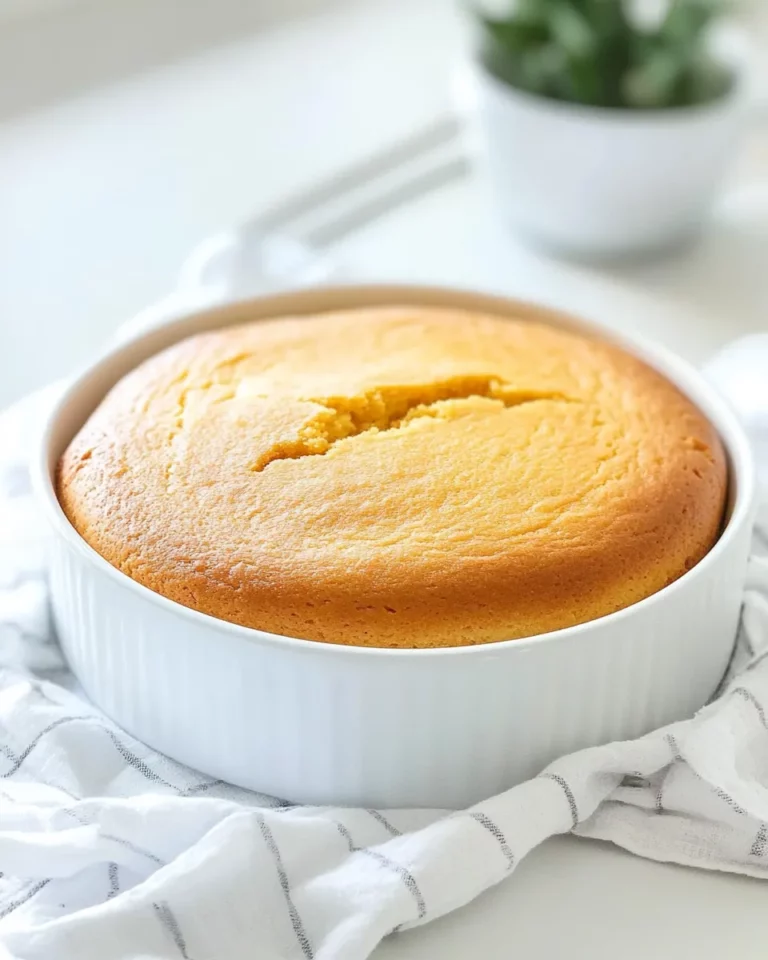
- Cover the bowl tightly with plastic wrap and let the dough rise in a warm place until doubled in volume, about 1 1/2 hours. Alternatively, refrigerate the covered dough for up to 24 hours for a slower rise (if refrigerating, allow the dough to come to room temperature for about 1 hour before shaping).
- Near the end of the rise, place a pizza stone in the oven and preheat the oven to 475°F. Allow the stone to preheat for 30–45 minutes.
- After the dough has doubled, press it down to deflate slightly and divide it into two equal portions. If you plan to save one portion for later, freeze that second portion now (following your preferred freezing method).
- If using both portions right away, place each portion into its own lightly oiled bowl, cover, and let rest 15 minutes to relax the gluten.
- On a lightly floured surface, stretch and shape each portion into a round about 11–14 inches in diameter, depending on how thick or thin you prefer the crust.
- Transfer each shaped dough to a sheet of parchment paper just large enough to fit the pizza. Brush the top of each crust with olive oil (about 1 Tbsp each).
- If you prefer a fluffier crust, let the shaped and oiled dough rest an additional 10 minutes before adding toppings.
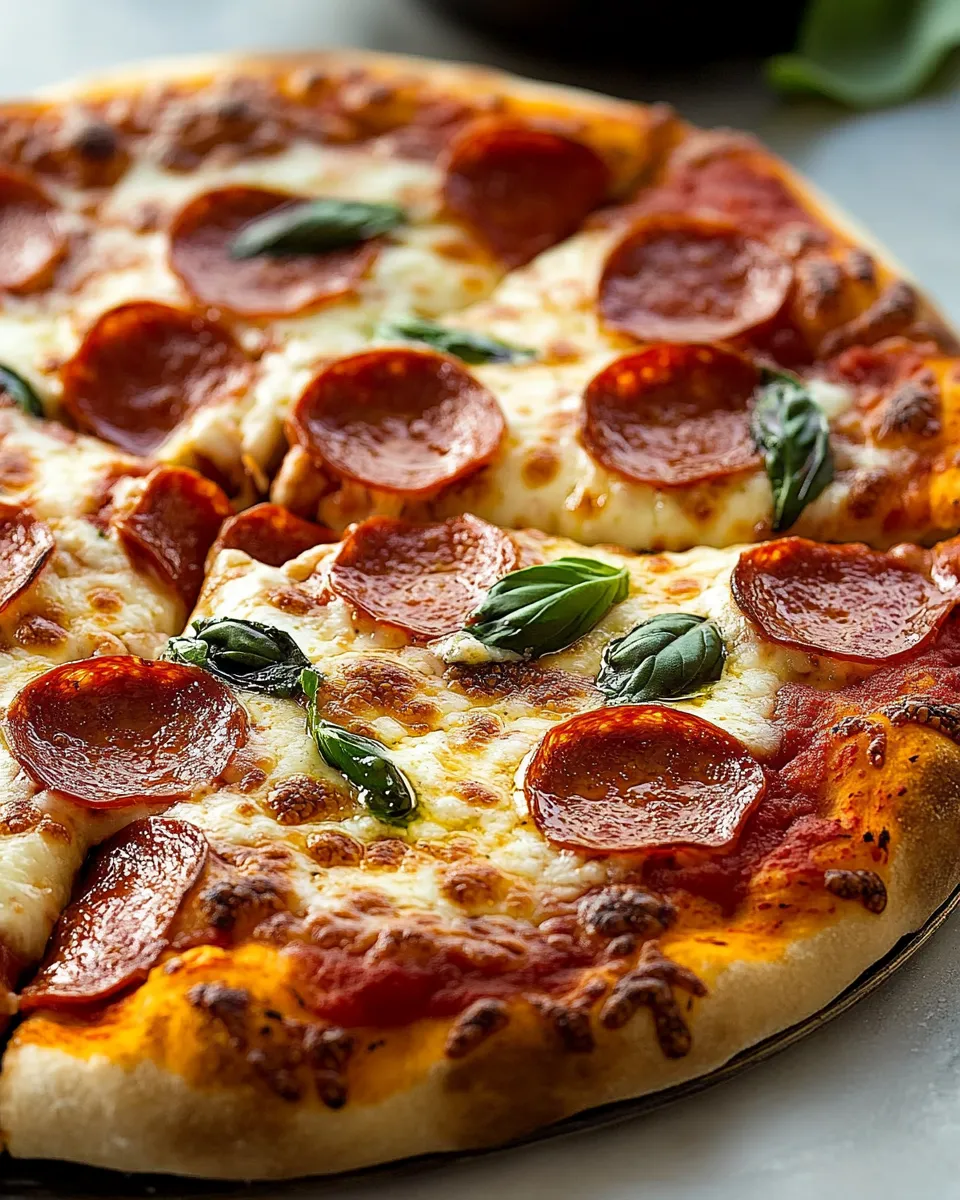
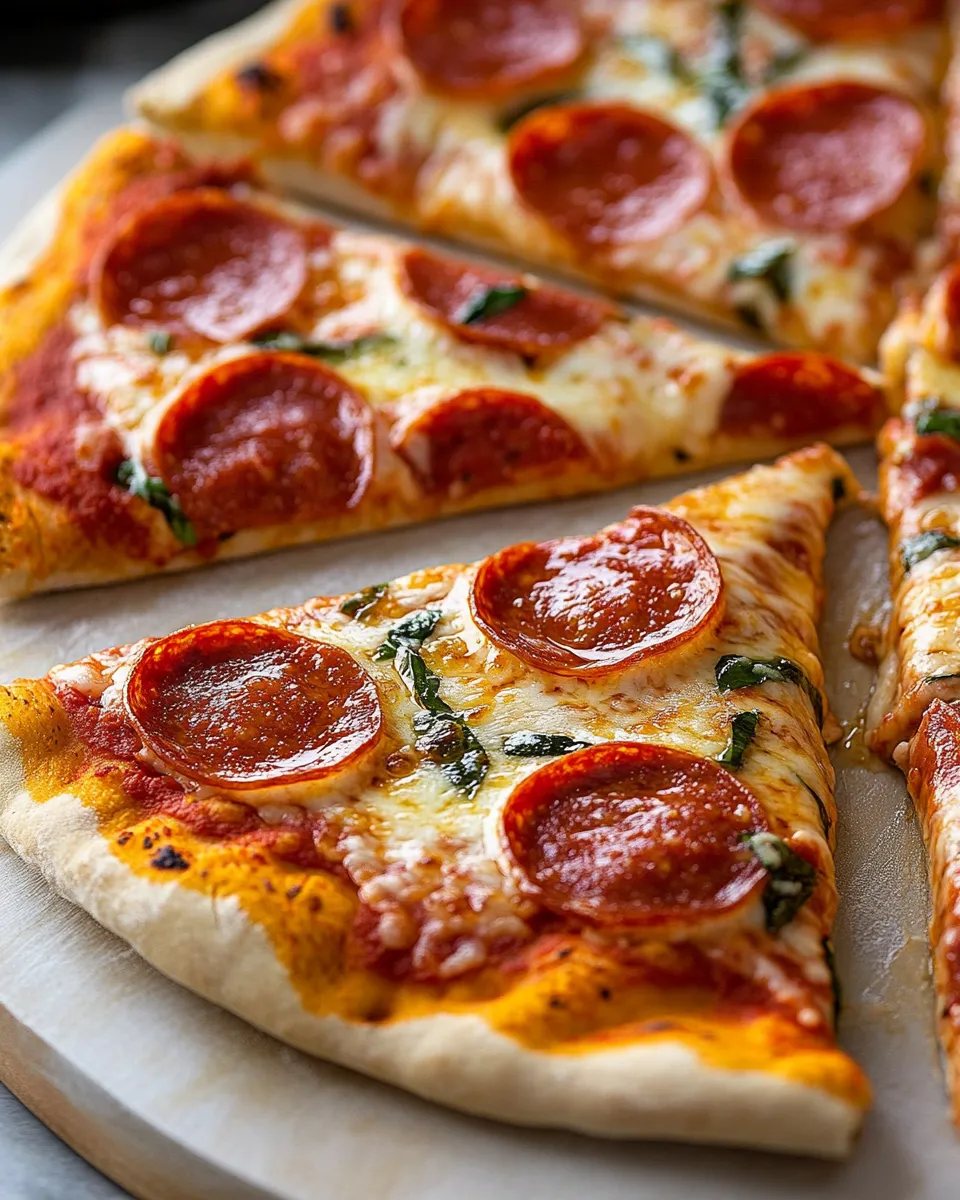
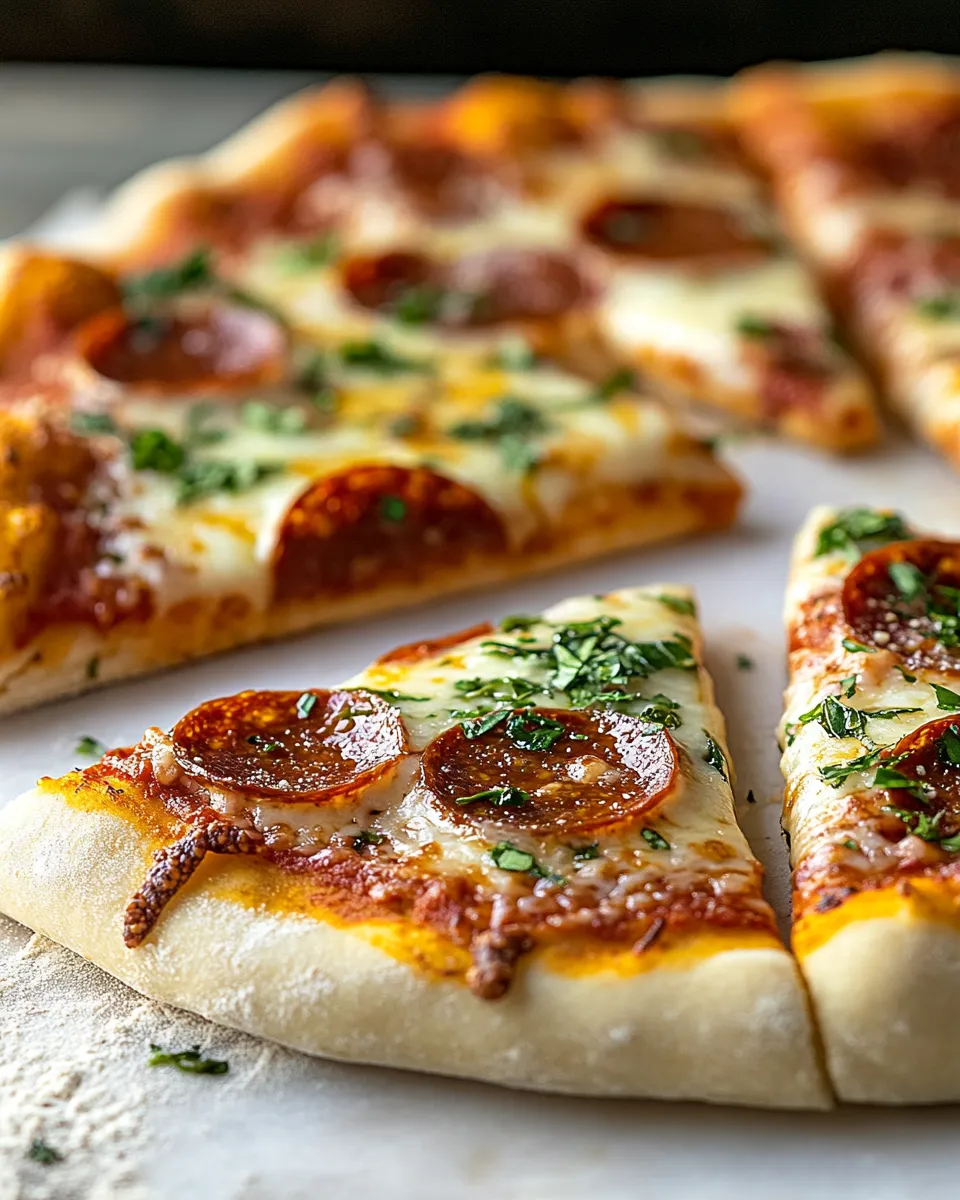
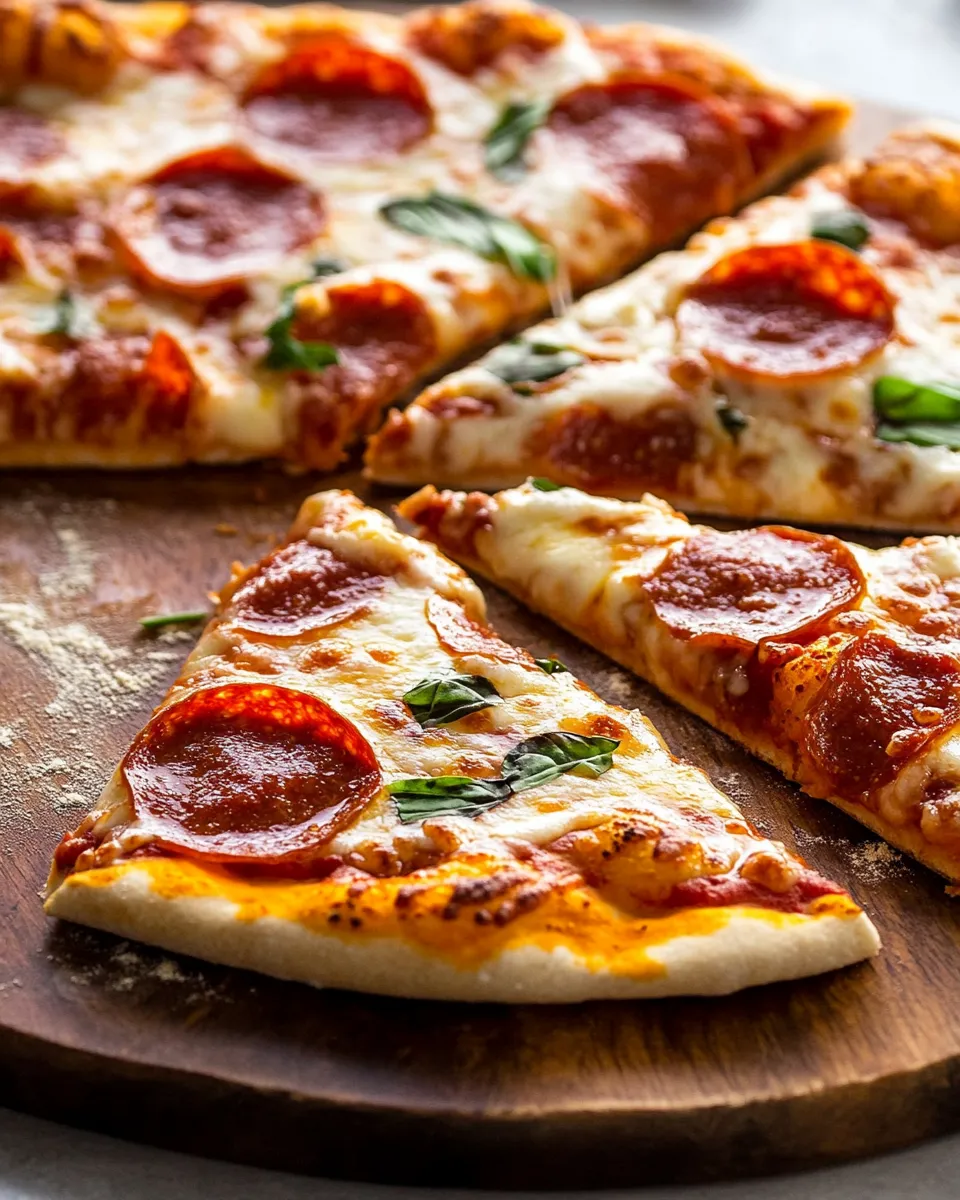
- Top the pizza: spread sauce (about 2/3 cup), sprinkle with cheese (about 2 cups mozzarella), and add desired toppings.
- Slide the parchment with the topped pizza onto the preheated pizza stone and bake until the crust is golden brown and the pizza is cooked through, about 11–14 minutes.
- Remove the pizza from the oven, slice, and serve warm. Repeat the shaping and baking process with the second dough portion if using.
Why It’s My Go-To
This dough hits the sweet spot between approachable and excellent. The two yeast options mean you’re covered whether you like a quick proof (active dry) or want to skip proofing altogether (instant). The recipe gives a tender interior and a crisp exterior without requiring high-hydration hand-stretch techniques. I can make this on a weeknight with predictable results or slow-ferment it in the fridge over a day for deeper flavor.
It’s forgiving: the instruction to mix most of the flour, then switch to the dough hook and add the rest prevents overworking early on and helps ensure even hydration. The small olive oil addition adds softness and improves browning. Finally, the oven-and-stone step is what turns a good home pizza into something with that restaurant-quality crust blister and chew.
Healthier Substitutions
If you want to shift this dough toward a healthier profile without dramatically changing the method, try these practical swaps:
- Replace part of the unbleached flour with whole wheat flour for extra fiber; start with a partial swap rather than a full swap to maintain texture.
- Use extra-virgin olive oil or reduce the oil slightly if you’re watching fat intake—flavor remains even with a modest reduction.
- Use a lower-sodium salt or reduce the amount slightly if you need less sodium, but don’t omit salt entirely since it affects dough structure and flavor.
Setup & Equipment
Have these on hand before you begin. They make the process smoother and the results more consistent:
- Electric stand mixer with paddle and dough hook — for easy mixing and kneading.
- Measuring cups and spoons — accurate measuring matters for texture.
- Digital thermometer — helpful to get water in the 110–130°F range depending on yeast choice.
- Large mixing bowl and lightly oiled large bowl for rising.
- Plastic wrap or a tight-fitting lid for covering the dough.
- Pizza stone (or heavy baking sheet) and a sheet of parchment paper for easy transfer.
- Bench scraper and lightly floured work surface for shaping.
Learn from These Mistakes
Here are mistakes I see most often and how to fix them:
- Using water that’s too hot — kills yeast. If your water feels uncomfortably hot to the wrist, cool it a bit. Follow the temperatures given for your yeast type.
- Adding all the flour at once — can result in a tough dough. The two-stage flour addition is intentional: it lets you bring the dough together and then knead to the right tackiness.
- Over-flouring while kneading — leads to a dense crust. Add extra flour 1–2 Tbsp at a time only if the dough is unmanageably sticky.
- Not preheating the stone long enough — a cool stone gives a limp bottom. Give it the full 30–45 minutes at 475°F for the best oven spring and browning.
- Skipping a rest after shaping — if the dough fights you when stretching, let it rest 10–15 minutes and try again.
Seasonal Serving Ideas
Change toppings with the seasons to keep pizza night exciting:
- Spring: fresh peas, mint, lemon zest, ricotta dollops, and a drizzle of olive oil after baking.
- Summer: ripe tomatoes, fresh basil, burrata or mozzarella, and a finishing scatter of arugula.
- Fall: roasted squash, caramelized onions, sage, and a light sprinkle of fontina or gruyère.
- Winter: mushrooms, roasted garlic, kale, and finishing chili oil for warmth.
If You’re Curious
A few practical notes I get asked about all the time:
- Proofed vs. instant yeast — proofing active dry confirms viability and warms the mix; instant yeast can be mixed straight into the flour and saves time.
- Room-temperature vs. refrigerated rise — cold fermentation develops more flavor; bring the dough back to room temperature before shaping for easier handling.
- Stone vs. baking sheet — a stone mimics the heat retention of a pizza oven and gives a better crust. If you don’t have one, a preheated heavy baking sheet works in a pinch.
Make-Ahead & Storage
Refrigeration
After the initial mix, you can refrigerate the covered dough for up to 24 hours for a slower rise and more developed flavor. When ready to shape, allow the dough to come to room temperature for about 1 hour before dividing and shaping.
Freezing
After dividing into two portions (step 11), freeze the second portion for later use. Wrap tightly in plastic and place in a freezer bag or airtight container. Thaw in the refrigerator overnight, then bring to room temperature about 1 hour before shaping.
Leftover pizza
Store cooled pizza in the refrigerator up to a few days. Reheat in a hot oven or on a skillet to revive the crust rather than microwaving, which makes it soggy.
Common Qs About Pizza Dough
Q: Which yeast should I use? A: Use active dry if you prefer to proof and confirm activity; use instant for speed and convenience. The recipe provides both options.
Q: Can I use all bread flour or all all-purpose flour? A: Yes. Bread flour gives more chew and structure; all-purpose gives a slightly more tender crumb. Both work with this method.
Q: Why are there two water temperatures? A: Active dry yeast benefits from a slightly cooler proofing temperature (110–115°F) to activate without stressing the yeast. Instant yeast can tolerate slightly warmer water (120–130°F) because it doesn’t need proofing.
Q: How thick should I stretch the dough? A: The recipe stretches to about 11–14 inches depending on your preference. Thinner for crispier, wider pies; smaller and thicker for a chewier crust.
Q: How do I know when the stone is hot enough? A: Give the stone 30–45 minutes at 475°F. If you press a floured fingertip into a small test piece of dough placed on the stone, you should see rapid browning after a minute or two.
In Closing
This Pizza Dough recipe has become a staple because it’s dependable, flexible, and forgiving. It takes the guesswork out of yeast choice and hydration while delivering a crust that browns well and stretches without tearing. Make it on a weeknight, or plan ahead and refrigerate for more complexity—either way, you’ll end up with a crust worth repeating.
Keep a small digital thermometer and a pizza stone in your kitchen and you’ll notice your pizzas improve overnight. If you try it, tell me what toppings you loved most or what adjustments you made—I’m always excited to hear how you make this dough your own.

The Best Pizza Dough Recipe
Ingredients
Ingredients
- 2 tspactive dry yeastor instant yeast see notes*
- 2 tspgranulated sugar
- 1 1/2 cupswarm water heated to 110 - 115 degrees for active dry yeast, 120 - 130 degrees for instant yeast
- 3 Tbspolive oil plus more for brushing
- 1 1/4 tspsalt
- 3 1/2 cups 17 ozunbleached all-purpose flouror bread flour, then more as needed (scoop and level to measure)
Instructions
Instructions
- Prepare ingredients and equipment: measure all ingredients. If using active dry yeast, heat 1/2 cup of the warm water to 110–115°F. If using instant yeast, heat 1 1/2 cups warm water to 120–130°F. Fit an electric stand mixer with the paddle attachment.
- For active dry yeast: in the mixer bowl whisk together 2 tsp active dry yeast, 2 tsp granulated sugar and the 1/2 cup warm water (110–115°F). Let rest 5–10 minutes until the mixture becomes foamy and bubbly.
- For instant yeast: do not proof. Add 2 tsp instant yeast and 2 tsp granulated sugar directly to the mixer bowl with 3 cups of the measured flour (see step 5) before adding the warm water.
- Add to the mixer bowl (with either yeast method): the remaining warm water (for active dry yeast add the remaining 1 cup; for instant yeast add all 1 1/2 cups total as noted in step 1), 3 Tbsp olive oil, and 1 1/4 tsp salt.
- Add 3 cups of the 3 1/2 cups (17 oz) unbleached all-purpose flour or bread flour to the mixer bowl. Mix on low speed with the paddle attachment just until the dough comes together and no large dry patches remain.
- Switch to the dough hook. Add the remaining 1/2 cup flour to the dough and begin kneading on low speed. If the dough is very sticky, add more flour 1–2 Tbsp at a time as needed (use sparingly) until the dough is not overly tacky.
- Continue kneading on low speed about 4 minutes, until the dough is soft, supple, and pulls away from the sides of the bowl (it may still stick slightly to the bottom). The dough should be slightly sticky but manageable.
- Lightly coat a large bowl with olive oil (or use olive oil cooking spray). Transfer the dough to the oiled bowl and turn it once to coat the top with oil.
- Cover the bowl tightly with plastic wrap and let the dough rise in a warm place until doubled in volume, about 1 1/2 hours. Alternatively, refrigerate the covered dough for up to 24 hours for a slower rise (if refrigerating, allow the dough to come to room temperature for about 1 hour before shaping).
- Near the end of the rise, place a pizza stone in the oven and preheat the oven to 475°F. Allow the stone to preheat for 30–45 minutes.
- After the dough has doubled, press it down to deflate slightly and divide it into two equal portions. If you plan to save one portion for later, freeze that second portion now (following your preferred freezing method).
- If using both portions right away, place each portion into its own lightly oiled bowl, cover, and let rest 15 minutes to relax the gluten.
- On a lightly floured surface, stretch and shape each portion into a round about 11–14 inches in diameter, depending on how thick or thin you prefer the crust.
- Transfer each shaped dough to a sheet of parchment paper just large enough to fit the pizza. Brush the top of each crust with olive oil (about 1 Tbsp each).
- If you prefer a fluffier crust, let the shaped and oiled dough rest an additional 10 minutes before adding toppings.
- Top the pizza: spread sauce (about 2/3 cup), sprinkle with cheese (about 2 cups mozzarella), and add desired toppings.
- Slide the parchment with the topped pizza onto the preheated pizza stone and bake until the crust is golden brown and the pizza is cooked through, about 11–14 minutes.
- Remove the pizza from the oven, slice, and serve warm. Repeat the shaping and baking process with the second dough portion if using.
Equipment
- Stand mixer
- paddle attachment
- dough hook
- Large Bowl
- Plastic Wrap
- Pizza Stone
- Oven
- Parchment Paper
- Measuring Cups
Notes
Use water heated to 120 to 130 degrees.
To mix just whisk together 3 cups flour, sugar, yeast and salt in the bowl of a stand mixer fitted with the paddle attachment.
Blend in water and oil. Then switch to hook attachment and proceed to mix as directed in step 3.
Wrap in parchment paper.
Transfer to a freezer resealable bag.
Freeze up to 3 months. Thaw overnight in refrigerator.
Let rest at room temp about 1 hour before shaping.