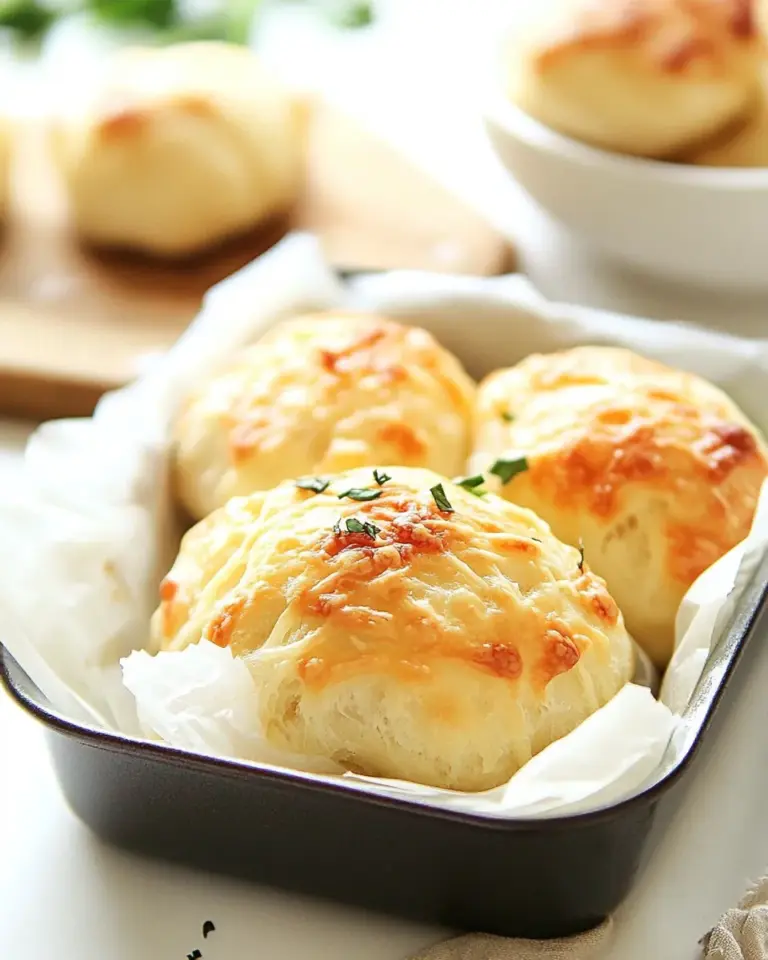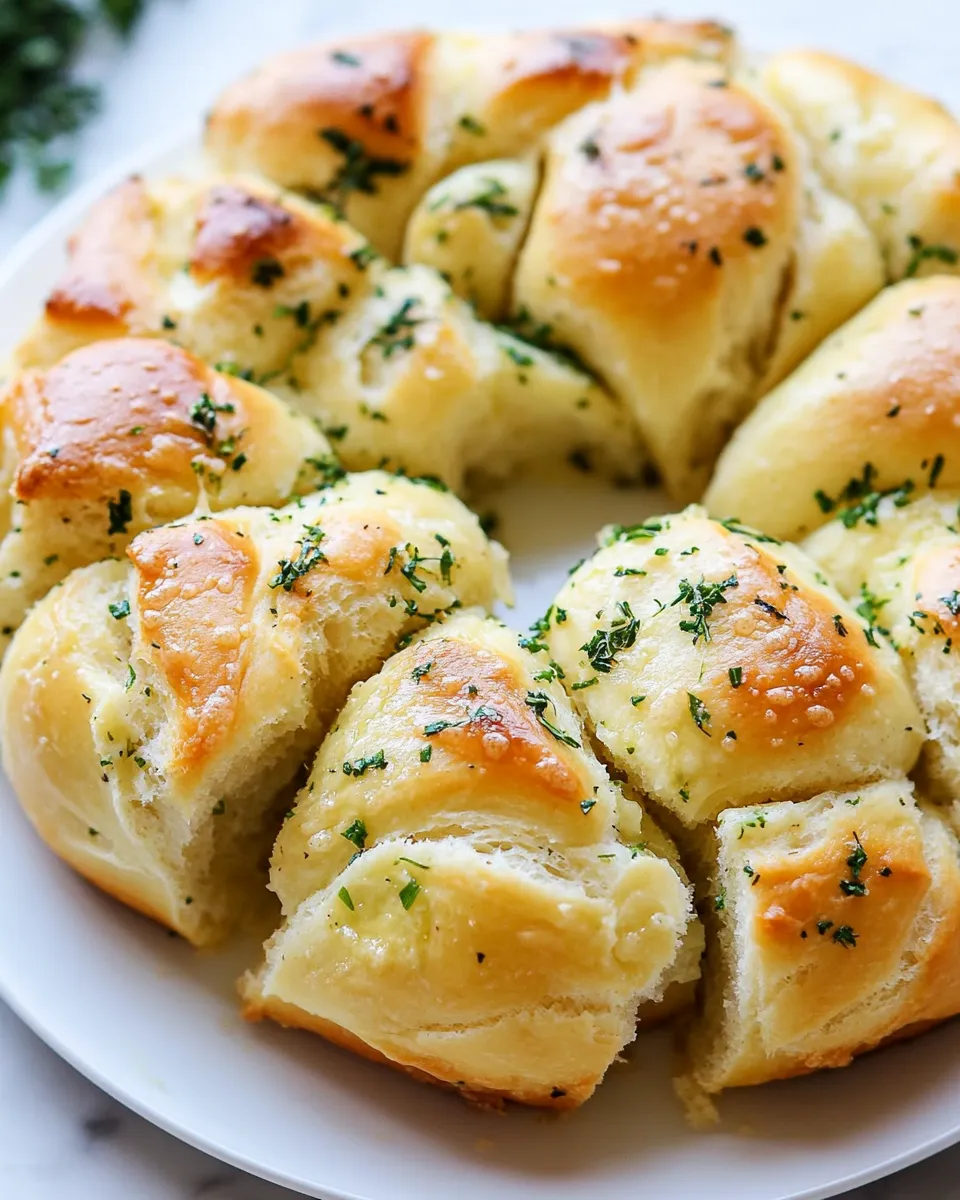
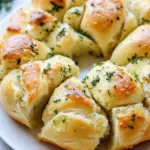
This pull-apart garlic bread is one of those recipes I turn to when I want something comforting that’s also a little showy. It’s hands-on but forgiving: you’ll roll, dip, and nest bite-sized dough rounds so they bake into a soft, tear-apart loaf with garlicky butter in every crevice. It’s great alongside a bowl of soup, a pasta night, or as the centerpiece for a casual gathering where people can tear off pieces and pass the loaf around.
I like this recipe for its rhythm. The dough is straightforward and the assembly is almost meditative — there’s a steady feel to cutting, rolling, and dipping. The garlic butter is simple but layered: parsley for freshness, garlic for punch, and a little Parmesan for a salty finish if you choose to include it. The result is always a warm, pillowy loaf with glossy, fragrant crusts that pull away easily.
Below you’ll find exactly what you need, step-by-step instructions taken from the tested method, and practical troubleshooting if things don’t go exactly as planned. Follow the process, keep an eye on the dough texture, and you’ll have a loaf that disappears fast.
What You’ll Need
Before you start, set aside your measured ingredients and a couple of pans. This recipe is built around a straightforward dough and a garlic-parsley butter. Pay attention to the yeast bloom and dough texture — those are the two places where a little care makes a big difference. If you want to scale this up, it’s easiest to keep the ratios intact and work in batches for shaping.
Ingredients
- 1/2 cup warm water — used to activate the yeast; should feel warm but not hot to the touch.
- 1 tablespoon white sugar — feeds the yeast so it blooms reliably.
- 1 teaspoon active dry yeast — the leavening agent; check the date for best rise.
- 1 tablespoon unsalted butter, softened — enriches the dough and adds tenderness.
- 1/2 cup milk — hydrates the dough and gives a slightly softer crumb than water alone.
- 1 teaspoon salt — seasons the dough; don’t skip it.
- 2 1/2 cups bread flour — gives structure and chew; bread flour works best for the right gluten development.
- 4 tablespoons unsalted butter, melted — forms the garlic butter the dough balls get dipped in.
- 1 pinch salt — a small extra seasoning in the butter mixture.
- some fresh parsley leaves, finely chopped — adds a fresh, herbal lift to the butter.
- 3 cloves garlic, finely minced — the primary flavor; mince finely so it spreads through the butter evenly.
- 1 teaspoon grated Parmesan cheese, optional — adds a salty, slightly nutty finish if you choose to include it.
Cooking Pull Apart Garlic Bread: The Process
- Fit a stand mixer with the dough hook. Pour 1/2cup warm water into the mixer bowl, sprinkle in 1tablespoon white sugar and 1teaspoon active dry yeast. Let sit 5–10 minutes until foamy.
- Add 1tablespoon unsalted butter (softened), 1/2cup milk, and 1teaspoon salt to the foamy yeast mixture and mix to combine.
- With the mixer running on low, add 2 1/2cups bread flour gradually until a dough forms.
- Knead the dough on medium-low with the dough hook for 7–10 minutes, until the dough clears the sides of the bowl but still sticks to the bottom. If the dough is too dense, add 1–2 tablespoons more warm water and knead until the desired texture is reached.
- Divide the dough into 2 equal portions.
- In a small bowl, combine 4tablespoons unsalted butter (melted), 1 pinch salt, some fresh parsley leaves (finely chopped), 3 cloves garlic (finely minced), and 1teaspoon grated Parmesan cheese (optional). Set aside a portion of this butter mixture to use for basting after baking.
- Cut each dough portion into small pieces and roll each piece into a small round. Dip each round into the butter mixture to coat.
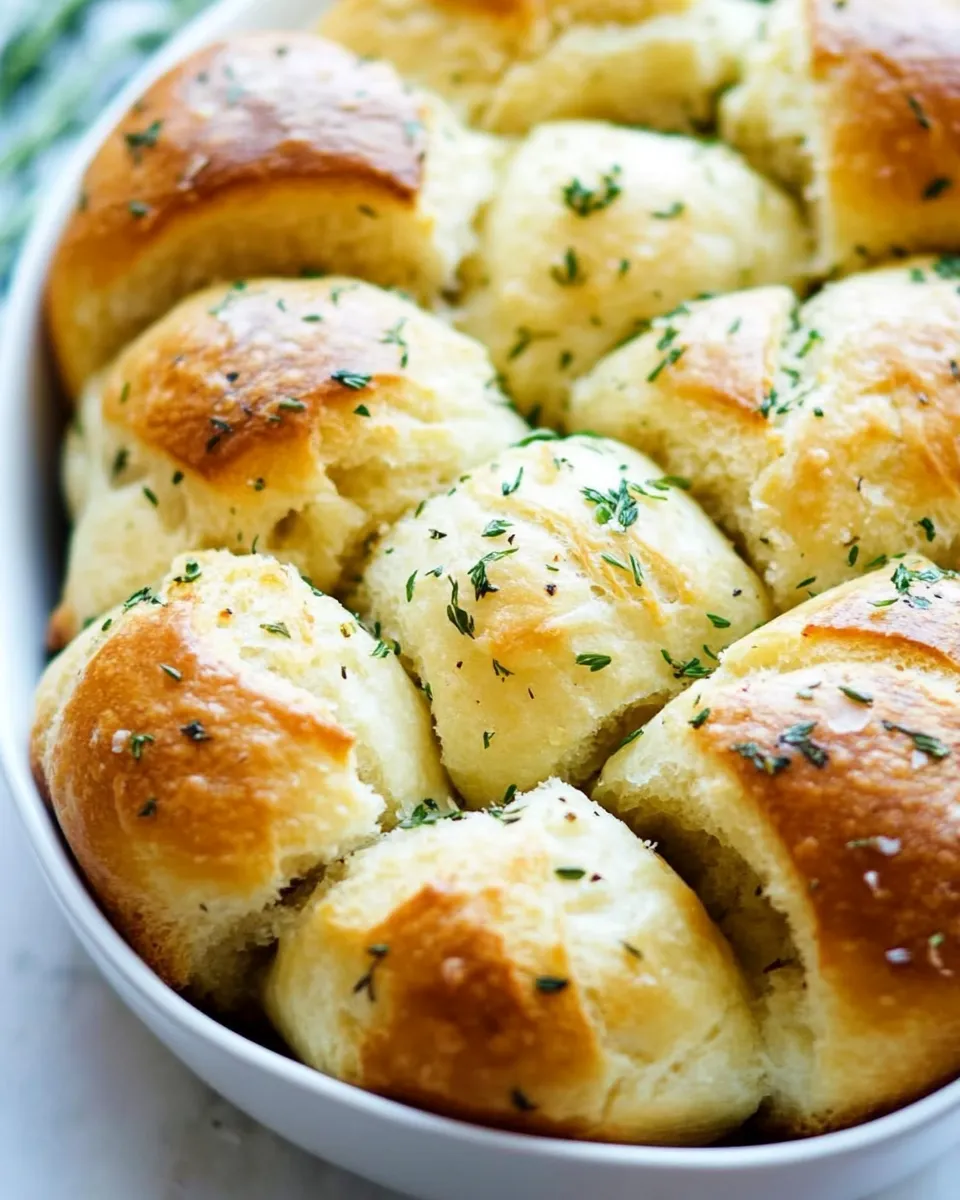
- Arrange the coated dough balls in two mini loaf pans or one regular loaf pan so they are close together and will pull apart when baked.
- Cover the pan(s) and let the dough rise until doubled in size, about 1 hour.
- Preheat the oven to 350°F (176°C). Bake the loaf(s) for 30 minutes or until golden brown.
- Immediately after removing from the oven, baste the pull-apart garlic bread with the reserved butter mixture. Allow to cool slightly, then serve.
Why I Love This Recipe
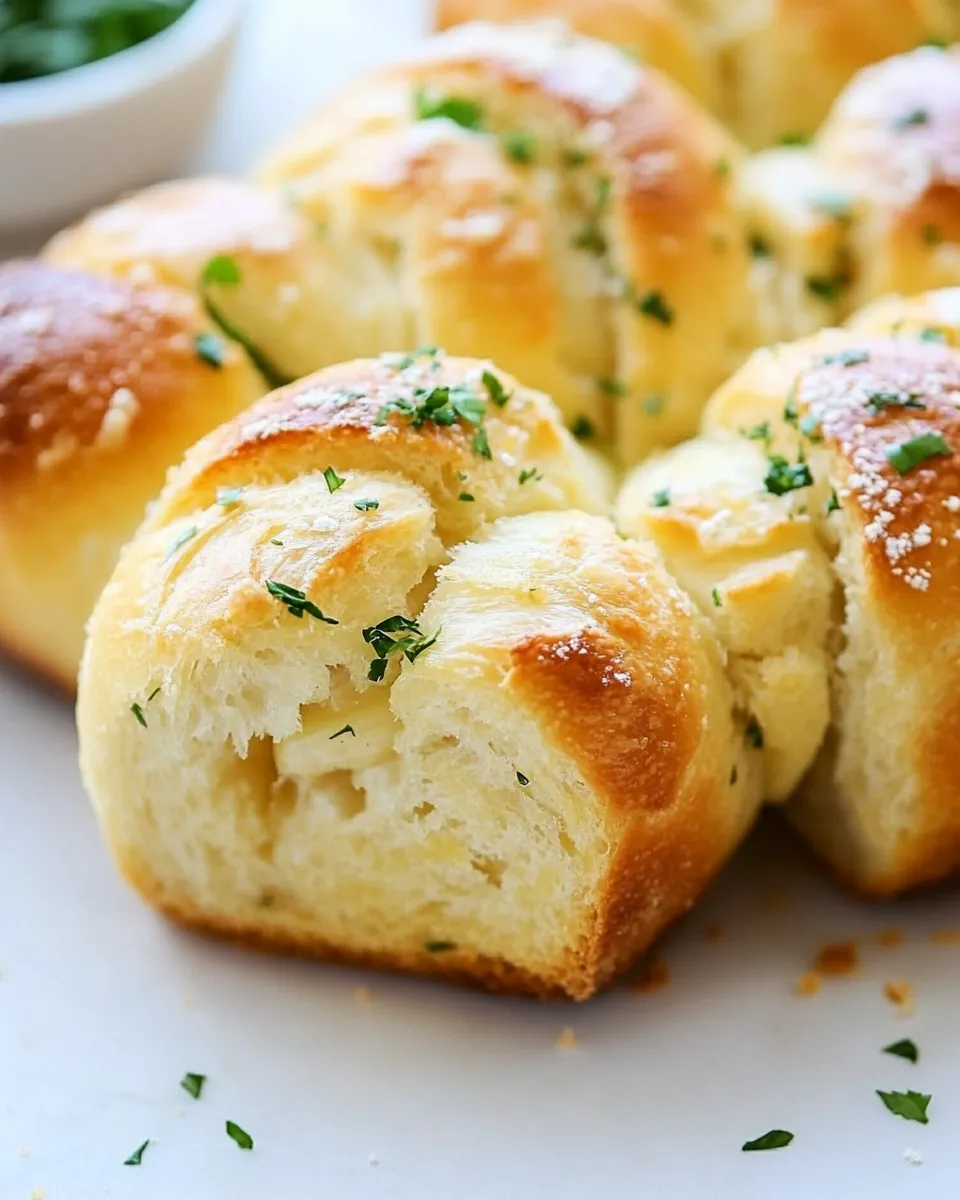
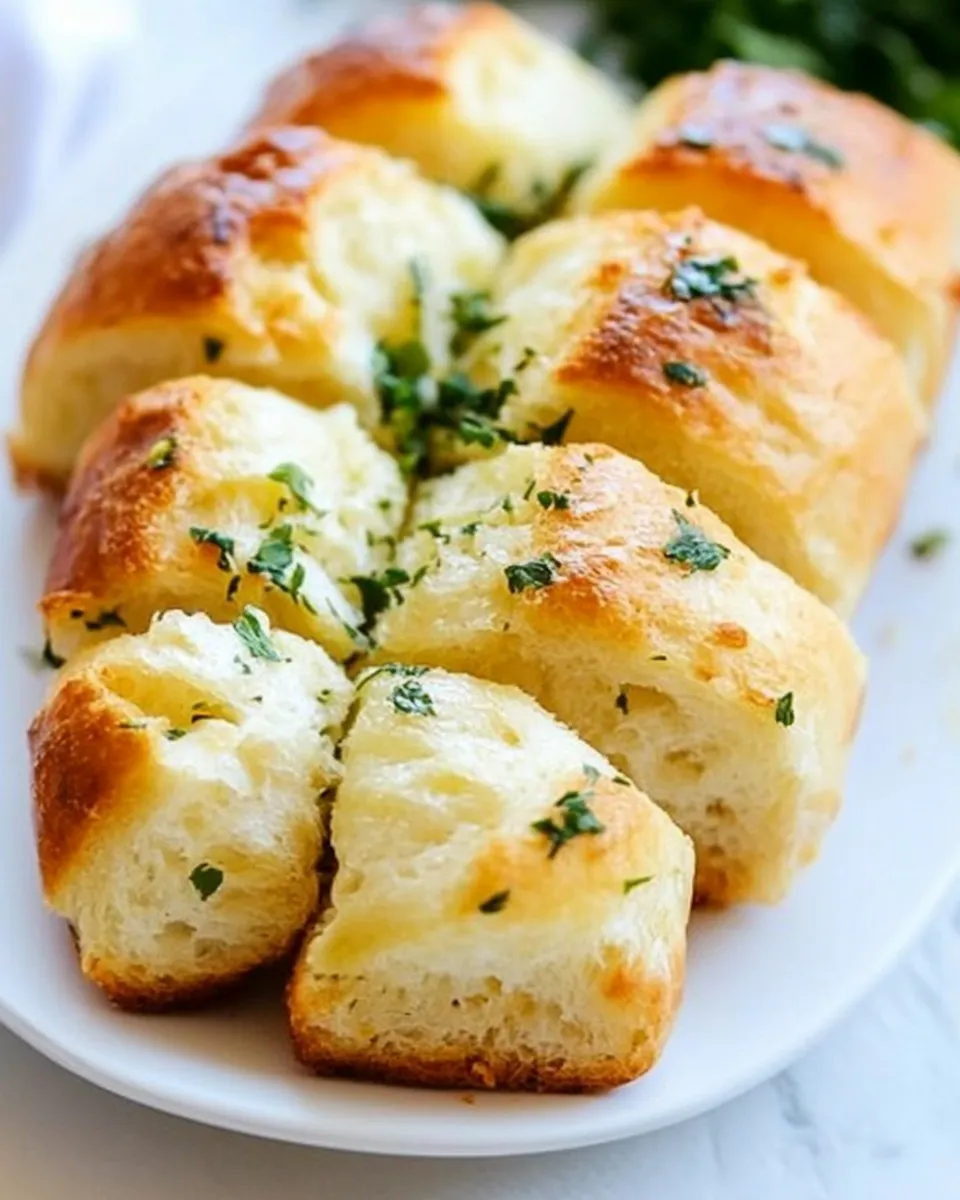
This recipe hits a sweet spot: it’s interactive, comforting, and reliably delicious. The shaping stage — rolling each piece, dipping it in garlic butter, and packing them together — creates layers where butter and flavor settle into the loaf. Each bite has a little edge of crisp from the crust and a soft center that pulls apart without tearing.
It’s flexible, too. You can make two mini loaves for guests, or a single regular loaf to bring to a potluck. The technique rewards attention to dough texture rather than perfect precision. I often make this when I want something warm and shareable that doesn’t require babysitting in the oven.
Dairy-Free/Gluten-Free Swaps
If you need dairy-free options, use a plant-based butter or a neutral oil for the garlic mixture. The butter’s role is to carry flavor and create sheen; plant-based spreads or oils do this well. For a richer dairy-free finish, sprinkle nutritional yeast at the end instead of Parmesan for that savory, cheesy note.
For gluten-free needs, the dough will need a flour blend formulated for yeast breads and often a binder like xanthan gum. Rise times and hydration will differ with gluten-free flour, so expect a looser dough and shorter kneading time. Because those swaps change texture, consider making a smaller test loaf first so you can adjust water and rise times without wasting ingredients.
What You’ll Need (Gear)
- Stand mixer with dough hook — makes the kneading step fast and consistent.
- Mixing bowls — for the yeast bloom and for the butter mixture.
- Mini loaf pans or one regular loaf pan — the shaping relies on the balls touching so they pull apart; either setup works.
- Measuring cups and spoons — yeast and liquid ratios matter for consistent rise.
- Small brush or spoon — to baste the reserved butter over the baked loaf.
- Plastic wrap or a clean kitchen towel — for covering the pan while the dough rises.
Missteps & Fixes
Dough doesn’t rise or the yeast doesn’t foam
- If the yeast mixture fails to foam after 10 minutes, your yeast might be old or the water too hot or cold. Start over with fresh yeast and water that’s warm (roughly body temperature).
Dough is too dense or dry
- If the dough clears the sides of the bowl but feels stiff and dry, add 1–2 tablespoons more warm water as the recipe suggests and knead until it reaches a slightly tacky, elastic texture. Small adjustments help; add water slowly.
Loaf is too flat after baking
- Under-proofing or over-proofing can flatten the loaf. Make sure the dough doubles in size during the rise. If it’s cold in your kitchen, give it a bit more time in a slightly warm place (off heat but away from drafts).
Garlic too sharp or raw tasting
- Finely mince the garlic and combine it with the butter ahead of time; if you prefer a milder garlic, briefly press or smash the garlic with salt to mellow it before mixing. The brief, hot oven bloom and the immediate baste after baking will also mellow raw bite.
In-Season Flavor Ideas
Spring: Add chopped fresh chives or tarragon to the butter for a bright, oniony lift.
Summer: Fold in a little finely chopped sun-dried tomato (very small amounts) or basil for Mediterranean notes.
Fall/Winter: Mix a pinch of smoked paprika into the butter for warmth, or stir in some finely chopped roasted rosemary for a piney aroma that pairs well with slow-roasted meats and stews.
These additions are meant to be subtle; the base garlic-parsley flavor should still shine through.
Behind the Recipe
This is a classic enriched bread workflow: activate yeast, add enriched liquids (butter and milk), build gluten with bread flour, then shape and proof. The pull-apart format creates a loaf with multiple exposed surfaces so the butter can caramelize at the edges while the interior stays soft. The reserved butter for basting at the end adds a glossy finish and a boost of fresh flavor right before serving.
I’ve found that the small rounds maximize surface area for butter absorption. Packing them close ensures they share heat and hold moisture, giving you distinct pull-apart sections rather than a single uniform loaf. The optional Parmesan is a finishing touch — it’s subtle when mixed into the butter but noticeable enough to add depth.
Make-Ahead & Storage
Make-ahead options:
- Prepare the dough and shape the balls, then place them in the pans, cover, and refrigerate overnight. The cold slow-rise develops flavor. Bring the pans to room temperature and let them finish proofing until doubled before baking.
- You can also bake the loaves fully, cool completely, then freeze. To reheat, thaw at room temperature and warm in a low oven (around 300°F / 150°C) until warmed through; baste with a little extra melted butter if desired.
Storage:
- Store leftover bread wrapped at room temperature for up to two days. For longer storage, refrigerate for 3–4 days or freeze for up to a month. Reheat in the oven to refresh texture; avoid microwaving for too long or it will become gummy.
Common Qs About Pull Apart Garlic Bread
- Q: Can I mix the dough by hand if I don’t have a stand mixer?
A: Yes. It will take a few more minutes of kneading by hand — aim for the same texture where the dough clears the sides of the bowl and feels elastic but slightly tacky. - Q: How small should the dough rounds be?
A: Make them bite-sized so they fit neatly in the pan and pull apart easily. Uniform size helps everything bake evenly. - Q: Do I have to use bread flour?
A: Bread flour gives better structure and chew, but all-purpose flour will work in a pinch. Expect a slightly softer, less chewy crumb with all-purpose flour. - Q: Can I skip the Parmesan?
A: Absolutely — it’s listed as optional. The loaf is still rich and flavorful without it. - Q: My garlic burned in the butter when I roasted it early — what should I do?
A: Burned garlic tastes bitter. If you’re roasting garlic ahead of time, keep it low and slow; if it’s already bitter, make a fresh butter mixture. Raw minced garlic in the butter will mellow with baking and the post-bake baste.
Final Thoughts
Pull-apart garlic bread is one of those recipes that feels special without being fussy. The technique is approachable, and the payoff is immediate: a loaf that’s soft, garlicky, and ideal for sharing. Stick to the process for the best texture, keep an eye on dough hydration, and don’t skip the final baste — it’s what gives the loaf its glossy, irresistible finish. Enjoy tearing into it warm.
Pull Apart Garlic Bread
Ingredients
Ingredients
- 1/2 cupwarm water
- 1 tablespoonwhite sugar
- 1 teaspoonactive dry yeast
- 1 tablespoonunsalted butter softened
- 1/2 cupmilk
- 1 teaspoonsalt
- 2 1/2 cupsbread flour
- 4 tablespoonsunsalted butter melted
- 1 pinchsalt
- somefresh parsley leaves finely chopped
- 3 clovesgarlic finely minced
- 1 teaspoongrated Parmesan cheese optional
Instructions
Instructions
- Fit a stand mixer with the dough hook. Pour 1/2cup warm water into the mixer bowl, sprinkle in 1tablespoon white sugar and 1teaspoon active dry yeast. Let sit 5–10 minutes until foamy.
- Add 1tablespoon unsalted butter (softened), 1/2cup milk, and 1teaspoon salt to the foamy yeast mixture and mix to combine.
- With the mixer running on low, add 2 1/2cups bread flour gradually until a dough forms.
- Knead the dough on medium-low with the dough hook for 7–10 minutes, until the dough clears the sides of the bowl but still sticks to the bottom. If the dough is too dense, add 1–2 tablespoons more warm water and knead until the desired texture is reached.
- Divide the dough into 2 equal portions.
- In a small bowl, combine 4tablespoons unsalted butter (melted), 1 pinch salt, some fresh parsley leaves (finely chopped), 3 cloves garlic (finely minced), and 1teaspoon grated Parmesan cheese (optional). Set aside a portion of this butter mixture to use for basting after baking.
- Cut each dough portion into small pieces and roll each piece into a small round. Dip each round into the butter mixture to coat.
- Arrange the coated dough balls in two mini loaf pans or one regular loaf pan so they are close together and will pull apart when baked.
- Cover the pan(s) and let the dough rise until doubled in size, about 1 hour.
- Preheat the oven to 350°F (176°C). Bake the loaf(s) for 30 minutes or until golden brown.
- Immediately after removing from the oven, baste the pull-apart garlic bread with the reserved butter mixture. Allow to cool slightly, then serve.
Equipment
- Stand mixer
- dough hook
- Small Bowl
- mini loaf pans
- Loaf Pan
- Oven
Notes
Dough should stick to the bottom of the bowl but clears sides.
You can divide the dough balls into however many pieces you would like to place into the loaf pan.