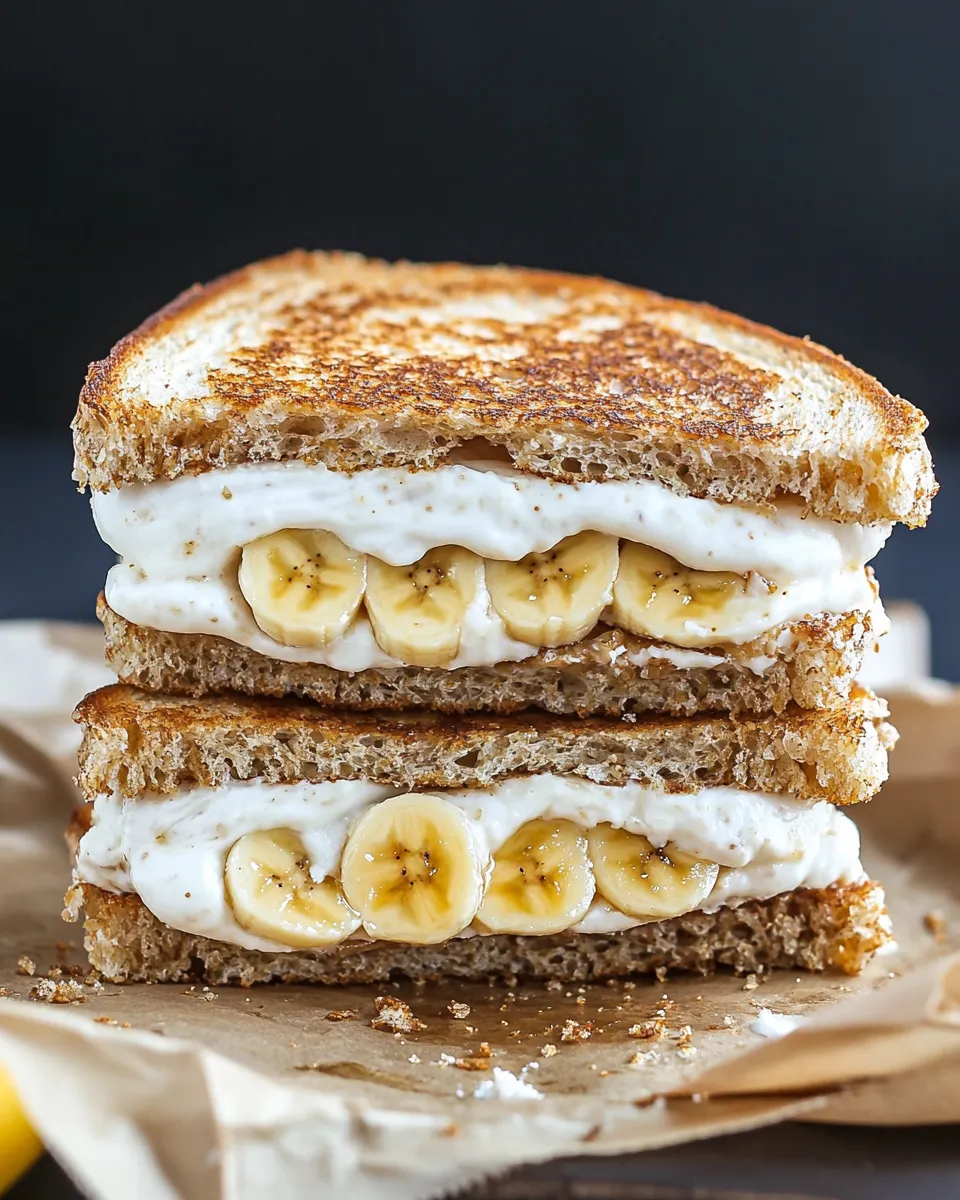
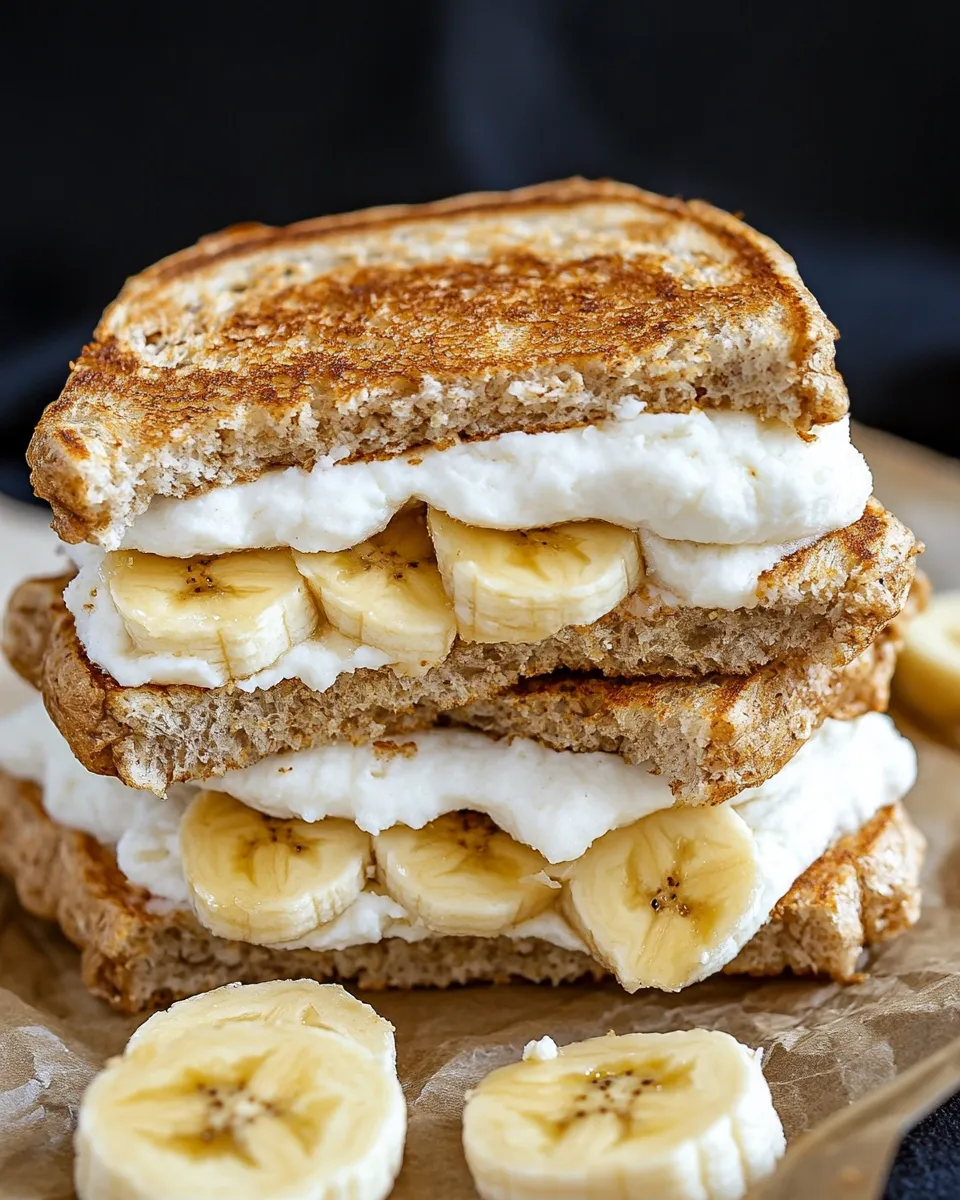
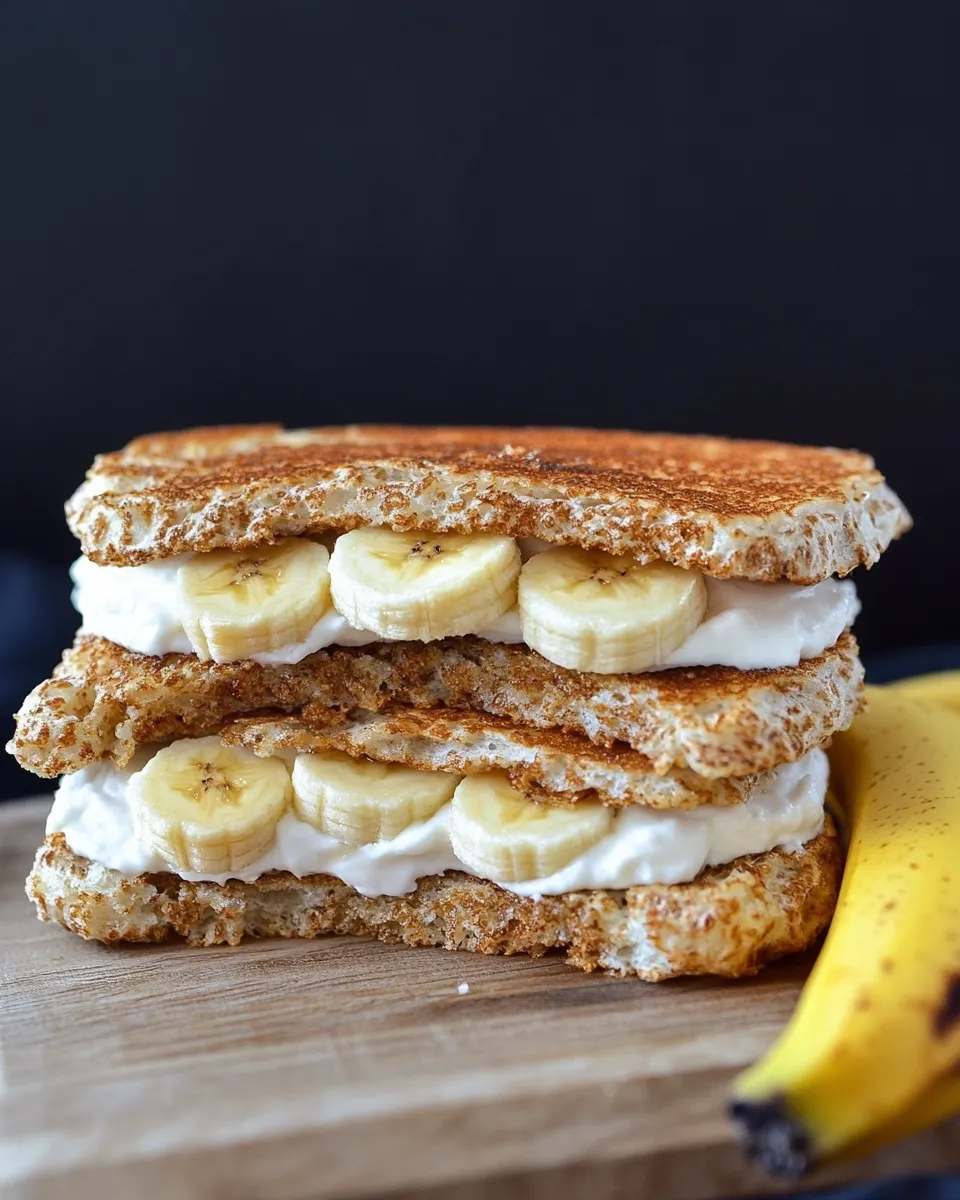
This sandwich is short on ceremony and long on comfort. It takes a few pantry staples and turns them into something warm, sweet, and very satisfying within minutes. No complicated steps. No special equipment. Just bread, butter, peanut butter, marshmallow creme, and a banana.
I test recipes in a small kitchen, the kind that makes efficiency a virtue. That means I care about timing, heat, and small details that change a good sandwich into a great one. You’ll get directions you can follow without hesitation and notes that actually matter while you make it.
Below I walk you through what goes into the sandwich, the step-by-step cook method, why the technique works, and useful tips for substitutions, storage, and troubleshooting. Read once, make it next time you want a quick, nostalgic treat.
What Goes Into Banana Fluffernutter Sandwich
- 2 slices white toast — neutral, soft loaves brown up quickly and hold the filling without overwhelming it.
- 1 tablespoon softened butter — browns the bread and creates a lightly crisp exterior; softened butter spreads evenly.
- 2 tablespoons creamy peanut butter — provides the savory, nutty base and helps anchor the banana slices.
- 2 tablespoons marshmallow creme — delivers the sweet, airy contrast that makes this a “fluffernutter.” Spread evenly to warm through.
- ½ banana, sliced — sliced thin enough to layer in one even layer; balancing ripeness is key (ripe but not mushy).
Cook Banana Fluffernutter Sandwich Like This
- Place the 2 slices of white toast on a clean work surface. Evenly spread the 1 tablespoon softened butter over one side of each slice so both outer sides are buttered.
- Turn the slices so the unbuttered sides face up. On one slice, spread 2 tablespoons creamy peanut butter evenly over the unbuttered side.
- On the other slice, spread 2 tablespoons marshmallow creme evenly over the unbuttered side.
- Arrange the 1/2 banana (sliced) in a single layer on top of the peanut butter.
- Close the sandwich with the marshmallow-creme-topped slice so the buttered sides face out.
- Heat a grill pan or nonstick skillet over medium heat until hot. Place the sandwich in the pan and cook the first side until golden and crispy, about 2–3 minutes, pressing gently with a spatula.
- Flip the sandwich and cook the other side until golden and the filling is warm, about 2–3 minutes.
- Transfer the sandwich to a plate, let sit about 30 seconds if desired, then serve immediately.
Why It Works Every Time
Two small things carry most of the success here: even buttering on the outside and controlled medium heat. Butter on the exterior browns reliably and forms a thin insulating crust. That crust traps enough heat to warm the marshmallow creme without burning the bread.
Pressing gently during the first side’s cook helps the two filling layers meet and spread slightly, so every bite gets peanut butter, banana, and marshmallow. The single layer of banana avoids sliding and prevents sogginess. Medium heat gives you brown, not black, and enough time for the center to warm through in roughly the same time the bread takes to toast.
Texture contrast matters. The creamy peanut butter anchors the fruit and offsets the sweet fluff. The toasted exterior gives structure so you can bite through without everything slipping out. Those elements together make a small number of ingredients feel balanced and satisfying.
International Equivalents
The Fluffernutter is an American classic in the peanut-butter-and-marshmallow family. Around the world, you’ll find sandwiches that marry nut butter and fruit or pair a sweet spread with cheese or jam. The basic idea—fatty or salty spread + sweet spread + fruit—translates easily.
Think of a landau of regional swaps: in places with different breads, use a soft white loaf or milk bread in place of “white toast.” If marshmallow creme isn’t common where you are, people sometimes use a thin layer of jam or a fruit-based sweet spread to provide the sweet counterpoint. The essential structure remains the same: a sturdy slice of bread, a savory/nutty layer, a sweet layer, and fresh fruit.
Before You Start: Equipment
Must-have
- Grill pan or nonstick skillet — you need a flat, evenly heated surface so the sandwich browns without scorching.
- Spatula — for pressing gently and flipping cleanly.
- Knife — to slice the banana and spread fillings if you don’t use spreadable utensils.
Nice-to-have
- Plate — for resting the sandwich for a few seconds before serving.
- Small butter knife or offset spatula — helps spread butter and marshmallow creme evenly.
Common Errors (and Fixes)
Burned bread. Fix: turn the heat down. Medium is the target; if the pan’s smoke point is reached the butter will burn before the filling warms.
Soggy center. Fix: use only a single layer of banana and don’t over-spread the marshmallow creme. Also, warm the sandwich long enough for the filling to heat but not so long that the bread softens from trapped steam.
Filling slides out. Fix: press gently during the first side’s cook so the filling adheres, and let the sandwich rest for 20–30 seconds off heat to let the filling settle before cutting or eating.
Uneven browning. Fix: make sure your pan is preheated evenly and the butter is spread across the outer sides, not just in patches. If one spot browns faster, the pan temperature is uneven or too high.
Smart Substitutions
Crunchy vs. creamy peanut butter: swap in crunchy if you want extra texture. The sandwich’s overall balance stays the same; expect more toothsome bites.
Bread options: a soft white loaf is what the recipe uses, but milk bread, brioche, or a thin-cut sandwich loaf will brown similarly. Thicker slices need slightly more cook time; watch the heat to avoid burning.
Marshmallow creme alternatives: if you can’t find marshmallow creme, a mild, spreadable jam or a thin spread of honey gives sweetness, though the texture will change. If you need a dairy-free or vegan route, use a plant-based butter and choose a vegan marshmallow spread or jam.
Banana ripeness: use a banana that is ripe enough to be sweet but not so soft it turns to mush when sliced. If your banana is underripe, the sandwich will lack sweetness; if it’s overripe, the filling can become runny.
If You’re Curious
Fluffernutter sandwiches have a bit of local lore behind them, but the practical takeaway is simple: sweetness plus fat plus fruit equals comfort. When heated, marshmallow creme softens quickly; combine that with the warm peanut butter and you get a molten, sweet center. That’s why even a brief cook time is enough.
Banana temperature and slice thickness matter. Thin slices warm faster and are less likely to slide. A short rest after cooking lets residual heat redistribute and keeps the filling from sliding out the moment you pick it up.
Make Ahead Like a Pro
You can speed up service without sacrificing quality. Pre-slice the banana and keep it in an airtight container for a few hours in the fridge. Pre-spread the peanut butter and marshmallow creme on separate slices, then stack with parchment between layers to keep them from sticking—assemble only when you’re ready to cook.
For short-term storage (a few hours), assemble the sandwich but skip the final toast in the pan. Wrap it tightly and keep it chilled. When you’re ready to eat, bring it to room temp for a few minutes and toast it in the skillet. The sandwich reheats predictably and crisps back up without the banana becoming overly soft.
Freezing a fully assembled, buttered sandwich is not recommended; frozen bananas will release moisture on thawing and the bread will get soggy. If you need to prep ahead for a make-ahead meal, layer spreads onto separate slices and freeze them flat with parchment between. Thaw and assemble before grilling.
Your Top Questions
- Can I eat this cold? — Yes. It’s sweet and soft cold, but the toasted exterior is part of the charm; pan-toasting gives a crisp contrast.
- Is there a vegan version? — Replace the butter with a plant-based spread and use a vegan marshmallow creme alternative; choose a suitable vegan bread.
- Can I double the recipe? — Absolutely. Make sandwiches one at a time in the pan or use a larger skillet and monitor cooking times; heat distribution will vary with quantity.
- Can I add chocolate? — A thin smear of chocolate spread will work, but it changes the original flavor profile from fluffernutter to more of a banana-chocolate sandwich.
- How ripe should the banana be? — Ripe enough to be sweet but not so soft that it turns to mush when handled—think yellow with a few brown speckles.
Bring It Home
This is a straightforward recipe that rewards attention to small details: even buttering, medium heat, and a single banana layer. Follow the steps exactly for a reliable result, and then make small changes to suit your taste—switch bread, try crunchy peanut butter, or test a jam if marshmallow creme isn’t available.
When you make it, toast it just until golden. Serve it hot, and take your first bite while the interior is warm and slightly molten. It’s quick, honest comfort food. Try it and tell me what small tweak made it yours—texture, heat, or a favorite swap.

Banana Fluffernutter Sandwich
Ingredients
Ingredients
- ?2 sliceswhite toast
- ?1 tablespoonbuttersoftened
- ?2 tablespooncreamy peanut butter
- ?2 tablespoonsmarshmallow creme
- ?1/2 bananasliced
Instructions
Instructions
- Place the 2 slices of white toast on a clean work surface. Evenly spread the 1 tablespoon softened butter over one side of each slice so both outer sides are buttered.
- Turn the slices so the unbuttered sides face up. On one slice, spread 2 tablespoons creamy peanut butter evenly over the unbuttered side.
- On the other slice, spread 2 tablespoons marshmallow creme evenly over the unbuttered side.
- Arrange the 1/2 banana (sliced) in a single layer on top of the peanut butter.
- Close the sandwich with the marshmallow-creme-topped slice so the buttered sides face out.
- Heat a grill pan or nonstick skillet over medium heat until hot. Place the sandwich in the pan and cook the first side until golden and crispy, about 2–3 minutes, pressing gently with a spatula.
- Flip the sandwich and cook the other side until golden and the filling is warm, about 2–3 minutes.
- Transfer the sandwich to a plate, let sit about 30 seconds if desired, then serve immediately.
Equipment
- grill pan or nonstick skillet
- Spatula
- Plate