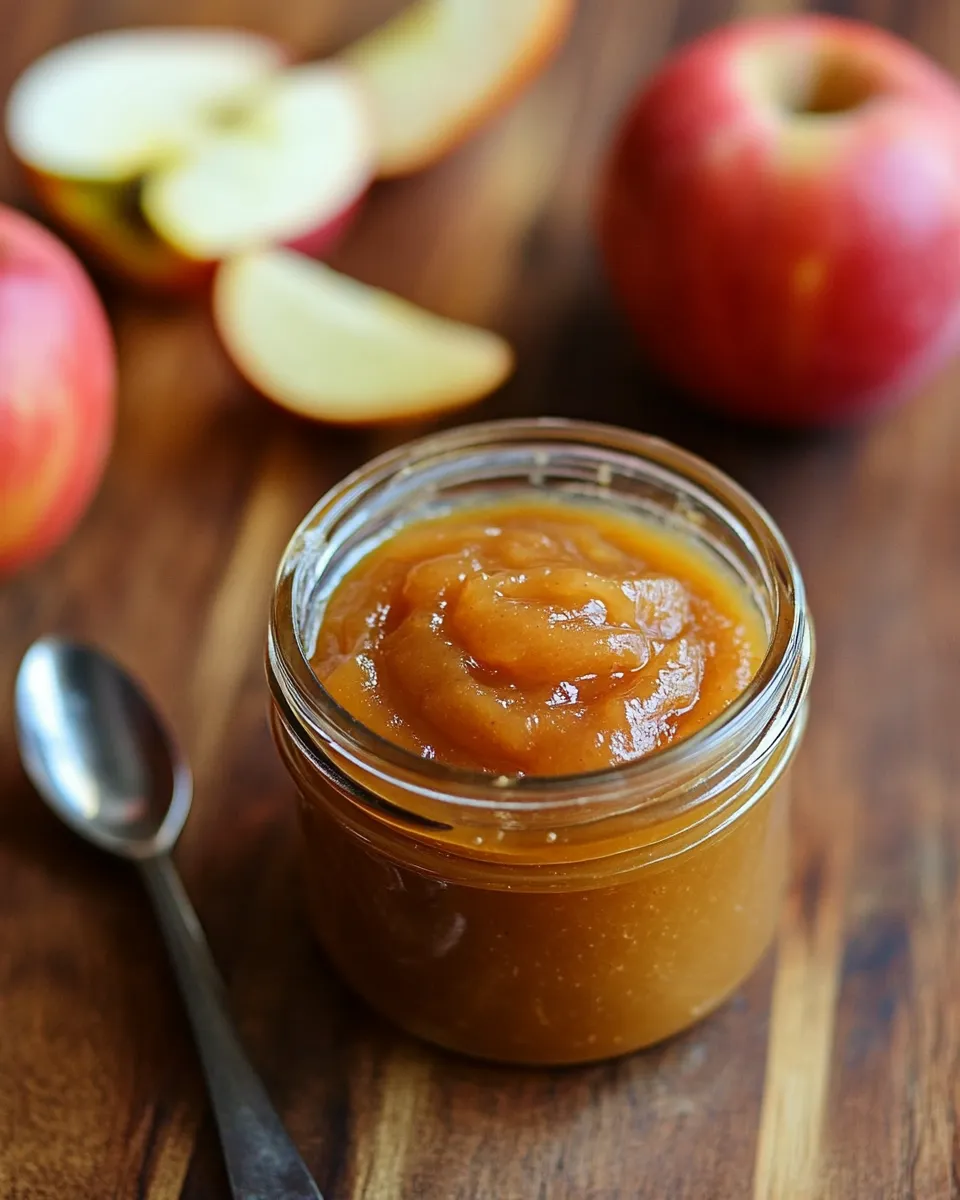
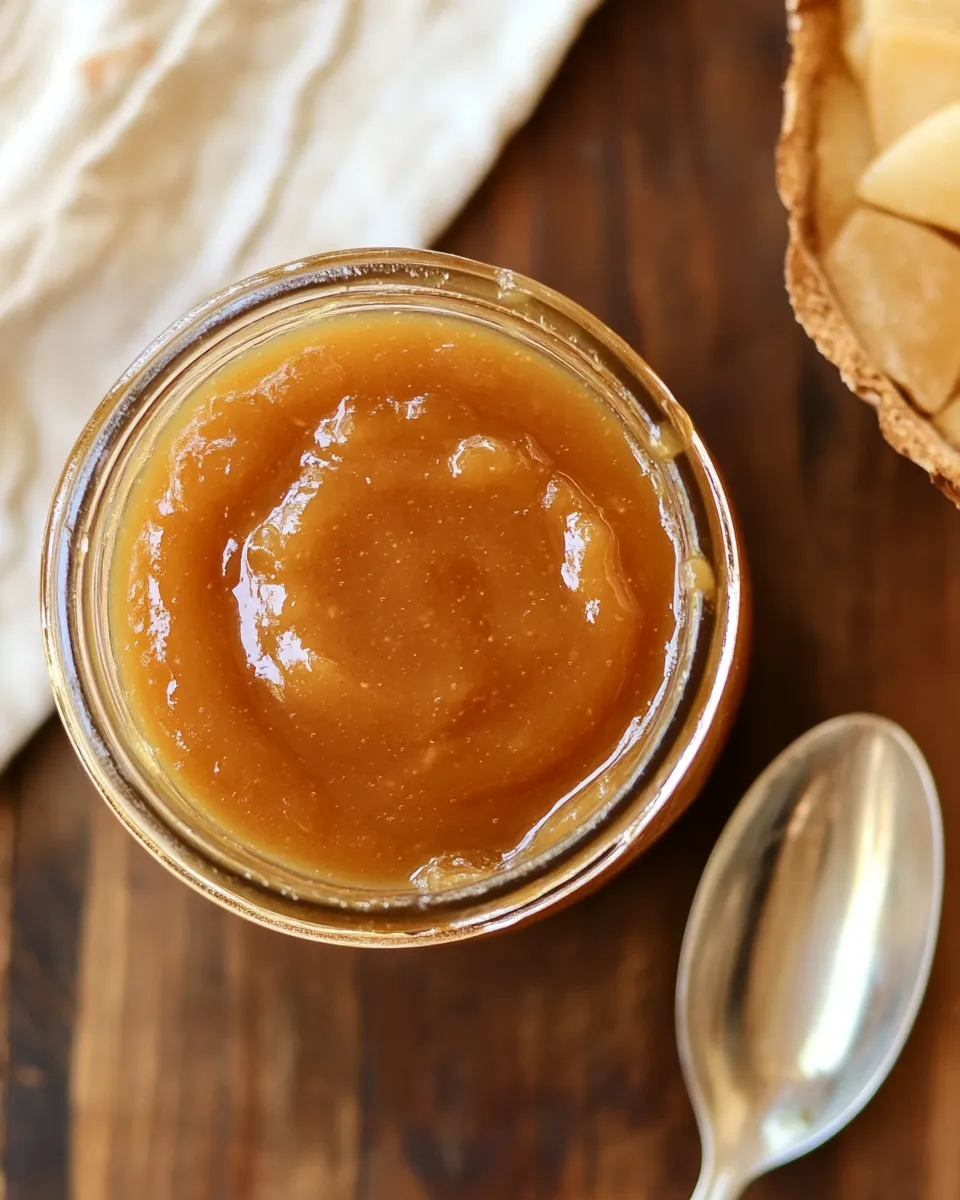
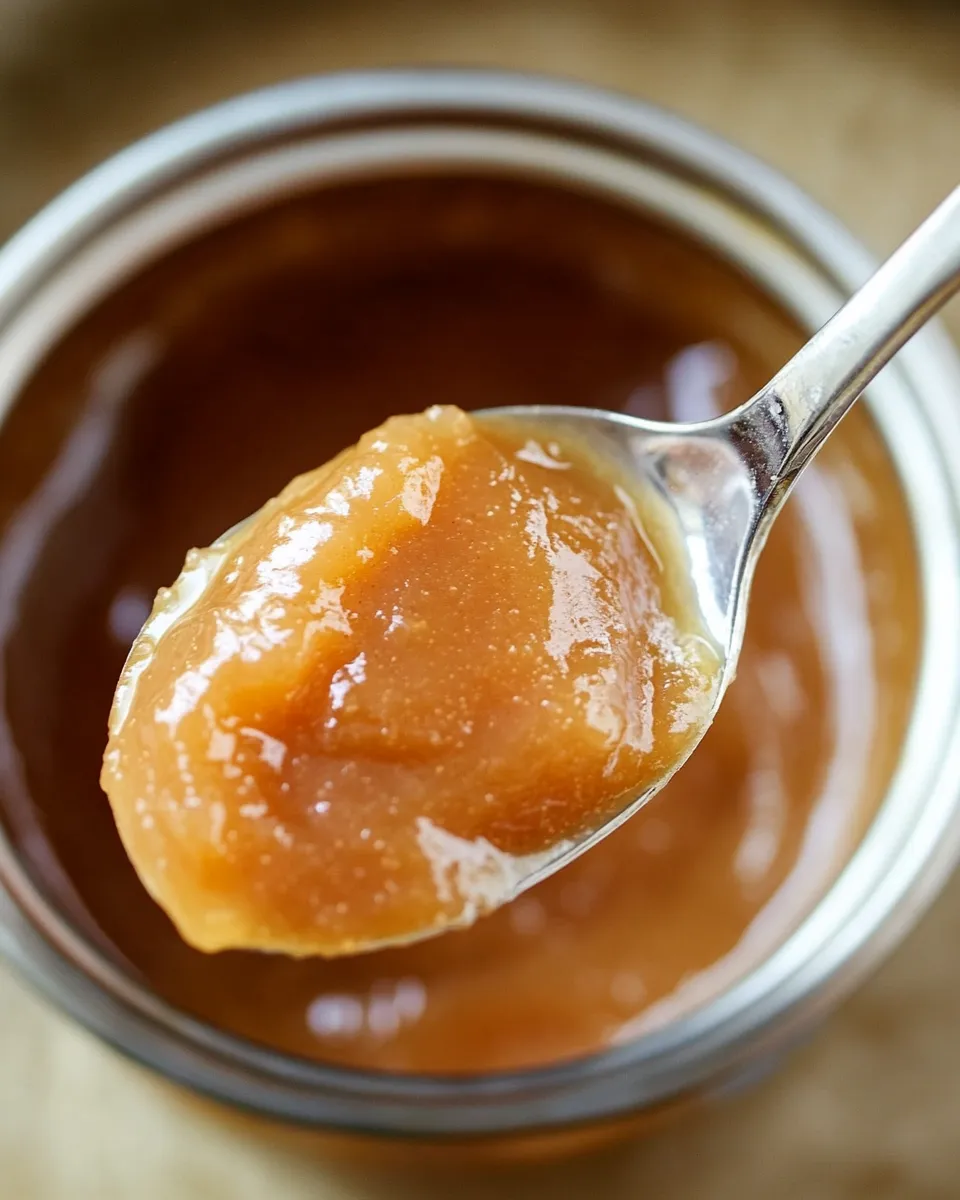
Apple butter is the slow, cozy cousin of applesauce: concentrated apple flavor, deep color, and a spreadable, velvety texture that makes toast, biscuits, and roasted pork sing. It’s the kind of thing you make when you have time to tend a pot or a slow cooker and want a pantry-ready flavor booster for weeks to come.
I make this recipe the way my kitchen actually works: practical steps you can follow whether you’ve got a pot on the stove, an Instant Pot, or a slow cooker. The directions keep the ingredient list short and honest, and they let the apples do the talking. You’ll get clear stages — cook, puree, reduce — and straightforward notes on texture and storage so you don’t guess your way through the last, crucial simmer.
Below you’ll find a tidy shopping list, the step-by-step build, troubleshooting tips, and sensible storage advice. No fluff, just the kind of guidance I wish I’d had the first time I tried to go from a bushel of apples to something that spreads like silk.
Shopping List
Ingredients
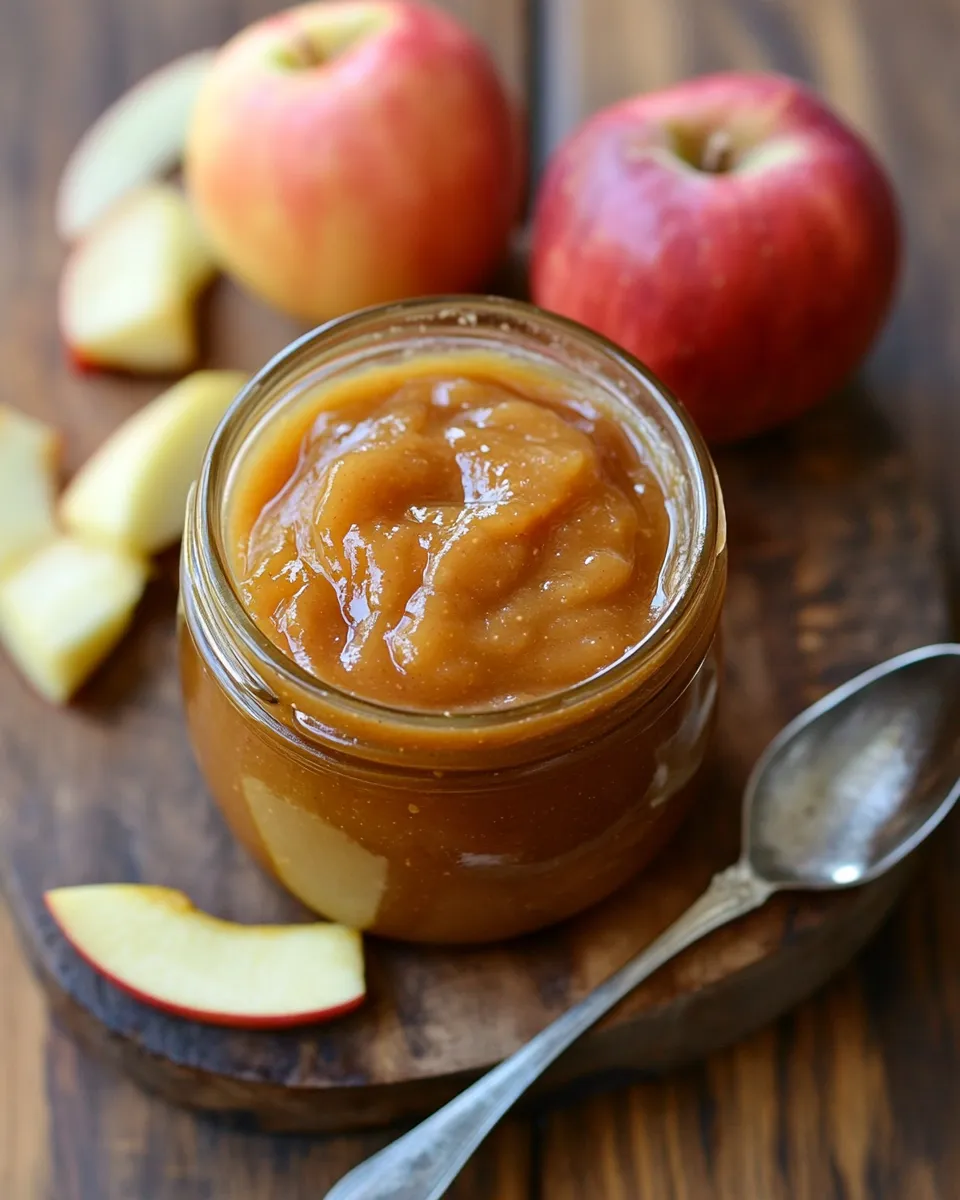
- 4 pounds (2 kg) apples — the foundation. Use a mix if you like: sweet + tart balances well.
- 1 cup (250 ml) water — prevents sticking and helps the apples break down.
- ½ cup (100 g) maple syrup or brown or granulated sugar — sweetens and helps deepen color; choose maple syrup for complexity or sugar for neutrality.
- 1 teaspoon ground cinnamon (optional) — warm spice; use if you want traditional flavor notes.
- ¼ teaspoon ground cloves (optional) — potent, so use sparingly or leave it out for a simpler profile.
- 1 teaspoon pure vanilla extract (optional) — stirred in at the end for aroma; add only after reducing.
- ¼ teaspoon salt — balances and brightens the apple flavor.
Build Homemade Apple Butter Step by Step
- Wash, peel, core, and quarter the apples.
- Place the quartered apples into a large pot, the Instant Pot insert, or the slow cooker. Add 1 cup (250 ml) water, ½ cup (100 g) maple syrup or sugar, ¼ teaspoon salt, and the optional spices (1 teaspoon ground cinnamon and ¼ teaspoon ground cloves) if using. Do not add the vanilla yet.
- Stovetop method (choose this if using a pot): Cover the pot, cook over low–medium heat, and stir occasionally until the apples are very soft, about 45–60 minutes. Use an immersion blender to puree the mixture until smooth. Continue to cook uncovered over low–medium heat, stirring frequently and scraping the bottom to prevent scorching, until the apple butter is thick, velvety, and darkened in color, about another 45–60 minutes.
- Instant Pot method (choose this if using an electric pressure cooker): Put the apple mixture (with the 1 cup water and other listed ingredients) into the Instant Pot insert. Cover and set the vent to sealing. Select “Manual” or “Pressure Cook” on high for 10 minutes. When the cook cycle finishes, allow a natural pressure release for about 15–20 minutes, then carefully open the lid. Puree the contents with an immersion blender. If the apple butter is too thin, use the “Sauté” setting and simmer, stirring constantly and scraping the bottom, until it reaches the desired thickness (this may take up to 15 minutes).
- Slow cooker method (choose this if using a slow cooker): Cover and cook on low for about 8 hours, stirring occasionally. When the apples are very soft, puree the mixture in the slow cooker with an immersion blender. If the apple butter is still too thin, continue cooking on low or high until it reduces to your preferred thickness, stirring to prevent sticking.
- After pureeing and reducing (all methods): Stir in 1 teaspoon pure vanilla extract if using. Taste and ensure seasoning is balanced (do not add additional ingredients beyond the listed amounts).
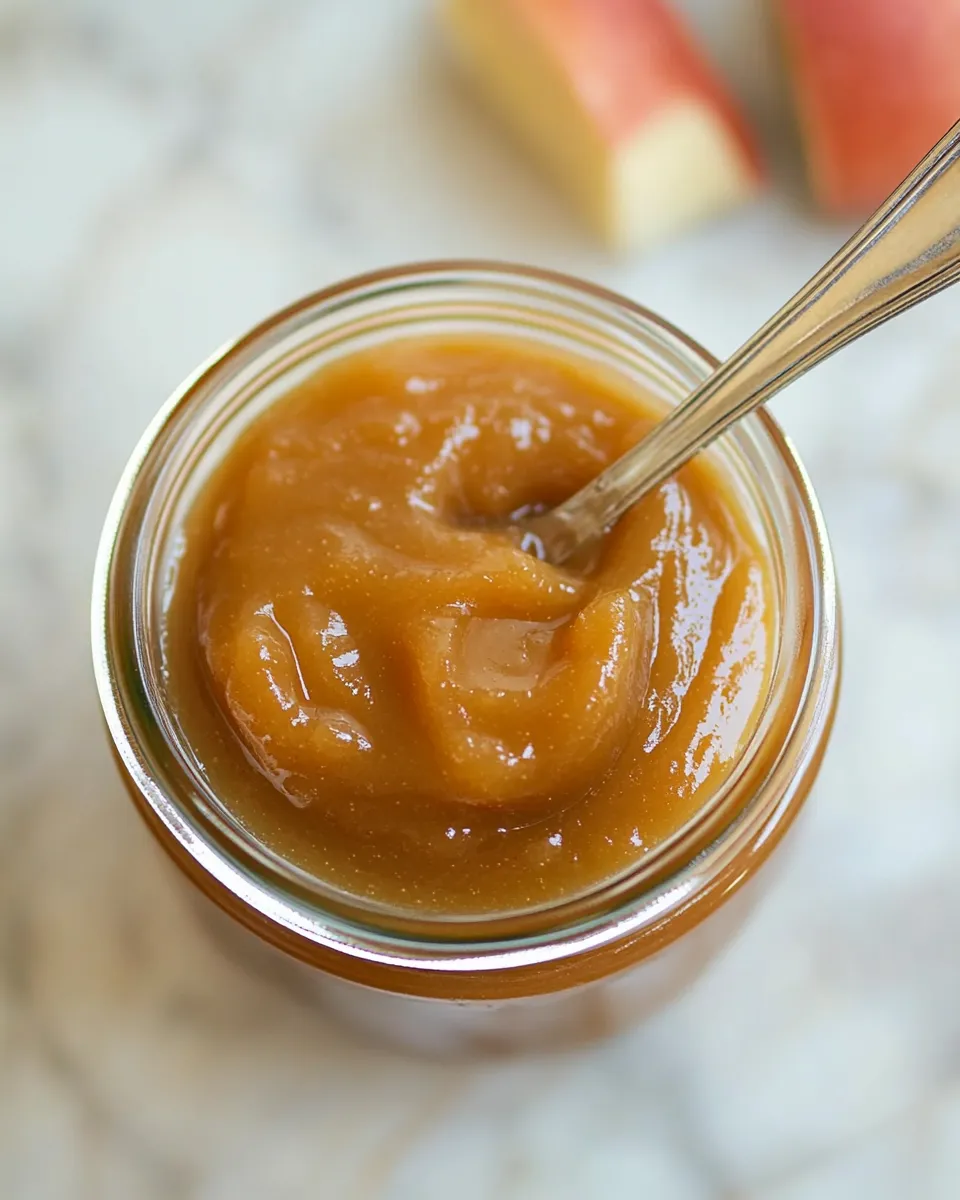
- Cool slightly, then transfer the apple butter to clean jars. Allow to cool to room temperature before refrigerating or processing according to safe canning guidelines if you plan to store long term.
Why It Deserves a Spot
Apple butter is concentrated apple flavor without a lot of fuss. One batch transforms several pounds of fruit into a spread you’ll reach for more than you expect. It’s versatile: use it on toast, swirl it into yogurt, brush it on roasted meat, or fold it into batters for quick breads. It stores well in the fridge and, if processed properly, in the pantry.
The magic is texture and depth. Slow reduction turns bright, thin applesauce into a deep, velvety butter with caramel undertones. The small amount of salt and optional spice lets natural apple character come forward instead of being masked.
What to Use Instead
- Apples — use any eating apples or a blend. Crisp, tart apples (like Granny Smith) add brightness; sweeter apples (like Fuji or Gala) give richer sweetness.
- Sweetener — the recipe allows ½ cup (100 g) maple syrup or brown or granulated sugar. Use maple syrup for a deeper, maple-apple note; use sugar for a cleaner apple flavor.
- Spices — the recipe lists 1 teaspoon ground cinnamon and ¼ teaspoon ground cloves as optional. Use cinnamon alone for a classic take; omit cloves if you prefer a milder spice profile.
- Vanilla — 1 teaspoon pure vanilla extract is optional and added at the end for aroma. Skip it if you prefer a pure apple-forward spread.
Tools & Equipment Needed
- Large pot (if using stovetop) or Instant Pot insert or slow cooker — pick based on the method you prefer.
- Immersion blender — the quickest, least messy way to puree the cooked apples to a smooth finish.
- Spoon or spatula — heat-safe, for stirring and scraping the bottom frequently during reduction.
- Clean jars with lids — for storing in the fridge or processing for long-term storage.
- Optional: fine-mesh sieve if you prefer an ultra-silky texture and want to remove any remaining bits.
Common Errors (and Fixes)
- Burning or scorching on the bottom (stovetop or Instant Pot sauté): fix by lowering the heat immediately, stirring and scraping the bottom to loosen any stuck bits. Move to a heavy-bottomed pan next time or reduce the heat sooner during the final reduction.
- Apple butter too thin after pureeing: keep reducing. Simmer uncovered over low heat (stovetop), use the Sauté cycle and stir constantly (Instant Pot), or continue on low/high (slow cooker) until thickened.
- Overly sweet result: if it tastes too sweet, use less sweetener next time. The recipe gives a clear amount; reduce the ½ cup (100 g) sweetener slightly for a tarter end product.
- Flat or one-note flavor: make sure to include the ¼ teaspoon salt and consider the optional 1 teaspoon vanilla extract at the end. These small additions lift the fruit without changing the recipe’s balance.
- Apple butter too chunky: puree longer with the immersion blender. If you want an ultra-smooth finish, press through a fine-mesh sieve after pureeing.
Better-for-You Options
- Swap maple syrup for granulated or brown sugar depending on preference. Maple syrup adds a richer, less refined sweetness and reduces added refined sugar if that’s a concern.
- Reduce the listed sweetener slightly if your apples are very sweet. The recipe already allows either maple syrup or sugar; trimming the ½ cup (100 g) down by a tablespoon or two can lower added sugars while keeping texture.
- Skip the optional spices if you prefer a pure fruit spread. The core recipe — apples, water, salt, and a touch of sweetener — is still wholesome and flavorful.
Insider Tips
Prep and flavor
- Mix apple varieties. A mix of sweet and tart apples gives complexity without adding ingredients.
- Don’t add vanilla until after reduction. The recipe specifies this for a reason: vanilla loses brightness if cooked for too long.
Texture and color
- Color deepens as the sugars concentrate and mild caramelization happens during reduction. Don’t rush the final simmer if you want that deep, glossy finish.
- To avoid scrapping every few minutes, use a heavy-bottomed pot on the stovetop; it distributes heat more evenly.
Freezer-Friendly Notes
Apple butter freezes well. Use freezer-safe containers or jars, leaving headspace for expansion (about ½ inch / 1 cm). Label with the date. Thaw in the fridge overnight and stir to recombine any separation. For the longest shelf life, freeze in small portions so you only thaw what you need.
If you plan to can jars for shelf storage, follow safe canning guidelines and tested processing times for fruit spreads. The recipe suggests allowing jars to cool to room temperature before refrigerating or processing; when in doubt, consult a reliable canning resource for proper jars, lids, and pressure/boiling-water-bath instructions.
Quick Questions
- How long does it keep in the fridge? Homemade apple butter should keep in the refrigerator for 2–3 weeks if stored in clean jars.
- Can I use any apple? Yes. The recipe is flexible. Use a mixture for balance or a single variety if you prefer one flavor profile.
- Do I have to use spices? No. Cinnamon and cloves are optional; the apple flavor stands on its own.
- Can I skip the sweetener? You can reduce it, but the ½ cup (100 g) of maple syrup or sugar helps with color and preservation of flavor during reduction. Taste and adjust in future batches.
- Is vanilla required? Vanilla is optional and added after reducing. It brightens aroma but is not essential.
The Last Word
This Homemade Apple Butter is an exercise in patience that rewards you with deep, concentrated apple flavor and a versatile pantry staple. Stick to the method: break down the apples, puree, then reduce slowly until velvety. Small details — salt, the timing of vanilla, and careful stirring during reduction — make the difference between good and great.
Make a double batch when apples are cheap or in season. You’ll use it faster than you expect. And if you ever doubt whether your apple butter is done, remember: the color deepens and the mixture becomes noticeably thicker and less watery when it’s ready. Happy cooking — and enjoy the small comfort of homemade preserves.
Homemade Apple Butter
Ingredients
Ingredients
- ?4 pounds 2 kgapples
- ?1 cup 250 mlwater
- ?1/2 cup 100 gmaple syrupor brown or granulated sugar
- ?1 teaspoonground cinnamonoptional
- ?1 teaspoonpure vanilla extractoptional
- ?1/4 teaspoonclovesoptional
- ?1/4 teaspoonsalt
Instructions
Instructions
- Wash, peel, core, and quarter the apples.
- Place the quartered apples into a large pot, the Instant Pot insert, or the slow cooker. Add 1 cup (250 ml) water, ½ cup (100 g) maple syrup or sugar, ¼ teaspoon salt, and the optional spices (1 teaspoon ground cinnamon and ¼ teaspoon ground cloves) if using. Do not add the vanilla yet.
- Stovetop method (choose this if using a pot): Cover the pot, cook over low–medium heat, and stir occasionally until the apples are very soft, about 45–60 minutes. Use an immersion blender to puree the mixture until smooth. Continue to cook uncovered over low–medium heat, stirring frequently and scraping the bottom to prevent scorching, until the apple butter is thick, velvety, and darkened in color, about another 45–60 minutes.
- Instant Pot method (choose this if using an electric pressure cooker): Put the apple mixture (with the 1 cup water and other listed ingredients) into the Instant Pot insert. Cover and set the vent to sealing. Select “Manual” or “Pressure Cook” on high for 10 minutes. When the cook cycle finishes, allow a natural pressure release for about 15–20 minutes, then carefully open the lid. Puree the contents with an immersion blender. If the apple butter is too thin, use the “Sauté” setting and simmer, stirring constantly and scraping the bottom, until it reaches the desired thickness (this may take up to 15 minutes).
- Slow cooker method (choose this if using a slow cooker): Cover and cook on low for about 8 hours, stirring occasionally. When the apples are very soft, puree the mixture in the slow cooker with an immersion blender. If the apple butter is still too thin, continue cooking on low or high until it reduces to your preferred thickness, stirring to prevent sticking.
- After pureeing and reducing (all methods): Stir in 1 teaspoon pure vanilla extract if using. Taste and ensure seasoning is balanced (do not add additional ingredients beyond the listed amounts).
- Cool slightly, then transfer the apple butter to clean jars. Allow to cool to room temperature before refrigerating or processing according to safe canning guidelines if you plan to store long term.
Equipment
- Large Pot
- Instant Pot insert
- Slow Cooker
- Immersion Blender
Notes
For the Instant Pot, use¼cup of water unless you’re using a newer model of Instant Pot then use½cup of water.
And for the slow cooker, use 1 cup of water.