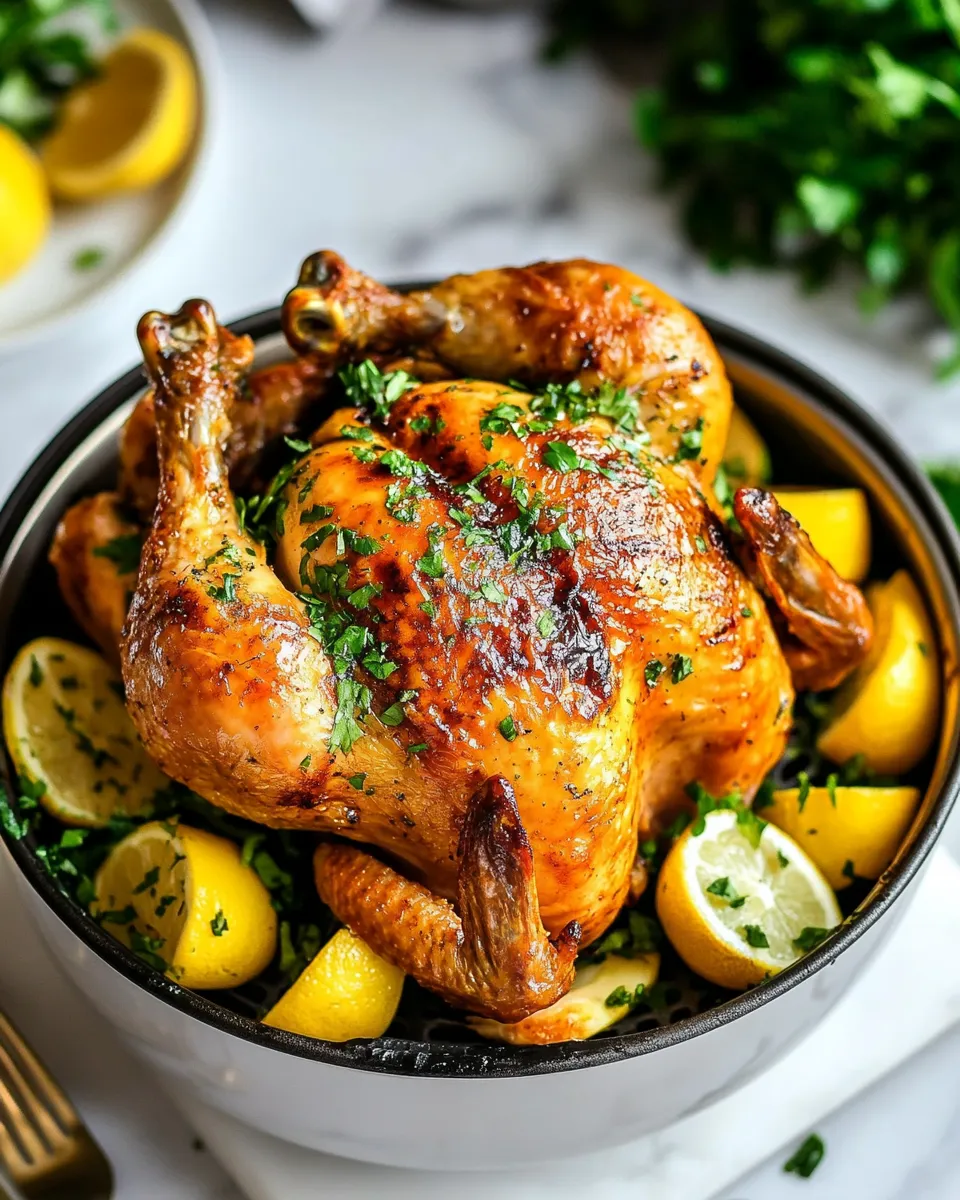
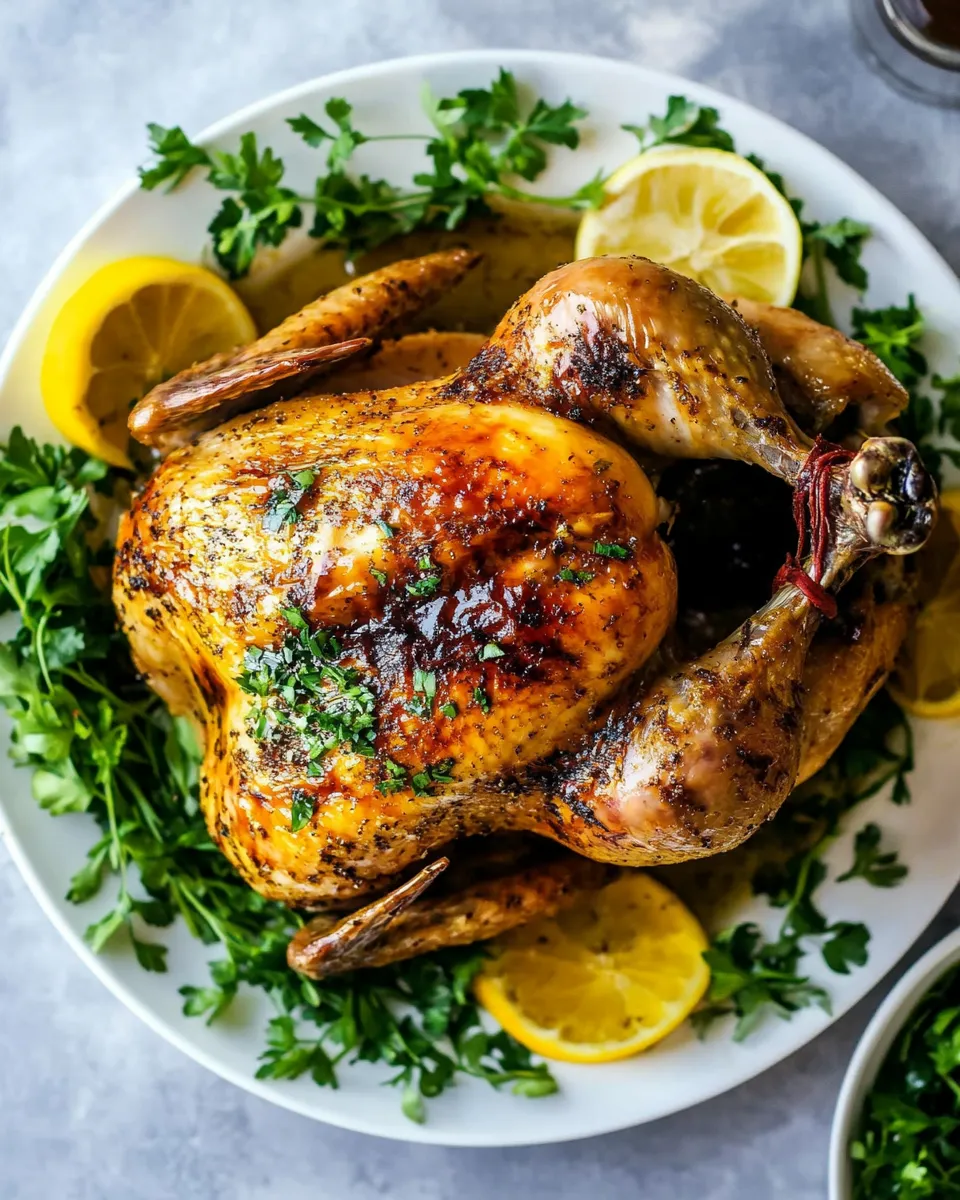
I love the simplicity of a whole chicken in the air fryer. It’s fast, tidy, and the skin crisps up beautifully without babysitting a roasting pan. No complicated marinades, no multi-step brining—just a few tidy moves and the air fryer does the heavy lifting.
This recipe is practical: clear steps, a minimal ingredient list, and predictable timing for a 3½–4 lb bird. I’ll walk you through prep, explain what to watch for, and share practical swaps if you need them. The goal is a golden, juicy roast chicken with a crisp skin every time.
What We’re Using
We keep this straightforward: a whole chicken, a single measured seasoning, and a quick spray of oil to promote browning. The air fryer provides convection and high heat in a compact space, which means faster cook time and a beautifully roasted result. You’ll also want a good meat thermometer and something heatproof to flip the bird safely.
Ingredients
- 1 whole chicken (between 3½ to 4 pounds) — the centerpiece; size matters because the timing suits this range.
- 1 tablespoon your favorite Nom Nom Paleo Spice blend or Diamond Crystal kosher salt — measures the amount of seasoning to flavor the skin and the meat under it.
- Avocado oil spray — used to lightly coat the air fryer basket so the chicken doesn’t stick and to help skin crisp.
Stepwise Method: Air Fryer Whole Chicken
- Remove the whole chicken (3½–4 lb) from its packaging. Open the cavity and remove any giblets or organs. Pat the chicken dry with paper towels.
- Using kitchen shears, trim away any excess flaps of skin and any large globs of fat at the cavity opening.
- Measure 1 tablespoon of your chosen seasoning (your favorite Nom Nom Paleo Spice blend or Diamond Crystal kosher salt) into a small bowl.
- Gently separate the skin from the breast meat with your fingers. Rub some of the seasoning directly onto the exposed breast meat under the skin, then rub the remaining seasoning all over the outside of the skin and inside the cavity.
- Tuck the wing tips behind the back of the chicken so they don’t burn. Place the chicken on a plate or tray, leave it uncovered, and refrigerate to marinate/dry-brine for at least 1 hour or up to 2 days.
- When ready to cook, preheat the air fryer to 375°F. When preheated, spray the interior basket with avocado oil spray.
- Place the chicken in the air fryer basket breast-side down. Air fry at 375°F for 30 minutes.
- Carefully flip the chicken so it is breast-side up (use tongs and oven mitts or heatproof gloves). Continue to air fry at 375°F for an additional 10–15 minutes, or until the skin is golden brown and the juices run clear.
- Check internal temperatures with a meat thermometer inserted into the thickest part of the breast and the thickest part of a thigh without touching bone. Remove the chicken when the breast reaches at least 157°F and the thighs reach 175°F.
- Transfer the chicken to a cutting board and let it rest for 20 minutes before carving (carryover heat will raise the breast to a safe final temperature).
- Optional: Remove the meat from the bones and save the carcass for making bone broth.
Why This Air Fryer Whole Chicken Stands Out
There’s a balance here between convenience and texture. The air fryer concentrates hot circulating air around the bird, crisping the skin faster than an oven while keeping the meat juicy. The under-skin seasoning step is small but decisive: it flavors the meat directly and keeps the outer layer from tasting like plain fat.
Time is another advantage. Compared to an oven roast, this method shortens active cooking and eliminates the need to baste. I also appreciate the tidy cleanup—no drippy roasting pan or splattered oven to scrub.
Allergy-Friendly Substitutes
This recipe is already very simple, which makes swaps straightforward.
- For the avocado oil spray — if you have an avocado allergy or prefer a different oil, use a neutral high‑smoke oil spray such as refined grapeseed spray or a light olive oil spray. If you don’t have spray, lightly brush a small amount of oil on the basket.
- For the Nom Nom Paleo Spice blend — use any single tablespoon of a kosher salt alternative or a mixed seasoning you tolerate. If you need to reduce sodium, use a no‑salt herb blend instead and increase aromatics like garlic powder sparingly.
- If you have a latex or surgical glove sensitivity, use silicone‑handled tongs and oven mitts for flipping instead of disposable gloves.
Toolbox for This Recipe
- Air fryer with a basket large enough for a 3½–4 lb chicken — the bird should sit without being crammed.
- Meat thermometer — instant‑read preferred for checking breast and thigh temps.
- Kitchen shears — quick for trimming skin and fat.
- Paper towels — for thorough drying, which helps skin crisp.
- Tongs and heatproof gloves or oven mitts — for flipping the hot bird safely.
- Small bowl and measuring spoon — to portion the 1 tablespoon seasoning.
- Plate or tray for resting and for the refrigerator marinating step.
Troubles You Can Avoid
Dry breast meat
Don’t overcook the breast. The recipe removes the chicken when the breast hits at least 157°F because the 20‑minute rest will raise it to finished temperature. If you pull the bird only when the breast reads 165°F, it will be overdone. Use an instant‑read thermometer and test the thickest part without touching bone.
Soggy skin
Pat the chicken thoroughly dry before seasoning. Leaving it uncovered in the refrigerator for at least an hour (or up to two days as allowed) helps the skin dry out and crisp. Also spray the basket, not the chicken—too much oil on the bird can lead to uneven browning.
Uneven browning
Flip at the 30‑minute mark as directed. The initial breast‑side‑down period cooks the legs and dark meat efficiently. If the wings or tips brown too quickly, tuck them behind the back more snugly or tent them with a small foil strip after flipping if necessary.
Better Choices & Swaps
If you want a slightly different flavor profile, you can swap the seasoning listed in the recipe with a single tablespoon of another dry rub you love—herb-forward blends, lemon‑pepper, smoked paprika mixes. Keep the quantity at the recipe’s 1 tablespoon so the balance of saltiness and flavor remains steady.
For oiling the basket, a light spray is enough. If you don’t have avocado oil spray, use a high‑smoke point oil spray or very lightly brush a neutral oil. Avoid heavy oil coats; they bruise the air flow and can produce an oily finish.
Behind-the-Scenes Notes
Why separate the skin from the breast? That pocket lets seasoning contact the meat directly while leaving the skin as a dry surface to crisp. The initial cook breast‑side down helps the fattier, juicier dark meat get up to temperature without drying the breast. Flipping near the end then browns the breast skin and finishes the bird.
Temperatures in the recipe are conservative in the oven‑roasting sense because of carryover cooking inside a compact air fryer. The resting step is essential: it redistributes juices and completes the internal temperature rise so the breast ends up tender.
Make Ahead Like a Pro
This recipe gives you two practical windows to plan around:
- Dry-brine window: After seasoning and tucking the wings, you can refrigerate the chicken uncovered for 1 hour up to 2 days. Longer resting deepens flavor and dries the skin for crisping.
- Cook and hold: If you need to make the bird ahead, roast it fully and refrigerate the carved meat in airtight containers for up to 3–4 days. Reheat gently in a low oven or in the air fryer at 325°F for a few minutes to refresh the skin and heat through without drying.
For meal prep, remove meat from bones and store separately. Save the carcass in the freezer and use it for a homemade bone broth when you have time.
Your Top Questions
What size chicken fits this method?
The recipe timing is designed for a whole chicken between 3½ and 4 pounds. Larger birds will need longer cooking time and more careful temperature checks; smaller birds will finish sooner.
Can I stuff the cavity?
I don’t recommend stuffing the cavity for air fryer cooking because it affects internal cooking time and can prevent even heat circulation. If you want aromatics, tuck a halved lemon or a few garlic cloves loosely into the cavity, but do so sparingly.
Do I need to truss the bird?
Trussing isn’t necessary here. Tucking the wing tips behind the back is enough to prevent burning. If you prefer trussing for presentation, do so, but it may slightly change airflow and browning.
How do I know when it’s safe to eat?
Use a thermometer. Remove the chicken when the breast reads at least 157°F and thighs 175°F, then rest for 20 minutes. The carryover heat will raise the breast to safe final temperature.
Ready to Cook?
Set up your workspace: dry the bird, measure that single tablespoon of seasoning, and make sure your air fryer basket is clean. The process is short on steps and big on results—crispy skin, juicy meat, and a tidy cleanup. Follow the steps, trust your thermometer, and enjoy a perfect whole chicken without the oven heat or long roast time.
If you try this, tell me how it turned out and whether you swapped in a different seasoning. Small changes often lead to big new favorites.
Air Fryer Whole Chicken
Ingredients
Ingredients
- ?1 whole chickenbetween 3 1/2 to 4 pounds
- ?1 tablespoonyour favorite Nom Nom Paleo Spice blendor Diamond Crystal kosher salt
- ?Avocado oil spray
Instructions
Instructions
- Remove the whole chicken (3½–4 lb) from its packaging. Open the cavity and remove any giblets or organs. Pat the chicken dry with paper towels.
- Using kitchen shears, trim away any excess flaps of skin and any large globs of fat at the cavity opening.
- Measure 1 tablespoon of your chosen seasoning (your favorite Nom Nom Paleo Spice blend or Diamond Crystal kosher salt) into a small bowl.
- Gently separate the skin from the breast meat with your fingers. Rub some of the seasoning directly onto the exposed breast meat under the skin, then rub the remaining seasoning all over the outside of the skin and inside the cavity.
- Tuck the wing tips behind the back of the chicken so they don’t burn. Place the chicken on a plate or tray, leave it uncovered, and refrigerate to marinate/dry-brine for at least 1 hour or up to 2 days.
- When ready to cook, preheat the air fryer to 375°F. When preheated, spray the interior basket with avocado oil spray.
- Place the chicken in the air fryer basket breast-side down. Air fry at 375°F for 30 minutes.
- Carefully flip the chicken so it is breast-side up (use tongs and oven mitts or heatproof gloves). Continue to air fry at 375°F for an additional 10–15 minutes, or until the skin is golden brown and the juices run clear.
- Check internal temperatures with a meat thermometer inserted into the thickest part of the breast and the thickest part of a thigh without touching bone. Remove the chicken when the breast reaches at least 157°F and the thighs reach 175°F.
- Transfer the chicken to a cutting board and let it rest for 20 minutes before carving (carryover heat will raise the breast to a safe final temperature).
- Optional: Remove the meat from the bones and save the carcass for making bone broth.
Equipment
- 1air fryer
Notes
Season well, all over, and early!Many years ago, I learned thatChef Judy Rodgers’s secretfor amazing roast chicken is to salt it well and early, so that’s what I always try to do. Even if you don’t have time to marinate, it’ll still taste fab.
Use a Nom Nom Paleo spice blend!My Whole30-compatible spice blends make healthy and delicious meals super easy and they’re now available onAmazonor directly fromThe Spice Lab.
Don’t truss your chicken!The first time I cooked a whole chicken in the air fryer, I made the mistake of tying the legs together—which made them pop up during the cooking process and get scorched by the heating element.
Start with the breast-side down!When you air fry the chicken with the breast-side down, you protect the white meat from getting overcooked and drying out before the rest of the chicken reaches the proper doneness. The 10 to 15 minutes of cooking the chicken breast-side up at the end is the perfect amount of time for a perfectly browned chicken with moist meat.
Use a meat thermometer to check for doneness!The only proper way to know if your whole chicken is cooked properly is to check the internal temperature with an accurate meat thermometer. I always use my trustyThermapen One. You can refer tothis articlefor the proper internal temperatures for cooked chicken.