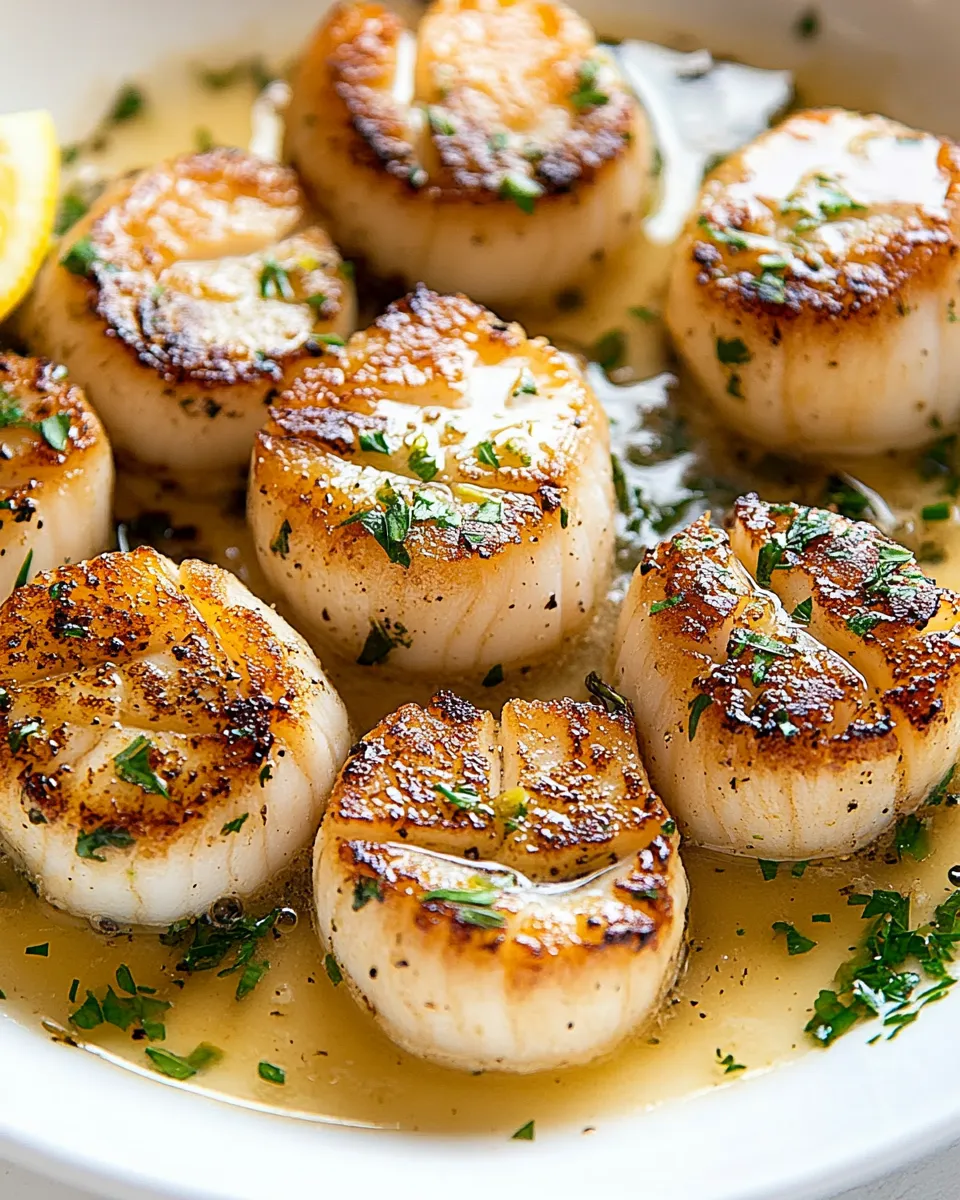
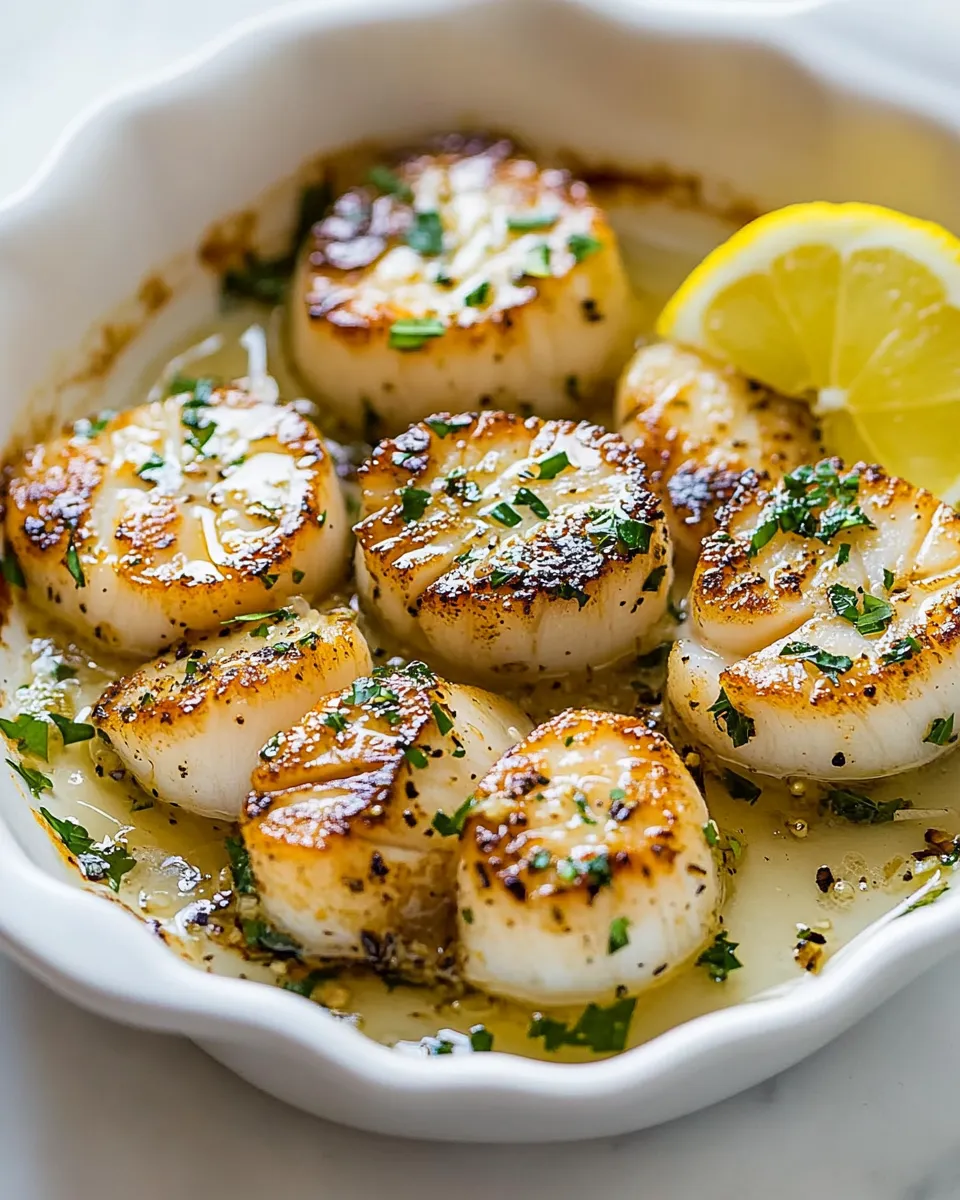
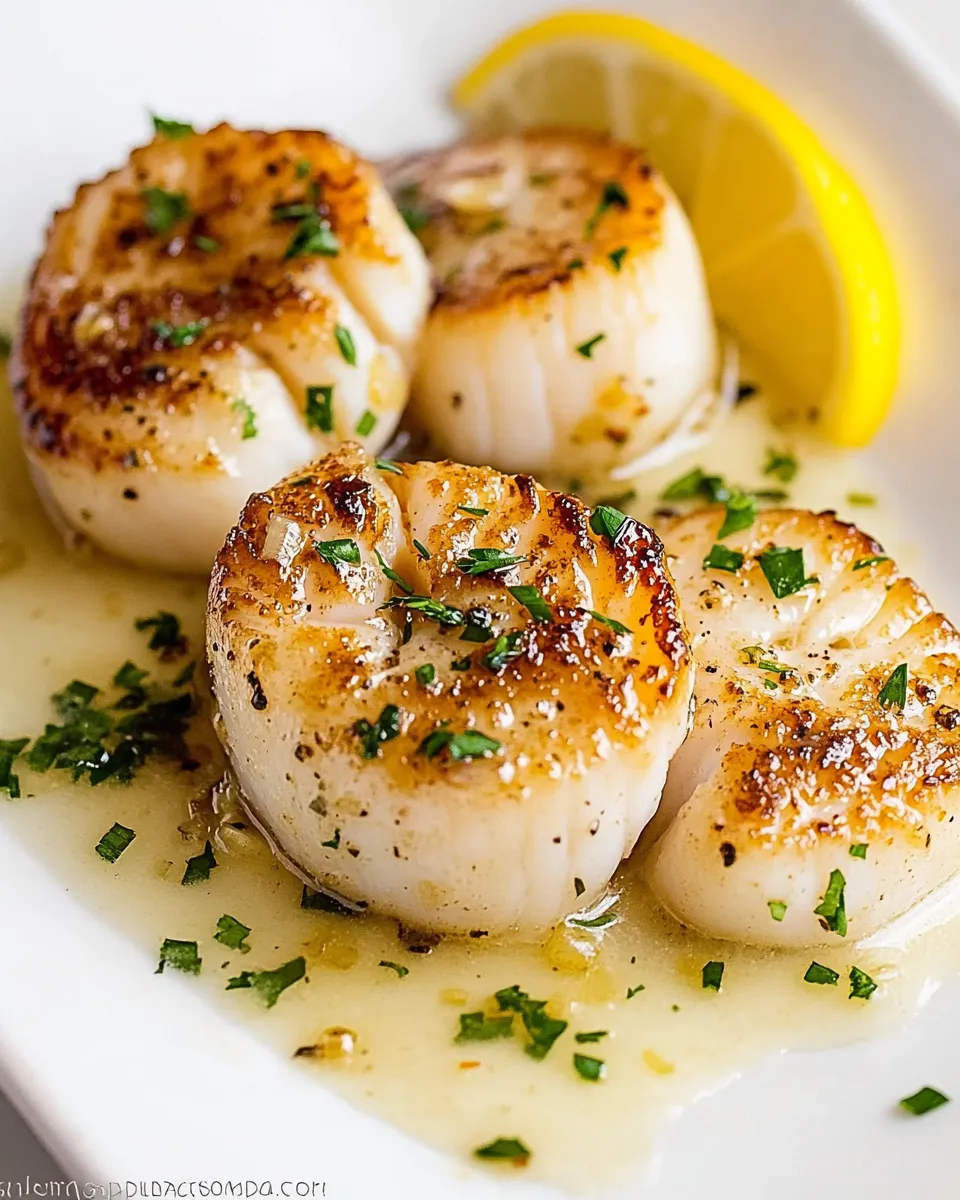
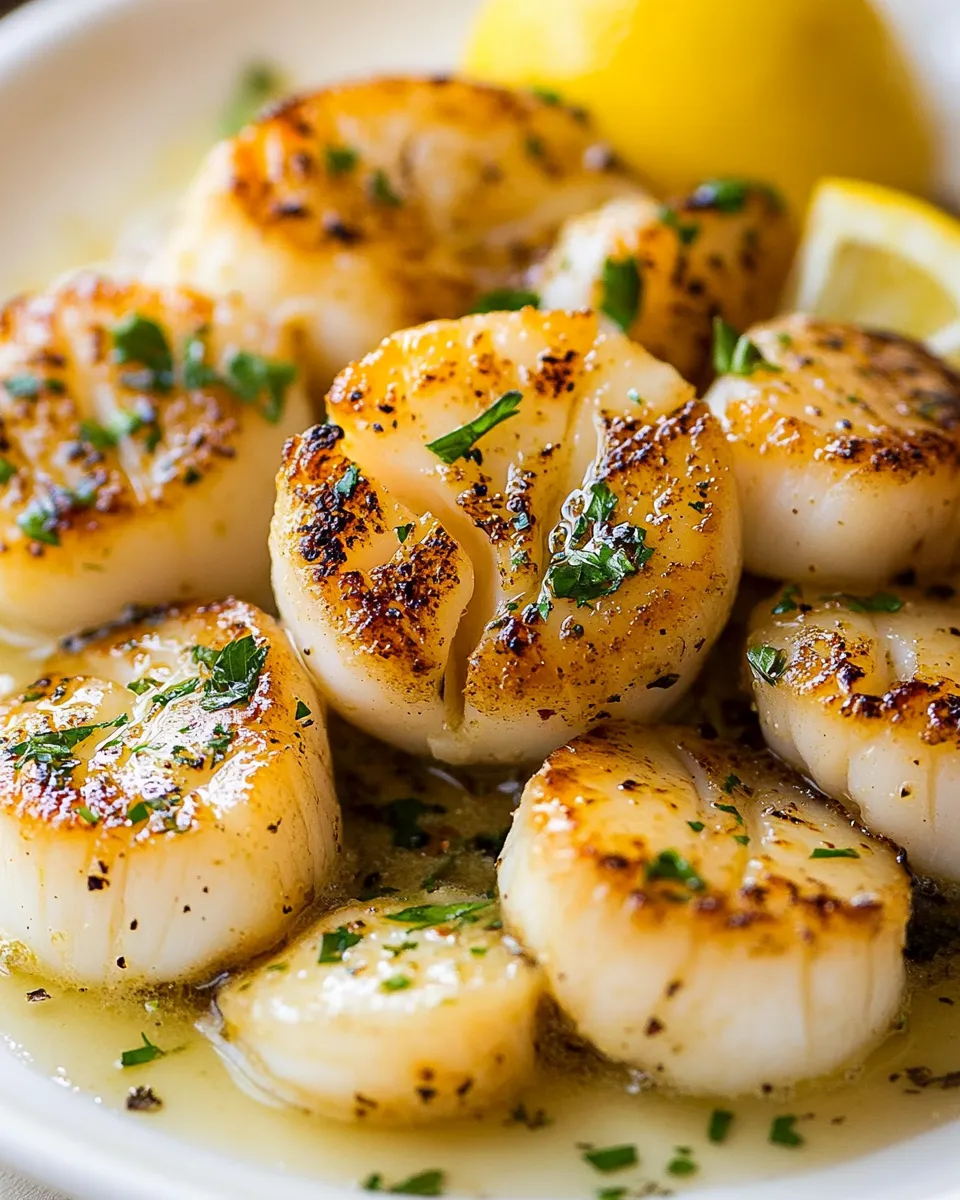
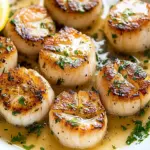
These scallops come together fast and always feel a little bit special. The exterior sears to a golden crust while the middle stays tender and silky. A quick pan sauce—just butter, garlic, and a squeeze of lemon—elevates them without masking the scallops’ sweet briny flavor.
I like this recipe when I need an impressive weeknight dinner or a simple starter for guests. It’s forgiving and direct: dry the scallops, season, hot pan, sear, finish in butter and garlic. Timing and temperature matter more than fancy ingredients.
Below you’ll find exactly what to buy, step-by-step instructions, common mistakes to avoid, and sensible swaps if you don’t eat dairy or want to stretch the dish. Keep a hot pan and a towel handy—the rest is straightforward.
What to Buy
Buy the freshest sea scallops you can find. Look for firm, glossy rounds with a mild ocean smell. If they’re labeled “dry,” that’s ideal—no additives or phosphates. A few simple pantry items finish them: olive oil, butter with a touch of salt and olive oil for richness, garlic, lemon, and parsley for brightness.
Ingredients
- 1 tbsp olive oil — helps get the pan hot and prevents sticking; mild-flavored olive oil works best.
- 1 lb. sea scallops — the star of the dish; pat dry for a proper sear.
- ½ tsp salt — seasons the scallops without overpowering them.
- ¼ tsp black pepper — fresh-cracked for a subtle bite.
- 3 tbsp Land O Lakes® Butter with Olive Oil & Sea Salt — melts into a silky pan sauce; the salted butter balances the lemon.
- 2 tsp garlic, minced — adds fragrant depth; add near the end so it doesn’t burn.
- 1 medium lemon, juice half, slice remaining half — juice brightens the butter sauce; sliced lemon is for serving.
- 1 tbsp parsley, chopped — fresh herb for color and a fresh finish.
Make Buttery Garlic Seared Scallops: A Simple Method
- Pat 1 lb. sea scallops dry with paper towels. Season both sides with ½ tsp salt and ¼ tsp black pepper.
- Heat a large cast-iron or stainless-steel skillet over medium-high heat until hot. Add 1 tbsp olive oil and swirl to coat the pan.
- Arrange the scallops in a single layer (do not overcrowd). Sear 2 to 3 minutes on the first side until browned and they release easily, then flip and sear 2 to 3 minutes more until browned and cooked through. Transfer scallops to a plate.
- Reduce heat to medium and add 3 tbsp Land O Lakes® Butter with Olive Oil & Sea Salt to the skillet. Let the butter melt.
- Stir in 2 tsp minced garlic and cook, stirring, until fragrant, about 30 seconds.
- Squeeze the juice of half the medium lemon into the skillet. Return the scallops to the pan and spoon the butter-garlic sauce over them. Sprinkle with 1 tbsp chopped parsley.
- Slice the remaining half of the lemon and serve the scallops immediately with the lemon slices alongside.
Why It Works Every Time
Three simple principles make this foolproof: dry scallops, a hot pan, and timing. Dry scallops form a crust because moisture evaporates instead of steaming. A properly preheated cast-iron or stainless skillet keeps contact heat even and encourages browning. And searing briefly on each side prevents overcooking: scallops go from tender to rubbery quickly.
The butter-garlic finish does a couple of jobs. Butter adds richness and sheen; garlic gives savory aromatics; lemon brightens and balances the fat. Using a butter that already contains olive oil and sea salt simplifies seasoning and gives a rounded flavor without extra steps.
Vegan & Vegetarian Swaps
- For a meaty, seared alternative: thick slices of king oyster mushroom. Pat dry, season, and sear the same way, adjusting time for thickness.
- Firm tofu (extra-firm) pressed and sliced can be pan-seared for a similar texture contrast. Use a neutral oil and finish with the butter substitute below.
- Replace butter with a high-quality vegan butter or a mixture of olive oil and a splash of miso paste for umami. Add garlic and lemon as directed.
Tools of the Trade
- Large cast-iron or stainless-steel skillet — holds heat and creates an even sear.
- Paper towels — for drying scallops thoroughly.
- Tongs — for flipping scallops cleanly without piercing them.
- Small bowl and zester or microplane — handy for the lemon and garlic prep.
- Instant-read thermometer (optional) — scallops are done around 115–120°F internally and will firm slightly as they rest.
Mistakes Even Pros Make
- Not drying the scallops. Any surface moisture creates steam and prevents a proper crust.
- Overcrowding the pan. Too many scallops lower the pan temperature and produce steam instead of sear.
- Cooking at too low a heat. The pan needs to be hot enough to brown quickly without overcooking the interior.
- Adding garlic too early. Garlic can burn in hot fat and turn bitter; add it after reducing heat to medium.
- Overcooking. Scallops cook quickly; keep to the 2–3 minute guideline per side and watch for a golden crust.
Seasonal Ingredient Swaps
- Spring: Add a handful of lightly blanched peas or thinly sliced ramps at the end for freshness.
- Summer: Finish with chopped heirloom cherry tomatoes tossed in at the last minute to retain their juices.
- Fall: Stir in a teaspoon of browned butter (browned separately) for nutty depth, then add the garlic and lemon.
- Winter: Serve with a parsnip puree or roasted root vegetables to pair with the rich butter sauce.
Pro Tips & Notes
Before You Start
- Bring scallops to near room temperature for 10–15 minutes before cooking; this helps even cooking.
- Use a kitchen towel or paper towels to blot scallops thoroughly. Don’t skip this step.
- Preheat the skillet long enough that a drop of water sizzles and evaporates on contact.
While Cooking
- Sear in a single layer and resist moving them until they release naturally from the pan. If they stick, they need another 30–60 seconds.
- Lower the heat before adding garlic so it softens and perfumes the butter without browning too fast.
- Spoon the butter sauce over the scallops once they return to the pan to coat and warm them without overcooking.
Finishing Touches
- Garnish with chopped parsley for color and a quick herbaceous note.
- Serve immediately. Scallops lose their texture and sweetness as they cool.
Freezer-Friendly Notes
Scallops are best fresh, but you can freeze them raw if needed. Freeze them individually on a tray, then transfer to an airtight bag for up to 3 months. Thaw in the refrigerator overnight and pat dry thoroughly before cooking.
Cooked scallops do not freeze well; the texture becomes grainy and rubbery after thawing. If you must freeze leftovers, use them in a saucier dish (stews or chowders) where texture changes are less noticeable.
Frequently Asked Questions
- How do I tell when scallops are done? They should be opaque and just firm to the touch. Overcooked scallops become tough and dry.
- Can I use bay scallops? Bay scallops are much smaller; they will cook faster. Reduce sear time and watch them closely.
- Why didn’t I get a crust? Likely reasons: scallops were wet, pan wasn’t hot enough, or the pan was overcrowded. Dry, hot, and single-layer searing creates the crust.
- Can I prepare the butter-garlic sauce ahead? You can mince garlic and melt butter ahead, but add garlic to hot butter at the last minute to keep it bright and prevent burning.
- Is it okay to use salted butter? Yes—this recipe uses a salted butter blend which simplifies seasoning. Taste before adding extra salt.
Bring It Home
This recipe is a reliable go-to when you want food that looks and tastes special with minimal fuss. The technique—dry, hot sear, finish with butter, garlic, and lemon—translates to other proteins and vegetables, too. Once you’ve done it a couple of times, timing and temperature become second nature.
Plate the scallops simply: a small smear of something creamy, a scattering of greens or roasted vegetables, and a wedge of lemon. Guests will notice the sear and the mellow garlic-butter flavor first. You’ll appreciate how little time and effort it takes to make a dish worth repeating.
Buttery Garlic Seared Scallops
Ingredients
Ingredients
- 1 tbspolive oil
- 1 lb.sea scallops
- 1/2 tspsalt
- 1/4 tspblack pepper
- 3 tbspLand O Lakes® Butter with Olive Oil & Sea Salt
- 2 tspgarlic minced
- 1 mediumlemon juice half, slice remaining half
- 1 tbspparsley chopped
Instructions
Instructions
- Pat 1 lb. sea scallops dry with paper towels. Season both sides with ½ tsp salt and ¼ tsp black pepper.
- Heat a large cast-iron or stainless-steel skillet over medium-high heat until hot. Add 1 tbsp olive oil and swirl to coat the pan.
- Arrange the scallops in a single layer (do not overcrowd). Sear 2 to 3 minutes on the first side until browned and they release easily, then flip and sear 2 to 3 minutes more until browned and cooked through. Transfer scallops to a plate.
- Reduce heat to medium and add 3 tbsp Land O Lakes® Butter with Olive Oil & Sea Salt to the skillet. Let the butter melt.
- Stir in 2 tsp minced garlic and cook, stirring, until fragrant, about 30 seconds.
- Squeeze the juice of half the medium lemon into the skillet. Return the scallops to the pan and spoon the butter-garlic sauce over them. Sprinkle with 1 tbsp chopped parsley.
- Slice the remaining half of the lemon and serve the scallops immediately with the lemon slices alongside.
Equipment
- large cast-iron or stainless-steel skillet
- Paper Towels
- Spoon