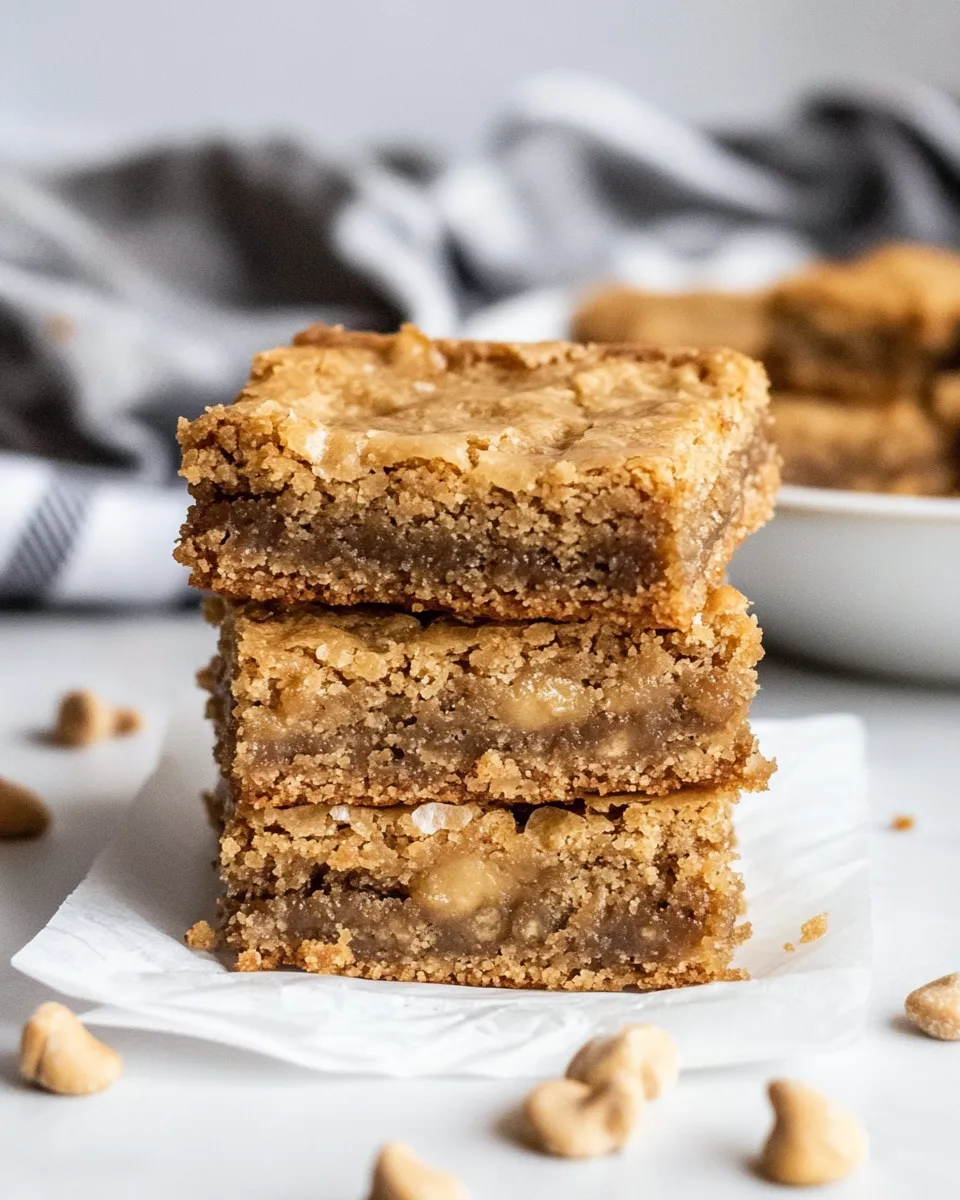
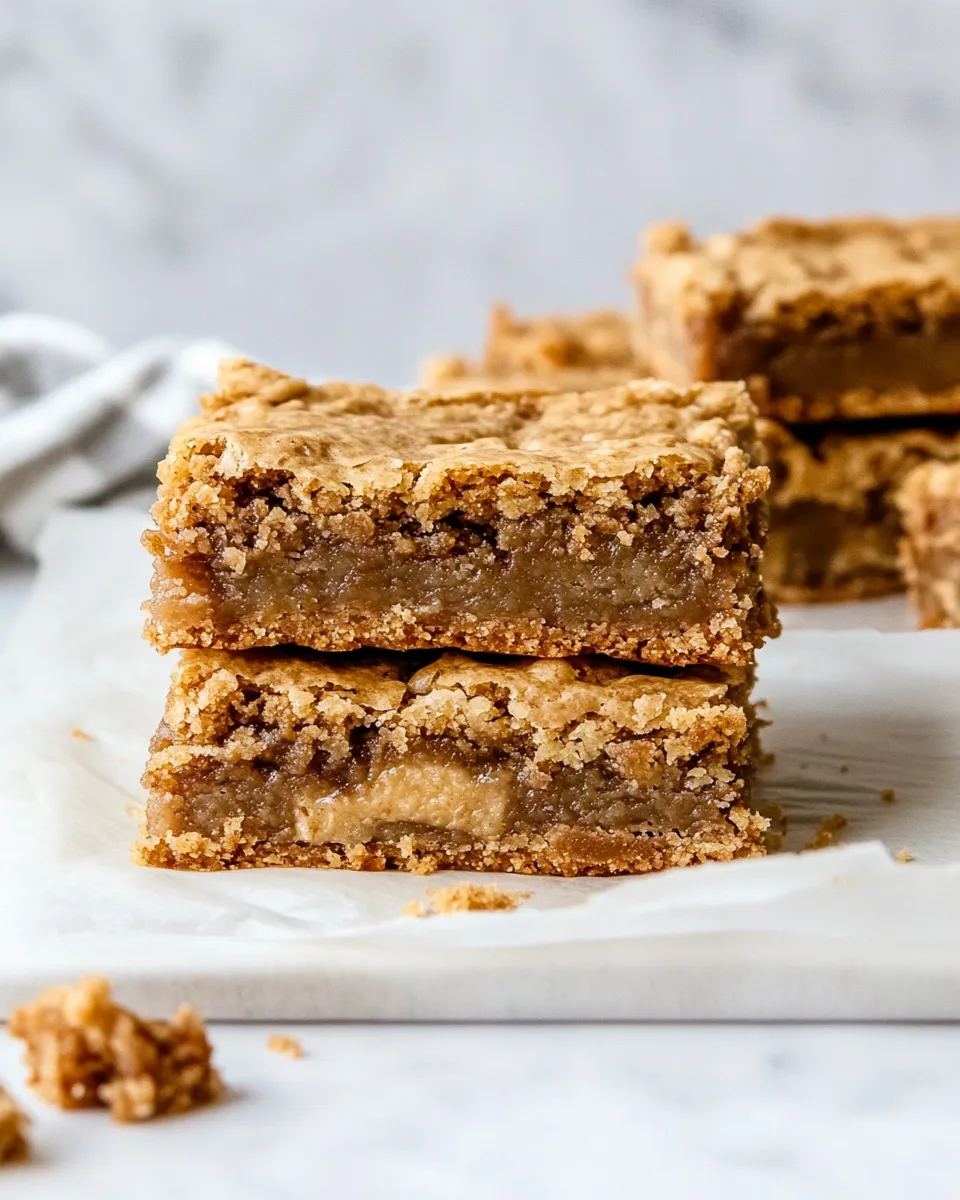
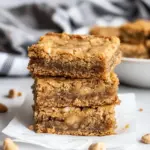
These blondies live at the intersection of rustic and polished: browned butter gives a toasted, caramel-like backbone while toffee bits and walnuts add crunch and a hint of chew. The batter comes together fast, and the bake time is short, which makes this an ideal make-ahead treat when you need something reliably impressive without drama.
I test these often because they’re simple but forgiving. You’ll notice the difference that browned butter makes the first time you take them out of the oven—there’s an immediate, warm scent that punches above the recipe’s simple ingredient list. I’ll walk you through the exact steps I use so you skip the experiments and go straight to the good stuff.
No fluff here: plain directions, practical tips, and a few variations that keep the base intact. If you like chewy blondies with toffee crunch and a deep, nutty undertone, you’re in the right place.
What’s in the Bowl
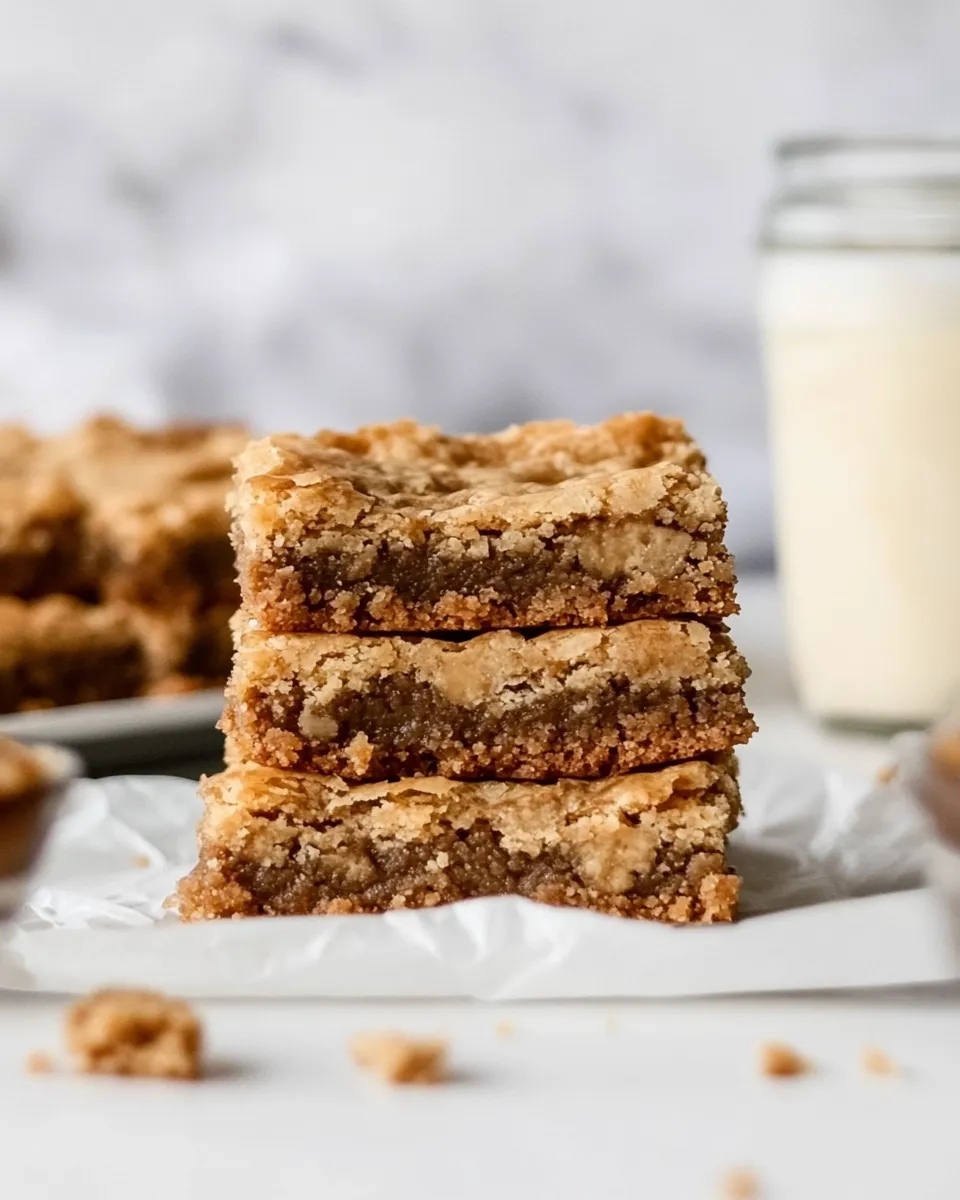
At its core this batter is browned butter, brown sugar, a touch of granulated sugar, eggs, vanilla, flour, and salt. The browned butter supplies nutty complexity, the brown sugar brings moisture and chew, and the extra egg yolk pushes the texture toward dense and tender instead of cakey. Toffee bits add sweet shards that melt into pockets of caramel, and chopped walnuts give a short, earthy crunch. That simple ratio—fat, sugar, egg, flour—delivers everything you need for a classic chewy blondie.
Understanding what each element does helps you tweak results without guessing. The butter is first transformed to create flavor; the timing when you cool it matters for texture. I’ll explain why and how in the instructions and the Chef’s Rationale section.
Ingredients
- 3/4 cup unsalted butter — browned for deep, toasty flavor; start with unsalted so you control the salt level.
- 1 cup brown sugar, packed — provides moisture and chew; packed means you press it into the cup so the amount is consistent.
- 1/3 cup granulated sugar — balances sweetness and helps with a slight crisp edge.
- 1 large egg + 1 egg yolk, room temperature — extra yolk increases richness and chewiness; room temperature mixes more evenly.
- 1 1/2 teaspoon vanilla extract — rounds and brightens the overall flavor.
- 1 1/4 cup all-purpose flour — the structure; measure by spooning into the cup and leveling to avoid a dense outcome.
- 3/4 teaspoon salt — balances sweetness and enhances the butter’s caramel notes.
- 1/3 cup chopped walnuts — for crunchy contrast and a toasty, slightly bitter counterpoint.
- 1/2 cup toffee bits — melt into little pockets of caramelized sweetness throughout the blondie.
Mastering Chewy Brown Butter Blondies: How-To
- Preheat the oven to 350°F (175°C). Line a 9×9-inch metal baking pan with parchment paper leaving an overhang on two sides, or lightly grease the pan; set aside.
- Put 3/4 cup unsalted butter in a medium saucepan and melt over medium heat. Once melted, increase the heat slightly (a notch above medium) and continue cooking, stirring constantly.
- Watch the butter as it pops and sizzles; when the milk solids turn golden brown and the butter is fragrant, immediately remove the pan from the heat.
- Pour the browned butter into a large heatproof bowl. Let it cool until warm but not hot, about 20 minutes (this prevents the eggs from cooking when added).
- Add 1 cup packed brown sugar and 1/3 cup granulated sugar to the cooled browned butter and mix until combined.
- Whisk in 1 large egg plus 1 egg yolk (both at room temperature) and 1 1/2 teaspoons vanilla extract until smooth and well combined.
- Add 1 1/4 cups all-purpose flour and 3/4 teaspoon salt to the wet mixture and stir until just combined (do not overmix).
- Fold in 1/3 cup chopped walnuts and 1/2 cup toffee bits until evenly distributed.
- Spread the batter evenly into the prepared 9×9 pan, smoothing the top with a spatula.
- Bake for 20–25 minutes, until the edges are golden brown and a toothpick inserted into the center comes out mostly clean with a few moist crumbs. Start checking at 20 minutes.
- Remove the pan from the oven and place it on a wire rack. Let the blondies cool completely in the pan, then lift them out using the parchment overhang (if used) and cut into squares before serving.
Why It’s Crowd-Pleasing
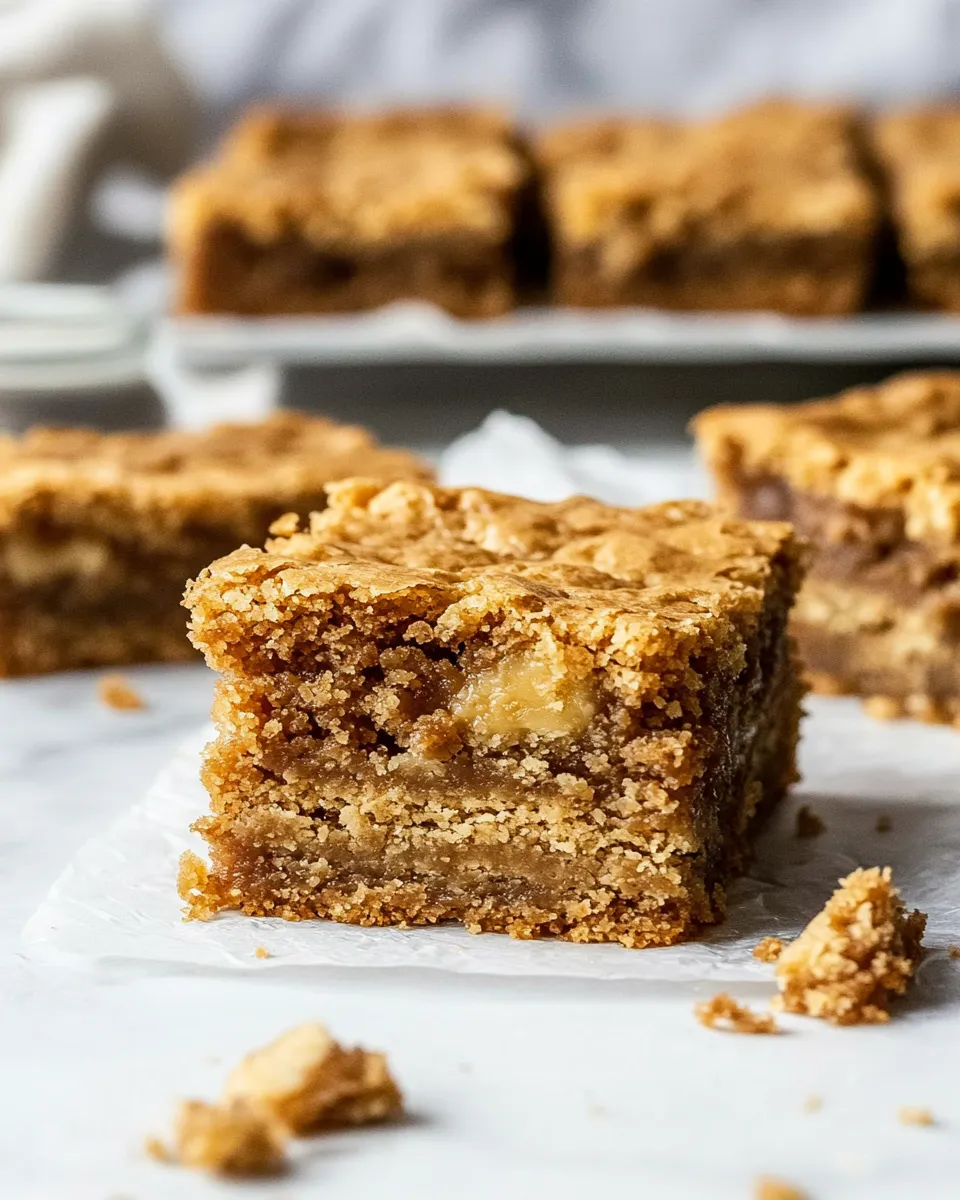
Flavor and texture work together here: the browned butter delivers a rich, toasty note that feels grown-up but familiar. Brown sugar keeps the interior moist and chewy, while the extra yolk prevents a cakey result. Toffee bits give concentrated bursts of caramelized sugar and the walnuts break up the chew with a satisfying bite.
From a practical perspective, this recipe is fast and forgiving. The steps are straightforward, and the short bake time means you don’t babysit the oven. People love them because they look elevated but taste comforting—the kind of dessert you bring to a gathering and immediately get asked for the recipe.
If You’re Out Of…
If you don’t have exactly what’s listed, you can work with a few acceptable swaps without altering the recipe’s balance. Use chopped toasted pecans if you prefer a milder nut flavor. If toffee bits aren’t on hand, a mix of coarsely chopped chocolate chips and a small handful of brown sugar sprinkled on top before baking will give a similar caramelized mouthfeel. Salted butter will work; reduce added salt slightly or skip it entirely and taste as you go.
Room-temperature eggs are recommended, but if your eggs are cold, place them in warm water for 5–10 minutes before using. That gets the batter to the right consistency and helps with even mixing.
Gear Checklist
- 9×9-inch metal baking pan (preferred for even browning)
- Parchment paper with overhang or nonstick spray
- Medium saucepan for browning butter
- Large heatproof mixing bowl
- Whisk and rubber spatula
- Measuring cups and spoons
- Wire rack for cooling
- Toothpick for doneness testing
Don’t Do This
Don’t skip cooling the browned butter. Adding hot butter to eggs will scramble them and ruin texture. Don’t rush the browning process by blasting the heat; you’ll scorch the milk solids and get a burnt taste instead of the desired nutty aroma. Avoid overmixing after the flour goes in—stir until just combined to prevent a tough blondie.
Also, don’t underbake because the center will be raw; but don’t overbake either. Pull the pan when the center still has a few moist crumbs on a toothpick. The blondies will continue to set as they cool.
Make It Your Way
Want variations? Here are directions that keep the structure but change the final personality:
- Chocolate-forward — fold in 1/2 cup semisweet chocolate chips in place of toffee bits for melty pockets instead of caramel shards.
- Nut-free — omit walnuts and add 1/2 cup extra toffee bits or chocolate chips.
- Salty-sweet — sprinkle flaky sea salt on top right after they come out of the oven.
- Extra chew — for a denser, chewier texture, bake in a slightly smaller pan (8×8) and watch closely to avoid overbaking.
Chef’s Rationale
I brown the butter first because it transforms the fat into a flavor base. Browning converts the milk solids and clarifies the butter’s profile, giving a subtle toffee and hazelnut aroma that pairs perfectly with both walnuts and toffee bits. Letting it cool to warm prevents accidental egg-cooking and helps incorporate sugars thoroughly.
The extra egg yolk is a deliberate choice to boost tenderness and chew. Yolks add fat and emulsifiers, which make the crumb richer and more cohesive. Brown sugar adds moisture and depth; the small amount of granulated sugar helps with slight crispness and balance. The salt is modest but necessary; it amplifies the butter and toffee flavors rather than making the blondie taste salty.
Save for Later: Storage Tips
Once completely cooled, store blondies in an airtight container at room temperature for up to 3 days. If you want to keep them longer, refrigerate for up to a week—note they’ll firm up and benefit from a short come-to-room-temperature period before serving.
For longer storage, freeze individual squares layered between sheets of parchment in a sealed container or freezer bag for up to 2 months. Thaw at room temperature or microwave for 8–12 seconds to revive that just-baked feel. If you’re serving from frozen, add a minute in a low oven (300°F) to bring back chewiness and warmth.
Ask the Chef
Q: How do I know when these are done?
A: Edges should be golden brown and a toothpick in the center should come out with a few moist crumbs. The center will firm as the blondies cool; underbaking leaves a raw center.
Q: Can I make the batter ahead and bake later?
A: You can hold assembled batter in the refrigerator for up to 24 hours if wrapped tightly, but take it out about 30 minutes before baking so it comes closer to room temperature. Cold batter may require a minute or two more in the oven.
Q: Why use a metal pan?
A: Metal pans conduct heat efficiently and give you reliable edge browning. Glass and ceramic take longer to heat and can change bake times; if you use glass, start checking a few minutes earlier and expect slightly longer total time.
That’s a Wrap
These Chewy Brown Butter Blondies are simple to make, reliable in texture, and rich in flavor. Follow the steps to the letter the first time—especially the browning and cooling of the butter—and you’ll get consistent results. Once you’re comfortable, mix in a few of the suggested variations to make them yours.
If you try them, tell me how you adapted the recipe. Leave a note about bake time in your oven or the substitutions you tested—those details help everyone who follows. Happy baking.
Chewy Brown Butter Blondies
Ingredients
Ingredients
- 3/4 cupunsalted butter
- 1 cupbrown sugarpacked
- 1/3 cupgranulated sugar
- 1 large egg + 1 egg yolkroom temperature
- 1 1/2 teaspoonvanilla extract
- 1 1/4 cupall-purpose flour
- 3/4 teaspoonsalt
- 1/3 cupchopped walnuts
- 1/2 cuptoffee bits
Instructions
Instructions
- Preheat the oven to 350°F (175°C). Line a 9×9-inch metal baking pan with parchment paper leaving an overhang on two sides, or lightly grease the pan; set aside.
- Put 3/4 cup unsalted butter in a medium saucepan and melt over medium heat. Once melted, increase the heat slightly (a notch above medium) and continue cooking, stirring constantly.
- Watch the butter as it pops and sizzles; when the milk solids turn golden brown and the butter is fragrant, immediately remove the pan from the heat.
- Pour the browned butter into a large heatproof bowl. Let it cool until warm but not hot, about 20 minutes (this prevents the eggs from cooking when added).
- Add 1 cup packed brown sugar and 1/3 cup granulated sugar to the cooled browned butter and mix until combined.
- Whisk in 1 large egg plus 1 egg yolk (both at room temperature) and 1 1/2 teaspoons vanilla extract until smooth and well combined.
- Add 1 1/4 cups all-purpose flour and 3/4 teaspoon salt to the wet mixture and stir until just combined (do not overmix).
- Fold in 1/3 cup chopped walnuts and 1/2 cup toffee bits until evenly distributed.
- Spread the batter evenly into the prepared 9×9 pan, smoothing the top with a spatula.
- Bake for 20–25 minutes, until the edges are golden brown and a toothpick inserted into the center comes out mostly clean with a few moist crumbs. Start checking at 20 minutes.
- Remove the pan from the oven and place it on a wire rack. Let the blondies cool completely in the pan, then lift them out using the parchment overhang (if used) and cut into squares before serving.
Equipment
- 9x9-inch baking pan
- Parchment Paper
- Medium Saucepan
- large heatproof bowl
- Whisk
- Spatula
- Wire Rack
Notes
Originally Posted January 16, 2019
Updated April 25, 2023