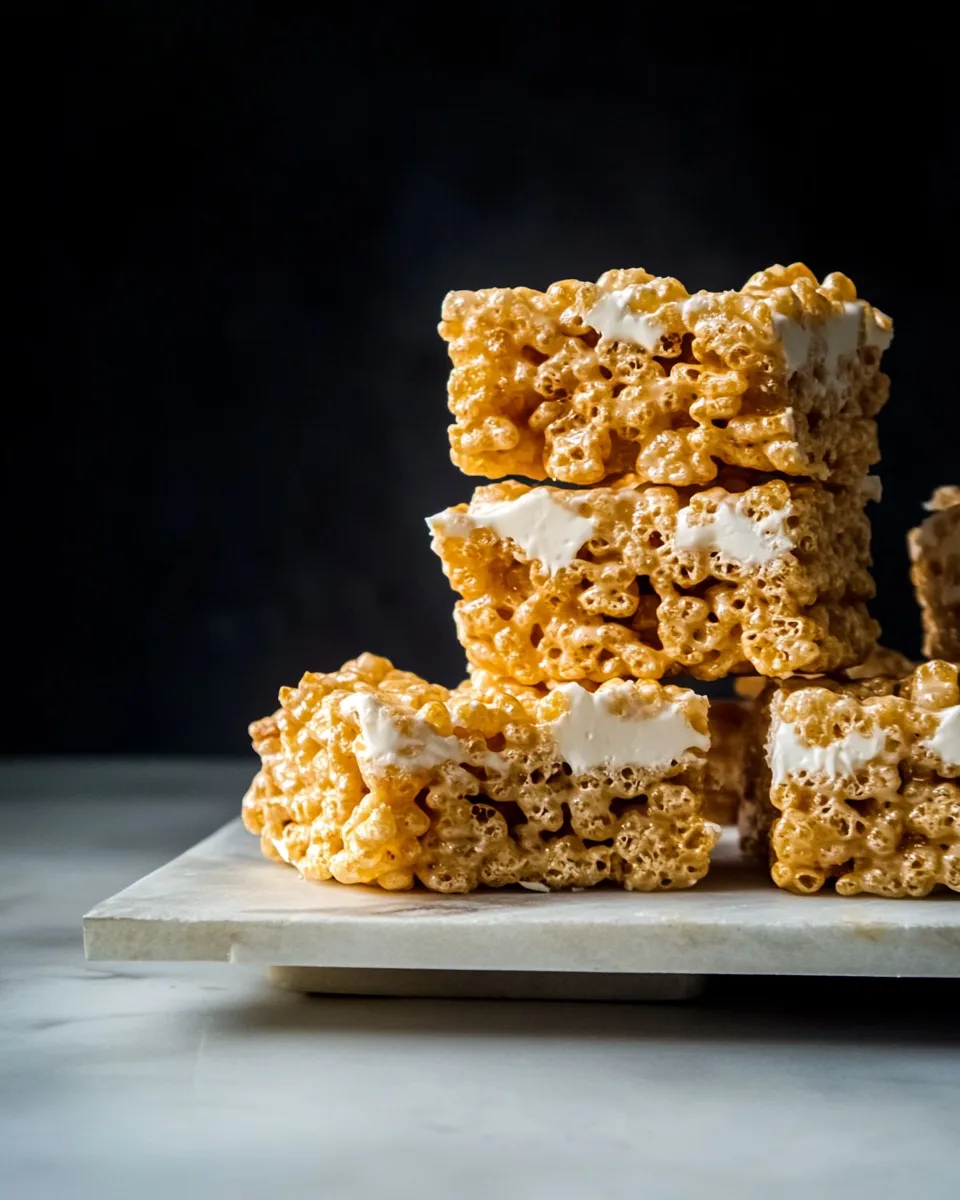
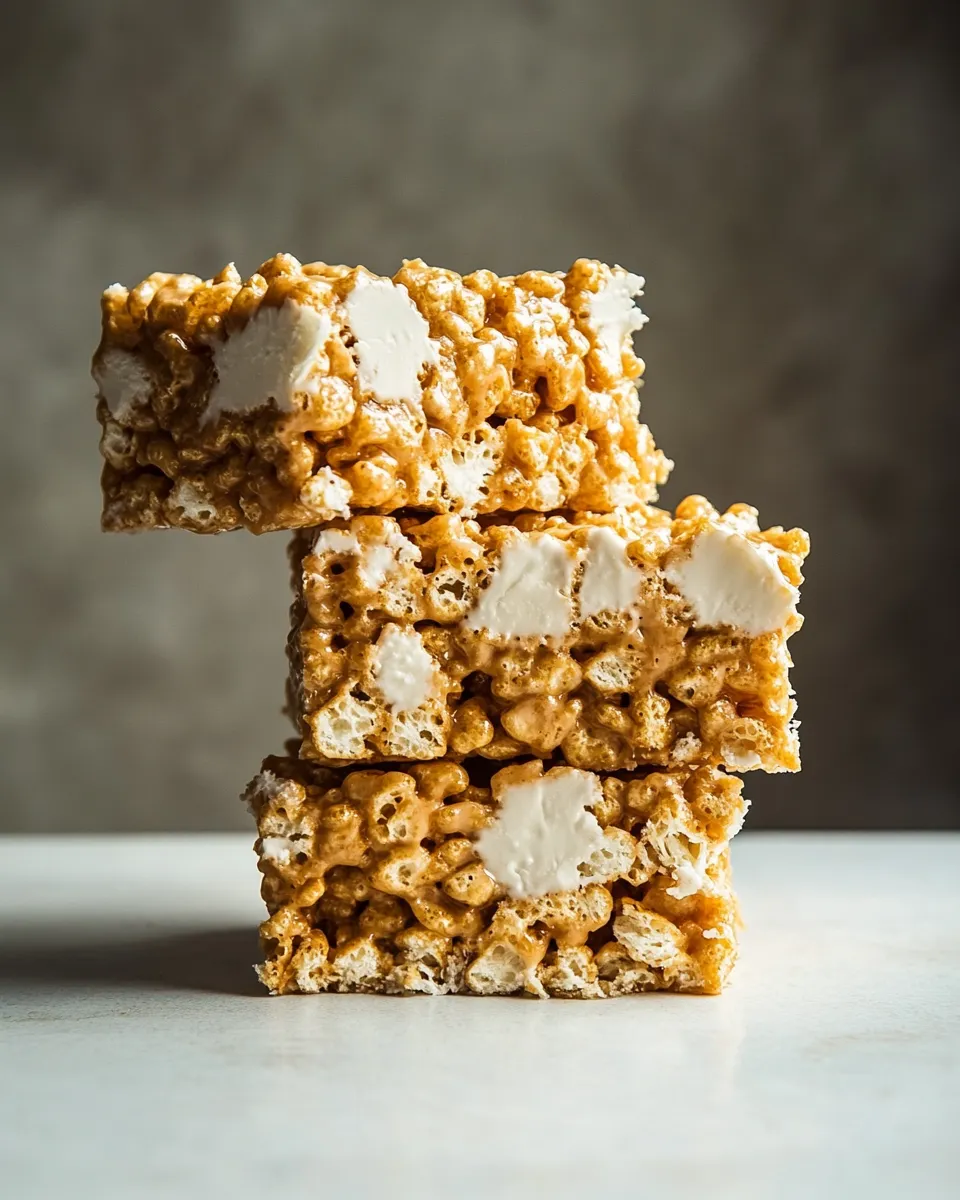
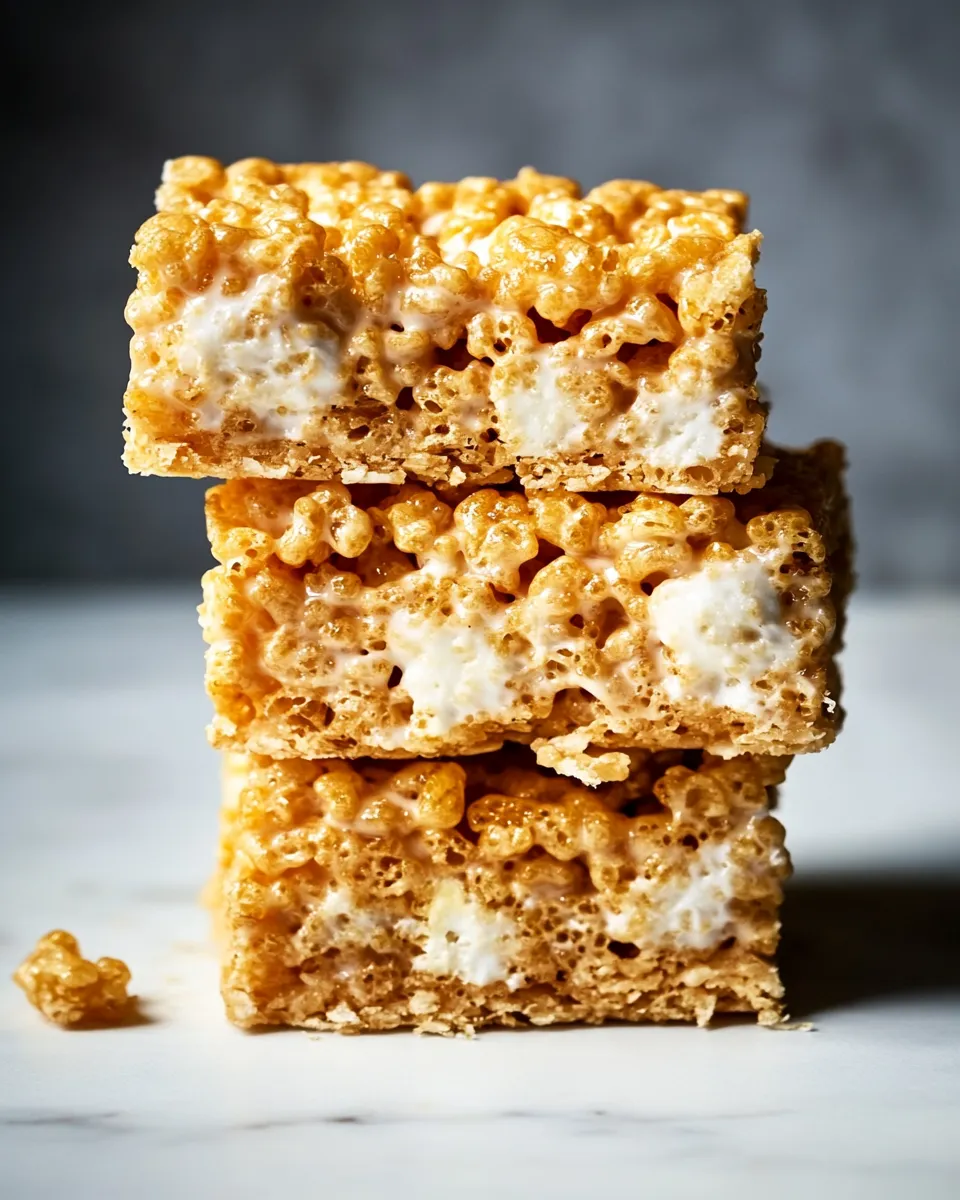
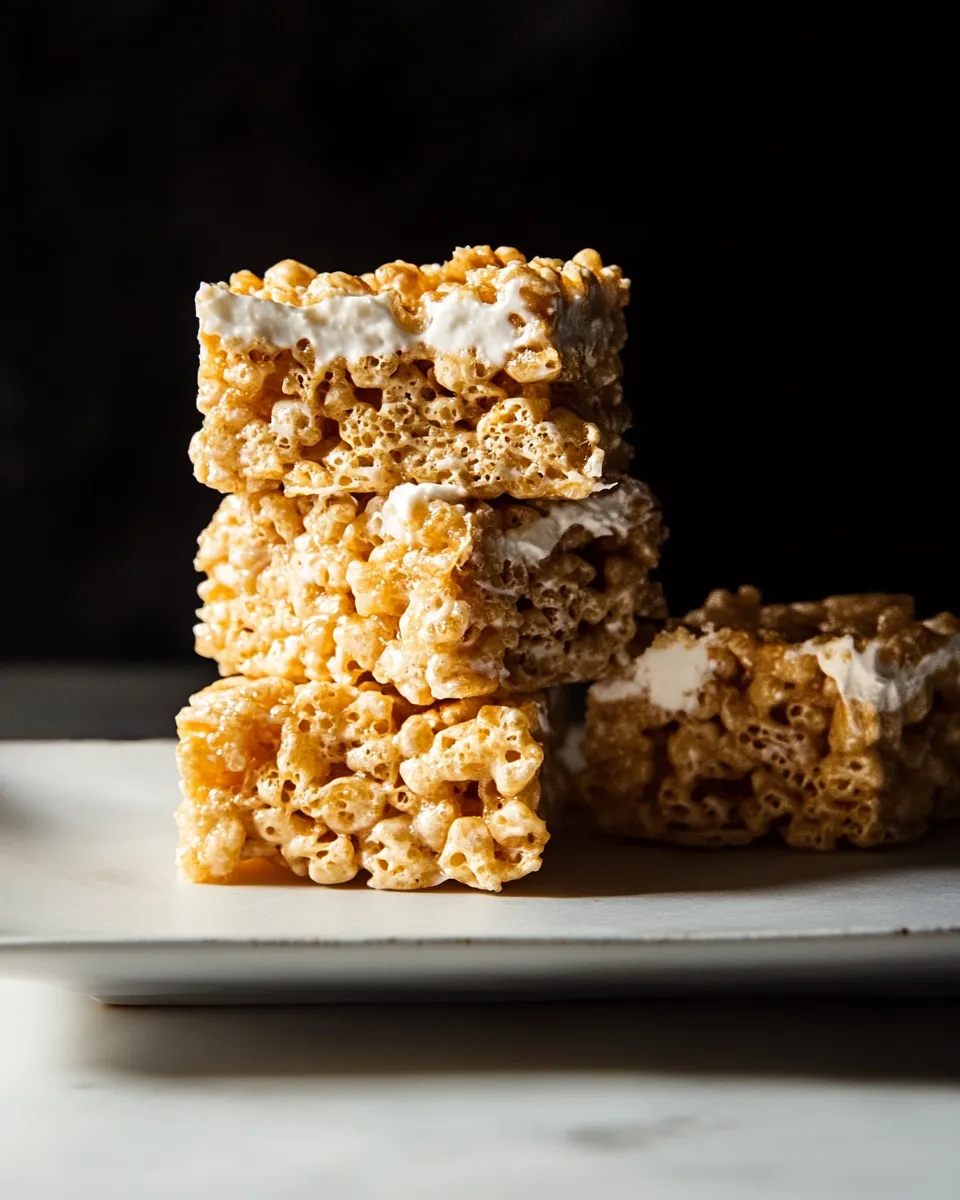
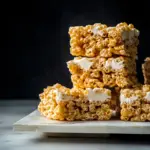
These Rice Krispie treats are the kind I make when I want something fast, satisfying, and a little bit nostalgic — but elevated. The combination of browned butter and pockets of soft marshmallow transforms a familiar snack into something richer and more interesting. Golden Grahams add a toasty, slightly sweet crunch that plays off the classic crispy rice texture.
I keep this recipe on heavy rotation because it’s forgiving and fast. Browning the butter takes just a few minutes but rewards you with nutty depth; reserving some marshmallows creates gooey pockets rather than a uniformly dense slab. The method is straightforward and stays the same whether you want 18 big bars or 24 small ones.
Below I lay out what goes into them, the exact steps I follow, tools I reach for, common mistakes to avoid, and how to store the bars so they stay chewy and fresh. If you want tips for vegan swaps or a healthier twist, I’ve included those too.
What Goes Into Chewy, Gooey Golden Rice Krispie Treats
Ingredients
- 1 cup (2 sticks) unsalted butter — browning the butter adds a nutty, caramel-like backbone; don’t skip this step.
- 2 (10-oz) bags mini marshmallows, divided (about 10⅔ cups) — most melt into the base while 2 cups are reserved to create soft, gooey pockets.
- 3 cups Golden Grahams — crushed for texture and a honey-toasty flavor; aim for a variety of piece sizes.
- ¾ teaspoon vanilla extract — brightens the sweetness and rounds the flavors.
- Heaping ½ teaspoon salt — balances the sweetness and highlights the browned butter notes.
- 5½ cups Rice Krispies or crispy rice cereal — the classic foundation; use the specified amount for the right density.
Cook Chewy, Gooey Golden Rice Krispie Treats Like This
- Line a 9 x 13-inch (23 x 33-cm) pan with heavy-duty aluminum foil, leaving an overhang on two sides for lifting. Lightly grease the foil with softened butter or nonstick spray. Set the pan aside.
- Remove 2 cups of the mini marshmallows and set them aside for later use.
- Place the 3 cups Golden Grahams in a large resealable plastic bag. Seal the bag and gently crush the cereal with a rolling pin, the bottom of a dry measuring cup, or your fist until you have a mix of smaller pieces, some Rice Krispies-sized pieces, and some crumbs. Do not pulverize completely. Set aside.
- In a large heavy-bottomed pot, melt the 1 cup (2 sticks) unsalted butter over medium-high heat. Swirl or stir occasionally. Continue cooking until the butter foams, turns a golden brown color and smells nutty, watching closely so it does not burn (this takes just a few minutes).
- As soon as the butter is browned, reduce the heat to low. Add the remaining mini marshmallows (all marshmallows except the reserved 2 cups), the 3/4 teaspoon vanilla extract, and the heaping 1/2 teaspoon salt. Stir constantly over low heat until the marshmallows are completely melted and the mixture is smooth.
- Remove the pot from the heat. Immediately add the 5 1/2 cups Rice Krispies and the crushed Golden Grahams. Stir with a rubber spatula or wooden spoon until the cereals are evenly coated and combined.
- Add the reserved 2 cups mini marshmallows to the pot and gently fold them in until they are softened and partially melted, leaving pockets of goo rather than fully melting them.
- Transfer the cereal-marshmallow mixture to the prepared pan. Using the butter wrapper, a lightly buttered spatula, or lightly greased/damp fingers, press the mixture gently and evenly into the pan—do not press so hard that the treats become overly compacted.
- Let the pan cool at room temperature until set, at least 1 hour.
- Use the foil overhang to lift the set slab from the pan onto a cutting board. Cut into 18 to 24 bars, depending on desired size. Store the bars in an airtight container at room temperature for up to 5 days.
Why It Works Every Time
There are a few simple technique points that make this recipe reliably good. First, browning the butter adds complexity — nutty, toasty notes that plain melted butter can’t provide. Those flavors hold up well against the sugar and marshmallows, so the treats taste richer rather than cloyingly sweet.
Second, reserving marshmallows and folding them in at the end gives you texture contrast: fully melted marshmallow binds, while the reserved ones soften into pockets of goo. They create a pleasing chew and surprise in every bite. Crushing the Golden Grahams rather than pulverizing them keeps a mix of textures — some crumbs, some small clusters, and some larger flakes — which prevents the bars from being one-note.
Finally, not over-pressing the mixture into the pan preserves that chewiness. Press too hard and you’ll end up with a dense, slightly tough slab. Gentle, even pressure sets a good structure while keeping the treats tender.
Vegan & Vegetarian Swaps
Vegetarian-friendly: this recipe is already vegetarian as written. For vegan adaptations consider these straightforward swaps (no quantities changed, just ingredient replacements):
- Replace unsalted butter with a solid vegan butter that browns well — watch closely as plant-based spreads can brown at different rates.
- Use vegan mini marshmallows (brands labeled vegan) in place of regular marshmallows, and still reserve 2 cups to fold in for gooey pockets.
- Choose a gluten-free crispy rice cereal and gluten-free Golden Grahams-style cereal if you need the treats to be gluten-free; texture may vary slightly.
Gear Checklist
- 9 x 13-inch (23 x 33-cm) pan — lined with heavy-duty foil for easy removal.
- Heavy-bottomed pot — helps brown butter evenly without hot spots.
- Large resealable plastic bag — for crushing the Golden Grahams.
- Rolling pin or sturdy measuring cup — for gentle crushing.
- Rubber spatula or wooden spoon — for stirring and folding.
- Measuring cups and spoons — for precise amounts.
- Butter wrapper, spatula, or lightly greased/damp fingers — to press the mixture into the pan without sticking.
Avoid These Mistakes
- Don’t walk away while browning butter. It goes from browned to burnt quickly. Stay attentive and remove from heat as soon as it smells nutty and turns golden.
- Don’t pulverize the Golden Grahams. Aim for a mix of sizes to keep texture contrast; completely crushed crumbs will flatten the profile.
- Don’t over-press the mixture into the pan. Firm but gentle pressure keeps the treats chewy instead of dense.
- Don’t skip reserving marshmallows. Those 2 cups are key to the gooey pockets that make these bars special.
- Don’t store while still warm. Let them cool and set for at least an hour to avoid soggy wrapping and condensation in the container.
Health-Conscious Tweaks
If you want to make these a bit lighter without changing the core method, focus on portions and pairing rather than altering the recipe ratios. Cut the slab into more, smaller bars to keep servings modest. Enjoy with a piece of fruit on the side to balance sweetness.
For ingredient-level adjustments: you can try a reduced-fat butter substitute or a lower-sugar cereal, but expect changes in flavor and texture. Browning is harder with very low-fat spreads. If using vegan or lower-fat versions, brown and monitor carefully, and accept that the chew and mouthfeel will shift.
If You’re Curious
About the Golden Grahams
Golden Grahams bring a mild honey-toasted note and a sturdier structure than rice cereal alone. Crushing them creates little pockets of concentrated flavor that stand out against the lighter Rice Krispies.
About the Reserved Marshmallows
Folding in reserved marshmallows at the end yields soft, partially melted pockets. If you instead melted everything fully, you’d end up with a more uniform, denser bar. The pockets are intentional; they give a pleasing textural surprise.
Storing Tips & Timelines
Store the bars in an airtight container at room temperature for up to 5 days, as the recipe states. Keep the container away from direct sunlight and heat. If humidity is high, place a sheet of parchment between layers to prevent sticking.
If you need to keep them longer, you can individually wrap bars in plastic wrap and freeze them. Thaw at room temperature — wrapped — to avoid condensation. For best texture, eat frozen-thawed bars within a month; the marshmallow pockets can change texture over extended freezing.
Top Questions & Answers
- Can I use salted butter? — Yes, but reduce or omit the added salt to avoid over-salting. The recipe calls for unsalted butter plus a heaping ½ teaspoon salt to control seasoning precisely.
- Why did my bars turn out hard? — Most likely you pressed the mixture too firmly into the pan or overcooked the marshmallow mixture. Press gently and remove from heat as soon as the marshmallows are melted and smooth.
- How do I get large gooey pockets? — Reserve larger marshmallows instead of minis, if you like, but the method requires folding in unmelted pieces so they soften rather than disappear. The recipe uses minis and reserves 2 cups for that purpose.
- Can I add mix-ins (chocolate, nuts, etc.)? — You can fold in small amounts of additions after step 6, but be mindful they will alter texture and shelf life. Small chips or a light sprinkle of chopped additions on top while still warm works best.
- Are these freezer-friendly? — Yes. Wrap individually and freeze. Thaw wrapped at room temperature for best results.
Final Bite
These Chewy, Gooey Golden Rice Krispie Treats are one of those recipes where a couple of small technique choices—browned butter, reserved marshmallows, and crushed Golden Grahams—take a simple bar to something memorable. They’re quick, forgiving, and endlessly adaptable. Make them for a bake sale, an after-school snack, or just because you want the comfort of something sweet with an adult twist. Enjoy, and don’t forget to leave a little pocket of goo in each bite.
Chewy, Gooey Golden Rice Krispie Treats
Ingredients
Ingredients
- 1 cup 2 sticksunsalted butter
- 2 10-ozbags mini marshmallows, divided (about 10 2/3 cups)
- 3 cupsGolden Grahams
- 3/4 teaspoonvanilla extract
- Heaping 1/2 teaspoonsalt
- 5 1/2 cupsRice Krispies or crispy rice cereal
Instructions
Instructions
- Line a 9 x 13-inch (23 x 33-cm) pan with heavy-duty aluminum foil, leaving an overhang on two sides for lifting. Lightly grease the foil with softened butter or nonstick spray. Set the pan aside.
- Remove 2 cups of the mini marshmallows and set them aside for later use.
- Place the 3 cups Golden Grahams in a large resealable plastic bag. Seal the bag and gently crush the cereal with a rolling pin, the bottom of a dry measuring cup, or your fist until you have a mix of smaller pieces, some Rice Krispies-sized pieces, and some crumbs. Do not pulverize completely. Set aside.
- In a large heavy-bottomed pot, melt the 1 cup (2 sticks) unsalted butter over medium-high heat. Swirl or stir occasionally. Continue cooking until the butter foams, turns a golden brown color and smells nutty, watching closely so it does not burn (this takes just a few minutes).
- As soon as the butter is browned, reduce the heat to low. Add the remaining mini marshmallows (all marshmallows except the reserved 2 cups), the 3/4 teaspoon vanilla extract, and the heaping 1/2 teaspoon salt. Stir constantly over low heat until the marshmallows are completely melted and the mixture is smooth.
- Remove the pot from the heat. Immediately add the 5 1/2 cups Rice Krispies and the crushed Golden Grahams. Stir with a rubber spatula or wooden spoon until the cereals are evenly coated and combined.
- Add the reserved 2 cups mini marshmallows to the pot and gently fold them in until they are softened and partially melted, leaving pockets of goo rather than fully melting them.
- Transfer the cereal-marshmallow mixture to the prepared pan. Using the butter wrapper, a lightly buttered spatula, or lightly greased/damp fingers, press the mixture gently and evenly into the pan—do not press so hard that the treats become overly compacted.
- Let the pan cool at room temperature until set, at least 1 hour.
- Use the foil overhang to lift the set slab from the pan onto a cutting board. Cut into 18 to 24 bars, depending on desired size. Store the bars in an airtight container at room temperature for up to 5 days.
Equipment
- 9 x 13-inch pan
- heavy-duty aluminum foil
- butter or nonstick spray
- Rolling Pin
- resealable plastic bag
- Measuring Cup
- Large Heavy-Bottomed Pot
- Rubber spatula
- Wooden Spoon
- butter wrapper or spatula
- Cutting Board
Notes
Freezing Instructions:
To freeze, place in layers separated by wax paper in an airtight container. Freeze for up to 6 weeks. Let stand at room temperature for about an hour before serving.