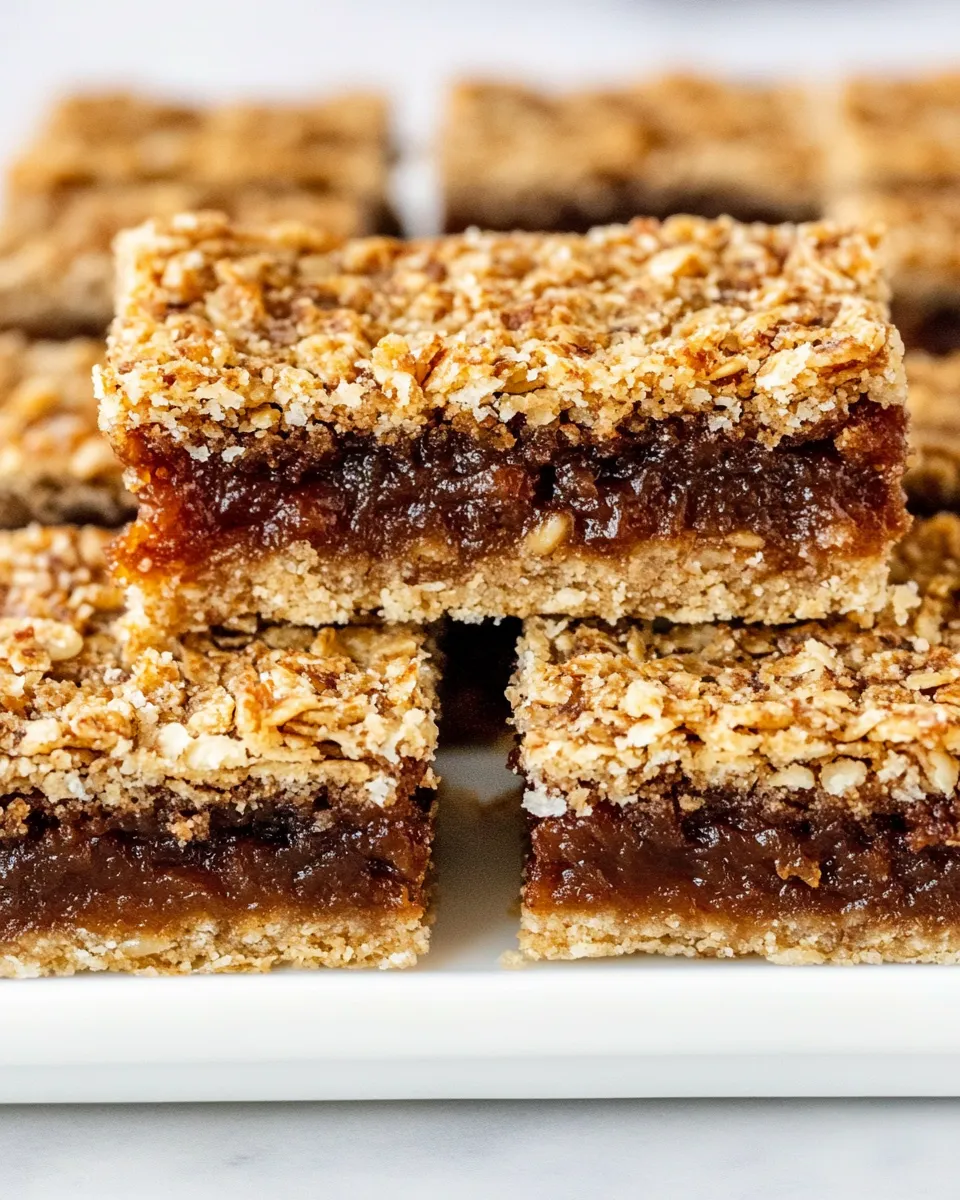
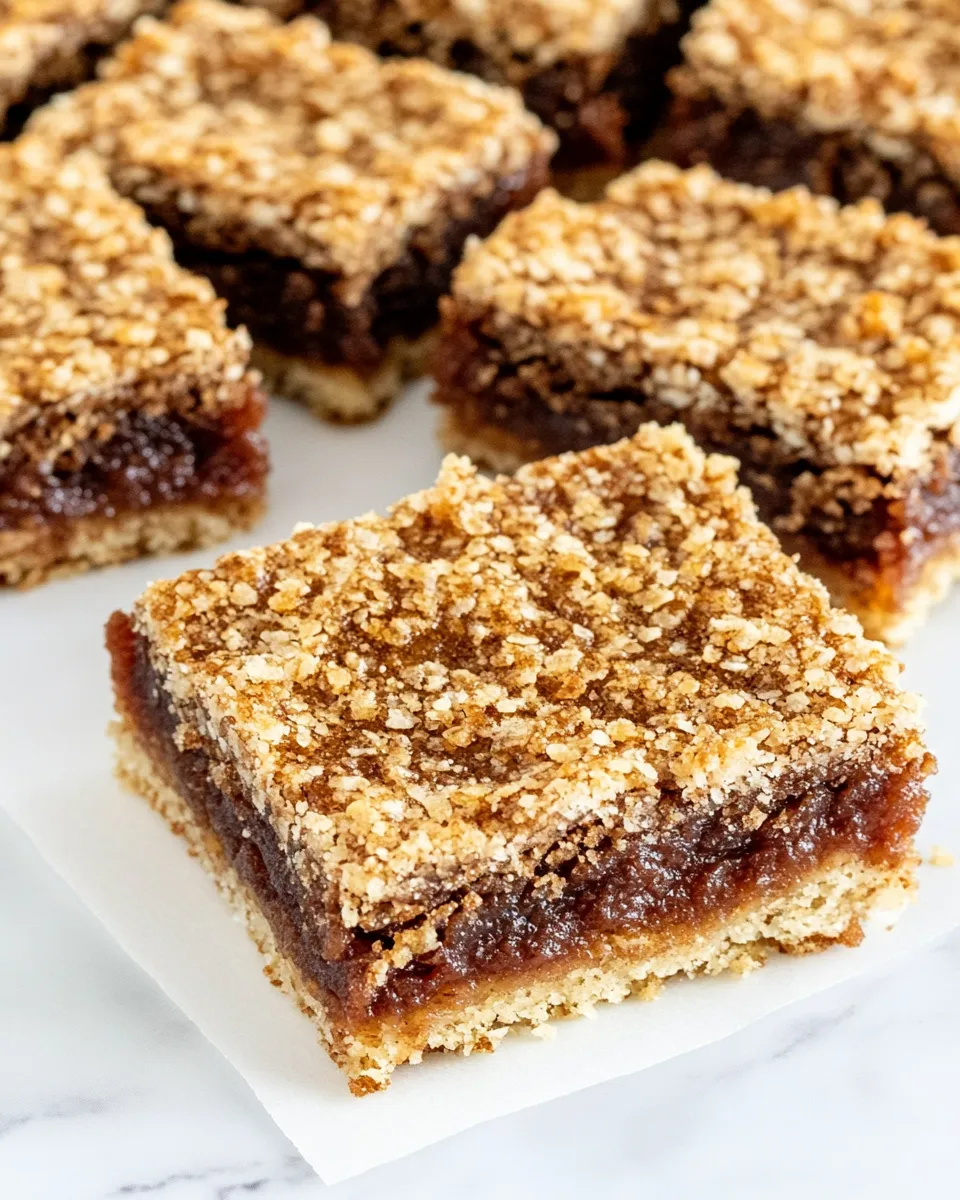
These Date Squares are the kind of thing I reach for when I want something reliably cozy and not too fussy. They marry a sticky, caramel-like date filling with a lightly crunchy oat crumble in a single slab that’s simple to slice and impossible to resist. The method is straightforward and the payoff is a snack that stores well and improves after a day in the fridge.
I keep this recipe in regular rotation because it’s forgiving: the date paste comes together on the stovetop then gets smoothed in the food processor, and the oat-and-flour crumb is pulsed with cold butter until pea-sized bits remain. That little butter-together step is the secret to a tender, shortbread-like base and topping that contrasts nicely with the soft date layer.
Below you’ll find shopping guidance, the exact ingredient list with quick notes, and the step-by-step instructions I follow every time. There are also troubleshooting tips, tool recommendations, and sensible ways to tweak the texture to suit your pantry or preferences.
Your Shopping Guide
Start with good-quality dates. Medjool or similar large, soft dates make a smoother, more naturally sweet filling. If you can buy pre-pitted dates, do — it saves time. If yours aren’t pitted, you’ll need to remove the pits before cooking.
Old-fashioned rolled oats are important here. They give structure and a pleasant chew in the crumb; instant oats will make a denser, less textured topping. Look for unsalted butter and keep it cold until you add it to the dry mix — that temperature contrast is what gives you those flaky, crumbly bits.
Other pantry items are basic: all-purpose flour, brown sugar, baking soda, salt, and a small amount of cinnamon and vanilla for lift and aroma. Nothing exotic, but quality does matter: fresh brown sugar and properly stored oats make a difference.
Ingredients
- 1 cup water — used to soften the dates and create the paste.
- 3 cups dates (pitted) — provides the sweet, caramel-like filling; pitted is essential.
- 1 teaspoon vanilla extract — brightens the date flavor.
- 2 cups old fashioned rolled oats — forms the hearty crumb base and topping.
- 1 cup all-purpose flour — adds structure to the crumble so it holds together when cut.
- 3/4 cup brown sugar — sweetens and adds a touch of molasses flavor to the crumbs.
- 1/2 teaspoon baking soda — a small lift for the crumb and helps with texture.
- 1/4 teaspoon salt — balances sweetness; use less if your butter is salted.
- 1/8 teaspoon cinnamon — a hint of warmth that complements dates.
- 1 cup cold butter (unsalted, cut into small cubes) — cold butter yields a tender, flaky crumb when pulsed into the dry mix.
Step-by-Step: Date Squares
- Preheat oven to 350°F. Line a 9-inch baking pan with parchment paper, leaving an overhang for easy removal, and set aside.
- In a medium saucepan combine 1 cup water and 3 cups pitted dates. Cook over medium heat, stirring occasionally, about 10 minutes or until the dates are very soft and most of the water is absorbed and the mixture is thick.
- Remove the saucepan from the heat, stir in 1 teaspoon vanilla extract, and let the date mixture cool until warm or room temperature (about 10–15 minutes).
- Transfer the cooled date mixture to a food processor and pulse until it forms a smooth paste. Set the date paste aside.
- In the food processor (no need to wash thoroughly), add 2 cups old-fashioned rolled oats, 1 cup all-purpose flour, 3/4 cup brown sugar, 1/2 teaspoon baking soda, 1/4 teaspoon salt, and 1/8 teaspoon cinnamon. Pulse a few times to combine the dry ingredients.
- Add 1 cup cold unsalted butter, cut into small cubes, to the dry mixture and pulse until the butter is incorporated and the mixture resembles coarse crumbs (pea-sized pieces).
- Measure out about 2/3 of the crumb mixture and spread it evenly in the bottom of the prepared pan to form the base. Use a spatula to distribute it evenly; press lightly to level but do not compact hard.
- Spread the date paste evenly over the crumb base with a spatula.
- Sprinkle the remaining 1/3 of the crumb mixture evenly over the date layer. Pat the top lightly with a spatula—do not press down firmly.
- Bake for 35–45 minutes, until the top is golden brown and the edges are set.
- Remove from the oven and let cool completely in the pan on a wire rack. Then place the pan in the refrigerator for about 2 hours to firm up.
- Use the parchment overhang to lift the slab from the pan and cut into squares.
What Sets This Recipe Apart
Two things make these Date Squares stand out: the stovetop date paste and the cold-butter oat crumble. Cooking the dates with water lets them soften and concentrate into a paste without adding extra sugars or syrups. The vanilla at the end keeps that natural caramel note bright.
The crumble is purposely flaky, not a compact shortbread. Pulsing cold butter into the dry mix creates little butter-coated pockets that bake into a tender, slightly crumbly texture. The result is a layered bar—chewy middle, tender base, and a crisp top edge—that feels professional but is straightforward to assemble.
Flavor-Forward Alternatives

If you want to nudge the flavor without changing the basic ingredient list, try these simple adjustments that work within the recipe’s framework:
- Increase the cinnamon slightly for a warmer, spicier note.
- Use salted butter instead of unsalted if you prefer a pronounced sweet-salty contrast.
- Toast the rolled oats briefly in a dry skillet before pulsing to deepen the nutty flavor of the crumbs.
- Pulse the date mixture less if you like a chunkier, more rustic filling, or longer for an ultra-smooth paste.
Prep & Cook Tools
Essentials
- 9-inch baking pan (lined with parchment) — the specified size ensures proper thickness and bake time.
- Medium saucepan — for softening and concentrating the dates.
- Food processor — speeds both the date paste and crumb-making steps.
- Wire rack — to cool the pan before chilling.
Nice-to-have
- Offset spatula — makes spreading the date layer neater and easier.
- Bench scraper or sharp knife — for clean, even square cuts after chilling.
Slip-Ups to Skip
Don’t skip chilling before cutting. The fridge step firms up the date layer so slices hold their shape. Cutting too soon will give you ragged squares that fall apart.
Avoid over-pulsing the butter into the crumb. If you blend until it’s fully combined you’ll end up with a dense, shortbread-like slab rather than a flaky crumble. You want pea-sized bits of butter distributed through the dry mix.
Also, be careful not to pack the base too hard when forming the lower crust. Press lightly to level it; compressing it tightly makes the texture heavy and reduces the contrast between base and topping.
Customize for Your Needs
Texture tweaks are the simplest way to customize. For chewier squares, shave a few minutes off the bake time and err on the side of a softer center. For firmer, more set squares, bake toward the upper end of the time range and chill fully before slicing.
If you want more crumble on top, increase how much of the crumb mixture you sprinkle over the filling—but take care not to press it down. If you prefer a smoother profile, pulse the crumbs a touch finer before adding butter.
Method to the Madness
There’s method behind each step. Cooking dates with water breaks them down and releases their sugars gently, preventing scorching and giving you a spreadable paste without adding sweeteners. Cooling the paste before pulsing helps it come together more predictably in the food processor.
Pulsing the dry ingredients first ensures even distribution of baking soda, salt, and cinnamon. Adding cold butter afterwards keeps the butter from warming and melting into the dry mix; those cold butter bits create pockets that bake into a tender, layered texture rather than becoming one uniform dough.
Best Ways to Store
Once cooled and chilled, store the cut squares in an airtight container in the refrigerator. They keep well for up to a week and actually firm up in flavor and texture after a day. For longer storage, layer squares between sheets of parchment and freeze for up to 3 months; thaw in the fridge before serving.
If you’re serving these at room temperature, take them out of the fridge about 20–30 minutes before you want to eat so they lose a bit of chill and the date layer softens slightly.
Questions People Ask
Can I use a different size pan? You can, but the thickness and bake time will change. A larger pan yields thinner bars that may bake faster; a smaller pan makes thicker bars that require longer baking. I use a 9-inch pan because it produces an ideal thickness that matches the bake time in the recipe.
Do I have to use a food processor? It makes the job faster and gives an even texture, but you can mash the dates by hand and rub cold butter into the dry mix with fingertips or a pastry cutter. The texture will be slightly different, more rustic, but still delicious.
How can I tell when they’re done? The top should be golden brown and the edges set. The center will firm up as the bars cool and chill, so don’t overbake trying to get a fully set center while they’re still hot.
Hungry for More?
If you like these Date Squares, try swapping the filling or topping in the future while keeping the same crumble approach. The technique—stove-softened filling and cold-butter crumbs—translates well across fruit fillings and makes a reliable template for other slab bars. Keep the pantry basics stocked and you’ll have a quick, homey bake at hand whenever you need one.
Date Squares
Ingredients
Ingredients
- 1 cupwater
- 3 cupsdates pitted
- 1 teaspoonvanilla extract
- 2 cupsold fashioned rolled oats
- 1 cupall-purpose flour
- 3/4 cupbrown sugar
- 1/2 teaspoonbaking soda
- 1/4 teaspoonsalt
- 1/8 teaspooncinnamon
- 1 cupcold butter unsalted, cut into small cubes
Instructions
Instructions
- Preheat oven to 350°F. Line a 9-inch baking pan with parchment paper, leaving an overhang for easy removal, and set aside.
- In a medium saucepan combine 1 cup water and 3 cups pitted dates. Cook over medium heat, stirring occasionally, about 10 minutes or until the dates are very soft and most of the water is absorbed and the mixture is thick.
- Remove the saucepan from the heat, stir in 1 teaspoon vanilla extract, and let the date mixture cool until warm or room temperature (about 10–15 minutes).
- Transfer the cooled date mixture to a food processor and pulse until it forms a smooth paste. Set the date paste aside.
- In the food processor (no need to wash thoroughly), add 2 cups old-fashioned rolled oats, 1 cup all-purpose flour, 3/4 cup brown sugar, 1/2 teaspoon baking soda, 1/4 teaspoon salt, and 1/8 teaspoon cinnamon. Pulse a few times to combine the dry ingredients.
- Add 1 cup cold unsalted butter, cut into small cubes, to the dry mixture and pulse until the butter is incorporated and the mixture resembles coarse crumbs (pea-sized pieces).
- Measure out about 2/3 of the crumb mixture and spread it evenly in the bottom of the prepared pan to form the base. Use a spatula to distribute it evenly; press lightly to level but do not compact hard.
- Spread the date paste evenly over the crumb base with a spatula.
- Sprinkle the remaining 1/3 of the crumb mixture evenly over the date layer. Pat the top lightly with a spatula—do not press down firmly.
- Bake for 35–45 minutes, until the top is golden brown and the edges are set.
- Remove from the oven and let cool completely in the pan on a wire rack. Then place the pan in the refrigerator for about 2 hours to firm up.
- Use the parchment overhang to lift the slab from the pan and cut into squares.
Equipment
- 9-inch Square Baking Cake Pan
- 1-Quart Saucepan
- KitchenAid 7-cup Food Processor
- Keep Calm And Bake On Spatula
- Parchment Paper
Notes
These sweet treats will keep for up toa weekif wrapped tightly or stored in an otherwise air tight container in the fridge.
To freeze, be sure to store these in an airtight container or wrapped up tightly and cute the squares up first for easier snacking when needed.