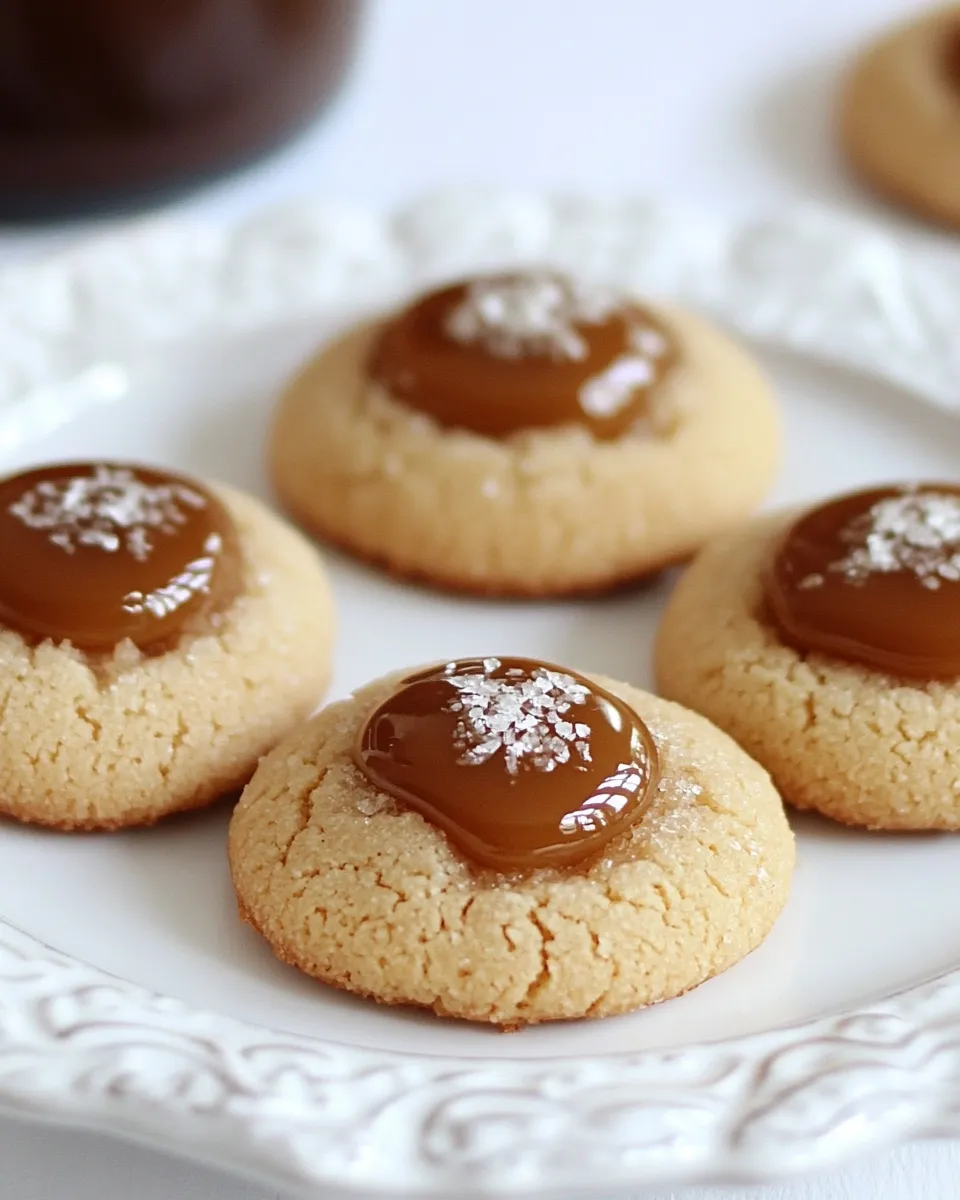
These dulce de leche sandwich cookies are simple, unfussy, and dangerously moreish. A tender, shortbread-like cookie dusted with powdered sugar pairs beautifully with the rich, caramel sweetness of dulce de leche. They travel well, stack cleanly in a tin, and make a quiet, confident impression at coffee hour or a potluck.
I test recipes until the texture and timing feel obvious. For these cookies I focused on ease and predictability: a straightforward dough, a quick chill, and a forgiving bake time. The real star is the filling—store-bought dulce de leche keeps assembly fast and predictable, while still tasting handcrafted.
Below you’ll find a clear rundown of what you need, smart substitutions, tools that matter, and the exact step‑by‑step directions I used when testing. No fluff, just practical guidance so you can make them tonight and know they’ll come out reliably.
The Essentials
Yield: Depends on cookie size (the recipe’s cutter is ~2 inches). Expect several dozen small sandwich cookies if you use that size. Prep time: active work is short—about 20–30 minutes—plus chilling: 2 hours minimum. Bake time: 14–18 minutes per batch. Difficulty: easy to moderate; the dough is straightforward, the only patience required is chilling.
Flavor profile: buttery, lightly sweet cookies with a soft crumb and a concentrated caramel center. Texture balance is key: the cookie should be tender, not crumbly, and the dulce de leche should be spoonable but not runny. That’s why chilling the rolled dough and waiting for cookies to cool before assembling matters.
Ingredients
- 1 ½ cups (339g) unsalted butter softened 3 sticks — Provides richness and the tender shortbread texture; room temperature for even creaming.
- 1 cup (113g) powdered sugar — Sweetens and gives a fine, tender crumb; sift if lumpy.
- 1 teaspoon vanilla extract — Adds depth and rounds the caramel notes.
- ¼ teaspoon salt — Balances sweetness and enhances butter and caramel flavors.
- 3 cups (372g) all-purpose flour — Structure for the cookies; measure by spooning into the cup and leveling or use a scale for accuracy.
- 2 13 ounces cans dulce de leche — The filling; ready-made keeps assembly fast. Use full-fat caramel for best texture.
Dulce de Leche Cookies, Made Easy
Think of this as a two-part build: make a workable dough, chill it solid, then bake and assemble. The dough itself is very forgiving—creamed butter and powdered sugar, a little vanilla, salt, and flour. No eggs, no liquid other than the butter, which keeps the dough firm and easy to roll.
Key shortcuts: roll the dough between parchment sheets to avoid excess flour and to make chilling and transfer simpler. Use pre-made dulce de leche to skip long stovetop work; it’s the fastest way to a perfect sandwich cookie. If you want a decorative touch, dust the finished sandwiches with a little powdered sugar.
Why Dulce de Leche Cookies is Worth Your Time
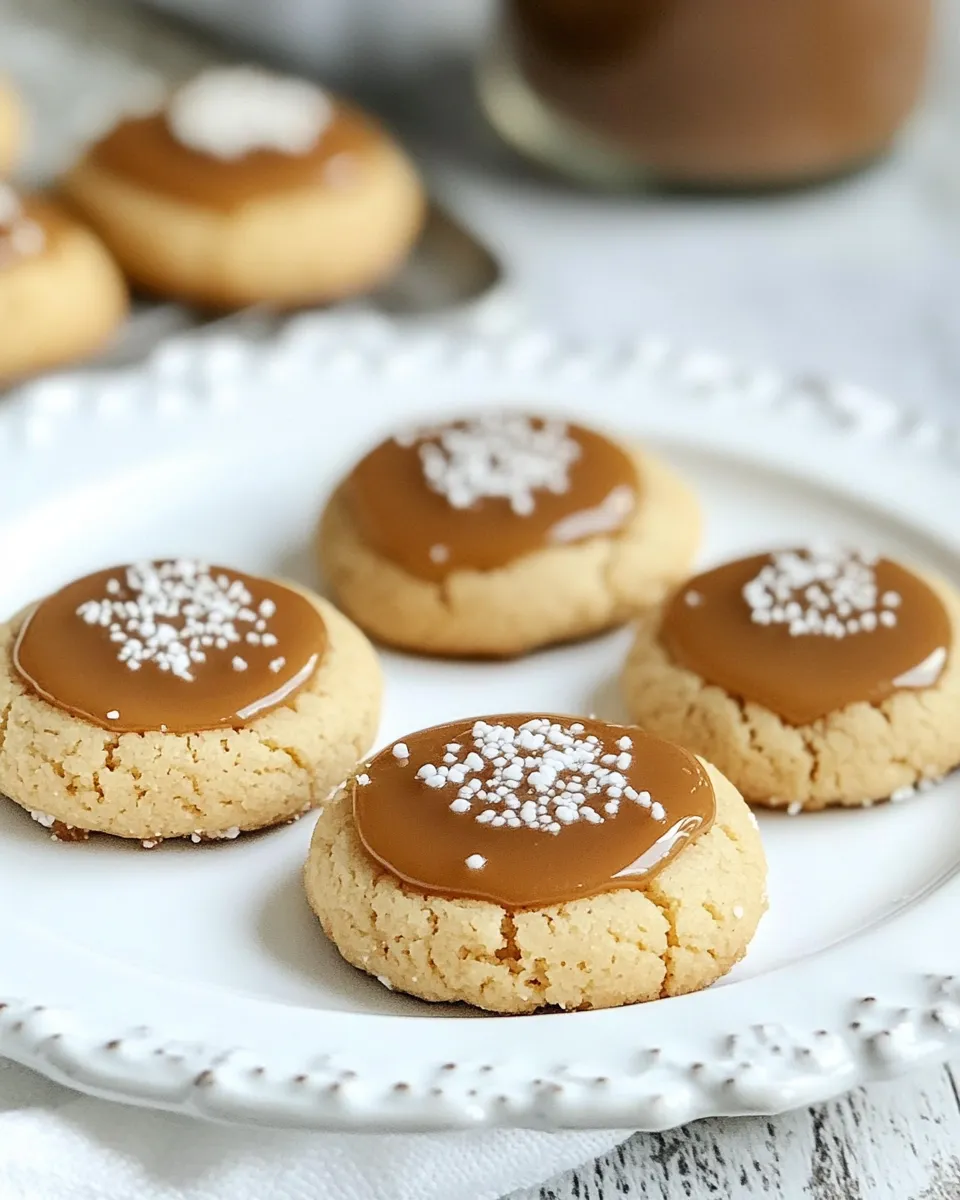
These cookies deliver comforting nostalgia with minimal fuss. The cookie is uncomplicated: buttery, crisp at the edges, soft in the center. The dulce de leche adds a concentrated caramel hit that feels indulgent. You get bakery-level flavor with home-kitchen effort.
They’re also versatile. Make them small for tea and coffee service, or larger for a more decadent dessert. Assemble them the day you plan to serve for best texture, or freeze them for longer storage. In short: a lot of reward for a little planning.
Substitutions by Category

- Butter — For a direct swap, use salted butter and omit or reduce the added salt. For a dairy-free option, use a high-quality vegan butter that behaves like regular butter when creamed.
- Sugar — Powdered sugar is essential here for the fine texture; swapping for granulated sugar will change the crumb and spread, so don’t replace it without adjusting the method.
- Flour — All-purpose is recommended. If you need gluten-free, try a 1:1 gluten-free flour blend tested for baked goods, but expect small differences in texture and potentially more crumbling.
- Dulce de Leche — Store-bought is the fastest choice. If you prefer homemade, simmer sweetened condensed milk until caramelized, but ensure it’s thick enough to pipe without running.
Tools of the Trade
- Stand mixer with paddle attachment or a large mixing bowl and hand mixer — for creaming butter and sugar smoothly.
- Rolling pin and parchment or wax paper — roll between sheets for an even 1/4-inch thickness and easy chilling.
- Cookie cutters (about 2-inch suggested) — choose your shape; consistency helps when assembling sandwiches.
- Baking sheets and parchment liners or silicone mats — cookies stick less and bake evenly.
- Wire rack — cool cookies completely before filling to prevent the dulce de leche from seeping.
- Piping bag or resealable plastic bag — for precise filling placement.
Avoid These Mistakes
- Skipping the chill. If the dough isn’t chilled, it can be too soft to cut cleanly and the shapes may lose definition. Chill at least 2 hours as directed.
- Filling warm cookies. If you fill before cookies cool, the dulce de leche can melt and make the sandwiches soggy.
- Overbaking. These cookies should be pale with edges just turning golden. Overbaked cookies will be dry rather than tender.
- Using runny dulce de leche. If your caramel is too thin, it will ooze; thicken it by chilling briefly or choose a thicker commercial brand.
Allergy-Friendly Swaps
- Dairy allergy — Swap to a high-quality vegan butter that behaves like real butter for creaming. Use a dairy-free caramel spread or make a thickened vegan caramel for the filling.
- Gluten intolerance — Use a cup-for-cup gluten-free all-purpose flour blend that includes xanthan gum. Expect slightly different texture; handle dough gently.
- Nut-free — This recipe is naturally nut-free, but check labels on processed dulce de leche for cross-contamination warnings.
What I Learned Testing
During testing, the most impactful step was chilling rolled dough on the tray before cutting. Doing that keeps edges clean and reduces distortion during transfer. Rolling between parchment also made chilling and transfer simple and reduced extra flour on the dough, which keeps the cookies tender.
I also learned to watch the bake time closely. This dough doesn’t change color dramatically as it bakes. Pull the sheets as soon as edges show the first hint of color and the centers feel set. The cookies continue to firm up while cooling on the sheet.
Storing, Freezing & Reheating
Assembled cookies: store in an airtight container for up to 3 days at room temperature. Refrigeration is unnecessary and can make the cookies firmer; bring them to room temperature before serving for best flavor and texture.
Freezing: you can freeze assembled sandwiches for up to 1 month. Layer with parchment to prevent sticking and thaw in the fridge or on the counter while still wrapped to avoid condensation on the surface. Alternatively, freeze unassembled baked cookies and fill after thawing for the freshest texture.
Reheating: avoid direct heat. If you want the dulce de leche a bit softer, let the assembled cookie sit at room temperature for 20–30 minutes. A short warm-up in a low oven (200°F/95°C) for a few minutes works, but watch closely so the caramel doesn’t become too runny.
Your Top Questions
- Can I make the dough ahead? Yes. The dough can be chilled overnight or up to 48 hours before rolling and cutting.
- What if my dulce de leche is too thick? If it’s excessively firm, allow it to come to room temperature or warm briefly in a bowl over hot water to soften before piping.
- Do the cookies need to be dusted with powdered sugar? No. The dusting is optional and adds visual polish, but the cookies are lovely without it.
- Can I add flavorings? Yes—try a teaspoon of orange zest in the dough or a pinch of cinnamon for a subtle twist. Keep additions small so the cookie’s texture remains stable.
Make It Tonight
- In a large bowl or the bowl of a stand mixer fitted with the paddle attachment, beat the softened butter and powdered sugar on medium speed until smooth and creamy, about 2–3 minutes.
- Add the vanilla extract and the salt and mix until evenly incorporated.
- Add the all-purpose flour 1 cup at a time, mixing on low speed and scraping down the bowl between additions, until the flour is fully incorporated and a cohesive dough has formed (you will add a total of 3 cups).
- If the dough is too sticky to roll, cover and chill for 20 minutes, then continue. If it is workable, proceed immediately.
- Divide the dough in half. Place one half between two sheets of parchment paper or wax paper and roll to an even 1/4-inch thickness. Repeat with the second half.
- Place the rolled dough (still between the paper layers) on a baking sheet or tray and chill in the refrigerator for at least 2 hours or up to overnight.
- Preheat the oven to 350°F (177°C). Line baking sheets with parchment paper or silicone baking mats.
- Remove one sheet of chilled dough from the refrigerator and peel off the top piece of parchment. Using a cookie cutter (about 2 inches for the size in the original recipe, or any desired shape/size), cut out cookies. Re-roll scraps and repeat until all dough is used, keeping the dough about 1/4 inch thick.
- Transfer cut cookies to the prepared baking sheets about 1–2 inches apart (these cookies do not spread much).
- Bake 14–18 minutes (time will vary with cookie size and thickness) until the edges just begin to turn golden. Allow cookies to cool on the baking sheet for a few minutes, then transfer to a wire rack to cool completely.
- When cookies are fully cool, turn half of them upside down. Open the can(s) of dulce de leche and spoon it into a piping bag or a resealable plastic bag with a corner snipped off. Pipe or spoon about 1–2 tablespoons of dulce de leche onto each upside-down cookie, then top with a second cookie to form a sandwich.
- Store the assembled cookies in an airtight container for up to 3 days at room temperature, or freeze for up to 1 month. Optional: dust with additional powdered sugar before serving.

Dulce de Leche Cookies
Ingredients
Ingredients
- 1 1/2 cups 339 g unsalted butter softened3 sticks
- 1 cup 113 g powdered sugar
- 1 teaspoonvanilla extract
- 1/4 teaspoonsalt
- 3 cups 372 g all-purpose flour
- 213 ounces cansdulce de leche
Instructions
Instructions
- In a large bowl or the bowl of a stand mixer fitted with the paddle attachment, beat the softened butter and powdered sugar on medium speed until smooth and creamy, about 2–3 minutes.
- Add the vanilla extract and the salt and mix until evenly incorporated.
- Add the all-purpose flour 1 cup at a time, mixing on low speed and scraping down the bowl between additions, until the flour is fully incorporated and a cohesive dough has formed (you will add a total of 3 cups).
- If the dough is too sticky to roll, cover and chill for 20 minutes, then continue. If it is workable, proceed immediately.
- Divide the dough in half. Place one half between two sheets of parchment paper or wax paper and roll to an even 1/4-inch thickness. Repeat with the second half.
- Place the rolled dough (still between the paper layers) on a baking sheet or tray and chill in the refrigerator for at least 2 hours or up to overnight.
- Preheat the oven to 350°F (177°C). Line baking sheets with parchment paper or silicone baking mats.
- Remove one sheet of chilled dough from the refrigerator and peel off the top piece of parchment. Using a cookie cutter (about 2 inches for the size in the original recipe, or any desired shape/size), cut out cookies. Re-roll scraps and repeat until all dough is used, keeping the dough about 1/4 inch thick.
- Transfer cut cookies to the prepared baking sheets about 1–2 inches apart (these cookies do not spread much).
- Bake 14–18 minutes (time will vary with cookie size and thickness) until the edges just begin to turn golden. Allow cookies to cool on the baking sheet for a few minutes, then transfer to a wire rack to cool completely.
- When cookies are fully cool, turn half of them upside down. Open the can(s) of dulce de leche and spoon it into a piping bag or a resealable plastic bag with a corner snipped off. Pipe or spoon about 1–2 tablespoons of dulce de leche onto each upside-down cookie, then top with a second cookie to form a sandwich.
- Store the assembled cookies in an airtight container for up to 3 days at room temperature, or freeze for up to 1 month. Optional: dust with additional powdered sugar before serving.
Equipment
- Large Bowl
- Stand mixer
- paddle attachment
- Spatula
- Measuring Cups
- Measuring Spoons
- Parchment Paper
- Rolling Pin
- cookie cutter
- Baking Sheets
- Wire Rack
- Piping bag