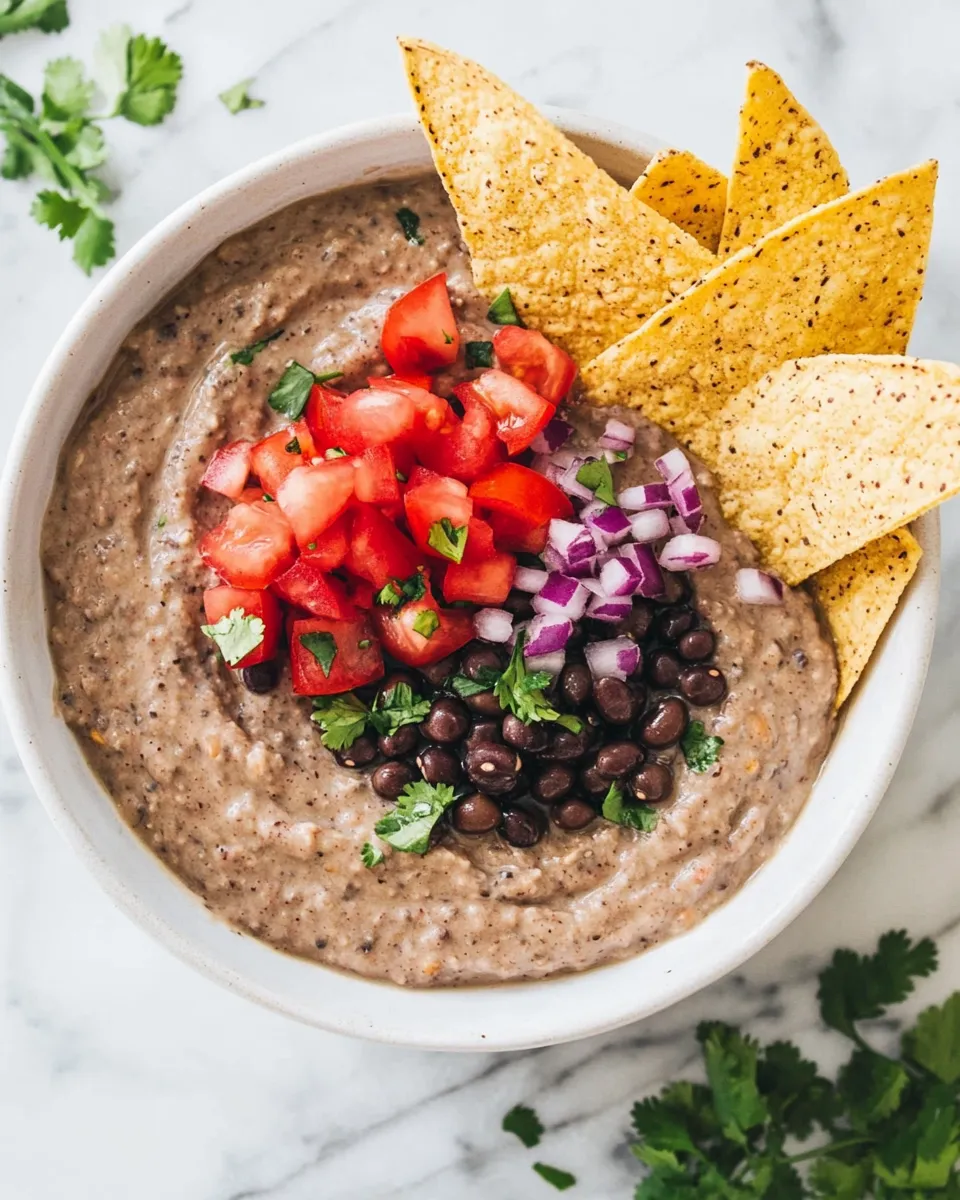
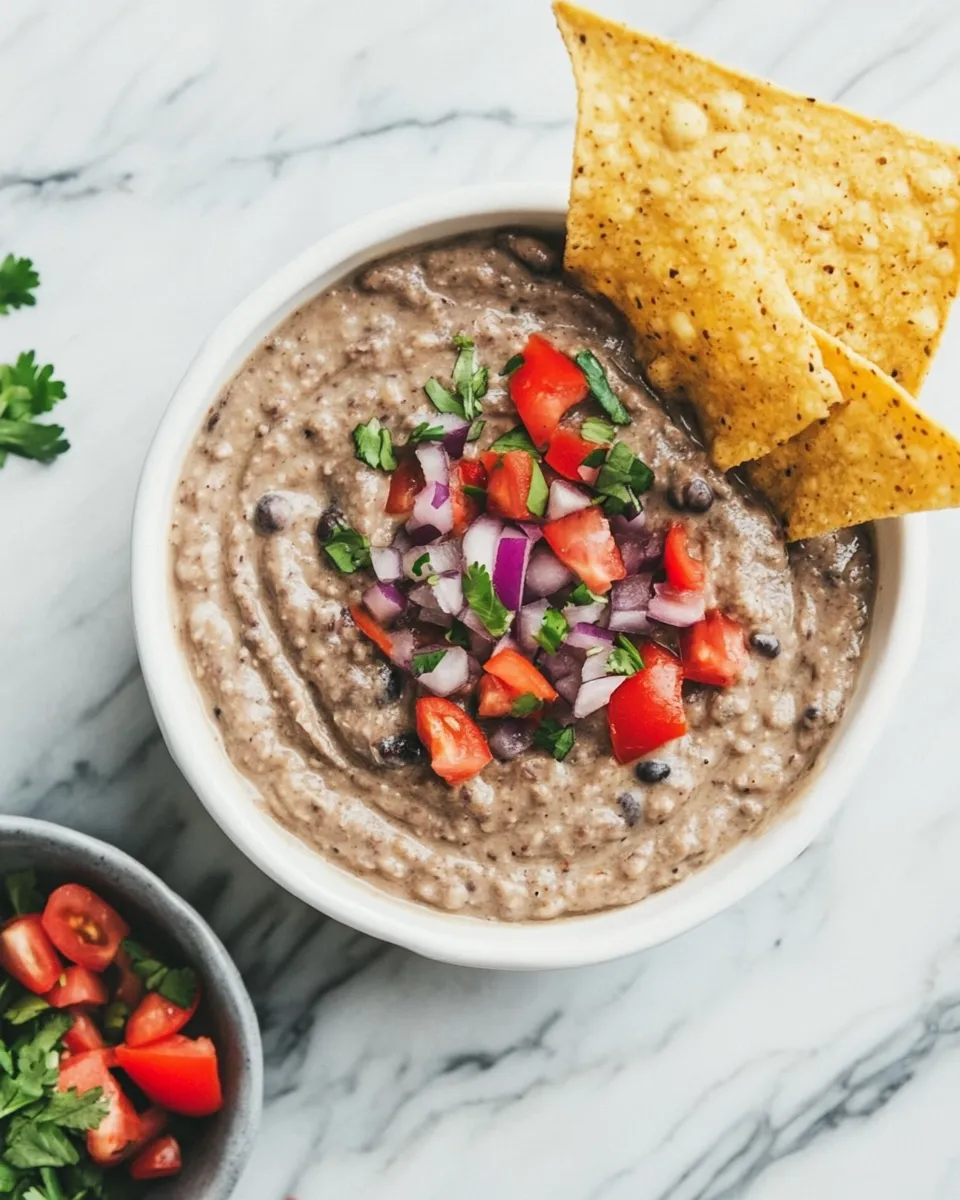
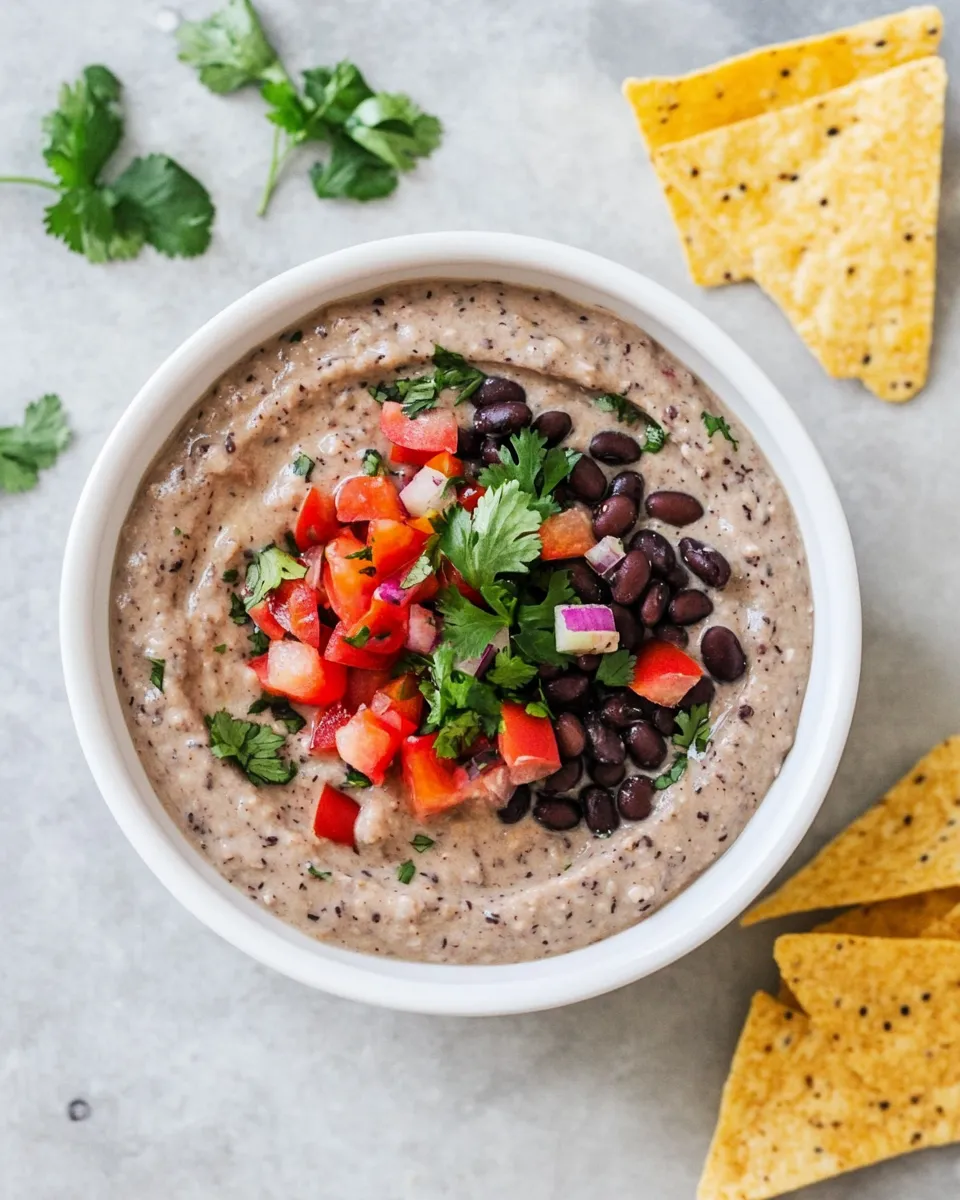
This black bean dip is the fridge-friendly solution I reach for when I want something hearty, fast, and crowd-pleasing. It takes pantry staples and turns them into a creamy, smoky spread that doubles as a party dip, sandwich spread, or a quick taco filling. No blending finesse required—just a food processor and a minute of attention.
I like that it’s forgiving: you can nudge the texture, heat, and salt to your liking with a couple of quick tastes. It’s also one of those recipes that improves if you make it ahead—flavors meld and the cumin and salsa knit into the beans. Serve it warm, cold, or at room temperature depending on how you plan to use it.
Below you’ll find the exact ingredients and a step-by-step method straight from the recipe, plus practical troubleshooting, storage notes, and small swaps that keep the dip accessible for different diets. No fuss. Just smart, useful guidance so your Black Bean Dip turns out every time.
What You’ll Gather
Collect the cans, a jar of salsa, your spices, and a food processor. Drain and rinse the beans to control sodium, and have a spatula ready to scrape the bowl. If you want a garnish, fresh cilantro and extra jalapeño slices are handy—but they’re optional according to the recipe.
Ingredients
- 2(15 oz.) cansblack beans, drained and rinsed — the creamy base and main protein; rinsing removes canning liquid and excess sodium.
- ¾cupsalsa — adds moisture, acidity, and most of the flavor profile; use your favorite jarred style.
- 1teaspoonground cumin — warm, earthy spice that lifts the beans without overpowering them.
- ½teaspoonfine sea salt, plus more to taste — starts the seasoning; the recipe lists extra salt to be added after tasting.
- ¼cupjarred jalapeno slices(optional) — gives preserved heat and a vinegary tang; include if you want more kick.
- ?cupfresh cilantro, roughly chopped (optional) — bright herbal finish; optional because some people prefer to omit it.
Method: Black Bean Dip
- Drain and rinse the black beans thoroughly, then add them to a food processor fitted with an “S” blade.
- Add the salsa, ground cumin, ½ teaspoon fine sea salt, and the optional jarred jalapeño slices and optional chopped cilantro (if using).
- Secure the lid and process until the beans are mostly pureed, about 60 seconds.
- Stop the processor and scrape down the sides and bottom with a spatula to ensure even blending.
- Taste the dip and add more salt if needed (the recipe lists ½ teaspoon plus more to taste). Process briefly again until fully blended and at your preferred consistency.
- Serve immediately with tortilla chips or sliced vegetables, or transfer to an airtight container and refrigerate. The dip will thicken slightly when chilled and can be served cold or returned to room temperature before serving.
Why This Recipe Is Reliable
It’s reliable because it uses canned beans and jarred salsa—two stable pantry items with consistent texture and flavor. The ratio between beans and salsa is balanced to create a dip that’s both creamy and saucy, which means it doesn’t rely on delicate timing or fresh produce that can vary from week to week.
The method is straightforward: blend, taste, adjust. That cycle—processing, scraping, tasting—is the backbone of reliable results. You won’t over-process by accident if you stop to scrape and taste. The cumin and salt are modest; they season rather than mask. That makes the dip forgiving if your salsa is tangier or your beans a bit drier.
Vegan & Vegetarian Swaps
This recipe is vegan and vegetarian as written. No dairy or animal products are required, so it’s ready for vegan guests straight from the ingredient list.
Want it creamier without changing the vegan profile? Add a bit more salsa or reserve a splash of the bean liquid (from the can) and pulse again until you reach the texture you want. If you prefer fresh heat, swap the jarred jalapeño slices for a chopped fresh jalapeño—start with half a pepper and taste, since fresh peppers can be sharper. If you omit cilantro, add an extra pinch of cumin or a squeeze of salsa to keep brightness.
Tools & Equipment Needed
Must-haves
- Food processor with an “S” blade — required for the texture the recipe aims for.
- Spatula — to scrape the bowl for even blending.
- Colander or fine-mesh sieve — to drain and rinse the canned beans.
Nice-to-haves
- Airtight container — for storing leftovers and for flavor melding overnight.
- Measuring spoons and cups — for the cumin, salsa, and salt so you start with consistent amounts.
Missteps & Fixes
Here are common issues and quick fixes so nothing derails you.
Too salty: Rinse the beans more thoroughly next time and choose a low-sodium salsa. If you’ve already over-salted the finished dip, stir in more drained, rinsed beans or a spoonful of unsalted salsa to dilute the saltiness. A dollop of plain mashed potato is an old trick if you need it in a pinch—though that does change the flavor.
Too thick: Add more salsa or a tablespoon of the bean liquid to loosen it. Pulse briefly until you reach the desired consistency. If you want it looser for spreading or drizzling, add one tablespoon at a time.
Too thin: Process a little longer without adding liquid, or add another drained can of beans if you want to increase yield and thickness.
Uneven texture: Always stop and scrape the sides during processing. The recipe calls for that step specifically—don’t skip it. Scraping ensures no large pieces remain stuck to the bowl.
Health-Conscious Tweaks
Rinsing the beans removes some canning sodium and excess starch—keep doing that. For even lower sodium, choose reduced-sodium or no-salt-added beans and a low-salt salsa. If you’re watching fat, this dip is already low-fat; avoid adding oil-based toppings.
To boost fiber and nutrients at serving time, offer sliced vegetables for dipping rather than just chips. Bell pepper strips, cucumber rounds, and celery are great. If you need more protein for a meal portion, scoop the dip onto a bed of greens or fold in a few extra drained beans after pureeing for chunkier texture.
Author’s Commentary
I come back to this recipe because it’s dependable and adaptable. When I’m hosting, I make a double batch and use half for chips and half to stuff into warm tortillas with avocado and shredded lettuce. On weeknights, I scoop it into bowls and top with chopped tomatoes and a sprinkle of cheese for a fast, satisfying dinner or lunch.
Two small habits changed how this dip performs for me. First: always rinse the beans. That step brightens the flavor and controls salt. Second: don’t skip the scrape-and-taste pause. It adds less than a minute to the process and prevents the common issues of uneven texture and undertasting your seasoning.
Keep It Fresh: Storage Guide
Transfer leftover dip to an airtight container and refrigerate. It will thicken as it cools; let it sit at room temperature for 20–30 minutes before serving if you prefer the original, looser texture. The recipe’s own instructions note that chilling will thicken the dip and that it can be served cold or returned to room temperature.
Storage timeline: keep refrigerated for up to 4–5 days. Freeze only if you expect to keep it longer—though texture may change after freezing and thawing. If you freeze, portion into serving-size containers and thaw overnight in the refrigerator before stirring well and serving.
Quick Questions
Q: Can I make this without a food processor? A: You can, but texture will differ. Mash the beans with a fork or potato masher and fold in salsa and spices. The dip will be chunkier and less smooth.
Q: Is fresh cilantro necessary? A: No. It’s optional. Add it for brightness if you like cilantro, or leave it out if you don’t.
Q: How spicy is it? A: The spice level depends on your salsa and whether you include the jarred jalapeño slices. Start without the jalapeños if you’re unsure, then add a few slices and pulse to test the heat.
Q: Can I use another bean? A: The recipe is written for black beans. Other beans will change flavor and texture, so adjust spices and salsa accordingly.
Bring It Home
This Black Bean Dip is the kind of recipe that earns its keep: quick to make, flexible at the table, and forgiving in the kitchen. Keep the basic ratio in mind—beans, salsa, cumin, salt—and you can adapt it for different uses without losing what makes it work: creamy body, a little acidity from the salsa, and cumin to anchor the flavor.
Make a batch, taste it, tweak the salt, and let it sit for a little while if you can. It’s an easy win that performs for crowds and for a quiet night in. If you try it, tell me how you served it—chips, veggies, tacos, or something else entirely.

Easy Black Bean Dip
Ingredients
Ingredients
- 2 15 oz. cansblack beans, drained and rinsed
- 3/4 cupsalsa
- 1 teaspoonground cumin
- 1/2 teaspoonfine sea salt plus more to taste
- 1/4 cupjarred jalapeno slices optional
- ?cupfresh cilantro roughly chopped (optional)
Instructions
Instructions
- Drain and rinse the black beans thoroughly, then add them to a food processor fitted with an "S" blade.
- Add the salsa, ground cumin, ½ teaspoon fine sea salt, and the optional jarred jalapeño slices and optional chopped cilantro (if using).
- Secure the lid and process until the beans are mostly pureed, about 60 seconds.
- Stop the processor and scrape down the sides and bottom with a spatula to ensure even blending.
- Taste the dip and add more salt if needed (the recipe lists ½ teaspoon plus more to taste). Process briefly again until fully blended and at your preferred consistency.
- Serve immediately with tortilla chips or sliced vegetables, or transfer to an airtight container and refrigerate. The dip will thicken slightly when chilled and can be served cold or returned to room temperature before serving.
Equipment
- Food Processor
- Spatula
- Airtight Container
Notes
Nutrition information is for roughly a 1/4 cup of black bean dip, assuming you get 2 1/2 cups total from this recipe. This information is automatically calculated using generic ingredients, so it’s just an estimate and not a guarantee.
Storage Tip:
This dip can be stored for up to 5 days in an airtight container in the fridge. (I have not tried freezing it yet.)
Salsa Note:
I’ve tested this recipe with 3 salsa varieties: Tostitos Medium Chunky Salsa, Trader Joe’s Authentic Red Salsa, and TJ’s Salsa Verde. All versions have turned out well, regardless of different flavors and texture consistencies, so as long as you like the flavor of the salsa you choose, it should turn out well. (Be sure to taste test your salsa first, if you haven’t tried it before!)
Serve it Warm:
You can warm this dip up by transferring it to an oven-safe dish. Top with shredded cheese, if you’d like, then warm it in an oven preheated to 375ºF for 20 to 25 minutes, or until the cheese has melted and the dip is hot.