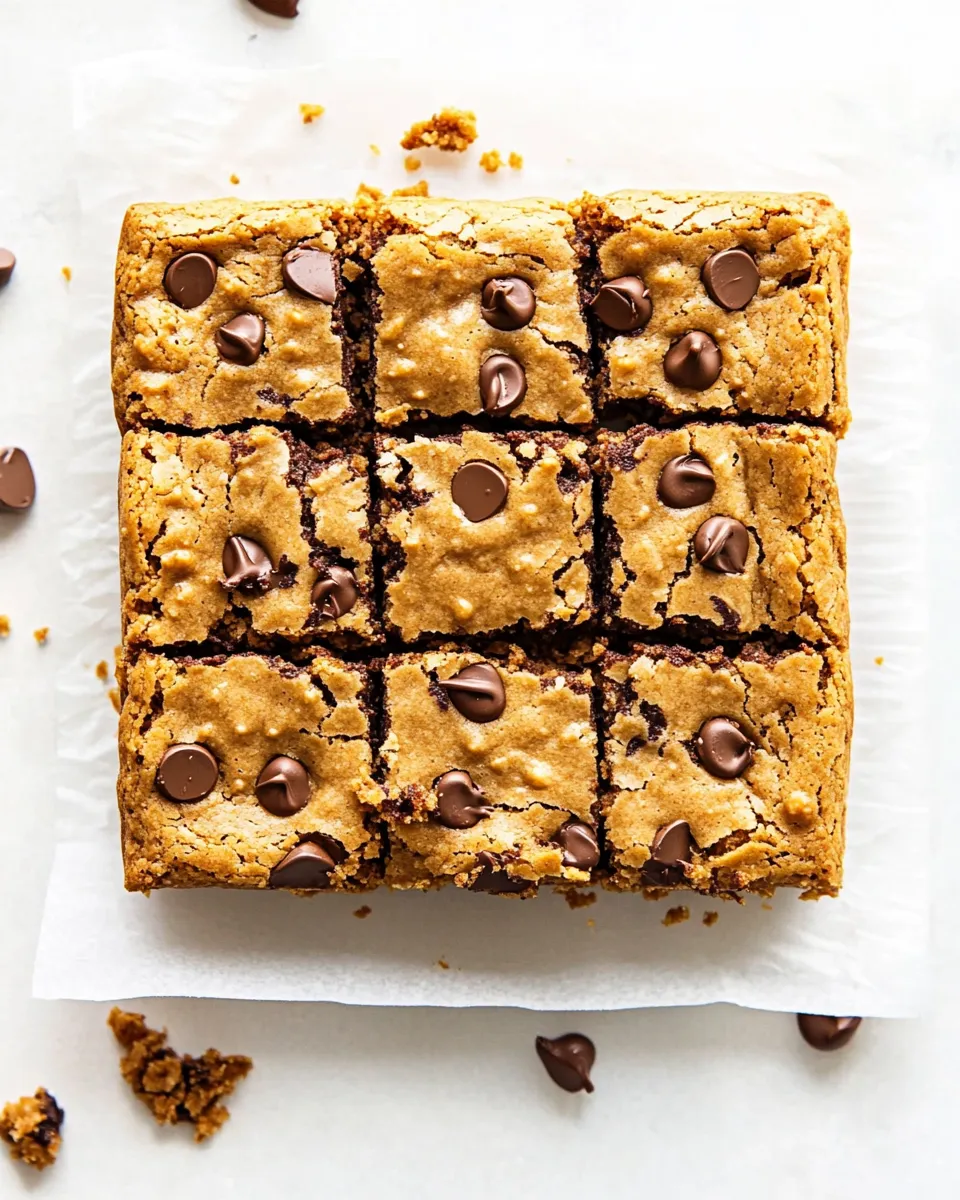
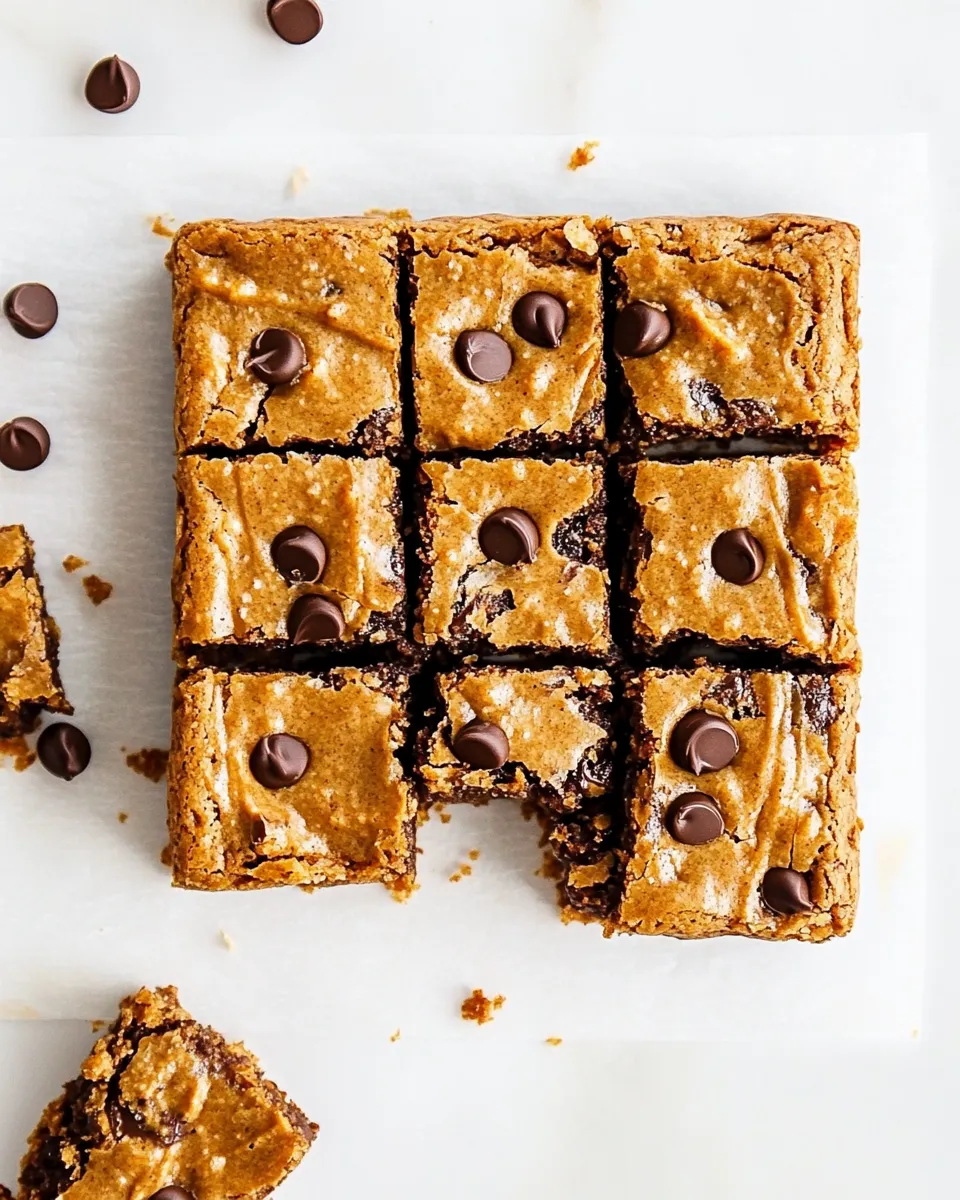
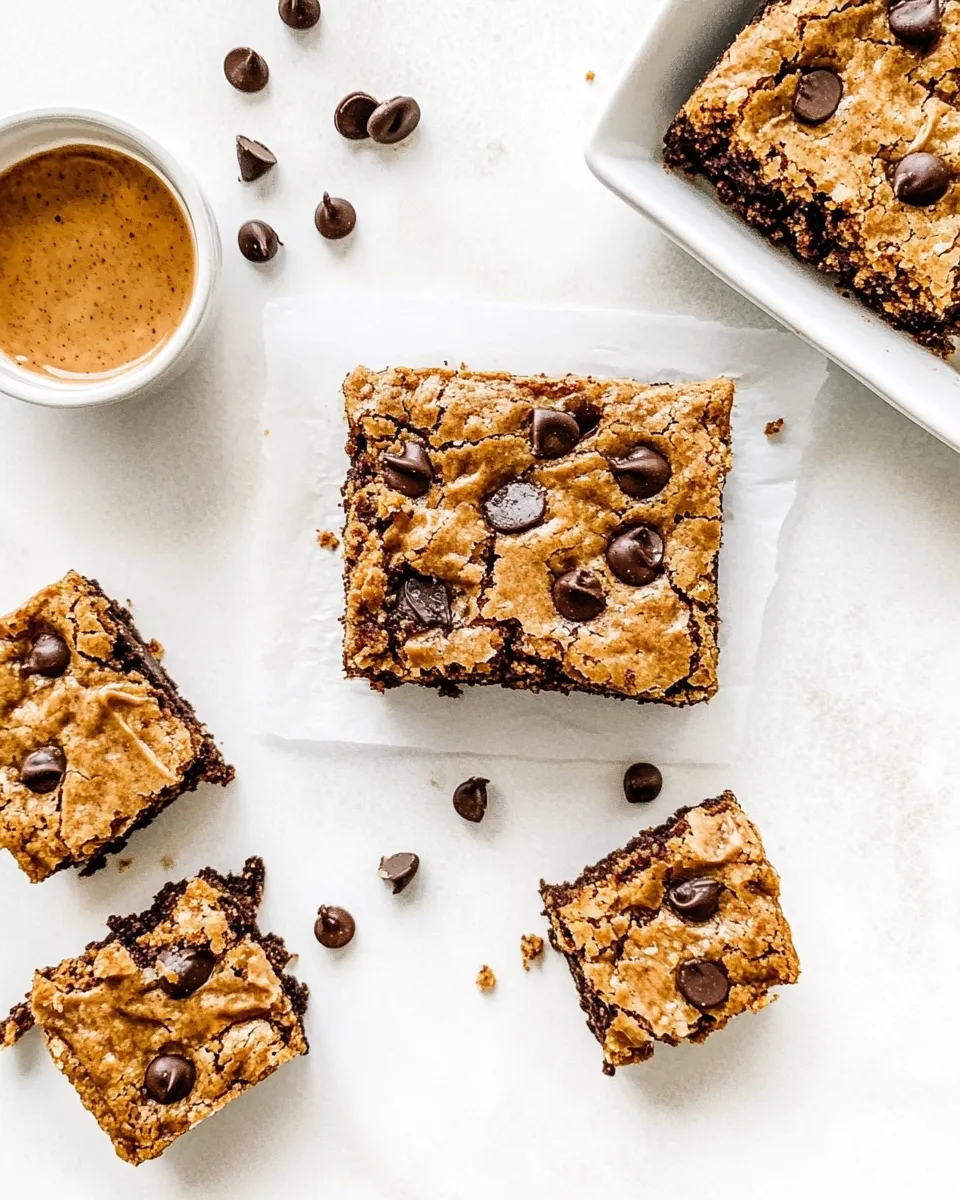
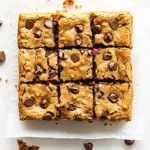
These flourless peanut butter blondies are exactly what I turn to when I want a rich, chewy bar without hauling out a bag of flour. They’re fudgy, quick to mix, and rely on drippy natural peanut butter for body and flavor. No sifting, no kneading — just stir, bake, and let them cool.
The recipe is forgiving, straightforward, and perfect for a weeknight bake or a last-minute dessert to bring to a potluck. Chocolate chips melt into pockets of sweetness, and flaky sea salt on top keeps them from ever tasting flat. If you like bold peanut butter flavor and a dense, chewy texture, these deliver every time.
I’ll walk you through what to buy, exactly how to make them (step by step), and the small tricks that stop the center from being gummy or crumbly. There’s a short ingredients list and a short bake time — exactly the kind of recipe I keep in heavy rotation.
Ingredients
- 1 1/2 cups drippy natural peanut butter* — provides the base, fat, and structure; “drippy” means it’s more fluid and blends easily.
- 1/2 cup pure maple syrup — the sweetener and liquid; adds sweetness and helps retain chewiness.
- 2 large eggs — bind the batter and help with lift and structure.
- 2 teaspoons pure vanilla extract — rounds out the flavor and enhances the peanut butter.
- 1/2 teaspoon baking soda — a small lift so the blondies aren’t too dense.
- 1/2 teaspoon baking powder — works with the baking soda to provide a little rise and a lighter crumb.
- 1/4 teaspoon kosher salt — balances sweetness and boosts the overall flavor.
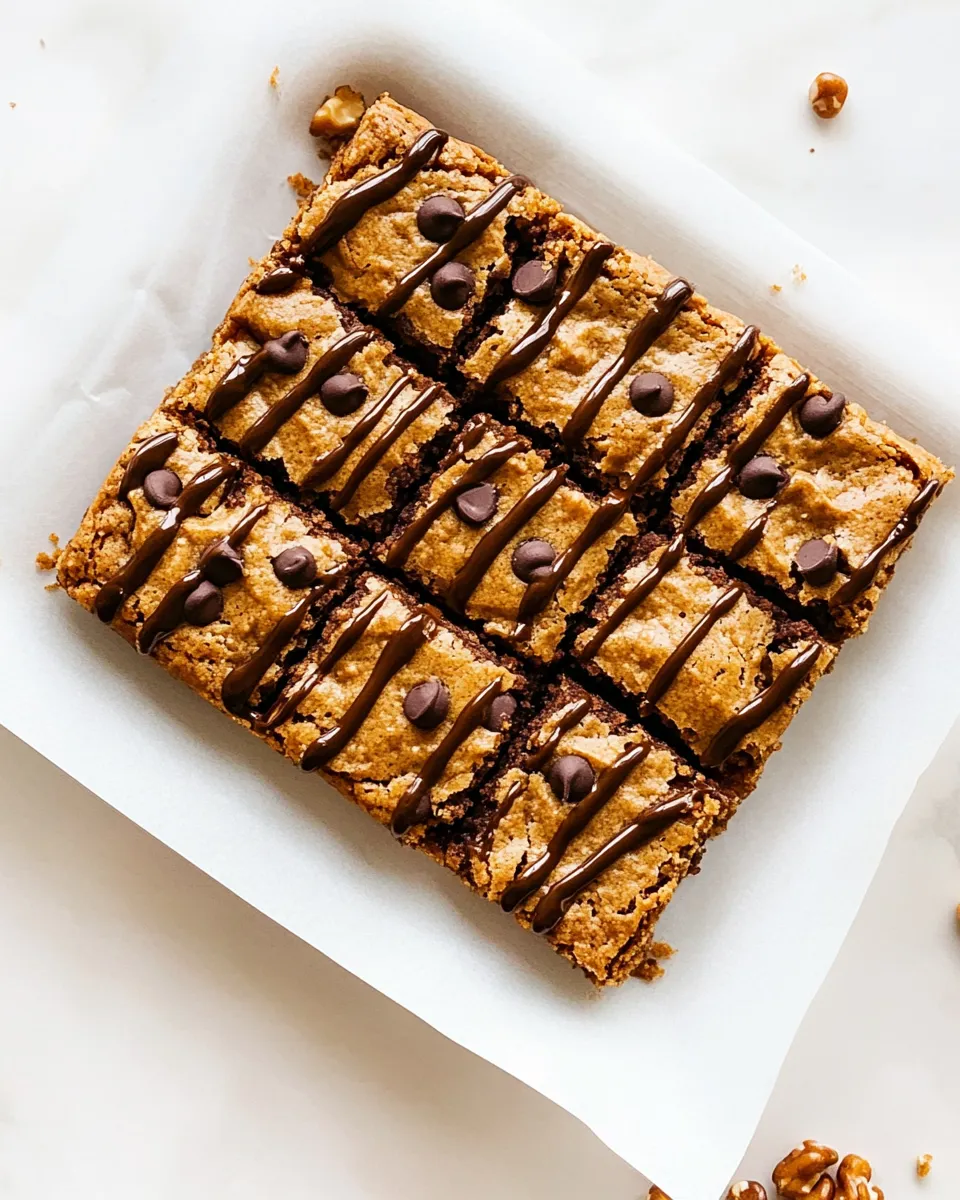
- 3/4 cup chocolate chips, divided — 1/2 cup goes into the batter for melty pockets; 1/4 cup is reserved to top the bars.
- Flaky sea salt, for sprinkling on top — optional finishing touch that adds crunch and a bright contrast to the sweetness.
Your Shopping Guide
Stick to the core ingredients and you’ll be fine. The two things to prioritize are the peanut butter and the chocolate chips. Choose a drippy natural peanut butter — this usually means the oil separates and the texture is looser when stirred. That fluidity keeps the batter easy to mix and prevents dry, crumbly bars.
For sweetener, pure maple syrup gives a gentle caramel note that complements peanut butter better than neutral sweeteners. If you’re buying chocolate chips, aim for a mid- or semi-sweet option so they balance the maple and peanut butter. And pick up flaky sea salt for the finish; it makes a surprising difference.
Measure tools matter less here than accurate eggs and a reliable 8×8-inch metal pan. If you don’t have metal, a light-colored glass pan will work but watch the baking time closely — metal conducts heat more predictably.
The Method for Flourless Peanut Butter Blondies
- Preheat the oven to 350°F (175°C) and place a rack in the center. Grease an 8×8-inch metal baking pan and line it with parchment paper, leaving an overhang for easy removal; set the pan aside.
- Measure 3/4 cup chocolate chips and set aside 1/4 cup for the top; you will use 1/2 cup in the batter.
- In a large bowl, add 1 1/2 cups drippy natural peanut butter, 1/2 cup pure maple syrup, 2 large eggs, and 2 teaspoons pure vanilla extract. Use a spatula to stir until the mixture is smooth and uniform.
- Add 1/2 teaspoon baking soda, 1/2 teaspoon baking powder, and 1/4 teaspoon kosher salt to the bowl. Stir with the spatula until the leavening and salt are evenly incorporated.
- Gently fold the 1/2 cup chocolate chips into the batter with the spatula, distributing them evenly.
- Transfer the batter to the prepared 8×8 pan and spread it into an even layer, using the spatula to reach the corners.
- Sprinkle the reserved 1/4 cup chocolate chips evenly over the top, then lightly sprinkle flaky sea salt over the surface.
- Bake for 20 to 25 minutes, until the edges are golden brown and the center is set but still slightly soft (a toothpick inserted in the center should come out with a few moist crumbs, not wet batter).
- Remove the pan from the oven and let the blondies cool completely in the pan on a wire rack. Use the parchment overhang to lift the slab from the pan, then cut into squares and serve.
Reasons to Love Flourless Peanut Butter Blondies
There’s a clarity to this recipe: fewer ingredients, maximum payoff. Because these bars are flourless, they’re naturally dense and fudgy — think rich peanut-butter squares more than cakey bars. That texture is what makes them feel indulgent even when they require minimal effort.
They’re also fast. From preheat to pan in the oven takes about 10 minutes of hands-on time. The maple syrup and natural peanut butter create a complex sweetness that doesn’t need frosting or extra steps. And the finishing flaky salt? It elevates a modest traybake into something you’d happily serve to guests.
Finally, the recipe is versatile. It’s simple to portion, freezes well, and ships okay if you want to send a batch in care packages or stash some in your freezer for emergencies.
Low-Carb/Keto Alternatives
Because these are already flourless, they’re closer to low-carb than most brownies. To push them further into keto territory, use a sugar-free maple-flavored syrup or a monk-fruit maple syrup alternative that measures similarly to liquid sweeteners. Keep in mind that changing the syrup will alter moisture and sweetness; taste and texture may shift slightly.
Swap the chocolate chips for a sugar-free or very-dark chocolate that’s low in net carbs. Also check your peanut butter’s label — some “natural” brands add sugar. For strict keto, choose a natural peanut butter with no added sweeteners. The eggs and peanut butter provide the structure, so you won’t need almond or coconut flour here.
Essential Tools for Success
- 8×8-inch metal baking pan — gives predictable edges and even browning.
- Parchment paper — makes removing the bars clean and easy.
- Rubber spatula — ideal for scraping the bowl and spreading batter without tearing the parchment.
- Measuring cups and spoons — the recipe depends on accurate small amounts (baking soda/powder).
- Wire rack — cools the bars evenly so they set properly before slicing.
Problems & Prevention
Issue: Blondies come out too gooey in the center. Prevention: Bake to the toothpick test described in step 8 — you want moist crumbs, not wet batter. Letting the pan cool completely in the pan also helps the center set. If you cut them too soon they’ll feel underdone.
Issue: Bars are dry or crumbly. Prevention: Make sure your peanut butter is the drippy, natural kind called for. Thicker, overly-processed peanut butter with added hydrogenated oils can dry the batter. Also measure the maple syrup carefully; it’s the primary liquid.
Issue: Edges burn before center is done. Prevention: Use a metal pan as directed (glass runs hotter). If your oven runs hot, drop the temperature 10–15°F and add a few minutes to the bake time. Rotate the pan halfway through baking if your oven has hot spots.
Dietary Customizations
Nut allergies: For a nut-free alternative, you can experiment with smooth sunflower seed butter that is drippy in texture. Keep in mind sunflower seed butter can darken and taste a bit “green” when baked; add a touch more maple syrup if needed. Do not substitute almond butter if the goal is nut-free — it’s still a tree nut.
Vegan: To attempt vegan bars, replace the eggs with a binder like a commercial egg replacer that mimics eggs in dense baked goods or try a chia/ground-flax egg (1 tablespoon ground flax mixed with 3 tablespoons water per egg), though texture will change. Also use vegan chocolate chips.
Lower sugar: Reduce chocolate chips or use a higher-cocoa dark chocolate with less sugar. Use a lower-sugar maple-flavored syrup if you’re comfortable with a slightly altered taste.
Pro Perspective
As a baker who leans on technique, I appreciate how this recipe minimizes variables. The chemical leaveners are small in quantity and mostly help avoid an overly heavy bar, so trust them. The single bowl approach is intentional: overworking the batter isn’t a concern, so fold gently and stop when uniform. Overmixing won’t ruin these the way it ruins cakes, but rough handling can cause inconsistent pockets of melted peanut oil.
Another pro tip: taste your peanut butter before you mix. If it’s exceptionally salty or very sweet, adjust your expectations and consider a smaller sprinkle of flaky salt. When you’re serving these professionally or to guests, a quick uniform dusting of powdered sugar is unnecessary — the balance of peanut, chocolate, and sea salt is perfect as-is.
Storage Pro Tips
Store cooled blondies in an airtight container at room temperature for up to 3 days. If your kitchen is warm, refrigerate and bring to room temperature before serving; refrigeration will firm them and make slicing cleaner. For longer storage, freeze individual squares on a baking sheet until solid, then transfer to a zip-top bag for up to 2 months. Thaw at room temperature or briefly warm in a low oven.
To refresh slightly stale blondies, pop them in a 300°F oven for 5–7 minutes wrapped in foil, or microwave a single square for 8–10 seconds to re-soften.
Helpful Q&A
Q: Can I use crunchy peanut butter? A: You can, but the texture will be different. Crunchy adds bits of peanut that change the bite. For the even, fudgy texture the recipe is known for, smooth drippy natural peanut butter is best.
Q: Why both baking soda and baking powder? A: The small amount of baking soda helps with browning and reacts with acids in the peanut butter, while baking powder gives just a touch more lift. Together they keep the bars from compressing into an overly dense slab.
Q: My batter looked oily — is that normal? A: Yes. Natural peanut butter can release oil. Stir it back in until the batter is uniform. If your peanut butter is unusually separated, give it a quick whisk before measuring.
Q: Can I double the recipe? A: Yes — use a 9×13-inch pan and monitor baking time. Start checking at 25 minutes; depending on depth it may take longer. You want the same toothpick ‘moist crumb’ test.
Bring It to the Table
Serve these blondies slightly warm with a scoop of vanilla ice cream for an easy dessert that feels special. They also stand alone perfectly with coffee or tea for a snack. For a simple presentation, stack a few squares on a small platter and garnish with a few extra chocolate chips and a light sprinkle of flaky salt seconds before serving.
If you’re packing them for a picnic, line the container with parchment between layers to prevent sticking. And if someone asks whether they’re gluten-free, the answer is yes — as written, these bars contain no flour. Just watch the peanut butter label for cross-contamination if that’s a concern.
Flourless Peanut Butter Blondies
Ingredients
Ingredients
- 1 1/2 cupsdrippy natural peanut butter*
- 1/2 cuppure maple syrup
- 2 large eggs
- 2 teaspoonspure vanilla extract
- 1/2 teaspoonbaking soda
- 1/2 teaspoonbaking powder
- 1/4 teaspoonkosher salt
- 3/4 cupchocolate chips divided
- Flaky sea salt for sprinkling on top
Instructions
Instructions
- Preheat the oven to 350°F (175°C) and place a rack in the center. Grease an 8×8-inch metal baking pan and line it with parchment paper, leaving an overhang for easy removal; set the pan aside.
- Measure 3/4 cup chocolate chips and set aside 1/4 cup for the top; you will use 1/2 cup in the batter.
- In a large bowl, add 1 1/2 cups drippy natural peanut butter, 1/2 cup pure maple syrup, 2 large eggs, and 2 teaspoons pure vanilla extract. Use a spatula to stir until the mixture is smooth and uniform.
- Add 1/2 teaspoon baking soda, 1/2 teaspoon baking powder, and 1/4 teaspoon kosher salt to the bowl. Stir with the spatula until the leavening and salt are evenly incorporated.
- Gently fold the 1/2 cup chocolate chips into the batter with the spatula, distributing them evenly.
- Transfer the batter to the prepared 8×8 pan and spread it into an even layer, using the spatula to reach the corners.
- Sprinkle the reserved 1/4 cup chocolate chips evenly over the top, then lightly sprinkle flaky sea salt over the surface.
- Bake for 20 to 25 minutes, until the edges are golden brown and the center is set but still slightly soft (a toothpick inserted in the center should come out with a few moist crumbs, not wet batter).
- Remove the pan from the oven and let the blondies cool completely in the pan on a wire rack. Use the parchment overhang to lift the slab from the pan, then cut into squares and serve.
Equipment
- Oven
- 8x8-inch metal baking pan
- Parchment Paper
- Mixing Bowl
- Spatula
- Measuring Cups
- Measuring Spoons
- Wire Rack
Notes
Make sure you stir the peanut butter well. It needs to be drippy and creamy! I use Costco’s Organic Kirkland peanut butter, the only ingredients are peanuts and salt.