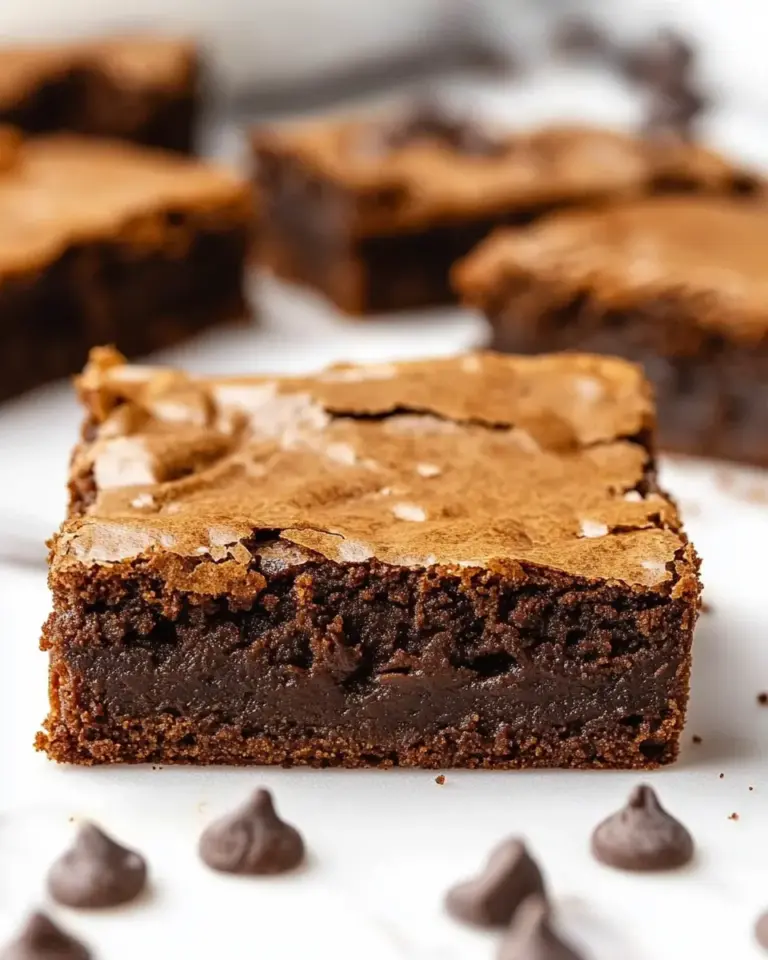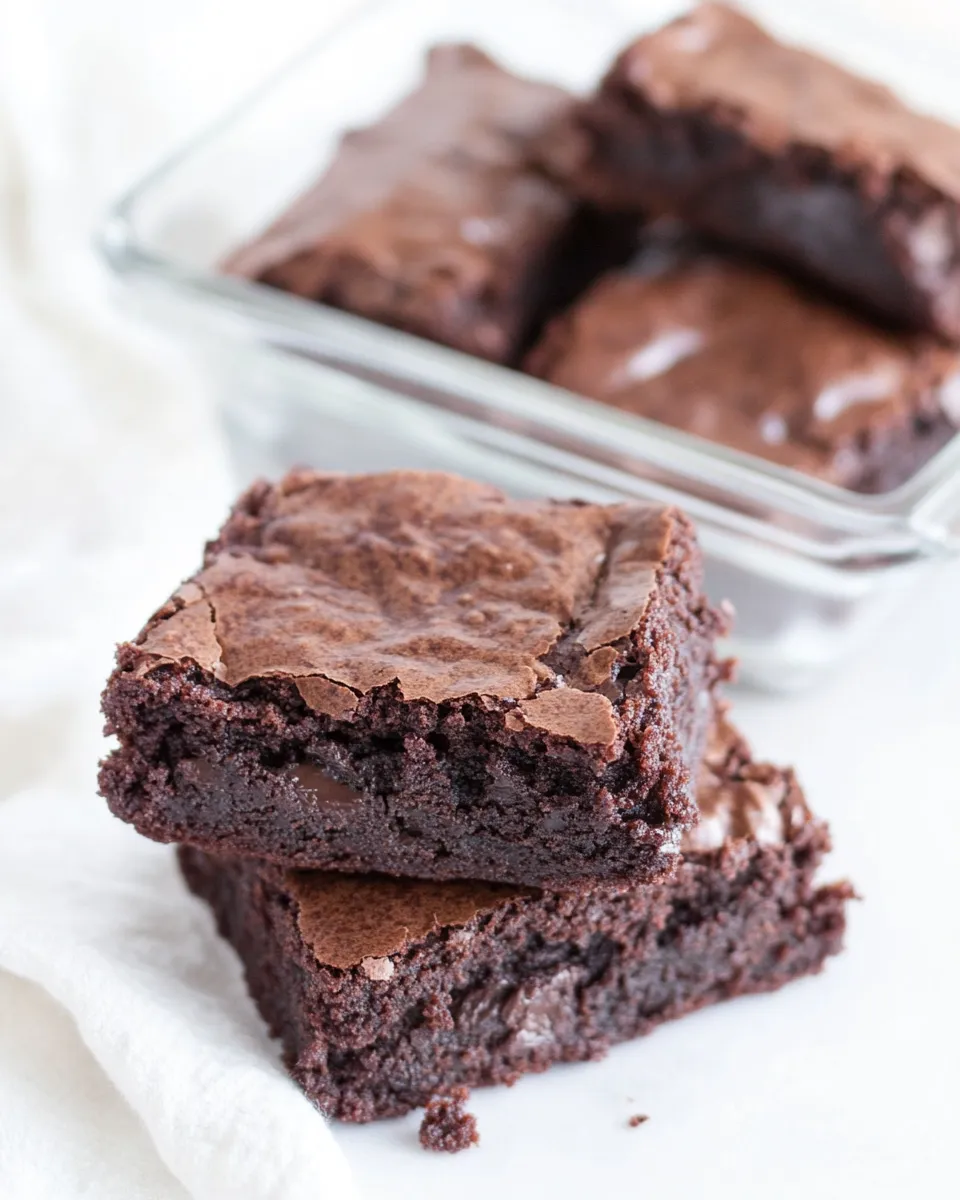
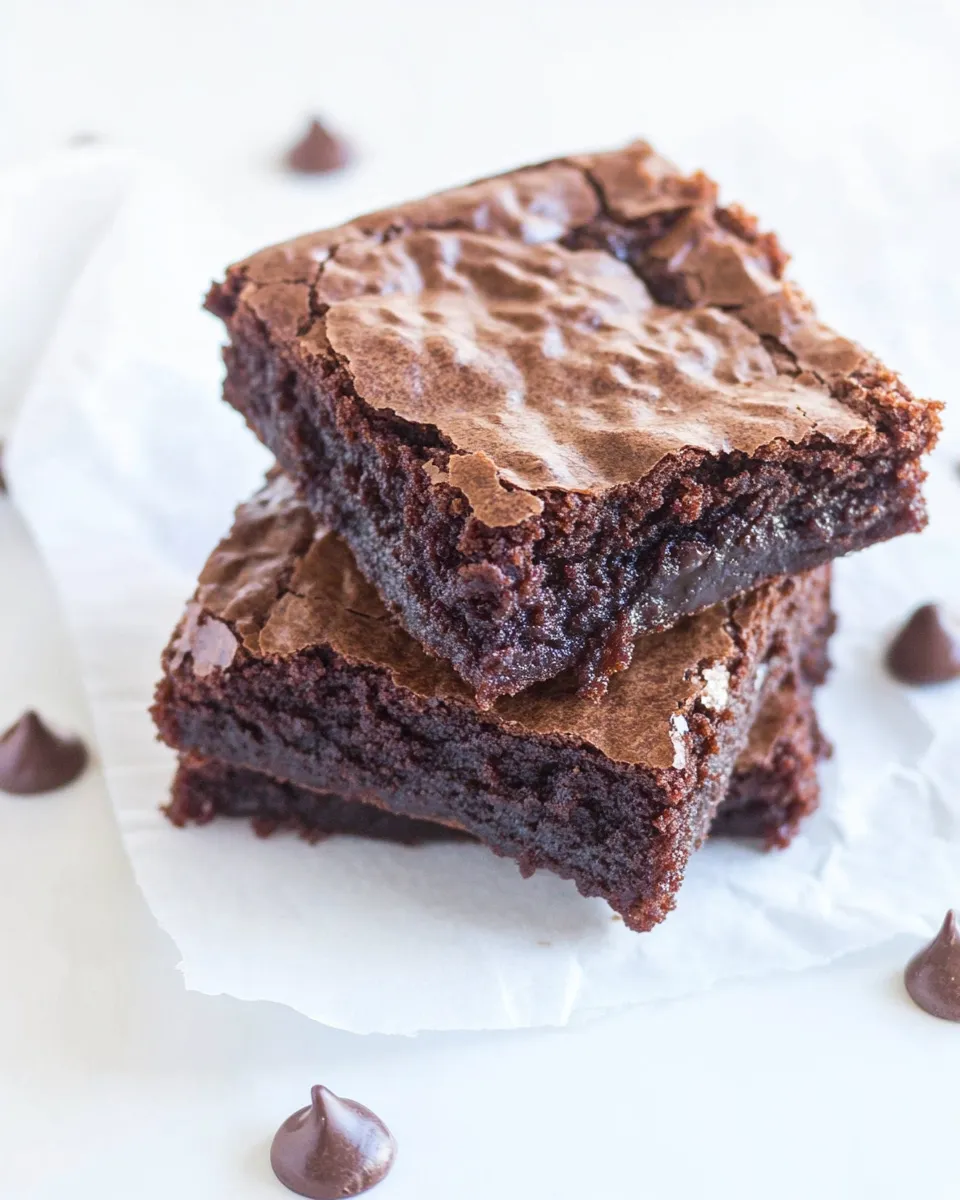
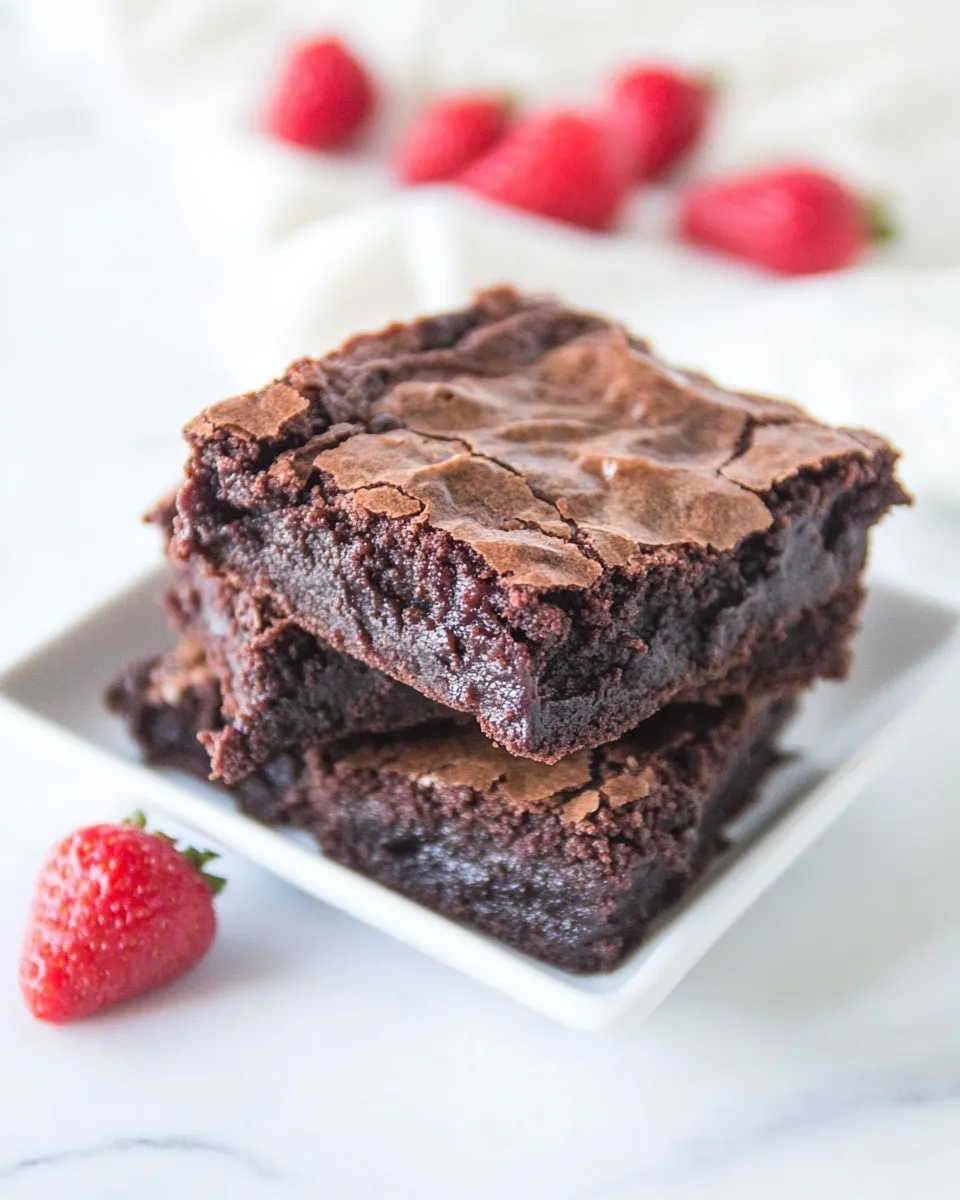
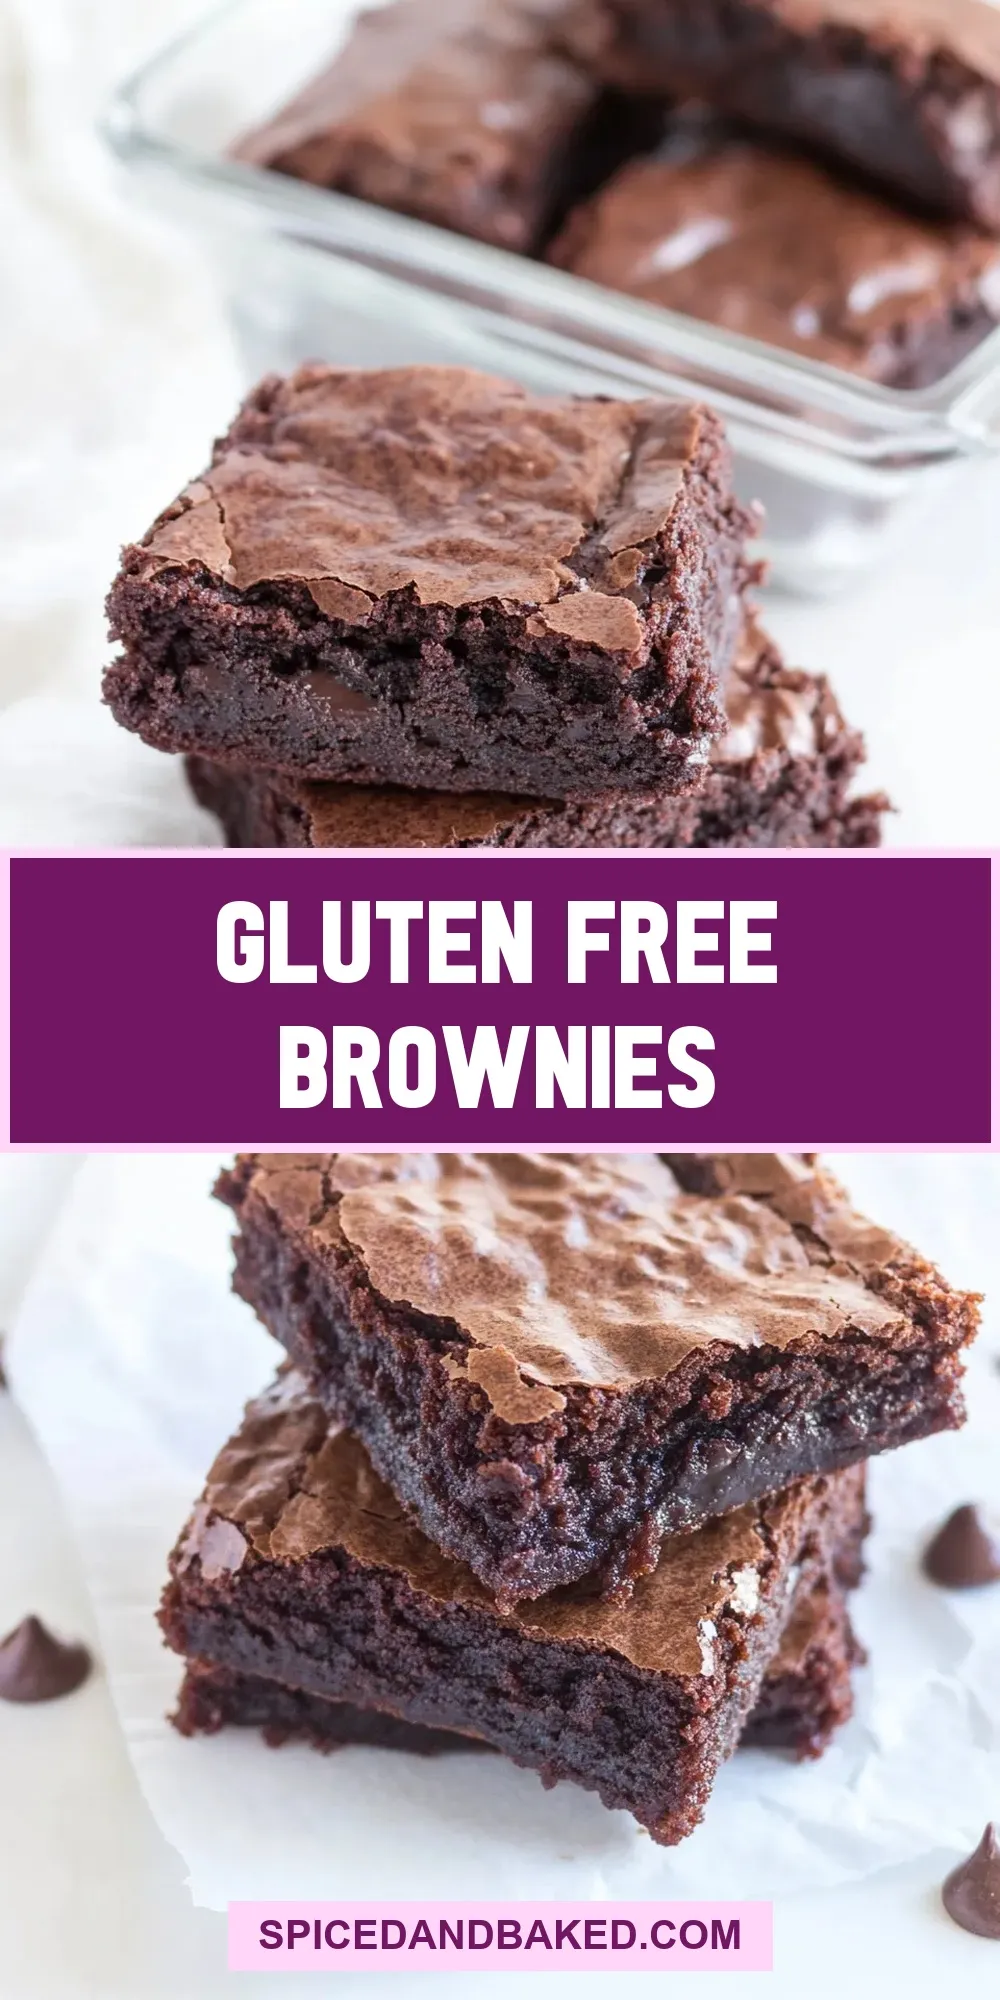
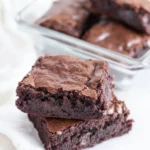
I make these brownies multiple times a month because they solve a small, persistent problem: I want rich, fudgy chocolate without relying on wheat flour. They deliver that dense, almost fudgy rectangle of chocolate bliss, with a crackly top and chewy center, and they’re genuinely simple to pull together. No strange substitutes, no complicated techniques — just good chocolate and a couple of pantry staples.
They come together fast enough for a weekday dessert and stand up to being dressed up: a sprinkle of flaky salt, a scoop of ice cream, or a smear of nut butter on a warm square. I like that they’re flexible around what you have on hand, and the recipe is forgiving for bakers who need reliable texture more than precise measurements.
Below I’ve broken down what each ingredient does, the exact step‑by‑step build, and practical notes for success and storage. If you’re moving to gluten‑free baking or just want a dependable chocolate square that doesn’t rely on flour, these brownies will fit into your rotation very quickly.
Ingredient Notes
Short, practical notes on ingredients keep the bake predictable. Read this before you start so you know what to expect from the batter and final texture.
The chocolate is the star: use a quality chocolate chip you like to eat. Cornstarch replaces wheat flour to provide structure without making the brownies cakey; it keeps the crumb tight and fudgy. A little espresso powder pushes the chocolate flavor forward — it won’t make the brownies taste like coffee, but it deepens the chocolate. Lastly, chill time matters: cool at least 30 minutes in the pan for cleaner slices.
Ingredients
- 1 1/2 cups chocolate chips, divided — chocolate provides flavor and structure; reserve some for sprinkling on top for glossy pockets.
- 6 tablespoons unsalted butter, cut into tablespoon pieces — melts with chocolate to form the base; use unsalted so you control the final salt level.
- 1/4 cup packed light brown sugar — adds moisture and chew, and a subtle caramel note.
- 1/4 cup granulated sugar — balances sweetness and helps create the shiny top.
- 2 large eggs — set the structure and contribute to richness; add them one at a time if you like more control.
- 2 teaspoons vanilla extract — rounds and lifts the chocolate flavor.
- 1/4 cup Dutch processed cocoa (can use unsweetened cocoa) — deepens chocolate intensity; Dutch process gives a darker, smoother profile.
- 3 tablespoons cornstarch, make sure it’s a gf brand — replaces flour as the primary dry binder to keep brownies dense and fudgy.
- 1/2 teaspoon espresso powder, optional — amplifies chocolate notes; totally optional but recommended if you have it.
- 1/4 teaspoon sea salt, plus more for sprinkling on brownies — balances sweetness and enhances chocolate; finish with a little flaky salt for contrast.
Build (Gluten Free Brownies) Step by Step
- Preheat the oven to 350°F. Spray an 8×8″ baking pan with nonstick cooking spray. Line the pan with parchment paper leaving an overhang on two opposite sides, then spray the parchment. Set the pan aside.
- Measure out the chocolate chips: set aside 1/2 cup (reserved) and use 1 cup for melting.
- In a large microwave-safe bowl, combine the 1 cup chocolate chips and the 6 tablespoons unsalted butter (cut into tablespoon pieces). Microwave on high in 30-second increments, stirring after each interval, until the chocolate and butter are melted and smooth (about 1–1½ minutes total). Do not overheat.
- Stir in the 1/4 cup packed light brown sugar and the 1/4 cup granulated sugar until the mixture is smooth.
- Stir in the 2 large eggs (add one at a time if you prefer), then stir in the 2 teaspoons vanilla extract until combined.
- Add the 1/4 cup Dutch-processed cocoa (or unsweetened cocoa), the 3 tablespoons cornstarch (make sure it’s a gluten-free brand), the 1/2 teaspoon espresso powder (optional), and the 1/4 teaspoon sea salt. Stir until just combined and no dry streaks remain.
- Stir in one-quarter of the reserved chocolate chips (1/4 of 1/2 cup = 2 tablespoons).
- Pour the batter into the prepared pan and smooth the top with a spatula. Sprinkle the remaining reserved chocolate chips over the top and lightly sprinkle additional sea salt to taste.
- Bake for 20–25 minutes, or until a toothpick inserted into the center comes out with a few moist crumbs (not wet batter). The edges should be set.
- Cool the brownies in the pan on a wire rack for at least 30 minutes (longer if you want cleaner slices). Use the parchment overhang to lift the brownies from the pan, then cut into squares.
Why This Recipe Belongs in Your Rotation
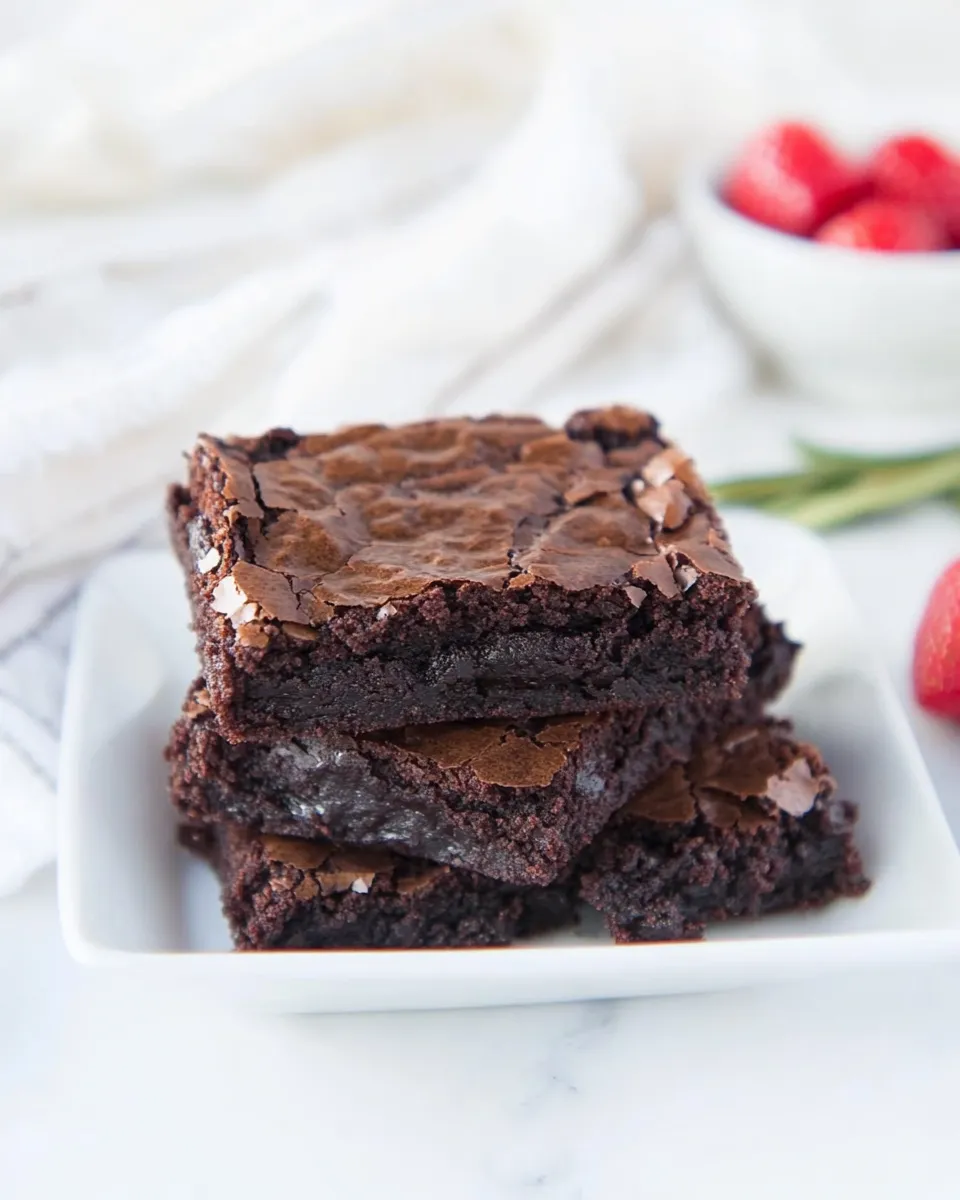
There’s a difference between a “gluten-free” label and a recipe that actually satisfies. These brownies hit the texture and flavor you expect from a good brownie — fudgy, intensely chocolatey, and easy to cut — without the dry, crumbly result some gluten-free bakes produce. They’re straightforward and quick: from melted chocolate to pan in under 15 minutes.
They’re also forgiving. The microwave melting method keeps cleanup minimal and makes the recipe accessible to bakers who don’t want to fuss with a double boiler. The cornstarch approach yields a tight crumb that responds well to chilling, so you don’t need to worry about underbaking or ending up with a soupy middle.
Ingredient Flex Options
Small swaps that won’t break the recipe:
- Chocolate: use whatever chips you prefer — semi‑sweet, bittersweet, or a mix. The flavor of the chips is the flavor of the brownies.
- Butter: if you need a dairy-free option, use a solid plant-based butter stick (see Allergy-Friendly Swaps for more on this).
- Sugars: the balance of brown and granulated gives chew and shine; you can adjust up or down a tablespoon or two to taste, but keep both sugars for texture contrast.
- Espresso powder: omit if you don’t have it — it deepens chocolate but isn’t essential.
Recommended Tools
- 8×8″ baking pan — the size matters for the thickness and bake time to work as written.
- Parchment paper with overhang — makes removal and slicing clean and easy.
- Microwave-safe bowl — for melting chocolate and butter quickly.
- Spatula — for folding the batter and smoothing the pan.
- Wire rack — for cooling the pan evenly to avoid steam buildup that can sog the crust.
- Toothpick or cake tester — to check doneness in the center.
Common Errors (and Fixes)
Chocolate Overheating
Problem: Chocolate seizes or becomes grainy when microwaved too long. Fix: Heat in 30-second bursts, stirring well after each interval; residual heat finishes the job. If it does seize, add a teaspoon of neutral oil or a small bit more butter and stir slowly to reincorporate.
Too Gooey in the Center
Problem: Center is wet after the full bake time. Fix: Check with a toothpick — you want moist crumbs, not batter. If it’s too wet, extend bake time by 3–4 minute increments. Cool in the pan at least 30 minutes; the center firms as it cools.
Crumbly, Dry Texture
Problem: Brownies lack fudginess and break apart. Fix: Make sure you measured cornstarch correctly and didn’t overbake. The cornstarch provides structure — under-measuring could make them loose; overbaking removes moisture. Also ensure eggs were added and fully mixed.
Allergy-Friendly Swaps
If you need to accommodate dairy or egg allergies, these swaps can work but will change texture slightly:
- Dairy-free: Replace the unsalted butter with a solid, stick-style dairy-free butter. Use dairy-free chocolate chips. Expect a slightly different mouthfeel but similar overall result.
- Egg-free: You can try an egg replacement such as a commercial egg replacer or a flax “egg” (1 tablespoon ground flaxseed + 2.5 tablespoons water per egg, chilled until gelatinous). Note: egg swaps reduce the richness and may affect the final set, so allow extra chilling time before slicing.
- Sugar alternatives: Coconut sugar can replace brown sugar for a deeper caramel note; brown sugar contributes moisture so keep an eye on bake time. Granulated swaps like erythritol aren’t a 1:1 for structure or browning, so I don’t recommend them for best texture.
If You’re Curious
Why cornstarch? It acts as the binder here in place of wheat flour. It absorbs moisture and gives the batter a tight crumb that slices well. Cornstarch also keeps things fudgier than a cup-for-cup gluten-free flour swap might.
Why the mix of sugars? Brown sugar contributes moisture and chew because of its molasses content; granulated sugar helps with the top’s glossy crackle. The combination gives both texture and that classic brownie top.
Make-Ahead & Storage
These brownies store well and are easy to prepare ahead. Cool completely, then wrap the pan tightly with plastic wrap, or transfer cut squares to an airtight container.
- Room temperature: 2 days in an airtight container. Keep away from direct heat or humidity.
- Refrigerator: Up to 7 days; bring to room temperature before serving for the best texture.
- Freezer: Individually wrap squares and freeze for up to 3 months. Thaw at room temperature or briefly microwave on low to warm through.
Common Qs About Gluten Free Brownies
Q: Can I use a different pan size? A: The recipe is calibrated for an 8×8″ pan. Using a larger pan will yield thinner brownies and reduce bake time; a smaller pan makes thicker brownies and requires longer baking. If you change pan size, watch the bake closely and use the toothpick test.
Q: Why does the batter look different from flour‑based brownies? A: Without wheat, the batter is denser and silkier because cornstarch behaves differently. That’s normal — it produces fudgier, less cake‑like brownies.
Q: Can I make these in a double boiler rather than the microwave? A: Yes. Gently melt the chocolate and butter over simmering water, stirring until smooth, then continue with the recipe.
Q: How do I get clean slices? A: Cool at least 30 minutes. For extra‑clean edges, refrigerate until firm, then use a sharp knife wiped clean between cuts. The parchment overhang makes lifting and slicing easier.
Save & Share
If you like a recipe that’s quick, dependable, and truly chocolate-forward, save this one. It’s the kind of recipe you’ll reach for when you need a no‑fuss dessert that impresses. Share a batch with friends, bring them to a potluck, or keep a pan in the freezer for emergencies — they thaw beautifully and still taste fresh.
If you try them, I’d love to hear how you served them and any small tweaks that worked for you. Tag a friend, drop a note, or leave your favorite topping in the comments — flaky sea salt or a scoop of vanilla are my go‑tos.
Gluten Free Brownies
Ingredients
Ingredients
- 1 1/2 cupschocolate chips divided
- 6 tablespoonsunsalted butter cut into tablespoon pieces
- 1/4 cuppacked light brown sugar
- 1/4 cupgranulated sugar
- 2 large eggs
- 2 teaspoonsvanilla extract
- 1/4 cupDutch processed cocoa (can use unsweetened cocoa)
- 3 tablespoonscornstarch make sure it's a gf brand
- 1/2 teaspoonsespresso powder optional
- 1/4 teaspoonsea salt plus more for sprinkling on brownies
Instructions
Instructions
- Preheat the oven to 350°F. Spray an 8×8" baking pan with nonstick cooking spray. Line the pan with parchment paper leaving an overhang on two opposite sides, then spray the parchment. Set the pan aside.
- Measure out the chocolate chips: set aside 1/2 cup (reserved) and use 1 cup for melting.
- In a large microwave-safe bowl, combine the 1 cup chocolate chips and the 6 tablespoons unsalted butter (cut into tablespoon pieces). Microwave on high in 30-second increments, stirring after each interval, until the chocolate and butter are melted and smooth (about 1–1½ minutes total). Do not overheat.
- Stir in the 1/4 cup packed light brown sugar and the 1/4 cup granulated sugar until the mixture is smooth.
- Stir in the 2 large eggs (add one at a time if you prefer), then stir in the 2 teaspoons vanilla extract until combined.
- Add the 1/4 cup Dutch-processed cocoa (or unsweetened cocoa), the 3 tablespoons cornstarch (make sure it’s a gluten-free brand), the 1/2 teaspoon espresso powder (optional), and the 1/4 teaspoon sea salt. Stir until just combined and no dry streaks remain.
- Stir in one-quarter of the reserved chocolate chips (1/4 of 1/2 cup = 2 tablespoons).
- Pour the batter into the prepared pan and smooth the top with a spatula. Sprinkle the remaining reserved chocolate chips over the top and lightly sprinkle additional sea salt to taste.
- Bake for 20–25 minutes, or until a toothpick inserted into the center comes out with a few moist crumbs (not wet batter). The edges should be set.
- Cool the brownies in the pan on a wire rack for at least 30 minutes (longer if you want cleaner slices). Use the parchment overhang to lift the brownies from the pan, then cut into squares.
Equipment
- 8x8 inch baking pan
- Parchment Paper
- nonstick cooking spray
- Microwave-safe Bowl
- Spatula
- Wire Rack
Notes
Store the brownies in an airtight container on the counter for 3 to 5 days. You can freeze the brownies for up to 2 months.