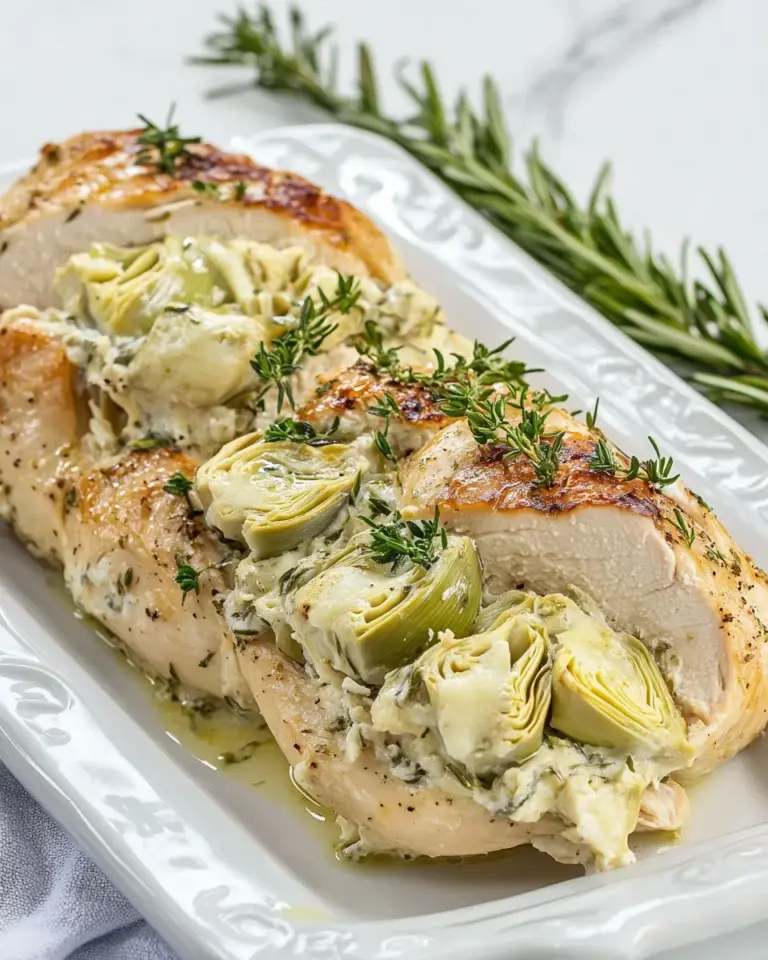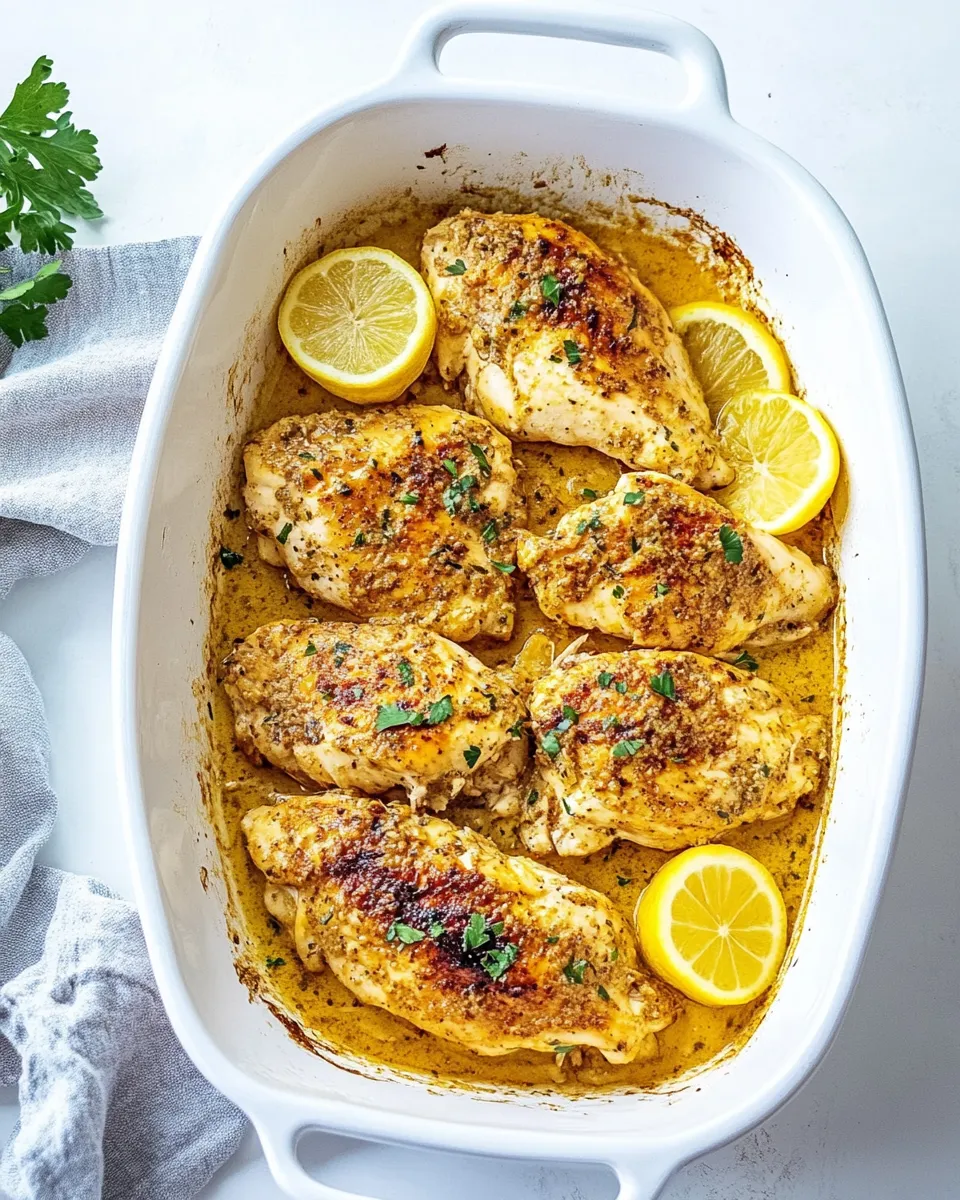
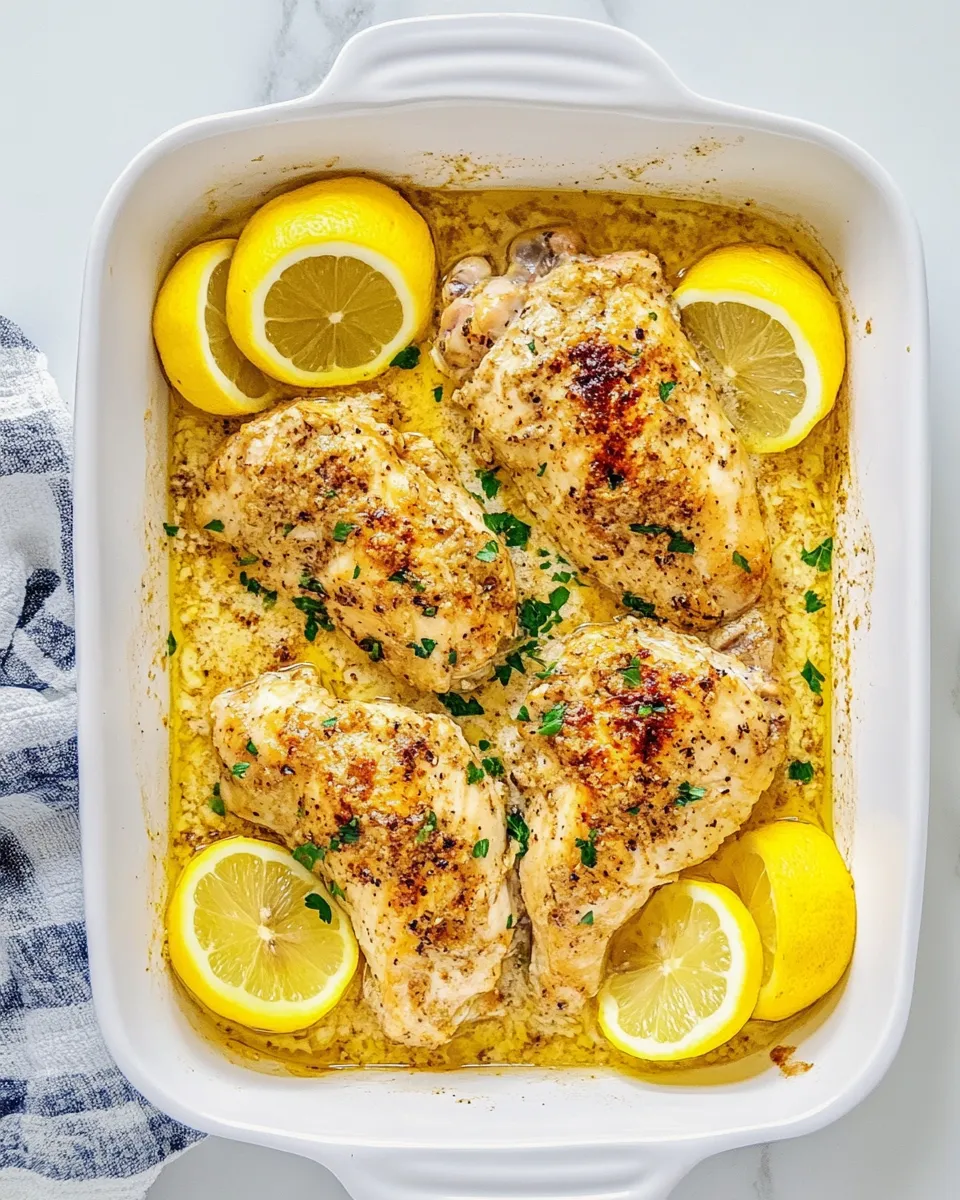
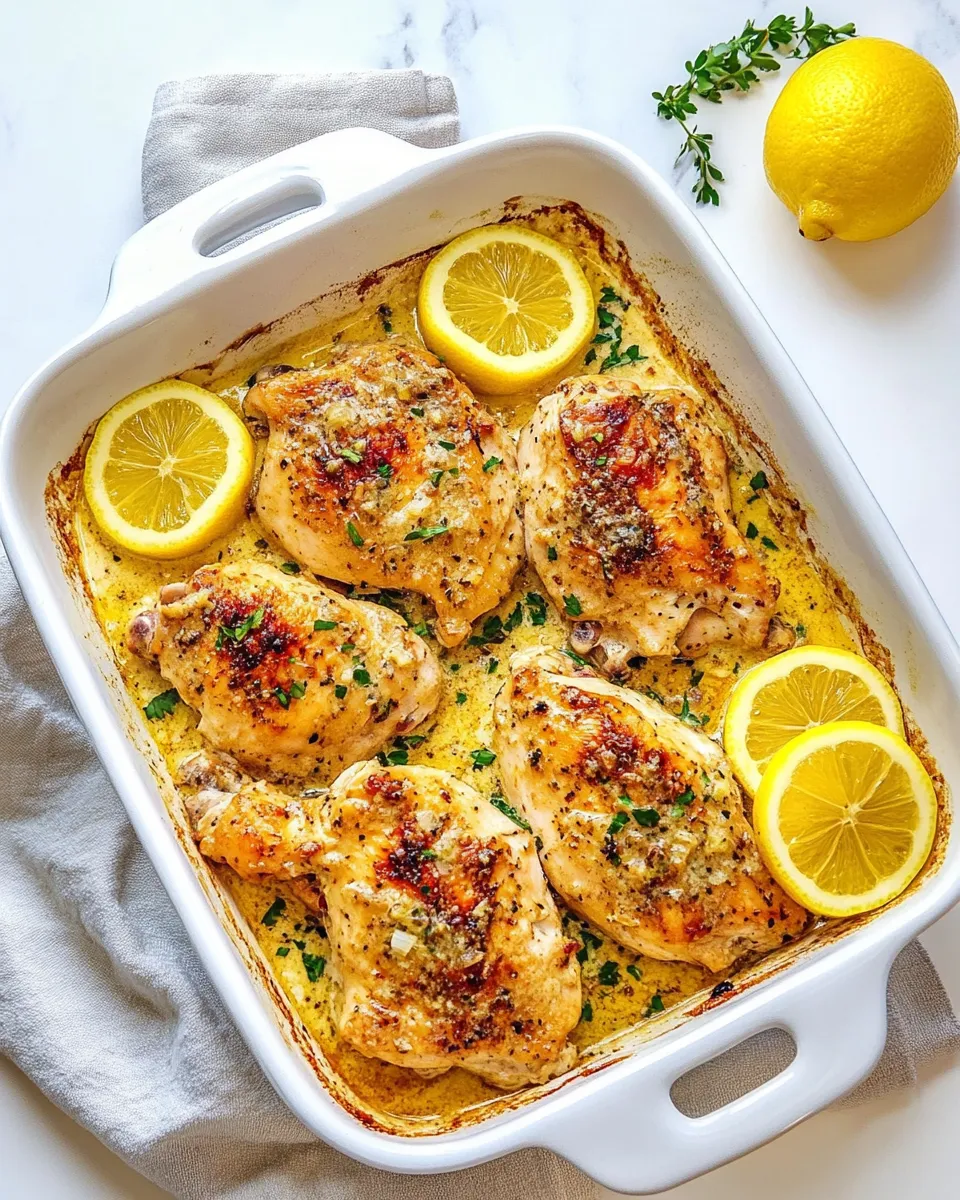
This lemon butter chicken is the kind of recipe I turn to when I want something bright, buttery, and reliably comforting. It balances a golden, lightly crisp exterior with a tender interior, then finishes in a lemony butter sauce that feels a little indulgent and entirely homey. I like it for weeknights and for guests — it looks and tastes like effort, but it’s straightforward to pull off.
I’ll walk you through exactly what to buy, how to prep, and the small technique details that make the difference between “fine” and “really good.” The method mixes a quick pan-sear with a short finish in the oven so you get both a nice crust and an evenly cooked center. Keep your ingredients ready and a thermometer close at hand.
Below you’ll find a precise ingredients list, step-by-step directions (the recipe’s source of truth), and practical tips for timing, storage, and easy variations. No fuss—just clear instructions and useful notes to help you cook confidently.
What to Buy
Shop with a simple plan: fresh lemons, good butter, and plain chicken are the stars. The rest are pantry items. If you like, buy a bunch of parsley — it brightens the whole dish at the end.
If you don’t already have kosher salt or freshly cracked black pepper at home, consider adding them to your cart. They make seasoning easy and consistent.
Ingredients
- 4 boneless, skinless chicken breasts, sliced in half lengthwise — the main protein; slicing lengthwise creates thinner cutlets that cook evenly.
- Kosher salt and freshly cracked black pepper — seasoning for the chicken and sauce; use to taste but don’t skip.
- 2 to 3 tablespoons extra-virgin olive oil — for searing; enough to coat the pan and encourage a golden crust.
- 3/4 cup all-purpose flour — for dredging; gives the chicken a light coating that browns nicely and helps thicken the sauce.
- 4 tablespoons unsalted butter — creates the rich lemon-butter sauce; start with unsalted to control salt levels.
- 2 garlic cloves, minced — aromatic base for the sauce; adds depth without overpowering the lemon.
- 1 lemon, thinly sliced — both garnish and cooked lemon slices that add fresh acidity and presentation.
- 1/4 cup freshly squeezed lemon juice — bright, tangy finish for the sauce; freshly squeezed is best.
- Chopped fresh parsley, for serving — a final fresh note and color pop; optional but recommended.
Directions: Lemon Butter Chicken
- Preheat the oven to 350°F (175°C).
- If your chicken breasts are not already even, place each between two pieces of plastic wrap and gently pound with a meat mallet or rolling pin until they are an even thickness. (The recipe calls for 4 boneless, skinless chicken breasts sliced in half lengthwise.)
- Season both sides of each chicken piece with kosher salt and freshly cracked black pepper.
- Place the 3/4 cup all-purpose flour in a shallow dish. Dredge each chicken piece in the flour, coating completely, and shake off any excess.
- Heat a large skillet over medium heat. Add 2 to 3 tablespoons extra-virgin olive oil to the pan.
- Working in batches so the pan is not crowded, add chicken pieces to the skillet and cook 3 to 4 minutes without moving them, until the undersides are golden. Flip and cook 3 more minutes. Transfer cooked chicken to a baking dish. Add more of the olive oil to the pan between batches if needed and repeat until all chicken is cooked and in the baking dish.
- Reduce the heat under the skillet to medium-low. Add the 4 tablespoons unsalted butter to the skillet and let it melt.
- Add the 2 minced garlic cloves to the melted butter and cook about 30 seconds, until fragrant but not browned.
- Add the thinly sliced 1 lemon and the 1/4 cup freshly squeezed lemon juice to the skillet. Cook 2 to 3 minutes, flipping the lemon slices occasionally, until the sauce is slightly reduced. Season the sauce with kosher salt and freshly cracked black pepper to taste.
- Pour the lemon-butter mixture, including the lemon slices, over the chicken in the baking dish, arranging the slices over the pieces.
- Bake the chicken in the preheated oven for 15 to 20 minutes, or until an instant-read thermometer inserted into the thickest part of the chicken registers 165°F (74°C).
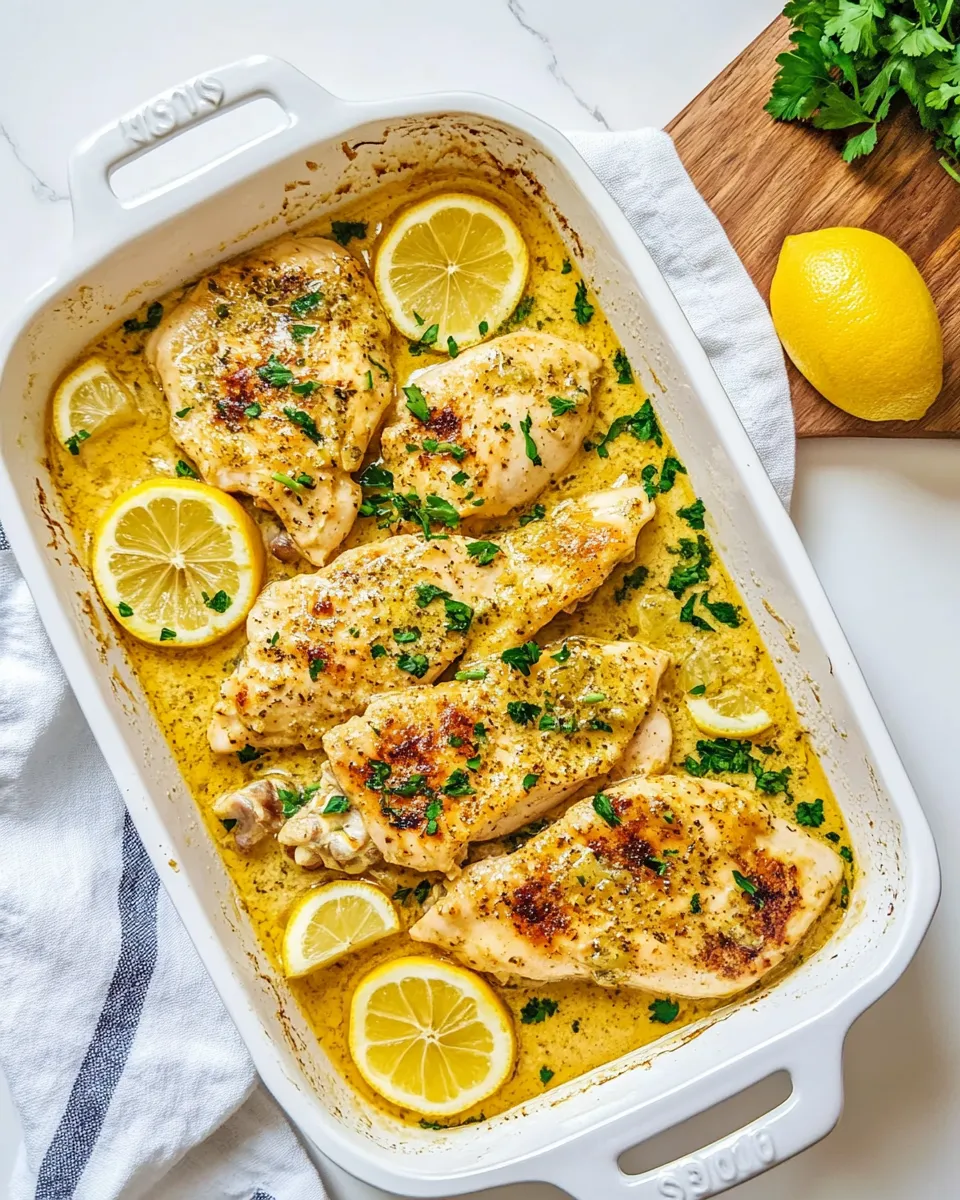
- Remove the dish from the oven, sprinkle chopped fresh parsley over the chicken, and serve immediately.
What Makes This Recipe Special
There are two simple techniques that elevate this dish: a quick pan-sear and a short oven finish. The sear builds a golden crust and flavor through caramelization. The oven ensures an even, juicy cook without overbrowning the outside.
The lemon-butter sauce is straightforward but purposeful. Butter rounds out the acidity of the lemon and garlic, creating a silky sauce that clings to the lightly floured chicken. Placing the lemon slices over the pieces during baking gives the dish a pretty finish and a mild roasted lemon flavor.
No-Store Runs Needed
If you already keep basics on hand — flour, olive oil, butter, garlic, salt, and pepper — you probably won’t need to run to the store. The one fresh item you’ll want is a lemon (or two), and parsley if you like a fresh finish.
If you’re missing parsley, the dish is still very good without it. If you only have bottled lemon juice, it will still work in a pinch, though fresh is brighter and cleaner.
What’s in the Gear List
- Large skillet — for searing the chicken and building the sauce.
- Baking dish — to finish the chicken in the oven.
- Meat mallet or rolling pin — to even out chicken thickness when needed.
- Shallow dish — for the flour dredge.
- Instant-read thermometer — the most reliable way to ensure doneness without overcooking.
- Tongs or spatula — for turning the chicken pieces safely while searing.
Pitfalls & How to Prevent Them
Overcrowding the pan. If you add too many pieces at once the chicken will steam instead of sear. Work in batches. Let each piece cook undisturbed for the 3–4 minutes the recipe calls for so you get a golden underside.
Burning the garlic. Garlic turns bitter quickly. Once you add it to melted butter, watch it closely and remove the skillet from high heat to keep it fragrant and not browned.
Uneven chicken thickness. If one piece is thicker it will finish later and risk drying. Pound to even thickness or slice breasts to create cutlets, as the recipe instructs.
Skipping the thermometer. Visual cues can be misleading. An instant-read thermometer set to 165°F (74°C) guarantees safe, juicy chicken.
Variations for Dietary Needs
Gluten-free: Use a 1:1 gluten-free flour blend for dredging. It’ll brown differently, so watch your sear time closely.
Dairy-free: Swap butter for a dairy-free butter or increase the olive oil slightly and finish with a splash of extra-virgin olive oil when you remove from heat. The sauce will be lighter but still flavorful.
Lower sodium: Reduce the salt during seasoning and use low-sodium butter or less salted finishing. Taste the sauce before adding more salt.
Protein swaps: Thin pork cutlets, turkey cutlets, or firm fish fillets (adjust baking time) can follow the same technique — just monitor cook time carefully.
Behind the Recipe
This method borrows from classic pan-fry-then-oven techniques used for cutlets and scaloppine. Dredging in flour gives texture and helps the sauce cling. The two-step cook keeps the outside flavorful and the center tender. Lemon and butter are a traditional pairing because acid cuts the richness while butter carries the flavor and creates a silky mouthfeel.
I like to think of this as a weeknight-friendly version of restaurant-style pan sauces: short, bright, and built on simple timing and temperature control rather than long reduction or complicated ingredients.
Refrigerate, Freeze, Reheat
Refrigerate leftover chicken in an airtight container for up to 3 days. The sauce will firm up in the fridge; reheat gently in a low oven (about 300°F / 150°C) or on the stovetop over low heat. Add a splash of water or olive oil if the sauce has thickened too much while chilling.
To freeze, cool completely, then transfer to a freezer-safe container and freeze up to 2 months. Thaw overnight in the refrigerator and reheat as above. Texture will be best if reheated slowly to avoid drying the meat.
Lemon Butter Chicken Q&A
Q: Can I use bone-in chicken? A: You can, but adjust the sear and bake time: bone-in pieces take longer to reach 165°F. Also, pans with bone-in pieces may need a longer oven finish.
Q: My sauce tastes flat. What now? A: Brighten it with a little extra lemon juice and finish with a tiny pinch of salt. Freshly cracked black pepper also lifts the flavor.
Q: Can I prepare this ahead? A: You can dredge the chicken and keep it covered in the fridge for a few hours before cooking. For best texture, sear and bake right before serving.
Q: Is flour absolutely necessary? A: The flour helps with browning and sauce texture. If you skip it, the chicken will still work but the sauce won’t be as silky and may be thinner.
Ready, Set, Cook
Quick checklist before you start: preheat the oven to 350°F (175°C); set out a shallow dish with 3/4 cup flour; slice and, if needed, pound your chicken cutlets; measure the lemon juice; mince the garlic. Heat your skillet only when you’re ready to sear so the oil doesn’t burn.
Follow the directions in order. Sear in batches, then build the sauce in the same skillet so you keep all the browned flavor. Finish in the oven until the thermometer reads 165°F (74°C), sprinkle with parsley, and serve. Simple, bright, and reliably satisfying.

Lemon Butter Chicken
Ingredients
Ingredients
- 4 boneless skinless chicken breasts, sliced in half lengthwise
- Kosher salt and freshly cracked black pepper
- 2 to 3 tablespoonsextra-virgin olive oil
- 3/4 cupall-purpose flour
- 4 tablespoonsunsalted butter
- 2 garlic cloves minced
- 1 lemon thinly sliced
- 1/4 cupfreshly squeezed lemon juice
- Chopped fresh parsley for serving
Instructions
Instructions
- Preheat the oven to 350°F (175°C).
- If your chicken breasts are not already even, place each between two pieces of plastic wrap and gently pound with a meat mallet or rolling pin until they are an even thickness. (The recipe calls for 4 boneless, skinless chicken breasts sliced in half lengthwise.)
- Season both sides of each chicken piece with kosher salt and freshly cracked black pepper.
- Place the 3/4 cup all-purpose flour in a shallow dish. Dredge each chicken piece in the flour, coating completely, and shake off any excess.
- Heat a large skillet over medium heat. Add 2 to 3 tablespoons extra-virgin olive oil to the pan.
- Working in batches so the pan is not crowded, add chicken pieces to the skillet and cook 3 to 4 minutes without moving them, until the undersides are golden. Flip and cook 3 more minutes. Transfer cooked chicken to a baking dish. Add more of the olive oil to the pan between batches if needed and repeat until all chicken is cooked and in the baking dish.
- Reduce the heat under the skillet to medium-low. Add the 4 tablespoons unsalted butter to the skillet and let it melt.
- Add the 2 minced garlic cloves to the melted butter and cook about 30 seconds, until fragrant but not browned.
- Add the thinly sliced 1 lemon and the 1/4 cup freshly squeezed lemon juice to the skillet. Cook 2 to 3 minutes, flipping the lemon slices occasionally, until the sauce is slightly reduced. Season the sauce with kosher salt and freshly cracked black pepper to taste.
- Pour the lemon-butter mixture, including the lemon slices, over the chicken in the baking dish, arranging the slices over the pieces.
- Bake the chicken in the preheated oven for 15 to 20 minutes, or until an instant-read thermometer inserted into the thickest part of the chicken registers 165°F (74°C).
- Remove the dish from the oven, sprinkle chopped fresh parsley over the chicken, and serve immediately.
Equipment
- Plastic Wrap
- Meat mallet or rolling pin
- Shallow Dish
- Large Skillet
- Baking Dish
- Oven
- Instant-read thermometer
Notes
Recipe from
Everyday Dinners
by Jessica Merchant