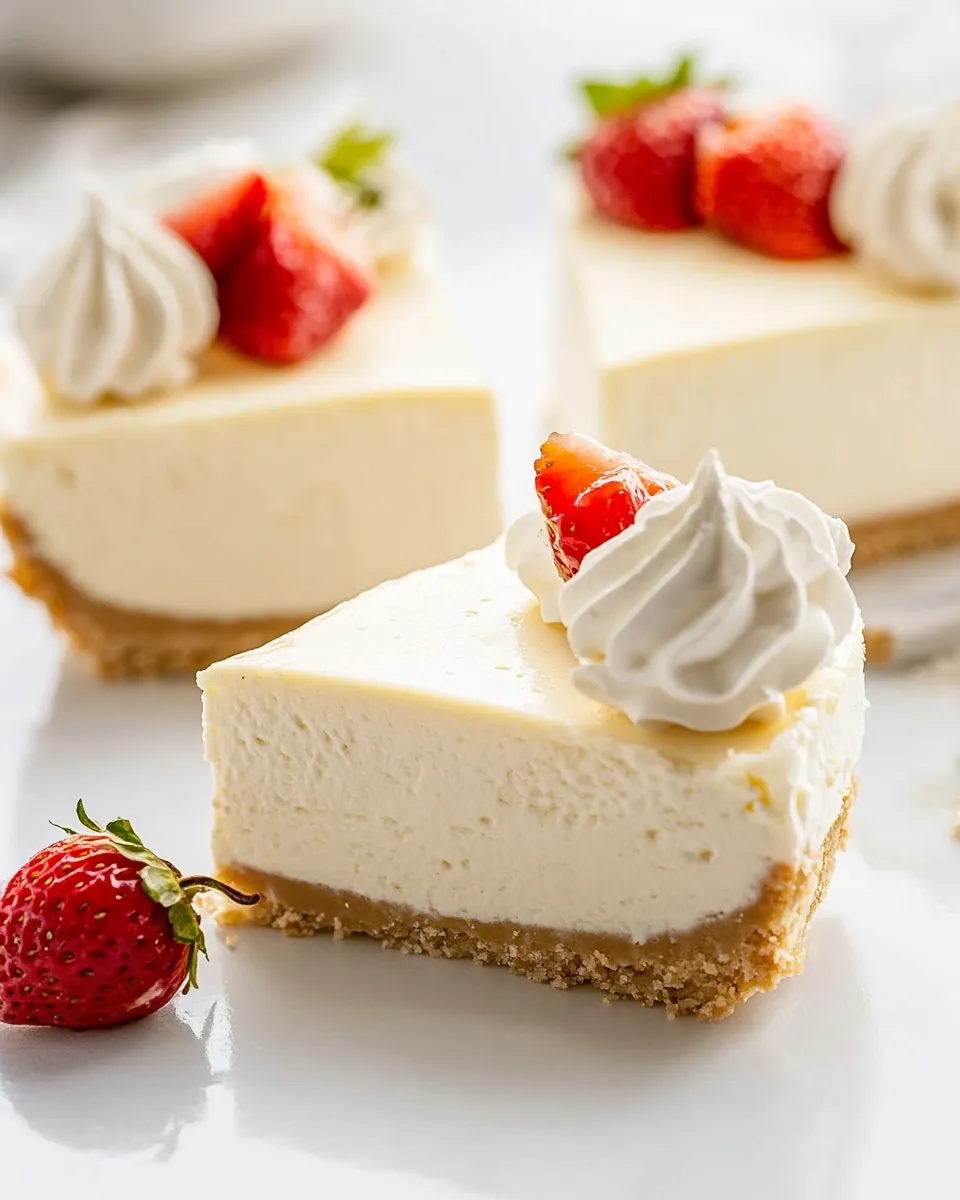
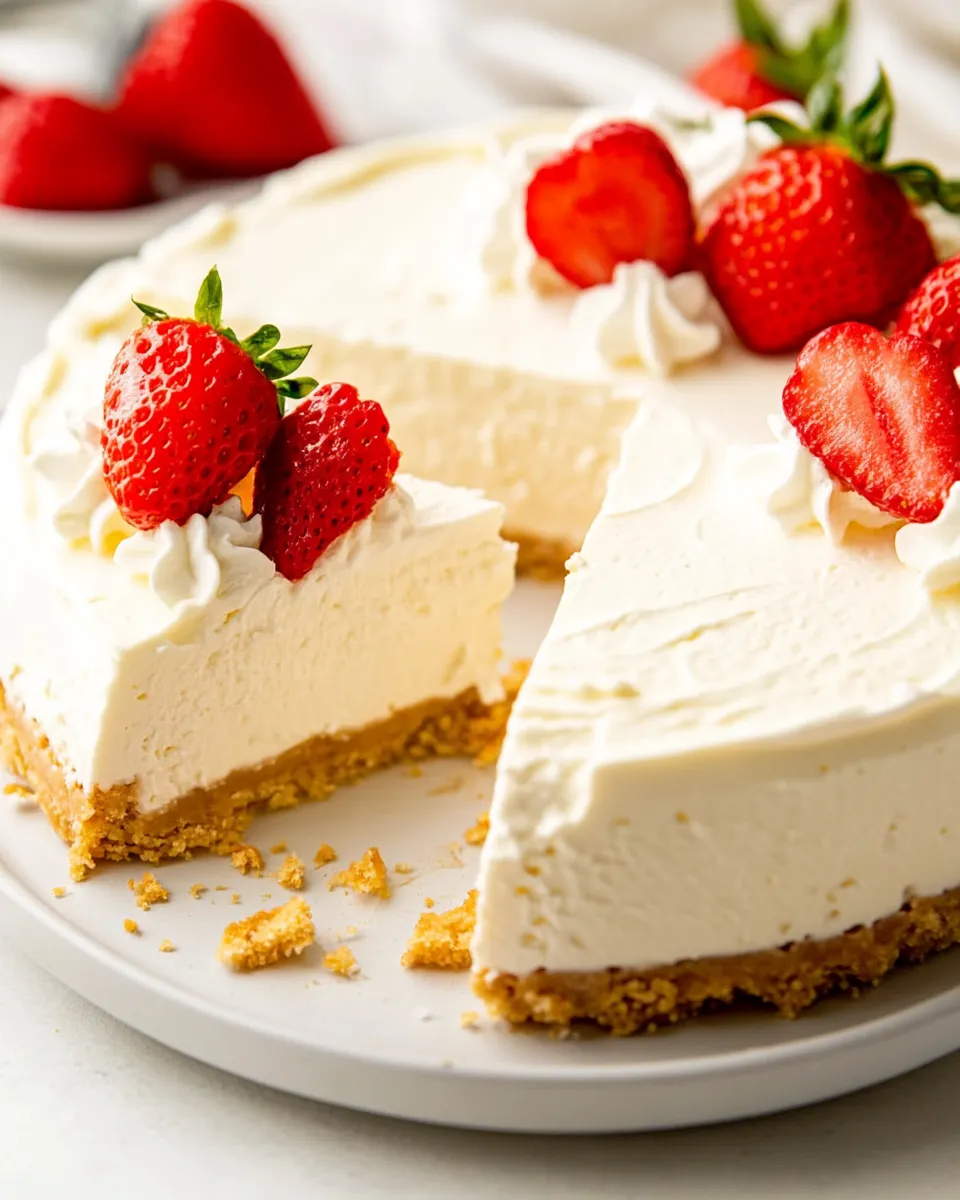
I like desserts that feel fancy but don’t demand a weekend of work. This no-bake cheesecake delivers that — creamy, clean-flavored, and ready after a short chill. It’s the kind of cake I make when I want something impressive but also realistic for a weeknight or last-minute guest.
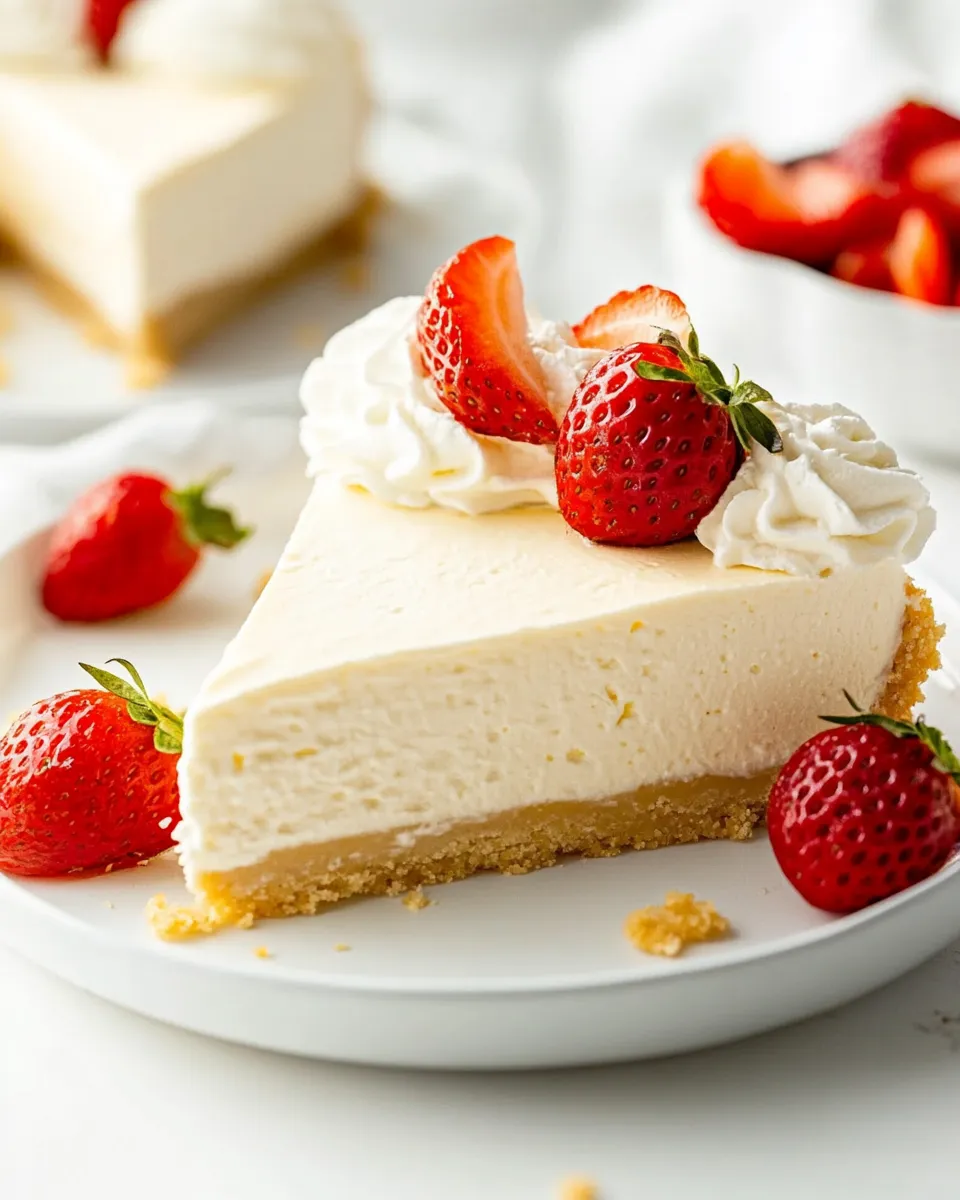
You’ll find the texture is what people notice first: light and silky because the filling folds whipped cream into an ultra-smooth cream cheese base. The crust is buttery and spiced from Biscoff crumbs, so it stands on its own even without elaborate toppings. Below you’ll get exact steps, the thinking behind each move, and practical tips to avoid common mistakes.
What Goes Into No-Bake Cheesecake
Ingredients
- 2 cups Biscoff cookie crumbs (you’ll need two packages; see note) — the spiced cookie base gives both structure and flavor; press well for a firm crust.
- 7 tablespoons unsalted butter, melted — binds the crumbs and adds richness; warm and fully melted is best for even mixing.
- 2 tablespoons sugar — a small lift in sweetness for the crust; balances the spice of the crumbs.
- ⅛ teaspoon salt — rounds flavors in the crust; use fine salt for even distribution.
- 1¼ cups heavy cream — whipped for lightness in the filling; cold cream whips faster and holds shape better.
- 16 oz cream cheese, at room temperature — the base of the filling; room temperature keeps the mix lump-free and smooth.
- ¾ cup granulated sugar — sweetness in the filling; adjust slightly if you prefer less sweet.
- 1 tablespoon fresh lemon juice, from 1 lemon — brightens and stabilizes the filling; fresh lemon is noticeably better than bottled.
- 1 teaspoon vanilla extract — rounds and lifts the cream cheese; use pure vanilla if you have it.
- ⅛ teaspoon salt — a small touch to balance the filling’s sweetness and enhance flavor.
Stepwise Method: No-Bake Cheesecake
- Combine 2 cups Biscoff cookie crumbs, 7 tablespoons melted unsalted butter, 2 tablespoons sugar, and 1/8 teaspoon salt in a medium bowl; mix until evenly moistened.
- Transfer the crumb mixture to a 9-inch springform pan. Using your fingers and the bottom of a dry measuring cup or a flat-sided glass, press the crumbs into an even 1/4-inch-thick layer across the base and press the crumbs up the sides 1½ to 2 inches to form the crust.
- Place the crust in the freezer to firm while you prepare the filling (at least 10–15 minutes).
- Chill the mixing bowl and whisk attachment briefly if possible. Pour 1¼ cups cold heavy cream into the chilled bowl and whip on medium-high speed until medium-stiff peaks form, about 3–5 minutes. Stop when peaks hold shape but are still slightly soft. Transfer the whipped cream to a separate bowl and set aside.
- In the same (unwashed) mixing bowl, add 16 oz room-temperature cream cheese, 3/4 cup granulated sugar, 1 tablespoon fresh lemon juice, 1 teaspoon vanilla extract, and 1/8 teaspoon salt. Beat on medium speed until the mixture is completely smooth and creamy, about 2 minutes, scraping down the sides of the bowl with a rubber spatula as needed.
- Add about one-third of the whipped cream to the cream cheese mixture and mix on low speed just until combined to loosen the filling.
- Remove the bowl from the mixer and gently fold in the remaining whipped cream with a rubber spatula until no streaks remain and the filling is uniform. Do not overmix; stop as soon as the mixture is evenly blended.
- Take the crust out of the freezer. Use an offset spatula to spread the filling evenly into the crust, smoothing the top.
- Cover the pan tightly with plastic wrap and refrigerate the cheesecake for at least 6 hours or up to 2 days to set.
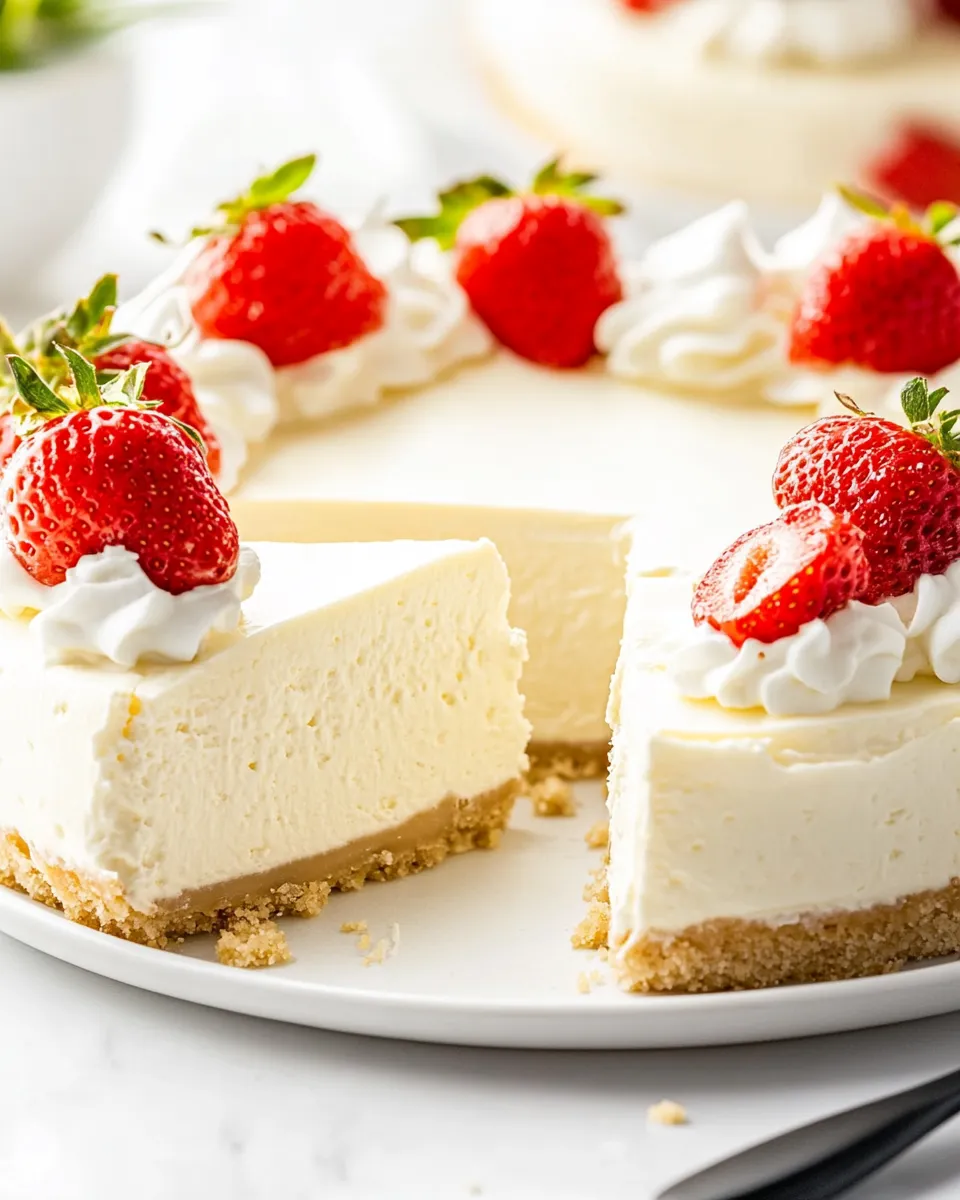
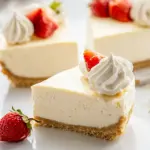
- To serve, remove the sides of the springform pan. Wipe a sharp knife clean or rinse it under hot running water and dry, then slice the cheesecake into wedges, rinsing and drying the knife between slices for clean cuts. Serve the cheesecake from the base of the pan.
Why It’s My Go-To
This recipe is reliable and fast without feeling cheap. There’s no baking, no water bath, and no juggling multiple pans. The technique plays to simple strengths: a sturdy, spiced cookie crust and a light filling that still reads as decadently creamy. It sets firmly enough for clean slices but stays soft and pleasant on the palate.
It’s also forgiving. The initial chill for the crust and the step where you temper the filling with a bit of whipped cream both give you a wide margin for error. You can make the crust ahead, whip the cream earlier in the day, and bring everything together an hour before guests arrive. For a hosted dinner, that makes this cheesecake a quiet hero.
Flavor-Forward Alternatives
You don’t have to top this with anything complicated. A quick fruit compote, a drizzle of salted caramel, or toasted nuts makes a statement. If you want to switch the cookie base, try graham crackers, gingersnaps, or chocolate wafer cookies in place of the Biscoff crumbs. Swap the lemon for orange zest and a touch more juice if you prefer a brighter citrus note.
For a chocolate twist: fold in a few tablespoons of sifted cocoa powder to the cream cheese mixture or add a thin layer of ganache on top once the cake is set. For an autumnal take, fold a spoonful of pumpkin puree into the filling and add warming spices to the crust. Keep any additions light so they don’t change the set of the filling dramatically.
What’s in the Gear List
- 9-inch springform pan — makes removing the cheesecake easy and keeps edges intact.
- Medium mixing bowl and a separate chilled bowl for whipping cream — two bowls keep textures straight.
- Stand mixer or hand mixer with whisk and paddle attachments — whisk for cream, paddle for the cream cheese.
- Rubber spatula and offset spatula — essential for folding and smoothing the top cleanly.
- Measuring cups and spoons — accurate measurements matter for texture.
- Flat-bottomed glass or dry measuring cup — perfect for pressing the crust evenly.
- Sharp chef’s knife and a bowl of hot water for rinsing — for clean slices when serving.
Steer Clear of These
Do not start with cold cream cheese. Cold cream cheese will give you lumps and a grainy filling. Let it come to room temperature before you beat it. Don’t overwhip the heavy cream; the recipe calls for medium-stiff peaks so the filling remains soft and spreadable. Overwhipped cream will tighten and resist folding, leading to a denser filling.
Avoid skimping on pressing the crust. If the crust is loose, slices will slough and look sloppy. Press it firmly and chill long enough so it firms up before adding the filling. Finally, don’t rush the chill time. The filling needs at least six hours to set properly; cutting too early yields messy slices.
Seasonal Flavor Boosts
– Spring: Fresh berries and a light lemon curd complement the cream cheese without overpowering it. Fresh fruit keeps things bright.
– Summer: Stone fruits like peaches or nectarines thinly sliced over a balsamic reduction make a pretty, fresh topping.
– Autumn: Fold in a small spoonful of pumpkin spice mix and top with toasted pecans for warmth and texture.
– Winter: A smear of salted caramel and flaked sea salt pairs beautifully with the spiced Biscoff crust.
These are modular ideas — add the seasonal element as a topping or a thin swirl, and keep the base method intact.
Method to the Madness
Every step has purpose. Chilling the bowl and the cream helps the whipping process: cold fat forms stable air pockets faster, and that stability = lighter texture. Using part of the whipped cream to loosen the cream cheese mixture before folding keeps the filling airy; adding it all at once would be harder to combine without overmixing.
Freezing the crust briefly firms the butter in the crumbs so it doesn’t compress too much when you spread the filling. Pressing the crust up the sides creates a neat rim that helps guide slices and gives every bite some crunch. Finally, the rinse-the-knife trick produces photo-ready slices and the cleanest presentation.
Freezer-Friendly Notes
This cheesecake freezes well if you wrap it tightly. After the initial chill and once the cake has set, cover the top directly with plastic wrap, then add a layer of foil for protection. Freeze on a flat surface. When ready to use, thaw in the refrigerator overnight for best texture. If you plan to slice while frozen, let slices rest briefly at room temperature so they soften enough to eat comfortably.
Reader Questions
Q: Can I use a different cookie for the crust?
A: Yes. Graham crackers, digestive biscuits, or chocolate wafers all work. Keep the ratio of crumbs to butter similar so the crust binds.
Q: Can I make this without a mixer?
A: You can. Beat the cream cheese by hand with a sturdy whisk and a bit more elbow grease, and use a hand whisk or balloon whisk for the cream. It takes longer, but it’s doable.
Q: What causes a watery filling?
A: Overwhipping the cream or under-beating the cream cheese can cause separation. Also, if you add citrus zest or juice in large amounts beyond the recipe, it can affect texture. Stick to the listed quantities.
Q: How long will leftovers keep in the fridge?
A: Stored tightly covered, the cheesecake will keep well for several days; the crust may soften slightly over time but the flavor holds up.
Bring It Home
This no-bake cheesecake is simple to assemble, gorgeous to present, and flexible enough for many occasions. Make the crust in the morning, whip and fold the filling in the afternoon, refrigerate, and serve later for a dessert that looks like you spent twice as long on it. Clean slices, a balanced sweetness, and that familiar Biscoff warmth make it a crowd-pleaser. Keep this recipe in your rotation for when you want dessert to feel effortless and thoughtful at the same time.
No-Bake Cheesecake
Ingredients
Ingredients
- 2 cupsBiscoff cookie crumbs you’ll need two packages; see note
- 7 tablespoonsunsalted butter melted
- 2 tablespoonssugar
- 1/8 teaspoonsalt
- 1 1/4 cupsheavy cream
- 16 ozcream cheese at room temperature
- 3/4 cupgranulated sugar
- 1 tablespoonfresh lemon juice from 1 lemon
- 1 teaspoonvanilla extract
- 1/8 teaspoonsalt
Instructions
Instructions
- Combine 2 cups Biscoff cookie crumbs, 7 tablespoons melted unsalted butter, 2 tablespoons sugar, and 1/8 teaspoon salt in a medium bowl; mix until evenly moistened.
- Transfer the crumb mixture to a 9-inch springform pan. Using your fingers and the bottom of a dry measuring cup or a flat-sided glass, press the crumbs into an even 1/4-inch-thick layer across the base and press the crumbs up the sides 1½ to 2 inches to form the crust.
- Place the crust in the freezer to firm while you prepare the filling (at least 10–15 minutes).
- Chill the mixing bowl and whisk attachment briefly if possible. Pour 1¼ cups cold heavy cream into the chilled bowl and whip on medium-high speed until medium-stiff peaks form, about 3–5 minutes. Stop when peaks hold shape but are still slightly soft. Transfer the whipped cream to a separate bowl and set aside.
- In the same (unwashed) mixing bowl, add 16 oz room-temperature cream cheese, 3/4 cup granulated sugar, 1 tablespoon fresh lemon juice, 1 teaspoon vanilla extract, and 1/8 teaspoon salt. Beat on medium speed until the mixture is completely smooth and creamy, about 2 minutes, scraping down the sides of the bowl with a rubber spatula as needed.
- Add about one-third of the whipped cream to the cream cheese mixture and mix on low speed just until combined to loosen the filling.
- Remove the bowl from the mixer and gently fold in the remaining whipped cream with a rubber spatula until no streaks remain and the filling is uniform. Do not overmix; stop as soon as the mixture is evenly blended.
- Take the crust out of the freezer. Use an offset spatula to spread the filling evenly into the crust, smoothing the top.
- Cover the pan tightly with plastic wrap and refrigerate the cheesecake for at least 6 hours or up to 2 days to set.
- To serve, remove the sides of the springform pan. Wipe a sharp knife clean or rinse it under hot running water and dry, then slice the cheesecake into wedges, rinsing and drying the knife between slices for clean cuts. Serve the cheesecake from the base of the pan.
Equipment
- 9-inch springform pan
- Medium Bowl
- Mixing Bowl
- Measuring Cup
- flat-sided glass or dry measuring cup
- electric mixer with whisk attachment
- Whisk
- Rubber spatula
- Offset spatula
- Plastic Wrap
- freezer
Notes
Make-Ahead Instructions:
The cheesecake can be made and stored in the springform pan in the fridge, tightly covered with plastic wrap, up to two days ahead of time.
Freezer-Friendly Instructions:
The cheesecake can be frozen for up to 3 months. To freeze, place the cake in the freezer briefly, unwrapped, to firm it up. Then double-wrap it tightly with aluminum foil or plastic freezer wrap, or place it in heavy-duty freezer bag. Thaw in the refrigerator the night before you plan to eat it.
Note:
To make the cookie crumbs, pulse the cookies in a food processor until finely ground. If you don’t have a food processor, place them in a zip-top bag and crush them with a rolling pin or the bottom of a measuring cup until you get fine, even crumbs. You’ll need two 8.8 oz packages of cookies, but only about 10 cookies from the second package to reach 2 cups of crumbs.