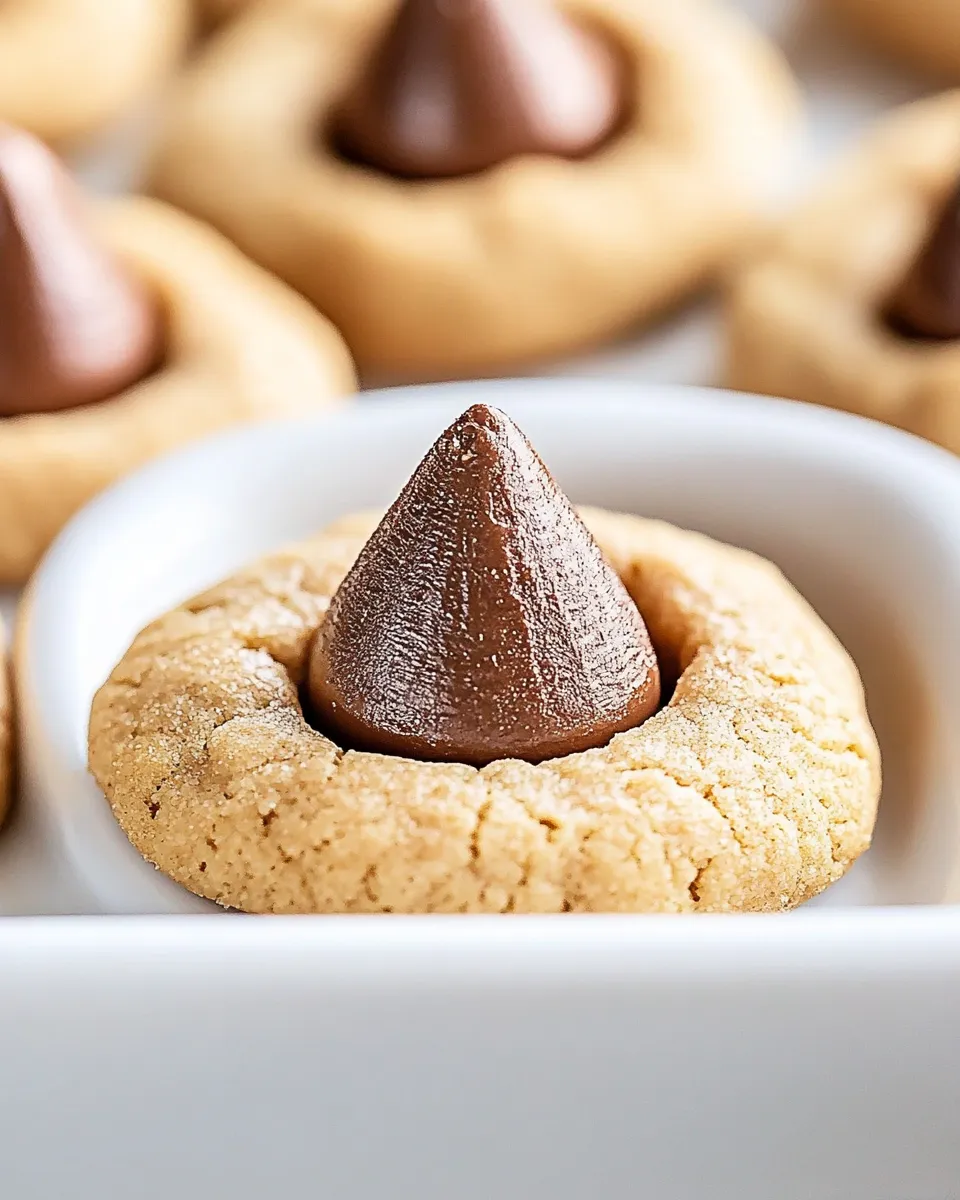
I make these Peanut Butter Kiss Cookies whenever I need a dependable, crowd-pleasing cookie that comes together fast. The dough is straightforward, the flavors are classic, and that Hershey Kiss pressed into the warm center gives you the best of both worlds: crisp edges and a melty chocolate heart. No fuss, just good results.
There are shortcuts here that actually improve the cookie: using creamy peanut butter for smooth texture, slightly underbaking so the centers stay tender, and rolling the dough in granulated sugar for a pretty crackled finish. If you follow the steps closely you’ll get about two dozen consistent cookies that travel well and disappear fast.
I’ll keep this practical: an ingredients list with notes, the exact step-by-step bake instructions you need, and troubleshooting tips if something goes sideways. Make these with a glass of milk or a coffee — they’re reliably comforting either way.
Ingredients
- ½ cup salted butter, softened — provides richness and tender crumb; bring to room temperature for even mixing.
- ½ cup brown sugar — adds moisture and a hint of molasses flavor; helps keep the centers soft.
- ½ cup white granulated sugar, plus extra for rolling cookie dough — sweetens and creates the classic sugared exterior when rolled.
- 1 egg — binds and gives structure; room temperature mixes more uniformly.
- ½ cup creamy peanut butter — the primary flavor; creamy gives smoother dough and consistent texture.
- 2 teaspoons vanilla extract — rounds and brightens the peanut butter flavor.
- 1½ cups all-purpose flour — the structural base; measure by spooning into the cup and leveling for accuracy.
- ¼ teaspoon salt — balances sweetness and enhances the peanut butter.
- 1 teaspoon baking soda — leavens and helps spread; gives the cookie the right lift.
- 24 Hershey Kisses, unwrapped — the signature chocolate center; unwrap before baking so they can soften quickly when pressed into the warm cookie.
Shopping List
If you’re heading to the store, here’s a compact shopping list based exactly on the ingredient list above. You may already have some of these staples in your pantry.
- Salted butter
- Brown sugar
- White granulated sugar
- Eggs
- Creamy peanut butter
- Vanilla extract
- All-purpose flour
- Salt
- Baking soda
- Hershey Kisses (24)
- Parchment paper or silicone liner (if you don’t already have one)
How to Prepare (Peanut Butter Kiss Cookies)
- Preheat the oven to 350°F. Line a baking sheet with parchment paper or a silicone liner and set aside.
- In a large mixing bowl, combine ½ cup softened salted butter, ½ cup brown sugar, and ½ cup white granulated sugar. Beat until the mixture is smooth and the sugars are incorporated, about 2–3 minutes. Scrape down the sides of the bowl as needed.
- Add 1 egg and beat until incorporated and slightly fluffy.
- Add ½ cup creamy peanut butter and 2 teaspoons vanilla extract; mix until evenly combined.
- Add 1½ cups all-purpose flour, ¼ teaspoon salt, and 1 teaspoon baking soda. Mix on low speed (or stir) until a cookie dough forms and no pockets of flour remain.
- Using a 1½-tablespoon scoop or measuring spoon, portion the dough into about 24 equal balls. Roll each ball in additional granulated sugar (reserve the extra sugar before you start if needed).
- Place the sugar-coated dough balls on the prepared baking sheet, spacing them evenly (about 2 inches apart).
- Bake in the preheated oven for 8–10 minutes, until the edges are set (centers may still look slightly soft).
- Immediately after removing the baking sheet from the oven, gently press one unwrapped Hershey Kiss into the center of each warm cookie.
- Allow the cookies to cool on the baking sheet for about 5 minutes, then transfer them to a wire rack to finish cooling. Serve warm for melty centers or cooled for firmer centers.
The Upside of (Peanut Butter Kiss Cookies)
These cookies are fast, dependable, and universally liked. Here’s what makes them worth the effort:
- Speed: The dough mixes quickly and there’s no chilling required, so you can bake in under 30 minutes from start to finish.
- Texture contrast: Slightly crisp edges with a tender, chewy center — plus a glossy chocolate point when warm.
- Kid-friendly: The Hershey Kiss on top makes these feel special; children love being part of the pressing step.
- Portable: They hold shape well and travel nicely for bake sales or packed lunches.
- Flexible serving: Eat warm for melty chocolate, or cooled for a more classic cookie bite.
International Equivalents
Not everyone measures the same way, so here are quick practical equivalents and notes:
- Flour: 1½ cups all-purpose flour ≈ 190 grams. Spoon and level the flour when measuring to avoid dense dough.
- Butter: ½ cup salted butter ≈ 113 grams. If you only have unsalted, add a pinch more salt to reach the same balance.
- Sugars: ½ cup brown sugar ≈ 110 grams packed; ½ cup granulated sugar ≈ 100 grams.
- Vanilla and baking soda: measurements remain the same globally; use level teaspoons.
- Kisses: 24 Hershey Kisses is standard — if using larger chocolates, expect fewer cookies or shallower set in the center.
What You’ll Need (Gear)
- Large mixing bowl — for creaming the butter and sugars comfortably.
- Electric mixer or sturdy wooden spoon — an electric mixer speeds up creaming but hand mixing works.
- Spoon or small scoop (1½-tablespoon) — for even cookie sizing; a small cookie scoop is ideal.
- Baking sheet — a rimmed sheet for even baking.
- Parchment paper or silicone liner — prevents sticking and makes cleanup easy.
- Wire rack — for cooling without soggy bottoms.
Slip-Ups to Skip
These are the most common mistakes and how to avoid them:
- Using cold butter — it won’t cream properly. Let it soften at room temperature until pliable but not greasy.
- Over-measuring flour — packed cups or scooping directly with the cup adds too much flour. Spoon into the cup and level.
- Overbaking — remove at 8 minutes if the edges are just set; center will firm as the cookies cool.
- Forgetting to unwrap Kisses — unwrapped chocolates will melt and make a mess instead of forming the signature point.
- Placing dough balls too close — leave about 2 inches so they spread without merging.
Better-for-You Options
If you want a slightly lighter or allergen-friendly version, consider these swaps. They change texture or flavor, so use them knowing the trade-offs.
- Peanut butter alternatives: Use powdered peanut butter reconstituted with a little water for fewer calories, but the cookies will be drier — add a teaspoon more butter if needed.
- Sugars: Swap half the white sugar for a natural sugar alternative like coconut sugar for a deeper flavor, but expect a darker color and slightly different spread.
- Chocolate: Use a darker chocolate kiss or a dairy-free chocolate kiss for fewer dairy calories or to accommodate lactose intolerance.
- Flour alternatives: A one-to-one gluten-free baking flour can work, but check for added xanthan gum in the blend and watch for slightly crumblier texture.
Chef’s Rationale
Here’s why the recipe is set up this way, simply and practically:
- Butter and sugars creamed first: This traps air and creates a lighter cookie with a tender crumb. The brown sugar keeps the center moist.
- Single egg: Provides enough structure without making the cookie cakey; more eggs would make them puffier and less tender.
- Peanut butter ratio: ½ cup keeps a strong peanut flavor without overwhelming the structure — too much peanut butter can cause spreading and greasiness.
- Baking soda, not powder: Soda gives the characteristic lift and spread in this kind of crispy-edge, chewy-center cookie.
- Rolling in sugar: Adds a subtle crunch and pretty sheen; it also helps the cookie maintain a lightly cracked surface that showcases the Kiss.
- Pressing the Kiss immediately after baking: Warm cookies allow the chocolate to soften and adhere cleanly without sinking too far or cracking.
Keep It Fresh: Storage Guide
Cool cookies completely before storing. Here’s how to keep them at their best:
- Room temperature: Store in an airtight container for up to 3 days. Place a sheet of parchment between layers to prevent sticking.
- Refrigeration: If your kitchen is warm, refrigerate for up to 7 days. Bring to room temperature before serving for softer centers.
- Freezing: Freeze baked cookies on a tray until solid, then transfer to a freezer bag for up to 3 months. Thaw on the counter or warm briefly in a 300°F oven for a fresh-baked feel.
- Dough: The scooped, unbaked dough balls can be frozen on a tray then stored in a bag for up to 3 months; bake from frozen and add a couple of extra minutes to the bake time.
FAQ
Q: Can I use natural peanut butter (oil-separated)?
A: Natural peanut butter often makes the dough looser because of the extra oil. You can use it, but expect more spread. Chill the dough briefly before baking if that happens.
Q: My Kisses sank into the cookies. What did I do wrong?
A: Press the unwrapped Hershey Kiss into the cookie immediately after removing the sheet from the oven, while the cookie is warm but still set at the edges. If the oven temperature is too high, cookies may spread too much and not support the chocolate.
Q: Can I make mini or jumbo cookies?
A: Yes. For mini, reduce bake time to 6–7 minutes. For jumbo, use a larger scoop and increase bake time to 11–13 minutes, watching for edges to set.
Q: Why did my cookies come out cakey?
A: Over-measuring flour, using too much egg, or overmixing can make cookies cakier. Measure flour correctly and mix just until combined.
See You at the Table
These Peanut Butter Kiss Cookies are one of those reliable recipes you can pull out when you want comfort without drama. They’re forgiving, fast, and carry a universal appeal — salty butter, sweet sugar, rich peanut butter, and a chocolate kiss. Give the recipe a run, make notes about your oven and ingredients, and soon you’ll have a go-to rendition that friends and family ask for repeatedly.
When you bake them, let the kitchen cool for a minute, pour yourself a drink, and enjoy the little ritual of pressing a chocolate star into each warm cookie. It’s simple, satisfying cooking — and it’s meant to be shared.

Peanut Butter Kiss Cookies
Ingredients
Ingredients
- 1/2 cupsalted butter softened
- 1/2 cupbrown sugar
- 1/2 cupwhite granulated sugar plus extra for rolling cookie dough
- 1 egg
- 1/2 cupcreamy peanut butter
- 2 teaspoonsvanilla extract
- 1 1/2 cupall purpose flour
- 1/4 teaspoonsalt
- 1 teaspoonbaking soda
- 24 Hershey Kisses unwrapped `
Instructions
Instructions
- Preheat the oven to 350°F. Line a baking sheet with parchment paper or a silicone liner and set aside.
- In a large mixing bowl, combine ½ cup softened salted butter, ½ cup brown sugar, and ½ cup white granulated sugar. Beat until the mixture is smooth and the sugars are incorporated, about 2–3 minutes. Scrape down the sides of the bowl as needed.
- Add 1 egg and beat until incorporated and slightly fluffy.
- Add ½ cup creamy peanut butter and 2 teaspoons vanilla extract; mix until evenly combined.
- Add 1½ cups all-purpose flour, ¼ teaspoon salt, and 1 teaspoon baking soda. Mix on low speed (or stir) until a cookie dough forms and no pockets of flour remain.
- Using a 1½-tablespoon scoop or measuring spoon, portion the dough into about 24 equal balls. Roll each ball in additional granulated sugar (reserve the extra sugar before you start if needed).
- Place the sugar-coated dough balls on the prepared baking sheet, spacing them evenly (about 2 inches apart).
- Bake in the preheated oven for 8–10 minutes, until the edges are set (centers may still look slightly soft).
- Immediately after removing the baking sheet from the oven, gently press one unwrapped Hershey Kiss into the center of each warm cookie.
- Allow the cookies to cool on the baking sheet for about 5 minutes, then transfer them to a wire rack to finish cooling. Serve warm for melty centers or cooled for firmer centers.
Equipment
- Large Mixing Bowl
- Baking Sheet
- parchment paper or silicone liner
- Wire Rack
- Measuring Spoons
- scoop or measuring spoon
Notes
Storage: Once cooled, store in an airtight container for up to 4 days.