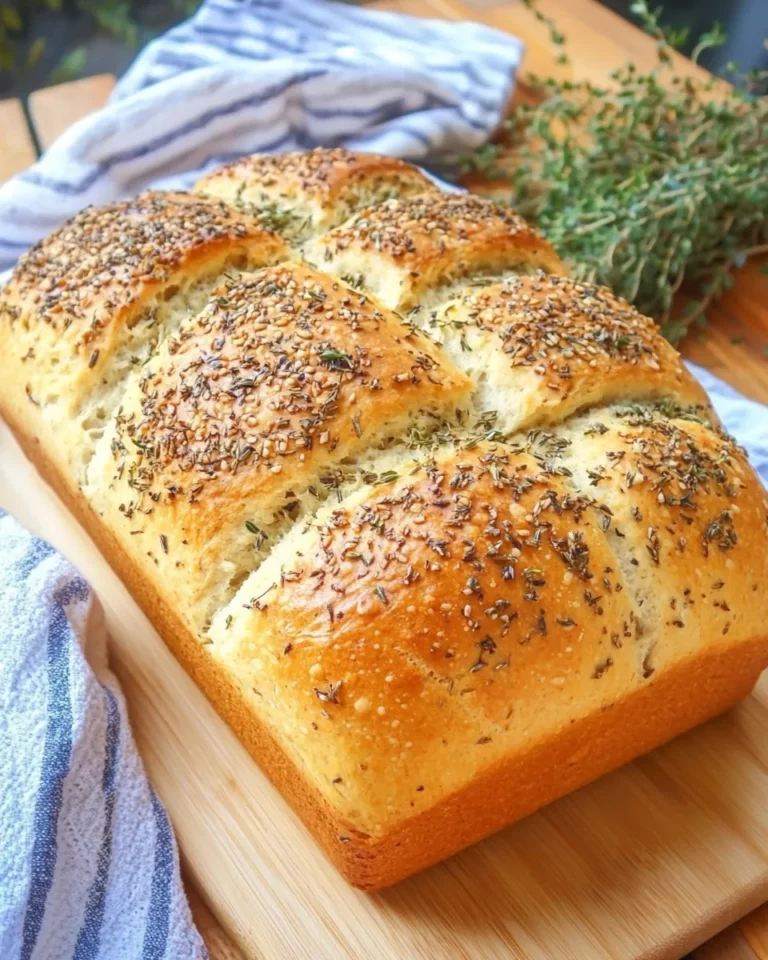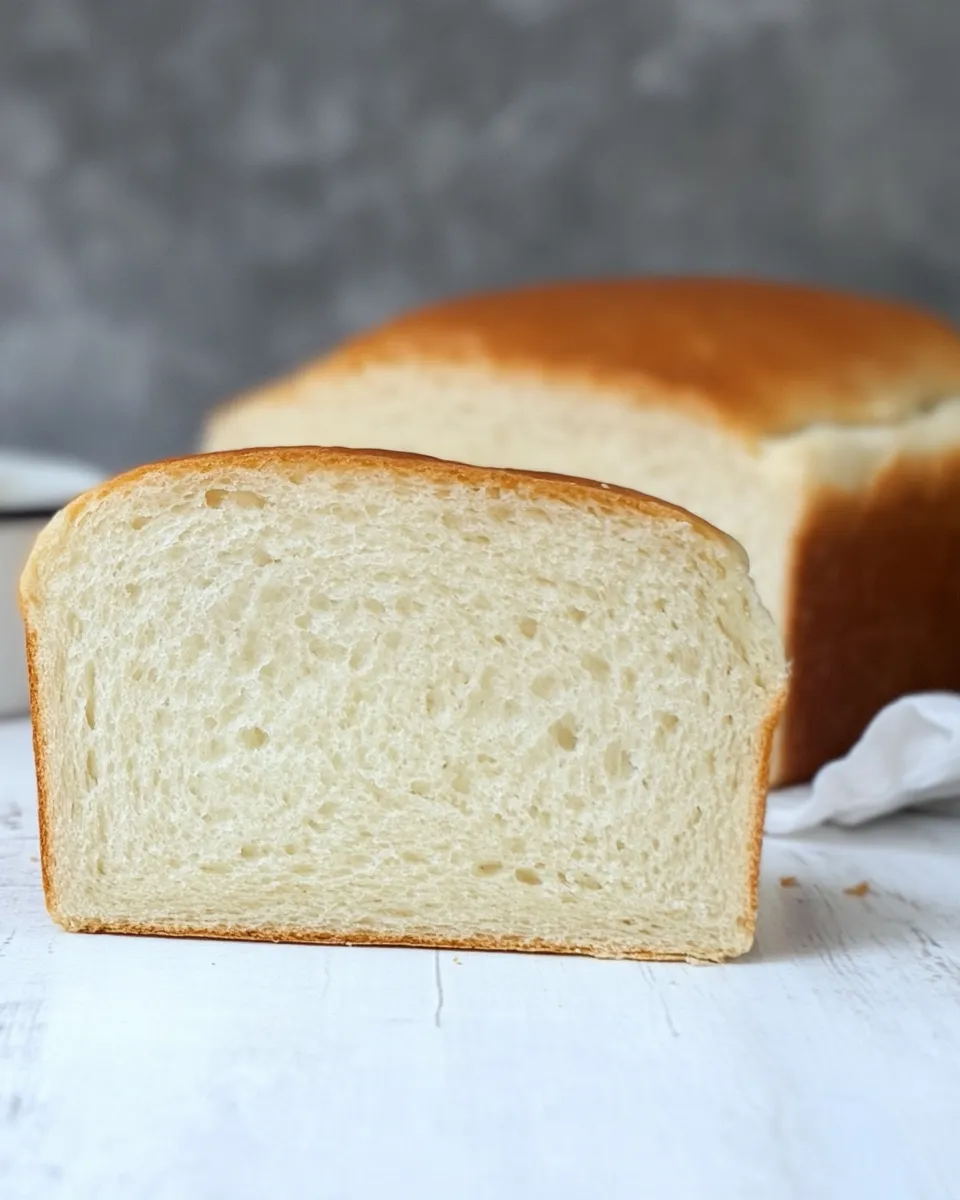
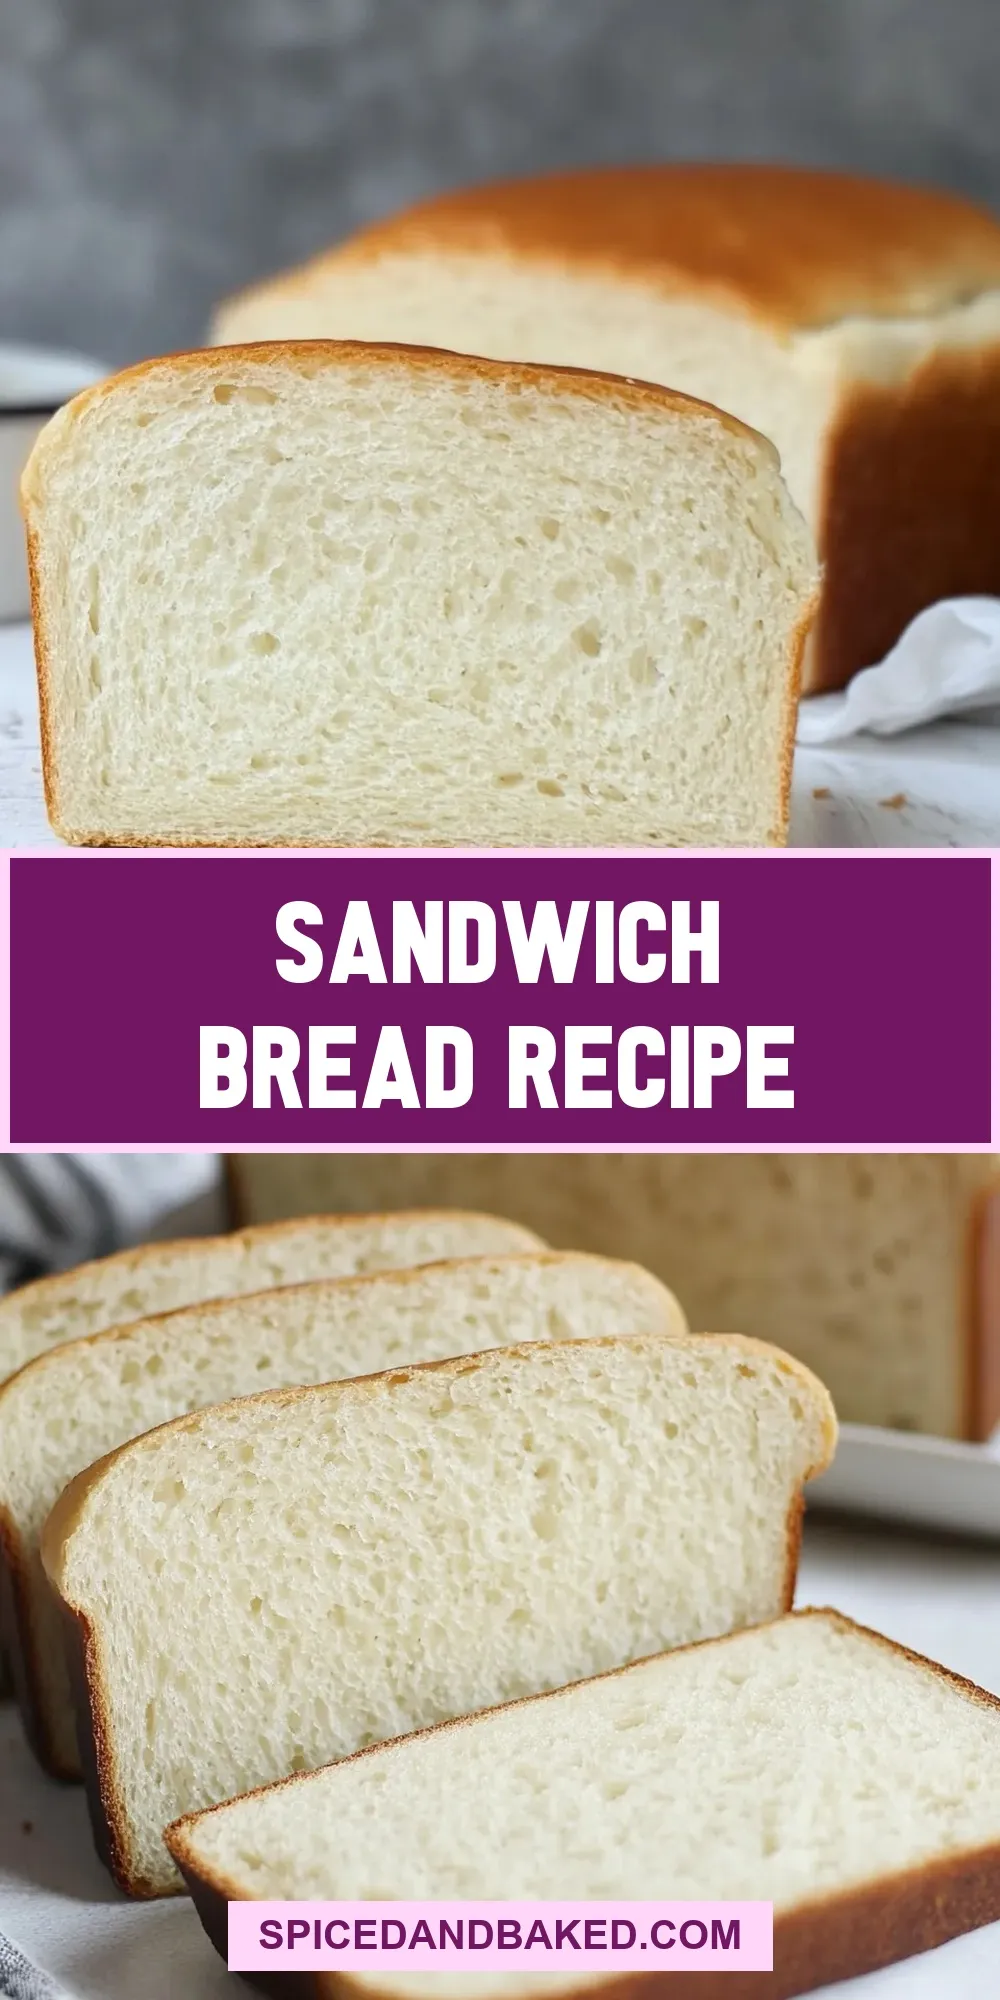
I bake this loaf every week. It’s the kind of sandwich bread that responds well to small adjustments, and it rewards patience with a soft crumb and a predictable crust. No fuss, just reliable comfort—perfect for school lunches and open-faced dinners alike.
This recipe lives at the intersection of simple technique and dependable ingredients: warmed milk, active yeast, flour, butter, a touch of sugar, and salt. Follow the steps and you’ll have a loaf that slices cleanly, toasts evenly, and freezes without fuss.
Below you’ll find a clear ingredient list, exact steps straight from the tested method, troubleshooting tips, equipment notes, and storage advice so your loaves stay fresh. Read once, then bake with confidence.
Ingredient Rundown
- 1 2/3 cups (363 g) milk, warmed to 100–110°F — warms the yeast and creates a tender crumb; don’t overheat or you’ll kill the yeast.
- 2 teaspoons (6 g) instant yeast — provides the lift; measure carefully and check the expiration date.
- 6 tablespoons (85 g) unsalted butter, softened to room temperature — adds richness and keeps the crumb soft; room-temp butter incorporates more evenly.
- 2 teaspoons (5 g) kosher salt — balances flavor and controls fermentation; don’t skip or reduce too much.
- 3 tablespoons (37 g) granulated sugar — feeds the yeast and gently sweetens the loaf; it also helps with crust color.
- 4 – 4 3/4 cups (480 – 570 g) all-purpose flour — structure for the loaf; add the extra flour only as needed so the dough isn’t overly sticky.
Sandwich Bread Recipe, Made Easy
- In a large bowl, stir 2 teaspoons instant yeast and 1 tablespoon of the granulated sugar into 1 2/3 cups (363 g) milk warmed to 100–110°F. Let sit 3–5 minutes until foamy. If it does not foam, the yeast is not active — do not proceed with this batch.
- Add 6 tablespoons (85 g) softened unsalted butter, the remaining granulated sugar (2 tablespoons), and 2 teaspoons (5 g) kosher salt to the yeast-milk mixture. Stir to combine.
- Add 4 cups (480 g) all-purpose flour and stir until a shaggy dough forms. If the dough is very sticky and does not pull away from the sides of the bowl, add more flour 1/4 cup at a time, up to an additional 3/4 cup (for a total of 4–4 3/4 cups / 480–570 g), until the dough begins to pull away from the bowl.
- Turn the dough onto a lightly floured work surface and knead by hand about 8–12 minutes, until the dough is smooth, elastic, and slightly tacky but not sticky. (You may use a stand mixer with a dough hook on low speed for about 6–8 minutes if preferred.)
- Lightly grease a large bowl, place the kneaded dough in the bowl, turn once to coat the surface with a light film of oil or butter, cover with plastic wrap or a damp towel, and place in a warm, draft-free spot. Let rise until doubled in size, about 1 1/2–2 hours.
- Punch down the risen dough and turn it out onto a lightly floured surface. Shape the dough into one or two loaves (depending on how many loaf pans you will use): flatten into a rectangle, roll up tightly, seal the seam, and tuck the ends under.
- Lightly grease your loaf pan(s) and place the shaped loaf(es) seam-side down in the pan(s). Loosely cover with plastic wrap or a damp towel and let rise in a warm place until the dough comes within about 1 inch of the top of the pan (or is nearly doubled), about 30–45 minutes.
- While the loaves are finishing their rise, preheat the oven to 350°F.
- Remove the cover and bake the loaves at 350°F until the internal temperature registers 190°F on an instant-read thermometer, about 40–45 minutes. If the crust is browning too quickly, tent loosely with foil for the last 10–15 minutes.
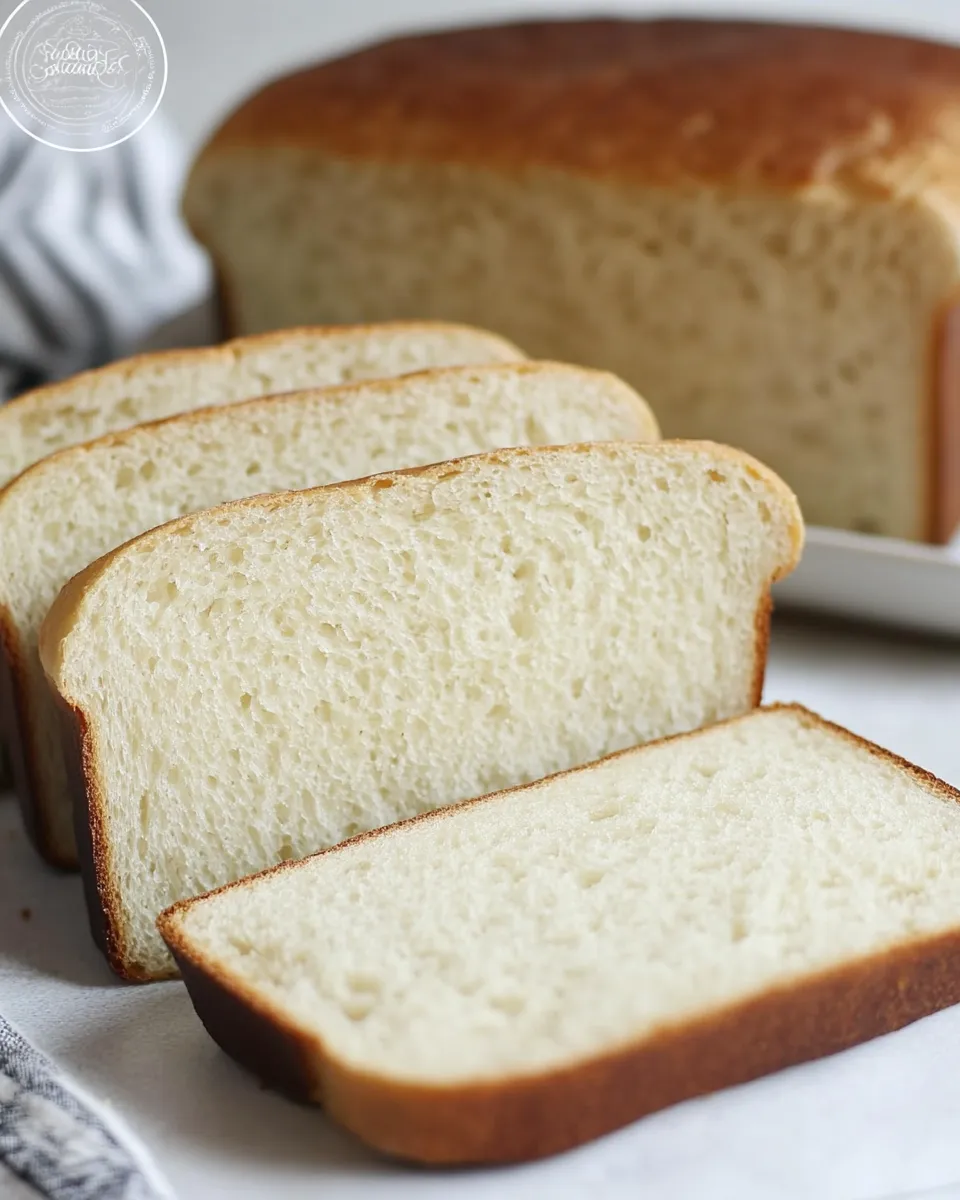
- Remove the loaves from the oven and let rest in the pans for 5–10 minutes. Then turn the bread out onto a wire rack and cool completely before slicing.
- Store cooled bread in a bread box or under a cake dome at room temperature for up to a week. To freeze, wrap the cooled loaves tightly in plastic wrap, then again in foil, and store in the freezer for up to 6 months.
The Upside of Sandwich Bread Recipe
This loaf is flexible. It’s soft enough for delicate fillings, sturdy enough for thick spreads, and neutral enough to pair with anything from jam to pastrami. It toasts beautifully and keeps a moist crumb when stored correctly.
Another upside: texture control. By adjusting hydration slightly within the allowed flour range and tweaking kneading time, you can favor a lighter, airier crumb or a slightly denser sandwich bread for hearty fillings. It’s a dependable base recipe for every-day bread.
Low-Carb/Keto Alternatives

Traditional sandwich bread depends on wheat flour for structure, so a direct, one-to-one low-carb swap won’t work without changing technique. If you need a lower-carb option, consider these approaches:
- Make a small, enriched oat-and-egg loaf (not a true keto bread) that uses less flour overall and more protein to mimic sandwich texture.
- Use thin, low-carb flatbreads or cloud bread for sandwiches instead of a sandwich loaf; they won’t replicate this recipe but will serve similar purposes with fewer carbs.
If you want to experiment with almond or coconut flour, treat this recipe as inspiration rather than a template—those flours require different binding agents and often no yeast, or much different hydration and bake times.
Equipment & Tools
Must-have
- Large mixing bowl — for proofing and mixing the yeast and milk.
- Loaf pan(s) — standard 9×5-inch pans work well for a single loaf; use two pans for split loaves.
- Instant-read thermometer — the most reliable way to know the loaf has reached 190°F inside.
Nice-to-have
- Stand mixer with dough hook — speeds kneading and reduces effort (6–8 minutes on low is suggested).
- Wire rack — for proper cooling so the bottom doesn’t get soggy.
- Plastic wrap or damp kitchen towel — for covered rises to prevent skin formation.
Mistakes Even Pros Make
Not testing yeast activity. If the yeast-milk-sugar mixture doesn’t foam within 3–5 minutes, that’s your cue: the yeast is inactive. Starting anyway wastes time and ingredients.
Over-flouring. The recipe gives a range for flour. Adding flour until the dough becomes stiff will yield a dry loaf. Aim for slightly tacky dough and trust the knead to build structure.
Skipping the internal temperature check. Oven times vary. Rely on the thermometer (190°F) rather than the clock alone for reliably baked bread.
Seasonal Adaptations
Warm kitchen, fast rise. Cold kitchen, slow rise. In winter, give the dough a longer bulk rise or place it in an oven warmed to 100°F then turned off (don’t leave it on). In summer, watch the dough more closely since it may double sooner.
Humidity affects flour absorption. In humid months you may need slightly less flour; in dry months, a touch more. Add flour in small increments, testing texture rather than aiming for a fixed number.
Notes on Ingredients
Milk temperature matters. 100–110°F wakes the yeast without stressing it. Cooler milk slows things down; hotter milk kills yeast. If your kitchen is very cool, use the upper end of the range. Use room-temperature butter so it incorporates without creating cold pockets in the dough.
Instant yeast vs active dry yeast. The recipe specifies instant yeast; it can be mixed directly into the warm milk and sugar as written. If substituting active dry yeast, proof it in the milk and sugar as well but factor in minor timing differences. Weigh ingredients when possible—especially flour and milk—for consistent results.
Storing Tips & Timelines
Short term: keep the cooled loaf in a bread box or under a cake dome at room temperature for up to a week. Avoid refrigeration—cold air dries bread quickly.
Long term: freeze well-wrapped loaves for up to 6 months. Slice before freezing if you reach for single slices often; frozen slices can be toasted directly from the freezer. Wrap tightly in plastic, then foil, to prevent freezer burn.
Top Questions & Answers
- Q: Can I substitute milk with water or non-dairy milk?
A: Water will produce a different crumb and a less rich flavor; non-dairy milk often works but can slightly change texture and browning. If using a non-dairy alternative, use an unsweetened version and keep the same temperature range. - Q: My crust is too dark before the loaf is done. What do I do?
A: Tent loosely with foil for the last 10–15 minutes of baking to prevent further browning while the interior finishes. - Q: How do I know when I’ve added enough flour?
A: Stop when the dough pulls away from the sides of the bowl and you can knead it into a smooth, elastic ball that’s slightly tacky but not sticky. Add extra flour 1/4 cup at a time only as needed. - Q: Can I make this dough in advance?
A: Yes. After shaping, instead of letting it rise a second time at room temperature, refrigerate the shaped, covered loaves overnight. Bring them to room temperature before the final rise and bake as directed. This can deepen flavor and add convenience.
The Takeaway
This Sandwich Bread Recipe is straightforward and forgiving when you follow its key rules: warm the milk to activate the yeast, don’t overdo the flour, and use an instant-read thermometer for doneness. It produces a reliable everyday loaf with a tender crumb and good structure for sandwiches.
Bake it once and you’ll see how small adjustments—kneading time, flour at the margin, and proofing environment—change the result in consistent ways. Take notes on what you do, and you’ll dial in your perfect loaf in a few tries.
Sandwich Bread Recipe
Ingredients
Ingredients
- 1 2/3 cup 363 gmilk, warmed to 100º F – 110º F
- 2 teaspoons 6 ginstant yeast
- 6 tablespoons 85 gunsalted butter, softened to room temperature
- 2 teaspoons 5 gkosher salt
- 3 tablespoons 37 ggranulated sugar
- 4 – 4 3/4 cups 480 – 570 gall-purpose flour
Instructions
Instructions
- In a large bowl, stir 2 teaspoons instant yeast and 1 tablespoon of the granulated sugar into 1 2/3 cups (363 g) milk warmed to 100–110°F. Let sit 3–5 minutes until foamy. If it does not foam, the yeast is not active — do not proceed with this batch.
- Add 6 tablespoons (85 g) softened unsalted butter, the remaining granulated sugar (2 tablespoons), and 2 teaspoons (5 g) kosher salt to the yeast-milk mixture. Stir to combine.
- Add 4 cups (480 g) all-purpose flour and stir until a shaggy dough forms. If the dough is very sticky and does not pull away from the sides of the bowl, add more flour 1/4 cup at a time, up to an additional 3/4 cup (for a total of 4–4 3/4 cups / 480–570 g), until the dough begins to pull away from the bowl.
- Turn the dough onto a lightly floured work surface and knead by hand about 8–12 minutes, until the dough is smooth, elastic, and slightly tacky but not sticky. (You may use a stand mixer with a dough hook on low speed for about 6–8 minutes if preferred.)
- Lightly grease a large bowl, place the kneaded dough in the bowl, turn once to coat the surface with a light film of oil or butter, cover with plastic wrap or a damp towel, and place in a warm, draft-free spot. Let rise until doubled in size, about 1 1/2–2 hours.
- Punch down the risen dough and turn it out onto a lightly floured surface. Shape the dough into one or two loaves (depending on how many loaf pans you will use): flatten into a rectangle, roll up tightly, seal the seam, and tuck the ends under.
- Lightly grease your loaf pan(s) and place the shaped loaf(es) seam-side down in the pan(s). Loosely cover with plastic wrap or a damp towel and let rise in a warm place until the dough comes within about 1 inch of the top of the pan (or is nearly doubled), about 30–45 minutes.
- While the loaves are finishing their rise, preheat the oven to 350°F.
- Remove the cover and bake the loaves at 350°F until the internal temperature registers 190°F on an instant-read thermometer, about 40–45 minutes. If the crust is browning too quickly, tent loosely with foil for the last 10–15 minutes.
- Remove the loaves from the oven and let rest in the pans for 5–10 minutes. Then turn the bread out onto a wire rack and cool completely before slicing.
- Store cooled bread in a bread box or under a cake dome at room temperature for up to a week. To freeze, wrap the cooled loaves tightly in plastic wrap, then again in foil, and store in the freezer for up to 6 months.
Equipment
- Large Bowl
- stand mixer (optional)
- dough hook (optional)
- loaf pan(s)
- Wire Rack
- Instant-read thermometer
- plastic wrap or damp towel
Notes
Total time does not include time for rising. Approximate rising times are:
1st rising: 1 1/2 hours
2nd rising: 15 minutes
Adapted from: USA Pans