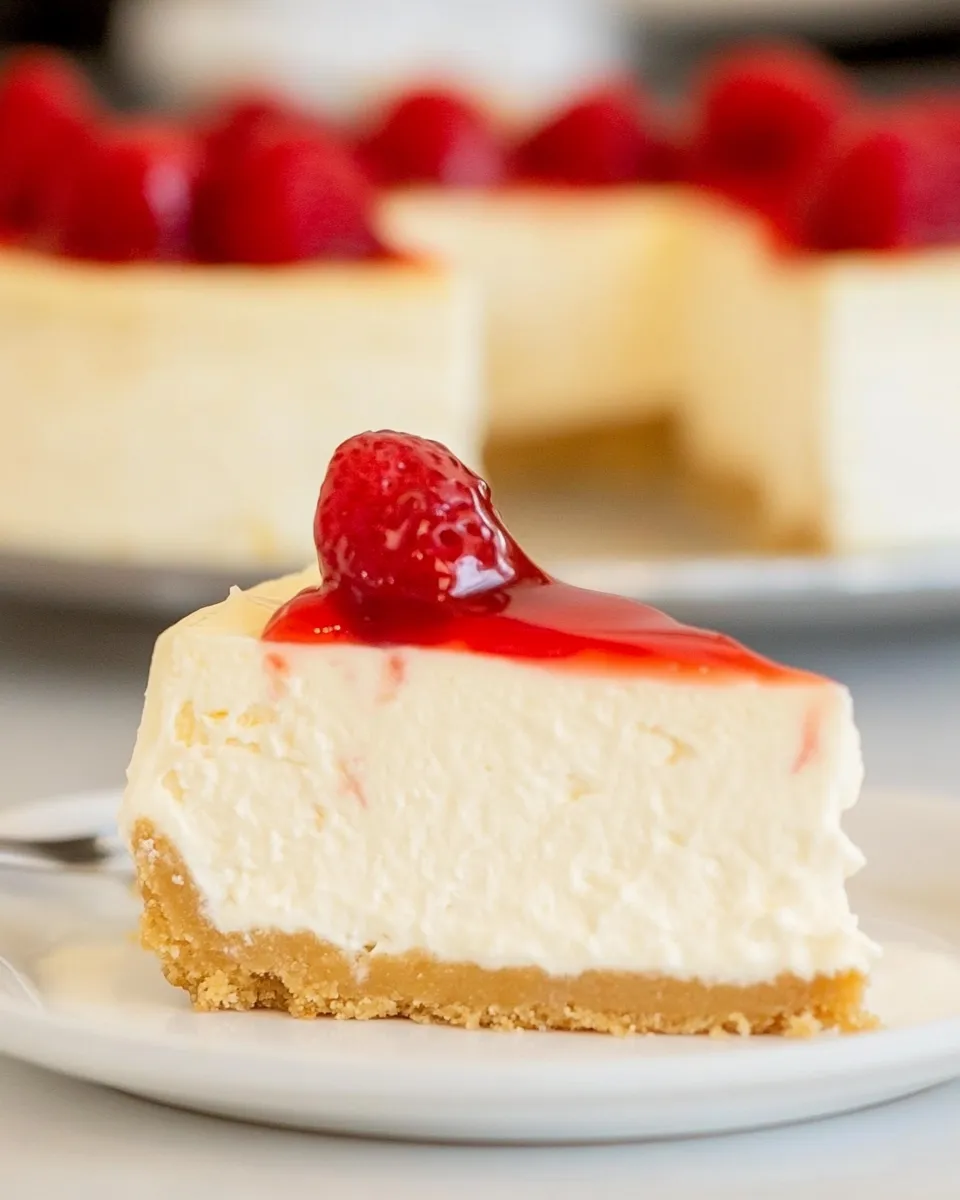
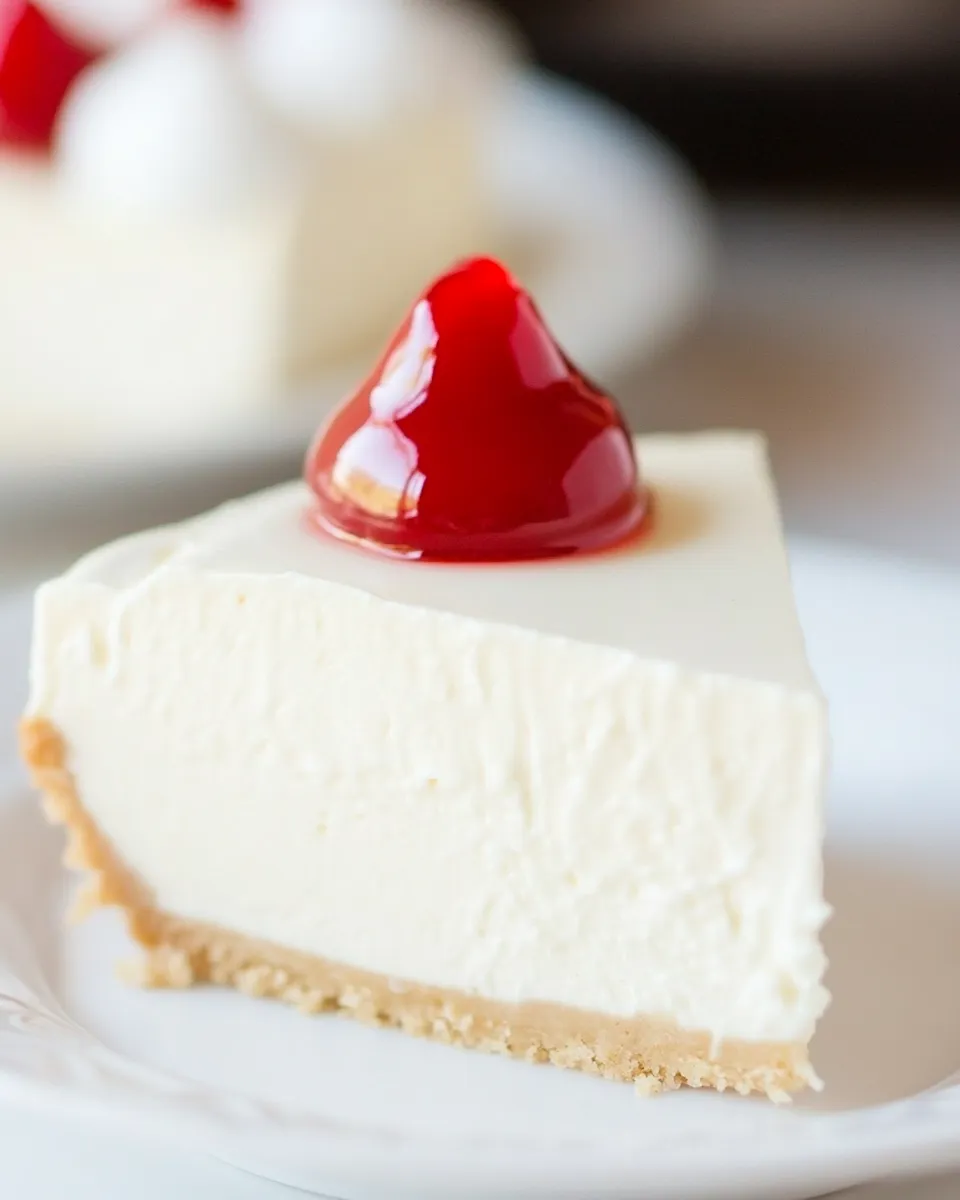
I make desserts nearly every week, and this vegan cheesecake is the one I turn to when I want something that looks and behaves like a traditional cheesecake—without dairy. It’s dependable, slices cleanly, and the texture is pleasantly dense without being gummy. I call it my weeknight-showstopper because it doesn’t demand luxury ingredients or fancy equipment.
This post cuts to the point: what you need, what to watch for, and the exact steps so you can get a flawless set cheesecake at home. I’ll also cover sensible swaps, storage tips, and answers to the questions I get asked most. No fluff—just a practical road map to a dessert everyone at the table will enjoy.
If you’re new to vegan baking, treat this as a reliable template. Follow the room-temperature and water-bath parts closely and you’ll be rewarded with creamy texture and tidy slices. Ready? Let’s go.
The Essentials
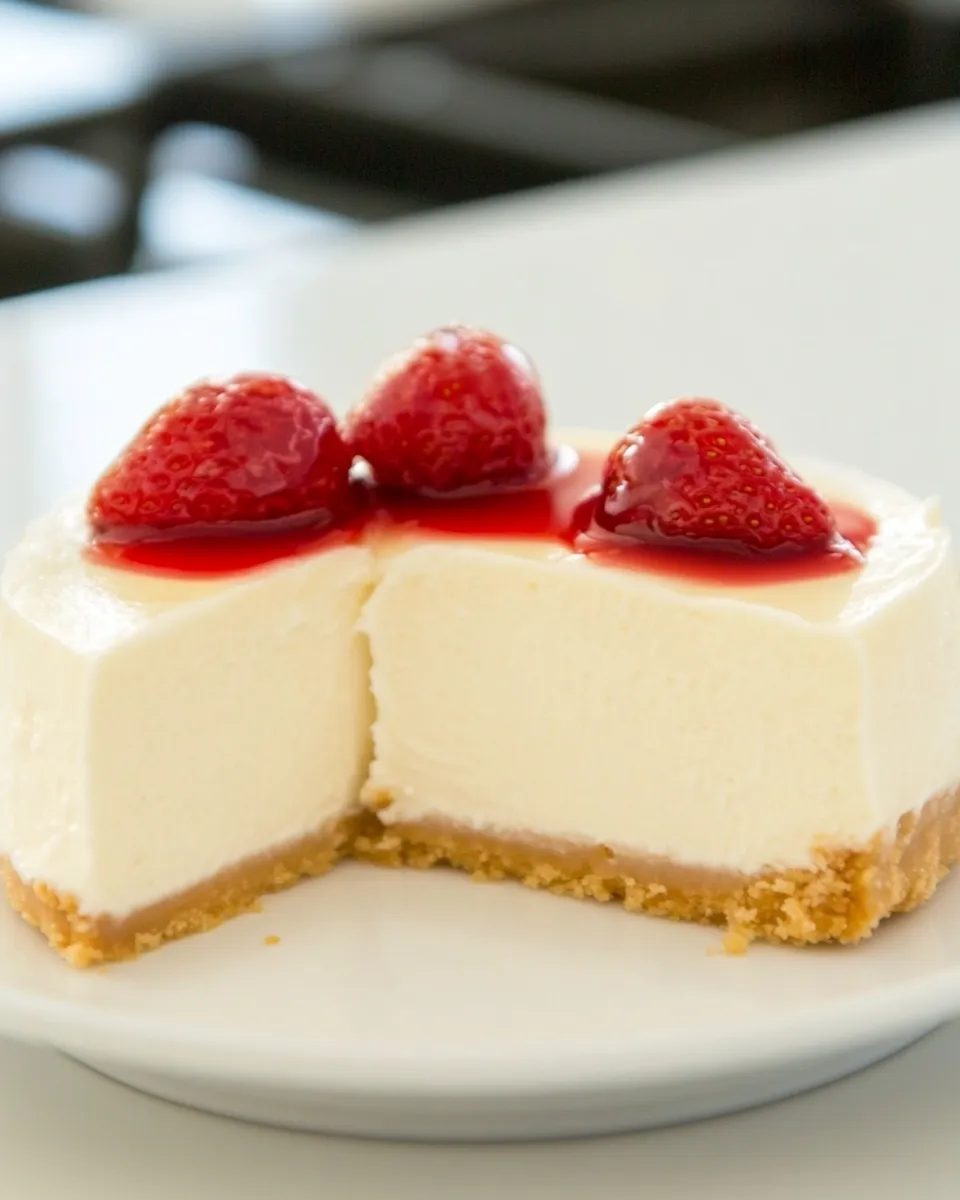
This cheesecake is about three things: a smooth cream cheese base, a stabilizer so it sets properly, and a gentle bake with a water bath to prevent cracks. The recipe relies on standard pantry items and a springform pan. It’s forgiving, but a few habits—bringing the cream cheese to room temperature, not overblending, and chilling fully—will make the difference between “good” and “great.”
Plan ahead—bring the cream cheese to room temperature and allow several hours (or overnight) to chill. That hands-off chilling time gives you the flexibility to make the filling one day and finish it the next. You’ll get cleaner slices and better flavor when it’s fully set.
Ingredients
- 24 oz vegan cream cheese — main structure and tang; bring to room temperature for a smooth, lump-free filling.
- 2 cups plant based yogurt — adds silkiness and a bit of culture-like brightness; plain works best to control sweetness.
- 2 1/2 tsp pure vanilla extract — anchors the flavor; use pure vanilla rather than imitation if you can.
- 4 tsp cornstarch (or here’s a Keto Cheesecake Recipe) — the stabilizer; it helps the filling set without baking into a rubbery texture.
- 2/3 cup sugar or pure maple syrup, or xylitol for sugar free — sweetener; choose based on dietary needs and flavor preference.
- 1 tbsp lemon juice (optional) — brightens the overall profile; useful if your dairy-free cream cheese is very mild.
- 1 pie crust (store bought or my homemade vegan pie crust recipe above) — the foundation; prebake if your crust recipe calls for it so the base is crisp.
Vegan Cheesecake, Made Easy
- Preheat the oven to 350°F (175°C). Place a large baking pan on the oven’s lower rack and fill it about halfway with water to create a water bath.
- Prepare your pie crust in a 9-inch springform pan (store-bought or your homemade crust) and set it aside.
- Bring 24 oz vegan cream cheese to room temperature.
- In a blender or food processor, beat the room-temperature cream cheese until smooth, scraping down the sides as needed.
- Add 2/3 cup sugar (or pure maple syrup, or xylitol for sugar-free), 2 cups plant-based yogurt, 2 1/2 tsp pure vanilla extract, 4 tsp cornstarch, and 1 tbsp lemon juice (optional). Blend just until the mixture is smooth—do not overbeat.
- Pour or spoon the filling evenly into the prepared crust and smooth the top with a spatula.
- Place the springform pan on the middle oven rack directly above the water bath and bake at 350°F for 30 minutes.
- When the 30 minutes are up, keep the oven door completely closed, turn off the oven, and leave the cheesecake inside for an additional 5 minutes.
- Remove the cheesecake from the oven and let it cool on the counter for at least 20 minutes.
- Transfer the cheesecake to the refrigerator and chill until fully set—several hours or overnight—before slicing.
- Store leftovers covered in the refrigerator for up to 4 days or in the freezer for up to 2 months.
Why This Recipe Is Reliable
There are a few technical choices here that work together. Room-temperature cream cheese blends smoothly, which reduces air incorporation and prevents cracks. Cornstarch is a simple, neutral stabilizer that firms the filling without adding flavor or toughness. The water bath moderates oven temperature around the cheesecake, producing an even, gentle bake so the center sets while the edges don’t overcook.
The “oven-off” five-minute step is a gentle finish that helps avoid a sudden temperature change—this is often when cracks happen. Finally, a thorough chill is critical; serving straight from the oven will yield a sloppy center. Leave it in the fridge until firm and you’ll have neat slices every time.
Low-Carb/Keto Alternatives
If you need a lower-carb version, the recipe already hints at a sugar-free sweetener option: xylitol. That’s an easy swap for the 2/3 cup sugar. For a fuller keto approach, replace the standard pie crust with a low-carb crust—recipes typically use ground nuts and a binder. The cornstarch callout also points to a keto method: you can replace starch thickeners with small adjustments like additional binder or a different set-and-chill technique if you’re following a specific keto cheesecake recipe.
Two practical notes: some sugar substitutes affect baking performance and freezing differently, and many sugar alcohols can cause digestive upset in sensitive people. Taste and test one substitution at a time.
Tools & Equipment Needed
Non-negotiable
- 9-inch springform pan — essential for easy removal and clean slices.
- Large baking pan for water bath — you’ll nest the springform above it to regulate heat.
- Blender or food processor — for the smoothest filling; a hand mixer can work but requires more scraping.
Useful but optional
- Offset spatula — for smoothing the top cleanly.
- Cooling rack — helps with even cooling once the cheesecake is out of the oven.
Slip-Ups to Skip
- Don’t try to blend cold cream cheese. It clumps and traps air, which leads to uneven texture and cracks.
- Avoid overblending after adding yogurt and sweetener. Stop when smooth—too much aeration can change the texture and cause collapse during cooling.
- Do not open the oven during the bake or during the five-minute oven-off period. Sudden drafts will encourage cracking.
- Don’t rush the chill. Cutting too early yields a soft, messy center instead of clean slices.
In-Season Swaps
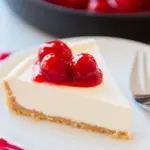
Toppings and finishes are where seasonality shines. In summer, a light berry compote or thinly sliced stone fruit is pretty and balances the richness. In autumn, a warm spiced pear or apple topping pairs nicely with maple as the sweetener. Winter calls for bright citrus curd or candied citrus slices to cut through the creaminess.
If you want a simple finish any time of year, a spoonful of fruit preserves warmed down and brushed on the cheesecake after chilling is fast, attractive, and delicious.
Chef’s Rationale
I built this recipe around reliability and accessibility. Vegan cream cheese and plant-based yogurt are widely available now. Cornstarch is neutral and easy to use, and the water-bath technique is low-effort but highly effective. I favor techniques that reduce variables: room-temperature ingredients, measured chilling time, and restrained blending.
The result is a cheesecake that reads familiar to people who love classic dairy-based versions, but that is made approachable for weeknight baking. The measurements and steps keep the process reproducible, whether you’re making it for a dinner party or to keep in the fridge for easy slices all week.
Save for Later: Storage Tips
Store the cheesecake covered in the refrigerator for up to 4 days. For longer storage, wrap a well-chilled cheesecake (or individual slices) tightly and freeze for up to 2 months. Thaw in the refrigerator overnight before serving for the best texture. If you freeze whole, allow an extra hour of sit time at room temperature before slicing to ease clean cuts.
If you notice small textural differences after freezing, that’s normal—refreezing may slightly change moisture distribution. Reheat is not recommended; serve chilled or at cool room temperature.
Helpful Q&A
- Q: Can I use a different thickener than cornstarch? — A: You can experiment with arrowroot or tapioca starch, but cornstarch is the neutral, reliable choice here. If you switch, keep the same total thickening power and note texture differences.
- Q: My cheesecake cracked. Why? — A: Usually from overmixing, too much oven temperature fluctuation, or opening the oven mid-bake. Follow the water bath step and the oven-off hold to reduce that risk.
- Q: Can I make this gluten-free? — A: Yes, by choosing a gluten-free pie crust. The filling itself is naturally gluten-free.
- Q: How do I get clean slices? — A: Chill thoroughly, run a sharp knife under hot water, dry it, then make each slice in one confident pull—wiping the knife between cuts helps.
- Q: Will this work with homemade vegan cream cheese? — A: It will, but consistency matters. If your homemade cream cheese is watery or grainy, you may need to strain and ensure it’s thick before using.
Ready to Cook?
When you’re ready, set up your station: bring the cream cheese out first, preheat the oven, and prep your crust. The recipe’s steps are straightforward; the timing aligns well with a busy day because most of the time is chilling. Make the filling, bake gently, and let refrigeration do the final work.
Post a photo if you share it—there’s nothing I love more than seeing how readers make recipes their own. If you run into trouble, come back to the Q&A here or drop a note in the comments. Enjoy your slice—this one’s worth the patience.
Vegan Cheesecake
Ingredients
Ingredients
- 24 ozvegan cream cheese
- 2 cupsplant based yogurt
- 2 1/2 tsppure vanilla extract
- 4 tspcornstarch or here's aKeto Cheesecake Recipe
- 2/3 cupsugaror pure maple syrup or xylitol for sugar free
- 1 tbsplemon juice optional
- 1 pie crust store bought or my homemade vegan pie crust recipe above
Instructions
Instructions
- Preheat the oven to 350°F (175°C). Place a large baking pan on the oven’s lower rack and fill it about halfway with water to create a water bath.
- Prepare your pie crust in a 9-inch springform pan (store-bought or your homemade crust) and set it aside.
- Bring 24 oz vegan cream cheese to room temperature.
- In a blender or food processor, beat the room-temperature cream cheese until smooth, scraping down the sides as needed.
- Add 2/3 cup sugar (or pure maple syrup, or xylitol for sugar-free), 2 cups plant-based yogurt, 2 1/2 tsp pure vanilla extract, 4 tsp cornstarch, and 1 tbsp lemon juice (optional). Blend just until the mixture is smooth—do not overbeat.
- Pour or spoon the filling evenly into the prepared crust and smooth the top with a spatula.
- Place the springform pan on the middle oven rack directly above the water bath and bake at 350°F for 30 minutes.
- When the 30 minutes are up, keep the oven door completely closed, turn off the oven, and leave the cheesecake inside for an additional 5 minutes.
- Remove the cheesecake from the oven and let it cool on the counter for at least 20 minutes.
- Transfer the cheesecake to the refrigerator and chill until fully set—several hours or overnight—before slicing.
- Store leftovers covered in the refrigerator for up to 4 days or in the freezer for up to 2 months.
Equipment
- 9-inch springform pan
- Blender or Food Processor
- large baking pan (for water bath)
- Spatula
Notes
Want a version with more protein? Whip up this easy
Protein Cheesecake
.