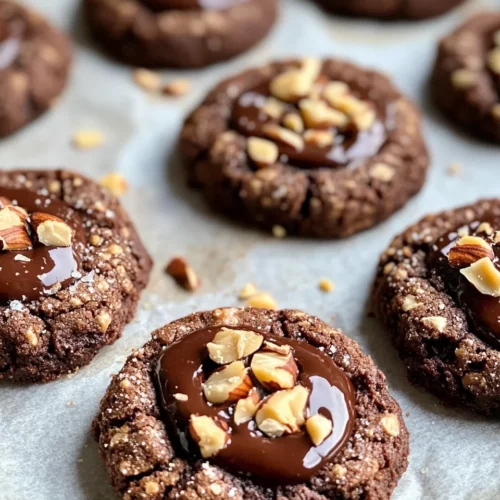
Chocolate Hazelnut Thumbprint Cookies
If you’re searching for a cookie that combines rich chocolate flavor with a nutty crunch and…
Equipment
- Oven
- Baking Sheet
- Parchment Paper
- Mixing Bowl
- Small Bowl
- Hand mixer or stand mixer
- Fine sieve
- Spatula
- Measuring Spoons
- 1 1/2-tablespoon scoop or cookie scoop
- Wire Rack
Ingredients
Ingredients
- 1 cupsalted buttersoftened
- 1 tablespoonground flax seed
- 2/3 cupgranulated sugar
- 1 teaspoonvanilla
- 1 teaspooncornstarch
- 2 cupsall purpose flourspooned and leveled
- 1/4 cupcocoa powder
- 1/2 cupdry toasted and unsalted hazelnuts*roughly chopped
- 1/4 cupadditional but optional dry toasted and unsalted hazelnuts* roughly chopped; for sprinkling on the cookies
- 1/3 cupchocolate hazelnut butter*homemadeor store-bought
- 12-15 hazelnutscut in half optional
Instructions
Instructions
- Preheat the oven to 350°F. Line two baking sheets with parchment paper and set aside.
- In a small bowl, mix 1 tablespoon ground flax seed with 2 1/2 tablespoons water; let thicken for at least 5 minutes.
- In a large bowl, add 1 cup softened salted butter and 2/3 cup granulated sugar. Using a hand mixer or stand mixer, cream on medium speed until light and fluffy, about 2–3 minutes. Scrape down the sides of the bowl.
- Add the thickened flax mixture and 1 teaspoon vanilla to the butter mixture. Beat until incorporated, then scrape down the bowl again.
- Place a fine sieve over the bowl and sift in 2 cups all-purpose flour, 1/4 cup cocoa powder, and 1 teaspoon cornstarch. Use a spatula to fold and combine the sifted dry ingredients into the butter mixture until a thick, not very sticky dough forms.
- Fold 1/2 cup roughly chopped, dry toasted unsalted hazelnuts into the dough until evenly distributed.
- Using a 1 1/2-tablespoon scoop (or measure), portion the dough into 24 even balls. Roll each portion between your palms into a smooth ball and place 12 balls on each prepared baking sheet, spacing them about 2 inches apart.
- Fill a small bowl with water. Using a rounded 1-teaspoon measuring spoon (lightly dip the spoon in the water between each press to prevent sticking), press the center of each dough ball to form a thumbprint well about 1/4–1/2 inch deep.
- (Optional) If using the additional 1/4 cup chopped hazelnuts for coating, spread them on a plate and gently press the outer edge/top of each cookie into the nuts so pieces adhere. Return cookies to the baking sheet.
- Bake one sheet at a time (or both, rotating position halfway if your oven requires it) at 350°F for 10–12 minutes, until the bottom edges are set but not darkened.
- Remove the baking sheet to a wire rack. The cookies will puff in the oven; immediately press the centers again with the rounded 1-teaspoon to restore the wells. Let the cookies rest on the sheet for 10 minutes to firm up.
- Divide 1/3 cup chocolate hazelnut butter among the 24 cookies (about 2/3 teaspoon per cookie) and spoon it into each thumbprint. If using, place one halved hazelnut on top of each filled center, pressing lightly.
- Let cookies cool completely before transferring to an airtight container. Store at room temperature up to 3 days. Only fill the cookies you plan to eat immediately if you will need to stack them, to avoid sticking.
Notes
Hazelnuts:I prefer to buy my hazelnuts pre-toasted. If you have raw hazelnuts, place them on a medium baking sheet and roast in a 350F oven for 10 to 12 minutes until golden. Let the nuts cool to a comfortable temperature before chopping.
Gluten-Free:I have only tested this recipe willall-purpose flour, but think it should work well with a 1:1 all-purpose gluten-free flour blend as well Butter: If you are using unsalted butter (or refined coconut oil) add 1/2 teaspoon of kosher salt to the dry ingredients after you sift them into the bowl in step 3.
Make-Ahead:You can prepare the cookie dough up to 3 days in advance before baking. Proceed with the recipe up to step 4, then cover the dough tightly with plastic wrap. Store in the fridge until you are ready to use; let the dough sit on the counter for around 30 minutes to soften before you form the cookies and proceed with the recipe.