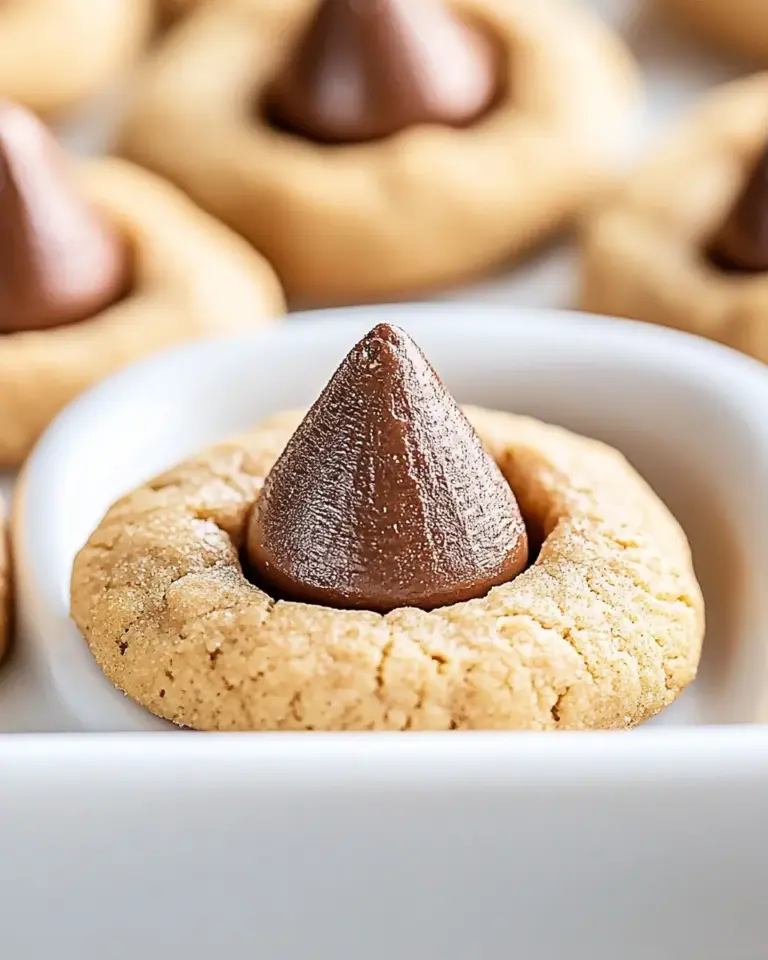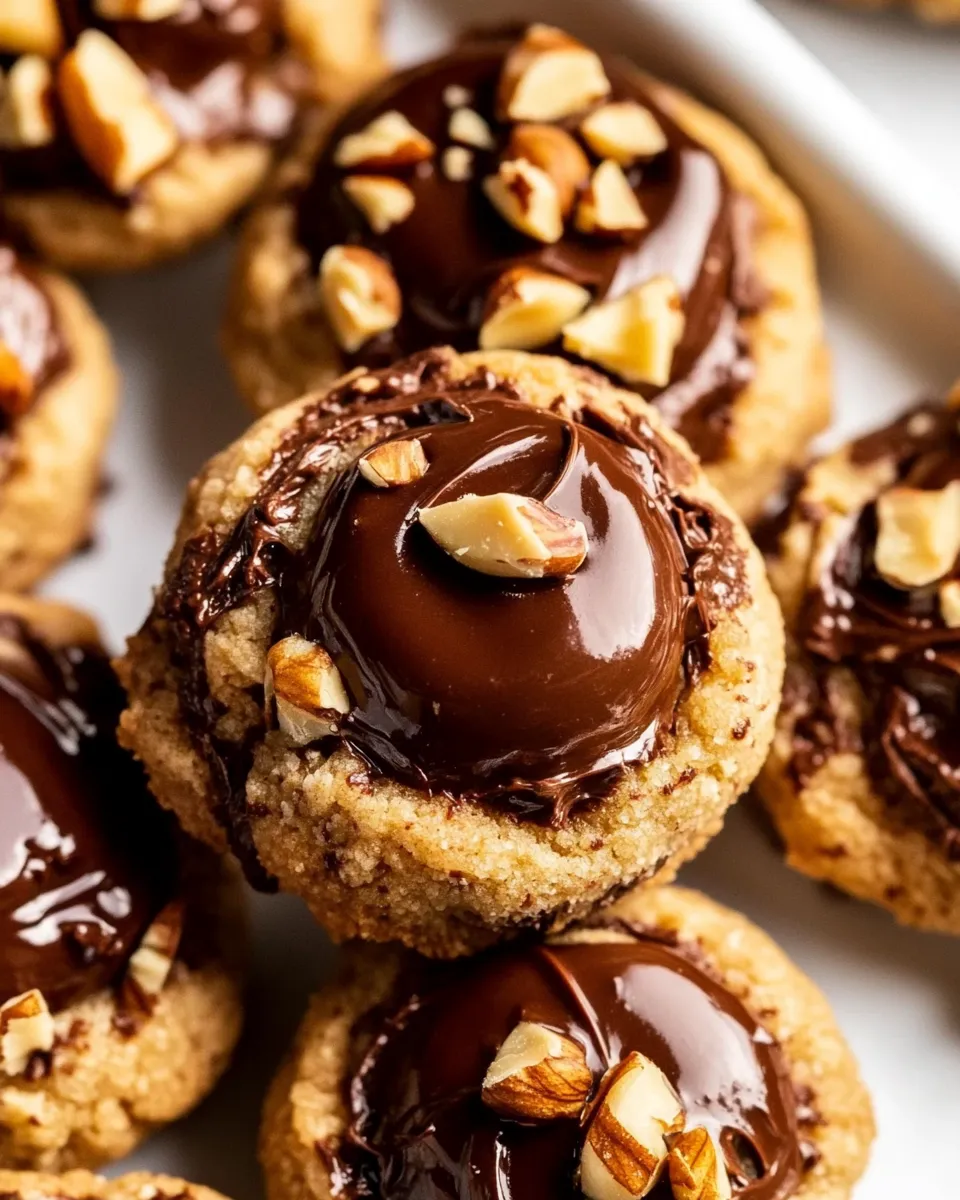
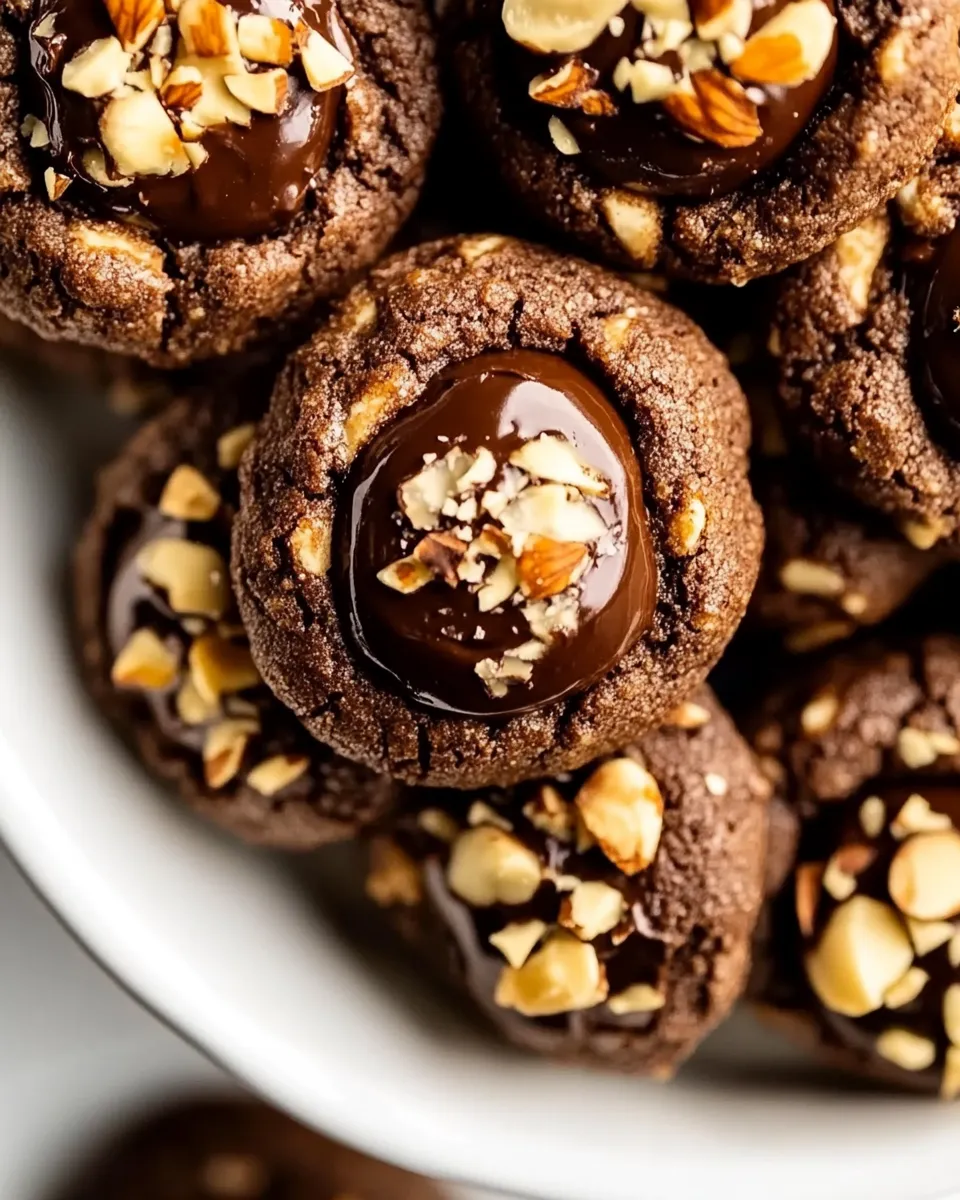
These chocolate hazelnut thumbprint cookies are the kind of recipe I turn to when I want small, perfectly portioned cookies that still feel special. They combine buttery cookie, a whisper of cocoa, crunchy toasted hazelnuts, and a glossy dollop of chocolate hazelnut butter at the center. The texture is tender with a nutty bite around the edges — simple mechanics, satisfying results.
I love that the dough is straightforward to make and forgiving to handle. You cream butter and sugar, fold in dry ingredients, add toasted hazelnuts, then portion and press centers. The assembly is quick and the bake time short, so you’ll be enjoying warm cookies the same day you make them.
No fancy equipment needed. A scoop, a teaspoon, a baking sheet, and a jar of chocolate hazelnut butter are all you really need. The tips and troubleshooting below will help avoid the few common pitfalls — cracked edges, flat cookies, or fillings that don’t sit pretty — so you get uniform, crowd-pleasing results every time.
Ingredient Breakdown
Ingredients
- 1 cup salted butter (softened) — provides fat and structure; using salted butter adds a touch of seasoning in the dough.
- 2/3 cup granulated sugar — sweetens and helps create a tender crumb when creamed with the butter.
- 1 tablespoon ground flax seed — adds a bit of texture and nutty flavor; it also helps bind slightly.
- 1 teaspoon vanilla — flavor enhancer; use pure vanilla for the best depth.
- 2 cups all-purpose flour (spooned and leveled) — the base of the dough; spooning and leveling ensures accurate measurement.
- 1/4 cup cocoa powder — deepens chocolate flavor and gives the cookie its cocoa backbone.
- 1 teaspoon cornstarch — lightens the texture and helps keep the cookies tender.
- 1/2 cup dry toasted and unsalted hazelnuts (roughly chopped) — folded into the dough for crunch and flavor; toasting amplifies the nutty aroma.
- 1/4 cup additional but optional dry toasted and unsalted hazelnuts (roughly chopped; for sprinkling on the cookies) — optional rim garnish that adds visual appeal and extra crunch.
- 1/3 cup chocolate hazelnut butter (homemade or store-bought) — the filling; rich, spreadable, and the flavor focal point of each cookie.
- 12–15 hazelnuts cut in half (optional) — optional garnish to nestle on top of the filling for a finished look.
Build Chocolate Hazelnut Thumbprint Cookies Step by Step
- Preheat the oven to 350°F. Line two baking sheets with parchment paper and set aside.
- In a large mixing bowl, add 1 cup salted butter (softened) and 2/3 cup granulated sugar. Use a hand mixer or stand mixer to cream them together until light and fluffy, about 2 to 3 minutes. Scrape down the sides of the bowl.
- Add 1 tablespoon ground flax seed and 1 teaspoon vanilla to the creamed butter and sugar. Mix until incorporated and scrape down the bowl once more.
- Place a fine sieve over the bowl and sift in 2 cups all-purpose flour (spooned and leveled), 1/4 cup cocoa powder, and 1 teaspoon cornstarch. Use a spatula to fold the dry ingredients into the butter mixture until a thick dough forms. The dough may look shaggy at first but should come together into a non-sticky, firm dough.
- Fold 1/2 cup dry toasted and unsalted hazelnuts (roughly chopped) into the dough until evenly distributed.
- Using a 1 1/2-tablespoon scoop (or measuring spoon), portion the dough into 24 even balls. Roll each portion between your palms into a smooth ball and place 12 dough balls on each prepared baking sheet, spacing them evenly.
- Use a rounded 1-teaspoon measuring spoon to press an indentation into the center of each dough ball to form the “thumbprint.” Press firmly but not all the way through so each cookie has a well for the filling. If the spoon sticks, wipe it with a clean dry towel between presses.
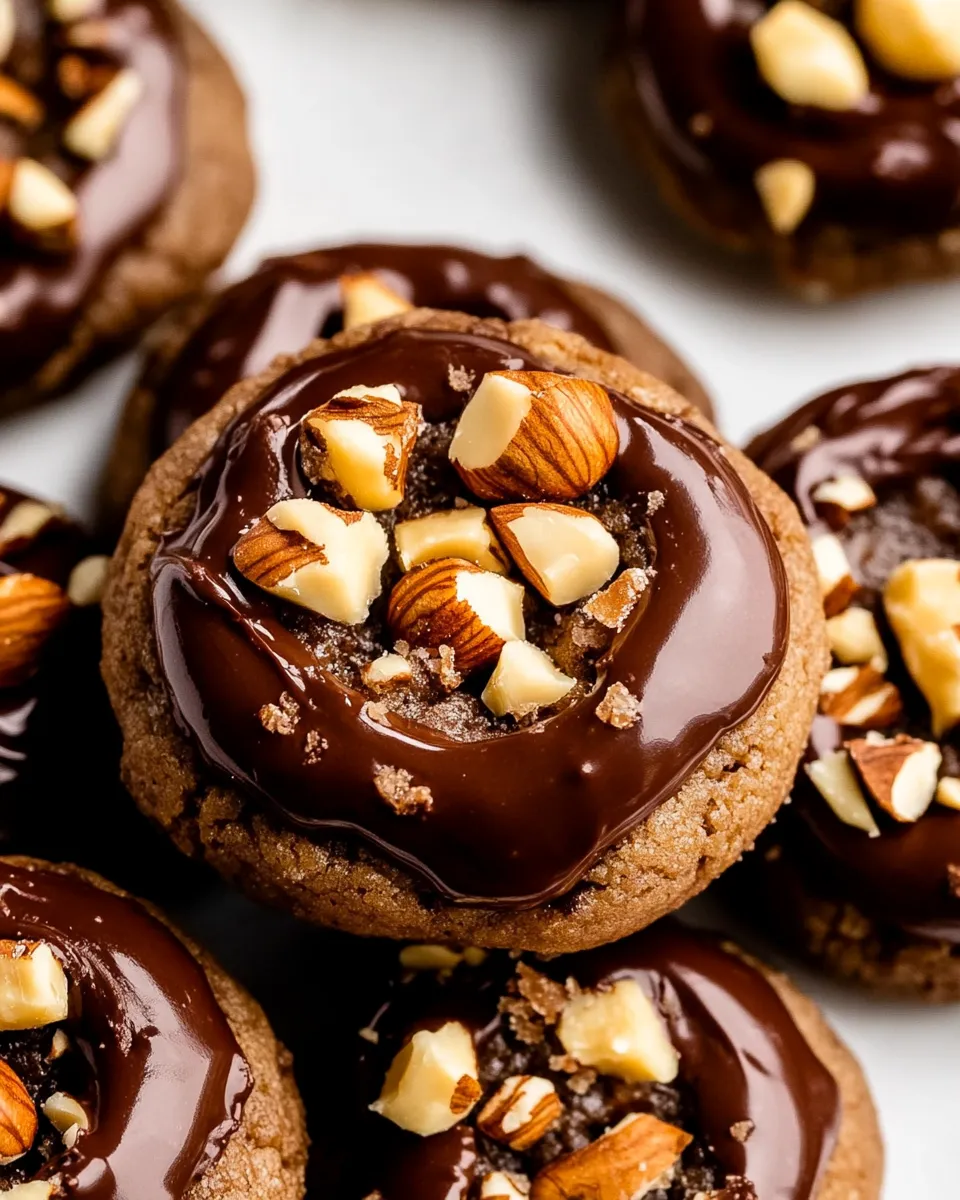
- (Optional) Spread the remaining 1/4 cup additional dry toasted and unsalted hazelnuts (roughly chopped) across a large plate. Gently press the outer edge of each cookie into the chopped hazelnuts so pieces adhere around the rim, then return cookies to the baking sheet.
- Bake one sheet at a time (or both if they fit and bake evenly) for 10 to 12 minutes, until the bottom edges have set but are not darkened.
- Remove the baking sheet from the oven. The cookie centers may have puffed; use the same rounded 1-teaspoon measuring spoon to press each center again to restore the indentations.
- Let the cookies cool on the baking sheet for 10 minutes to firm up.
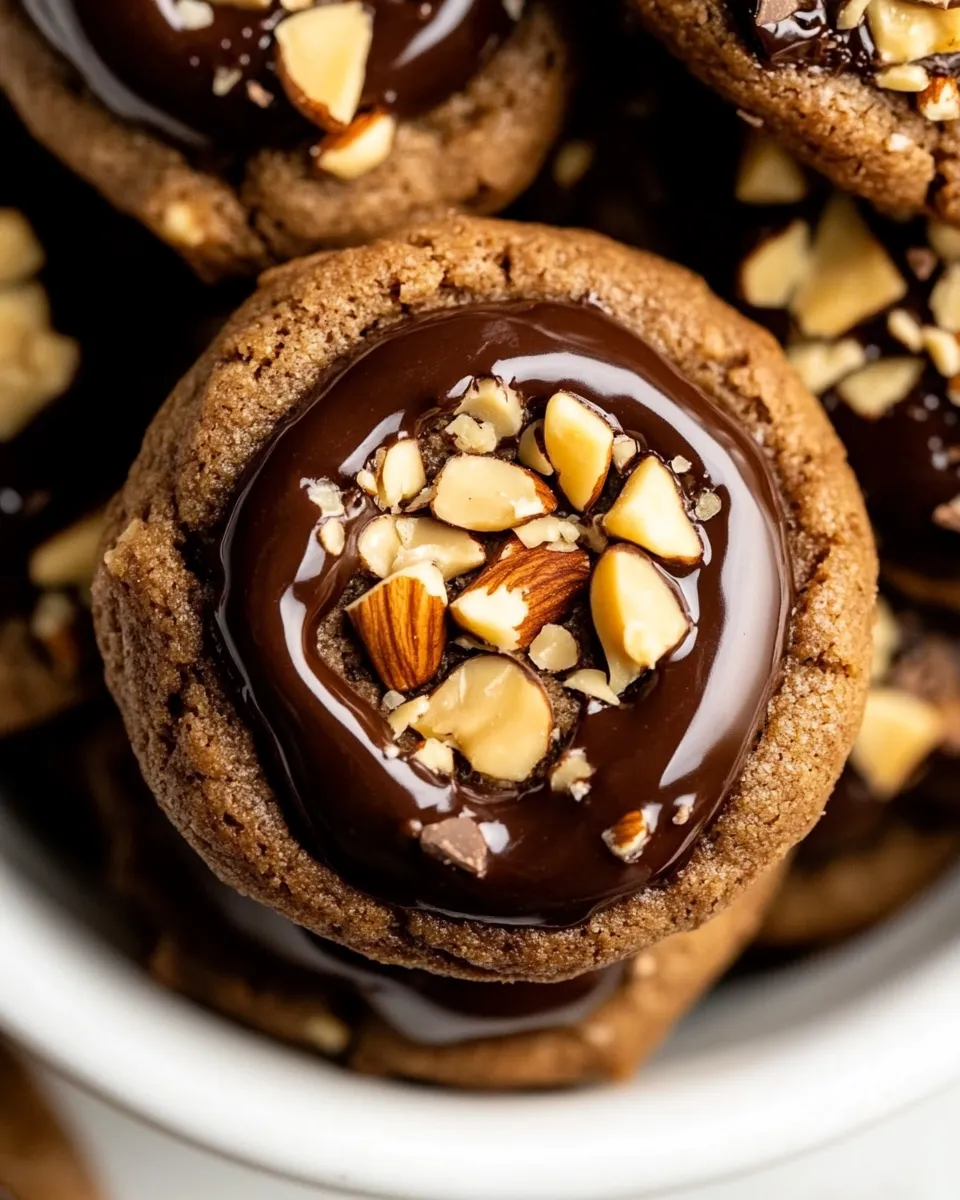
- Divide the 1/3 cup chocolate hazelnut butter among the 24 cookies (about 2/3 teaspoon per cookie) and spoon it into each cookie’s center. If using, place one halved hazelnut (from the 12–15 hazelnuts cut in half) into the center of each filled cookie.
- Let cookies cool completely before transferring to an airtight container. Store at room temperature for up to 3 days. Note: fill only the cookies you plan to eat soon, as filled cookies can stick together if stacked.
Why Cooks Rave About It
These cookies balance simplicity and indulgence. The base cookie is humble — just butter, sugar, flour, and cocoa — but the toasted hazelnuts and chocolate hazelnut butter lift it into something memorable. Texture matters here: the cookie is tender, the chopped hazelnuts add crunch, and the filling gives a smooth, spreadable contrast.
They’re also flexible. The dough is sturdy enough to hold a well, forgiving when pressed, and slices cleanly for making ahead. The portion size makes them ideal for parties or for packing in lunches. And they look thoughtful without extra fuss: the little nest of glossy chocolate hazelnut butter framed by nutty edges feels festive.
Finally, they’re approachable. No tempering chocolate, no rolling out dough, no special skills. A standard mixer and a few measured steps produce bakery-worthy results at home.
If You’re Out Of…
Short on one ingredient? Here are practical swaps and notes that keep results close to the original while respecting the recipe’s intent.
- Salted butter — If you only have unsalted butter, use it and add a pinch (about 1/8 teaspoon) of table salt to the dough to round out flavor.
- Ground flax seed — It adds a subtle texture; if you don’t have it, omit it. The dough will still bind and behave similarly.
- Cocoa powder — Dutch-process will deepened flavor; natural cocoa gives a brighter chocolate note. Either works, but keep the quantity the same.
- Dry toasted hazelnuts — Toast other nuts (like almonds) in the same quantity if necessary, but note the flavor profile will change.
- Chocolate hazelnut butter — A plain chocolate spread will work in a pinch; the hazelnut element is what makes these unique, so try to use a hazelnut-based spread when possible.
What’s in the Gear List
Minimal tools make this recipe approachable. Here’s what I reach for.
- Stand mixer or hand mixer — for creaming butter and sugar until light.
- Large mixing bowl — to combine wet and dry elements.
- Fine sieve — for sifting flour and cocoa to avoid lumps.
- 1 1/2-tablespoon scoop or measuring spoon and a rounded 1-teaspoon measuring spoon — for even portions and consistent thumbprints.
- Baking sheets and parchment paper — two sheets lined ensure even baking and easy cleanup.
- Spatula — to fold the dry ingredients into the butter mixture.
- Cutting board and knife — if you’re cutting hazelnuts in half for garnish.
What Not to Do
Make these mistakes and you’ll pay for them in cookie texture or appearance. Avoid the common traps below.
- Do not skip sifting the flour and cocoa. Lumps can lead to uneven mixing and dry pockets in the dough.
- Don’t over-press when making the thumbprint indentation. Press firmly to create a well, but stopping before you go all the way through preserves the cookie’s shape.
- Don’t fill the cookies while they’re still hot from the oven. Warm cookies make the filling run and can cause sticking when stacked.
- Avoid overbaking. Pull them when the bottom edges have set but are not darkened; they will firm up on the sheet as they rest.
- Don’t skip cooling for 10 minutes on the baking sheet. That brief rest stabilizes the cookie so the filling holds its shape.
Seasonal Serving Ideas
These thumbprints adapt well to seasonal tweaks without changing the base recipe.
- Winter: Serve slightly warmed and dusted with a tiny pinch of powdered sugar. Add a halved hazelnut on top for a festive look.
- Spring: Pair with a plate of fresh berries; the bright acidity cuts the richness.
- Summer: Chill the filled cookies briefly before serving for a cooler bite, or serve alongside vanilla ice cream.
- Autumn: Add a small pinch of cinnamon or orange zest to the chocolate hazelnut butter before filling for a cozy twist.
Notes on Ingredients
Use these notes to make informed choices and improve consistency.
- Measuring flour — Spoon and level the flour into the measuring cup rather than scooping directly; this prevents dense dough.
- Butter temperature — Softened butter (not melted) creams properly with sugar. If it’s too warm, the dough will be greasy and spread too much in the oven.
- Toasting hazelnuts — Toast them on a sheet at 350°F for 8–10 minutes or until fragrant, then cool before chopping. Toasting brings out oil and flavor.
- Chocolate hazelnut butter — If your spread is very thick, warm it slightly to make spooning easier. If it’s very runny, chill briefly before filling so it holds in the well.
Prep Ahead & Store
Make ahead options
You can prepare the dough, portion into balls, and keep them chilled on a parchment-lined tray covered with plastic wrap for up to 24 hours before pressing the thumbprints and baking. Alternatively, freeze the rolled balls on a tray for an hour, then transfer to a container and freeze for up to 1 month. Bake from frozen, adding an extra 2–3 minutes to the baking time and checking for set edges.
Storage
Unfilled cookies store best at room temperature in an airtight container for up to 3 days. If you fill them, only fill the number you plan to eat within 24 hours since the filling can cause cookies to stick together if stacked. For longer storage, keep unfilled cookies frozen for up to 1 month; thaw to room temperature before filling.
Troubleshooting Q&A
Short answers to common problems.
- Q: My cookies spread too much. A: Butter was likely too warm or you used more flour than measured. Chill the dough briefly before portioning and ensure butter is softened but not oily.
- Q: The thumbprints puff back up after baking. A: Press the centers again immediately after removing from the oven while the cookies are still warm. The recipe includes this step for a reason.
- Q: The filling is runny. A: Your chocolate hazelnut butter may be too warm; cool it briefly in the fridge before spooning. Also avoid filling while cookies are hot.
- Q: Cookies are dry. A: Overbaking or too much flour can dry them. Bake until edges are set but not browned, and measure flour correctly.
Final Bite
These Chocolate Hazelnut Thumbprint Cookies are dependable, approachable, and delicious. They look special enough for gifting and are simple enough for last-minute baking. The next time you want a cookie that balances tender cocoa dough, nutty crunch, and a glossy chocolate-hazelnut center, this recipe will deliver. Make a double batch — they disappear fast, and you’ll be glad you did.

Chocolate Hazelnut Thumbprint Cookies
Ingredients
Ingredients
- 1 cupsalted buttersoftened
- 1 tablespoonground flax seed
- 2/3 cupgranulated sugar
- 1 teaspoonvanilla
- 1 teaspooncornstarch
- 2 cupsall purpose flourspooned and leveled
- 1/4 cupcocoa powder
- 1/2 cupdry toasted and unsalted hazelnuts*roughly chopped
- 1/4 cupadditional but optional dry toasted and unsalted hazelnuts* roughly chopped; for sprinkling on the cookies
- 1/3 cupchocolate hazelnut butter*homemadeor store-bought
- 12-15 hazelnutscut in half optional
Instructions
Instructions
- Preheat the oven to 350°F. Line two baking sheets with parchment paper and set aside.
- In a large mixing bowl, add 1 cup salted butter (softened) and 2/3 cup granulated sugar. Use a hand mixer or stand mixer to cream them together until light and fluffy, about 2 to 3 minutes. Scrape down the sides of the bowl.
- Add 1 tablespoon ground flax seed and 1 teaspoon vanilla to the creamed butter and sugar. Mix until incorporated and scrape down the bowl once more.
- Place a fine sieve over the bowl and sift in 2 cups all-purpose flour (spooned and leveled), 1/4 cup cocoa powder, and 1 teaspoon cornstarch. Use a spatula to fold the dry ingredients into the butter mixture until a thick dough forms. The dough may look shaggy at first but should come together into a non-sticky, firm dough.
- Fold 1/2 cup dry toasted and unsalted hazelnuts (roughly chopped) into the dough until evenly distributed.
- Using a 1 1/2-tablespoon scoop (or measuring spoon), portion the dough into 24 even balls. Roll each portion between your palms into a smooth ball and place 12 dough balls on each prepared baking sheet, spacing them evenly.
- Use a rounded 1-teaspoon measuring spoon to press an indentation into the center of each dough ball to form the “thumbprint.” Press firmly but not all the way through so each cookie has a well for the filling. If the spoon sticks, wipe it with a clean dry towel between presses.
- (Optional) Spread the remaining 1/4 cup additional dry toasted and unsalted hazelnuts (roughly chopped) across a large plate. Gently press the outer edge of each cookie into the chopped hazelnuts so pieces adhere around the rim, then return cookies to the baking sheet.
- Bake one sheet at a time (or both if they fit and bake evenly) for 10 to 12 minutes, until the bottom edges have set but are not darkened.
- Remove the baking sheet from the oven. The cookie centers may have puffed; use the same rounded 1-teaspoon measuring spoon to press each center again to restore the indentations.
- Let the cookies cool on the baking sheet for 10 minutes to firm up.
- Divide the 1/3 cup chocolate hazelnut butter among the 24 cookies (about 2/3 teaspoon per cookie) and spoon it into each cookie’s center. If using, place one halved hazelnut (from the 12–15 hazelnuts cut in half) into the center of each filled cookie.
- Let cookies cool completely before transferring to an airtight container. Store at room temperature for up to 3 days. Note: fill only the cookies you plan to eat soon, as filled cookies can stick together if stacked.
Equipment
- Oven
- Baking Sheets
- Parchment Paper
- Large Mixing Bowl
- Hand mixer or stand mixer
- Fine sieve
- Spatula
- Measuring Spoons
- 1 1/2-tablespoon scoop or measuring spoon
Notes
Gluten-Free:I have only tested this recipe willall-purpose flour, but think it should work well with a 1:1 all-purpose gluten-free flour blend as well Butter: If you are using unsalted butter (or refined coconut oil) add 1/2 teaspoon of kosher salt to the dry ingredients after you sift them into the bowl in step 3.
Make-Ahead:You can prepare the cookie dough up to 3 days in advance before baking. Proceed with the recipe up to step 4, then cover the dough tightly with plastic wrap. Store in the fridge until you are ready to use; let the dough sit on the counter for around 30 minutes to soften before you form the cookies and proceed with the recipe.