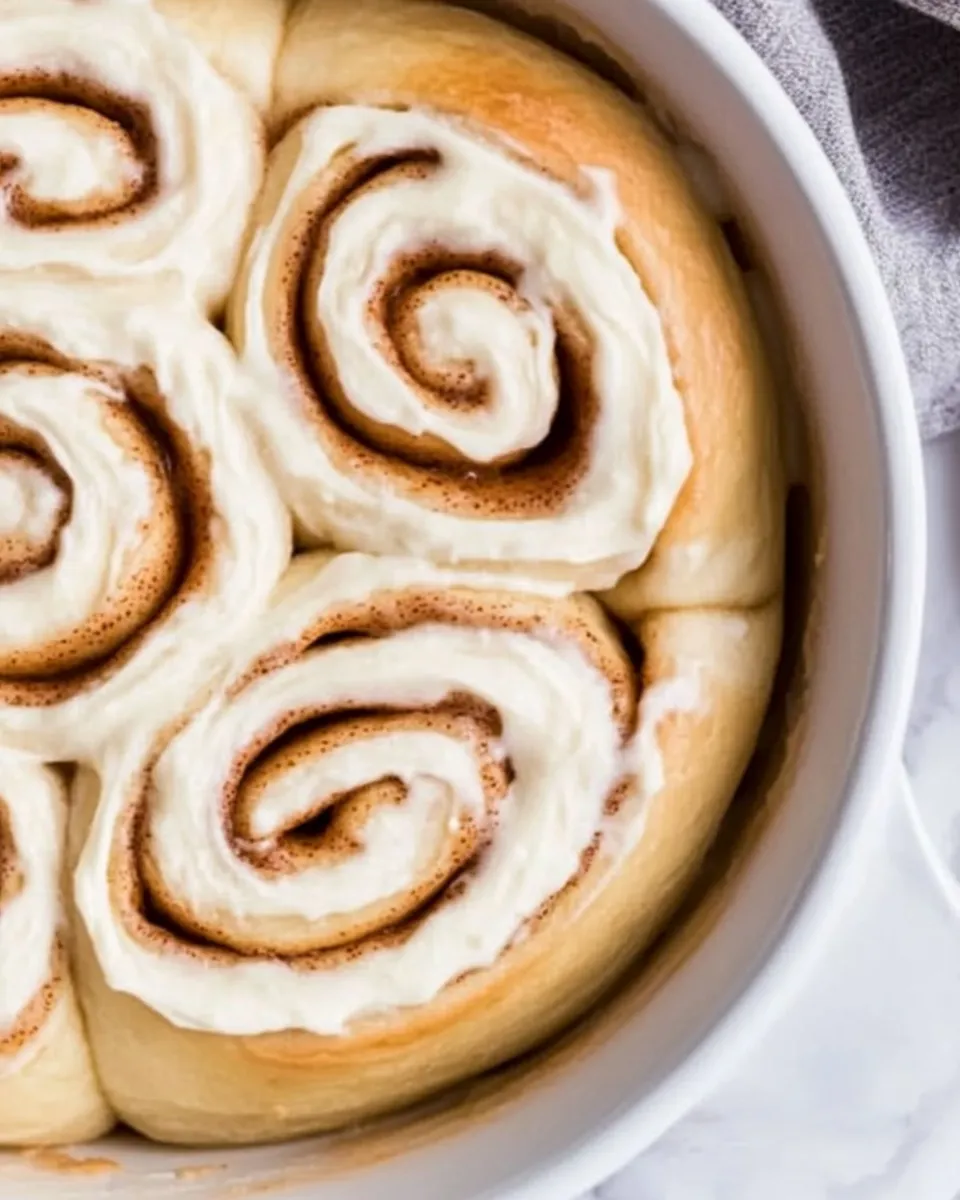
These buttermilk cinnamon rolls are exactly the kind of recipe I reach for when I want something comforting but not fussy. They rise nicely, bake up with tender layers, and the tang from the buttermilk keeps the sweetness balanced. The method is straightforward; most of the time is hands-off rising and a little patience.
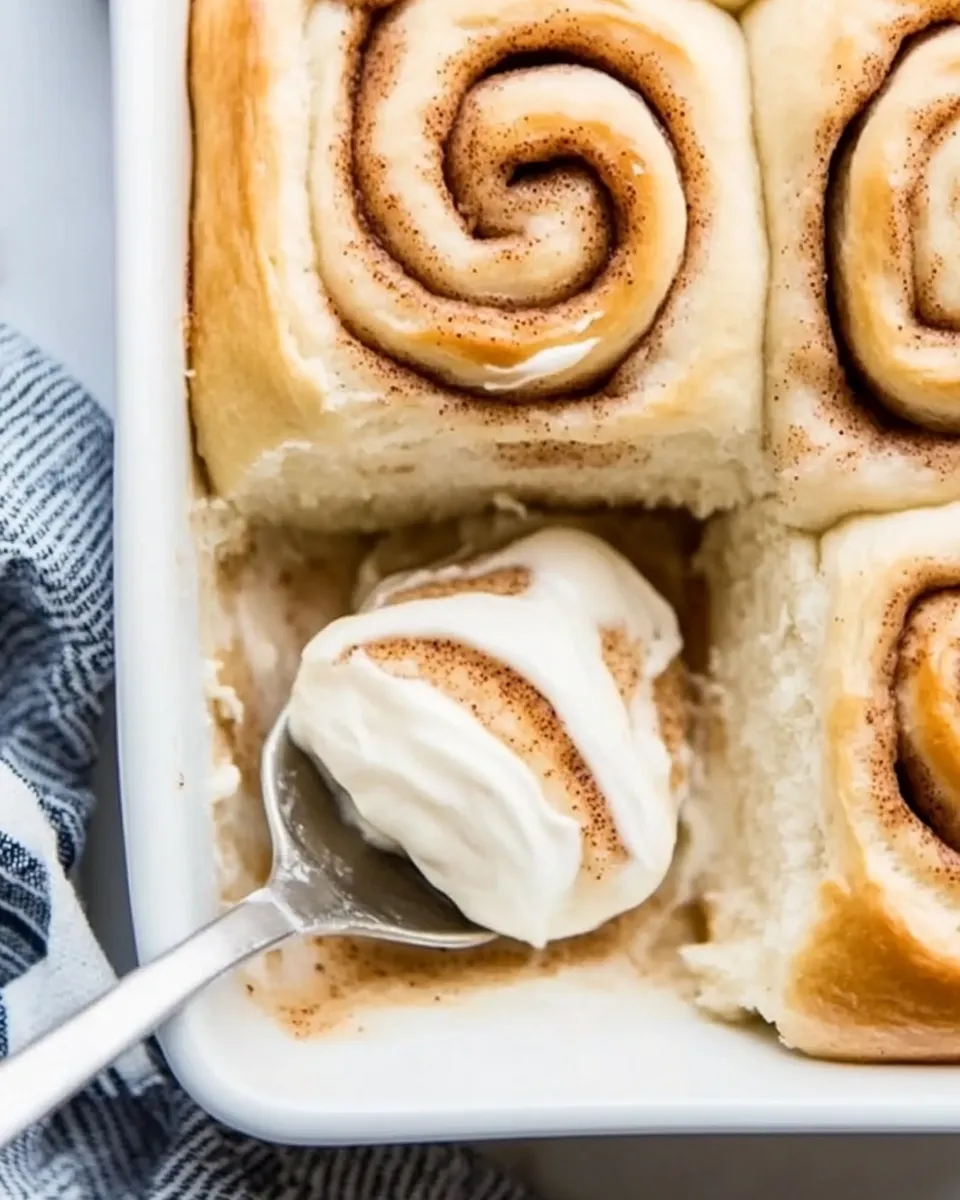
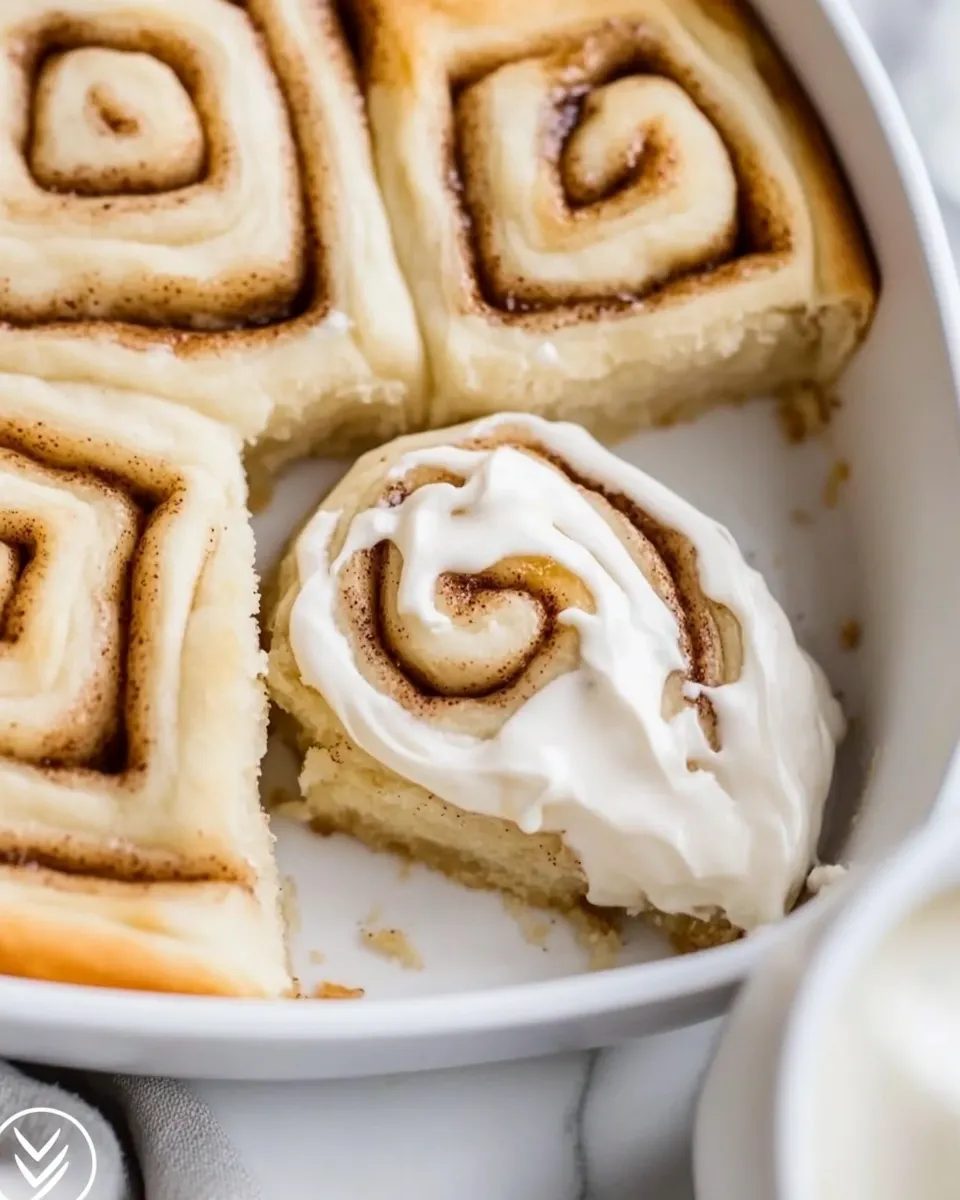
I like to think of this recipe as practical weekend baking: it rewards a little planning, and it also plays nicely with an overnight schedule if you want fresh rolls on demand. The cream cheese icing is smooth and tangy, and spooning it onto warm rolls is the only sticky business here worth the mess.
Below you’ll find the ingredient list used verbatim for the recipe, step-by-step directions exactly as written for reliable results, and a set of tips and alternatives to help you adapt the dough to your schedule or kitchen.
Ingredient Rundown
Before you dive in, a quick look at what each ingredient does will make the process feel less like guesswork. The buttermilk adds tang and acid that tenderize the gluten, instant yeast gives a predictable rise, and the combination of white and brown sugar balances structure and caramelized flavor. Butter appears in multiple places: in the dough for richness, in the filling for gooeyness, and in the icing for silkiness.
Flour and eggs build the framework of the rolls; salt controls fermentation and enhances flavor. The heavy cream or whole milk brushed on before baking helps the tops brown evenly. Finally, cream cheese and powdered sugar make a classic icing that melts into each swirl.
Ingredients
- 1c buttermilk, warmed to 90°F — activates the yeast gently and adds a subtle tang to the dough.
- 1 pack instant active yeast, (.25 oz or 2 ¼ tsp), (also called “rapid rise”) — leavening agent; hydrates in the warm buttermilk.
- 1/2c salted butter, very soft or somewhat melted — enriches the dough and keeps the crumb tender.
- 1/3c white sugar — feeds the yeast and adds a touch of sweetness to the dough base.
- 1/2 tsp salt — balances sweetness and tightens the dough’s structure.
- 2 large eggs — add richness, color, and structure to the dough.
- 4c all purpose flour, more as needed — the main structure; add sparingly if the dough is sticky.
- 1/4c heavy cream, for brushing the tops, or whole milk — promotes even browning and adds a bit of richness to the crust.
- 1/2c salted butter, very soft — for the filling; it melts with the sugar to create a gooey spiral.
- 1 1/4c brown sugar — gives the filling moisture and caramel notes.
- 2T cinnamon — the primary flavor in the filling; adjust to taste if you prefer a stronger or milder cinnamon presence.
- 5T salted butter, softened — for the cream cheese icing; it adds smoothness and sheen.
- 4oz cream cheese — gives the icing its tangy, silky body.
- 1 tsp vanilla extract — rounds and lifts flavor in the icing.
- 1 ½ – 2c powdered sugar — sweetens and thickens the icing; start with 1 ½ cups and add more to reach your desired consistency.
Cooking (Buttermilk Cinnamon Rolls): The Process
- Warm 1 cup buttermilk to no more than 90°F (use low heat on the stove or microwave in short bursts), then transfer it to the bowl of a stand mixer.
- Sprinkle 1 pack instant (rapid rise) yeast over the warmed buttermilk, whisk briefly, and let sit 5–10 minutes to hydrate. (Instant yeast may not produce a strong froth; if it does, fine—if not, proceed.)
- Add 2 large room-temperature eggs, 1/3 cup white sugar, and 1/2 cup salted butter (very soft or somewhat melted) to the mixer. Fit the paddle attachment and beat on medium until the mixture is smooth and combined. Small butter clumps are okay.
- Add 4 cups all-purpose flour and 1/2 teaspoon salt to the bowl and beat until incorporated. Replace the paddle with the dough hook.
- Knead on low speed with the dough hook for about 5–7 minutes. If the dough is very sticky and clings to the bowl, add more flour 1–2 tablespoons at a time. The finished dough should form a smooth, tacky but not sticky ball; add flour only as needed.
- Transfer the dough to a large bowl lightly coated with oil, turn once to coat, cover with a towel or plastic wrap, and let rise in a warm place until doubled in size (about 1 hour; you can use the warmed-oven trick — heat to 350°F for 2–3 minutes, turn oven off, then place dough inside to rise).
- While the dough rises, make the filling: combine 1/2 cup very softened salted butter, 1 1/4 cups brown sugar, and 2 tablespoons cinnamon until evenly mixed.
- When the dough has doubled, punch it down gently and turn it out onto a lightly floured surface. Press or shape the dough into a rough rectangle, then roll with a rolling pin to about 24 inches long by 16 inches wide (exact dimensions not critical).
- Use a rubber spatula to spread the filling evenly over the dough, leaving a 1/2-inch border along one long edge.
- Starting from the 24-inch side, roll the dough into a tight log (avoid rolling so tight that the centers will be compressed). Trim the ends if desired.
- Cut the log into rolls about 1 3/4 inches thick if you trimmed the ends, or about 2 inches thick if you did not. Use unflavored dental floss or a sharp knife for clean cuts.
- Place the cut rolls in a greased 9×13-inch baking pan, leaving a little space between them. Cover and proof in a warm place until the rolls are puffy and nearly doubled (about 30–60 minutes). If making an overnight version, cover and refrigerate the pan at this point.
- Preheat the oven to 350°F. While the oven preheats, brush the tops and sides of the rolls with 1/4 cup heavy cream (or whole milk).
- Bake the rolls at 350°F for about 20–25 minutes, checking at 20 minutes. They are done when the tops are golden brown and the center roll reads about 190–200°F, or when the center is no longer wet and doughy.
- While the rolls bake or after they come out, make the cream cheese icing: beat 5 tablespoons softened salted butter and 4 ounces cream cheese until smooth. Add 1 teaspoon vanilla extract and combine, then slowly beat in 1 1/2 to 2 cups powdered sugar until you reach your desired consistency.
- Let the baked rolls cool in the pan for 5–10 minutes. Spoon equal amounts of the cream cheese icing over each roll; allow the icing to sit a minute to soften, then spread to the edges with an offset spatula or knife.
- Serve warm. Store leftovers sealed at room temperature for 1–2 days or refrigerated for up to 5 days.
What Makes This Recipe Special
There are a few small choices in this recipe that yield big results. Warming the buttermilk to no more than 90°F gives the dough a gentle, reliable start without shocking the yeast. The use of salted butter in the dough and filling adds an extra layer of flavor that keeps the rolls from tasting flat.
The dual-sugar approach — white sugar in the dough and brown sugar in the filling — builds structure while delivering a caramelized, gooey interior. Finally, the light brush of cream or milk before baking promotes even browning so you get that classic golden domed top instead of a pale finish.
Low-Carb/Keto Alternatives

Classic cinnamon rolls rely on wheat flour and sugar for structure and caramelization, so low-carb swaps change texture considerably. If you need a lower-carb option, look for specialty low-carb dough products designed for yeast baking or try a recipe specifically formulated for almond or coconut flour; those recipes account for different hydration and require alternative binding ingredients. For the filling and icing, sugar substitutes formulated for baking can work, but expect a different mouthfeel and browning behavior.
In short: you can reduce carbs, but plan for a different result and follow a tested low-carb version rather than directly swapping ingredients at the same quantities.
Recommended Tools
- Stand mixer with paddle and dough hook — saves time and gives a consistent dough texture.
- Rolling pin — for rolling the dough evenly to about 24×16 inches.
- 9×13-inch baking pan — fits the rolls comfortably for even baking.
- Instant-read thermometer — useful to confirm the center roll reaches about 190–200°F.
- Offset spatula or knife — for spreading the icing cleanly.
- Unflavored dental floss (optional) — an easy way to slice neat rolls without squashing.
Easy-to-Miss Gotchas
- Buttermilk temperature: keep it at or below 90°F. Too hot and you risk killing the yeast or cooking the eggs you’ve added later.
- Instant yeast behavior: instant (rapid rise) yeast may not foam strongly. That’s normal; if it doesn’t bubble, continue with the recipe as written.
- Dough stickiness: the dough should be tacky, not sticky. Add flour 1–2 tablespoons at a time during kneading only if it clings excessively.
- Rolling too tight: rolling the log too tight compresses the center spirals, which can give dense centers; roll tight enough to hold the shape but not to crush the layers.
- Proofing space: allow room for the rolls to expand in the pan. Crowding them will delay proofing and change baking time.
- Baking doneness: watch the center roll. Surface color alone can be misleading — use temperature or cut into a center roll to confirm it’s not doughy.
Seasonal Adaptations
Cinnamon rolls adapt beautifully to the seasons. In fall, fold a handful of toasted chopped pecans into the filling for a toasty crunch or grate a bit of apple into the filling and drain excess moisture first. In winter, add orange zest to the icing for a bright contrast to the rich filling. Spring and summer call for lighter touches: a scattering of chopped fresh strawberries on the icing after it sets makes a pretty and flavorful garnish.
Stick to small additions so you don’t upset the dough’s moisture balance. Anything very wet needs to be reduced or cooked down before being added.
Chef’s Notes
Room temperature ingredients help the dough come together more easily and give a consistent rise. If you’re short on time, you can proof the rolls in a slightly warm oven (as described), but don’t use a hot oven — you only want a cozy environment, not a second bake.
For an overnight option: assemble the rolls through step 12, then cover tightly and refrigerate the pan. The slow, cold proof overnight develops flavor and allows you to bake freshly in the morning. Bring the pan back to room temperature for 20–30 minutes before preheating and brushing with cream.
Storage Pro Tips
Short-term (1–2 days)
Store cooled rolls sealed at room temperature in an airtight container. If you prefer chilled icing, refrigerate the pan loosely covered; bring to room temperature before warming briefly in a 300°F oven for 5–8 minutes to refresh.
Long-term (freezing)
Freeze undecorated rolls in the pan or wrapped tightly for up to 2 months. Thaw overnight in the refrigerator or at room temperature, then bake or reheat as needed. If already iced, set them on a tray to harden the icing slightly before wrapping, or freeze without icing and add fresh icing after reheating.
Handy Q&A
- Q: Can I use active dry yeast instead of instant?
A: Yes. If using active dry yeast, proof it in the warm buttermilk with a pinch of sugar until foamy before continuing, and allow extra time for the first rise. - Q: What if my filling leaks out while baking?
A: Excess filling can escape if the log was overfilled or the edges weren’t sealed. Trim and press the seam gently, and leave a small outer border when spreading the filling. - Q: How do I get gooey centers without underbaking?
A: Aim for the internal temperature target (190–200°F) and watch the center roll. If the tops brown too quickly, tent with foil for the last few minutes and rely on temp or center texture to check doneness.
Make It Tonight
If you want these tonight, start by warming the buttermilk and getting the dough mixed early evening. Allow about 2 hours total if you want them fresh from the oven: 15–20 minutes to mix and knead, roughly 1 hour for the first rise, 30–60 minutes for the proofed rolls, and 20–25 minutes to bake. Plan for the icing and a short cool-down before serving. If you’re tight on time, assemble the rolls and refrigerate them after step 12, then bake from chilled the next morning for fresh rolls without the evening rush.
These cinnamon rolls are forgiving and scalable. Follow the steps as written, pay attention to dough feel more than exact time, and you’ll have reliably tender, cinnamon-swirled rolls to share.
Buttermilk Cinnamon Rolls
Ingredients
Ingredients
- 1 cbuttermilk warmed to 90°F
- 1 pack instant active yeast (.25 oz or 2 1/4 tsp), (also called "rapid rise)
- 1/2 csalted butter very soft or somewhat melted
- 1/3 cwhite sugar
- 1/2 tspsalt
- 2 large eggs
- 4 call purpose flour more as needed
- 1/4 cheavy cream for brushing the tops, or whole milk
- 1/2 csalted butter very soft
- 1 1/4 cbrown sugar
- 2 Tcinnamon
- 5 Tsalted butter softened
- 4 ozcream cheese
- 1 tspvanilla extract
- 1 1/2 – 2 cpowdered sugar
Instructions
Instructions
- Warm 1 cup buttermilk to no more than 90°F (use low heat on the stove or microwave in short bursts), then transfer it to the bowl of a stand mixer.
- Sprinkle 1 pack instant (rapid rise) yeast over the warmed buttermilk, whisk briefly, and let sit 5–10 minutes to hydrate. (Instant yeast may not produce a strong froth; if it does, fine—if not, proceed.)
- Add 2 large room-temperature eggs, 1/3 cup white sugar, and 1/2 cup salted butter (very soft or somewhat melted) to the mixer. Fit the paddle attachment and beat on medium until the mixture is smooth and combined. Small butter clumps are okay.
- Add 4 cups all-purpose flour and 1/2 teaspoon salt to the bowl and beat until incorporated. Replace the paddle with the dough hook.
- Knead on low speed with the dough hook for about 5–7 minutes. If the dough is very sticky and clings to the bowl, add more flour 1–2 tablespoons at a time. The finished dough should form a smooth, tacky but not sticky ball; add flour only as needed.
- Transfer the dough to a large bowl lightly coated with oil, turn once to coat, cover with a towel or plastic wrap, and let rise in a warm place until doubled in size (about 1 hour; you can use the warmed-oven trick — heat to 350°F for 2–3 minutes, turn oven off, then place dough inside to rise).
- While the dough rises, make the filling: combine 1/2 cup very softened salted butter, 1 1/4 cups brown sugar, and 2 tablespoons cinnamon until evenly mixed.
- When the dough has doubled, punch it down gently and turn it out onto a lightly floured surface. Press or shape the dough into a rough rectangle, then roll with a rolling pin to about 24 inches long by 16 inches wide (exact dimensions not critical).
- Use a rubber spatula to spread the filling evenly over the dough, leaving a 1/2-inch border along one long edge.
- Starting from the 24-inch side, roll the dough into a tight log (avoid rolling so tight that the centers will be compressed). Trim the ends if desired.
- Cut the log into rolls about 1 3/4 inches thick if you trimmed the ends, or about 2 inches thick if you did not. Use unflavored dental floss or a sharp knife for clean cuts.
- Place the cut rolls in a greased 9×13-inch baking pan, leaving a little space between them. Cover and proof in a warm place until the rolls are puffy and nearly doubled (about 30–60 minutes). If making an overnight version, cover and refrigerate the pan at this point.
- Preheat the oven to 350°F. While the oven preheats, brush the tops and sides of the rolls with 1/4 cup heavy cream (or whole milk).
- Bake the rolls at 350°F for about 20–25 minutes, checking at 20 minutes. They are done when the tops are golden brown and the center roll reads about 190–200°F, or when the center is no longer wet and doughy.
- While the rolls bake or after they come out, make the cream cheese icing: beat 5 tablespoons softened salted butter and 4 ounces cream cheese until smooth. Add 1 teaspoon vanilla extract and combine, then slowly beat in 1 1/2 to 2 cups powdered sugar until you reach your desired consistency.
- Let the baked rolls cool in the pan for 5–10 minutes. Spoon equal amounts of the cream cheese icing over each roll; allow the icing to sit a minute to soften, then spread to the edges with an offset spatula or knife.
- Serve warm. Store leftovers sealed at room temperature for 1–2 days or refrigerated for up to 5 days.
Equipment
- Stand mixer
- paddle attachment
- dough hook
- Large Bowl
- Rolling Pin
- Rubber spatula
- 9x13-inch baking pan
- Offset spatula
- Oven
- knife or unflavored dental floss
Notes
You can make this cinnamon roll dough without a stand mixer.It will take a bit more effort as you will have to knead the dough, but it is still perfectly doable. Knead the cinnamon roll dough until smooth and you can poke your finger into it without dough sticking to it. It should be a little tacky but not super sticky.
You can tent the cinnamon rolls with aluminum foil to avoid the tops getting too dark while baking.If you don’t want the tops of your rolls to be too browned, after about 12 minutes of baking, loosely tent a piece of foil over the cinnamon rolls and bake until done.
Depending on how cool your home is, the rise time for your dough may vary.Try to find a very warm spot in your house. A spot near a vent, in a warm (but not on) oven, or another cozy spot for the quickest time.