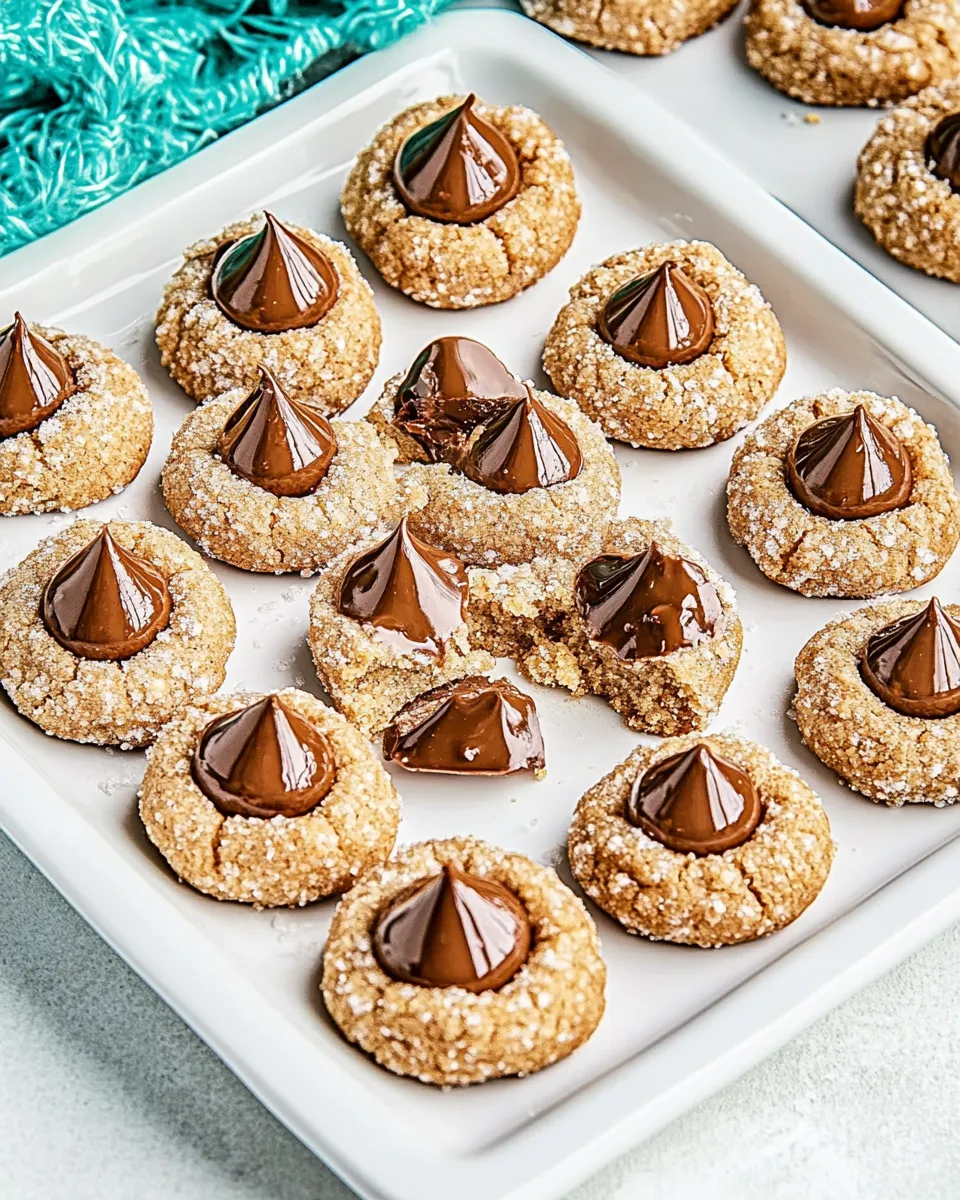
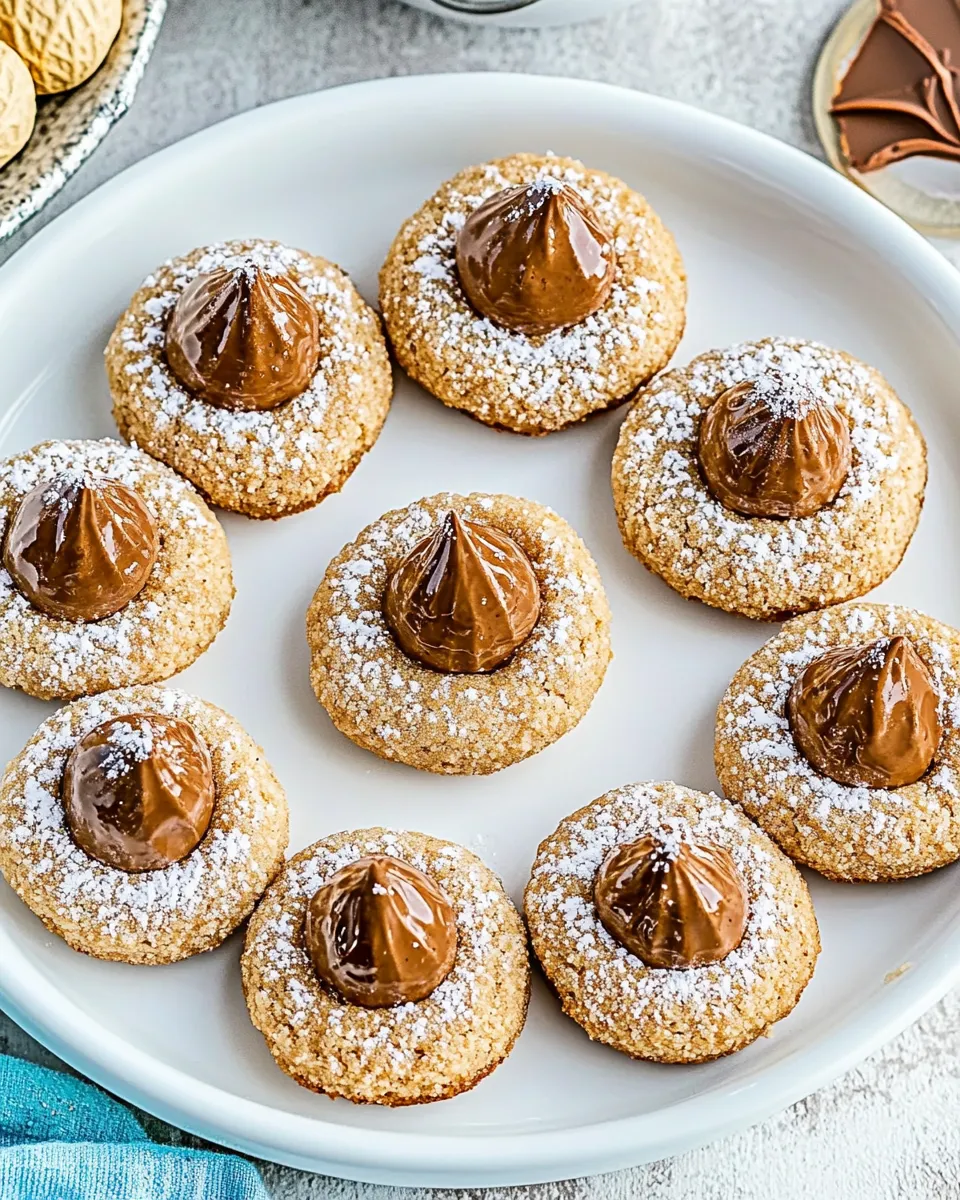
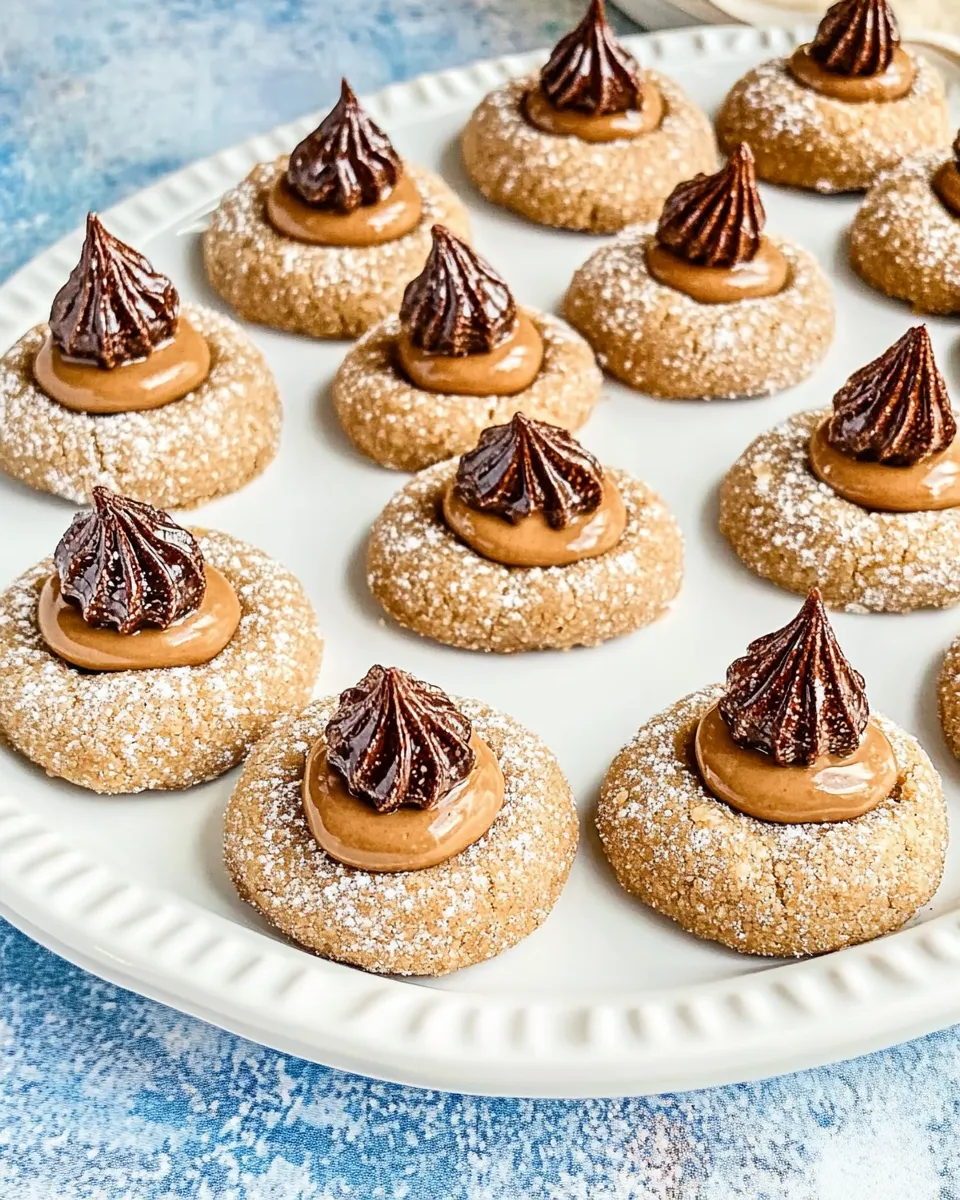
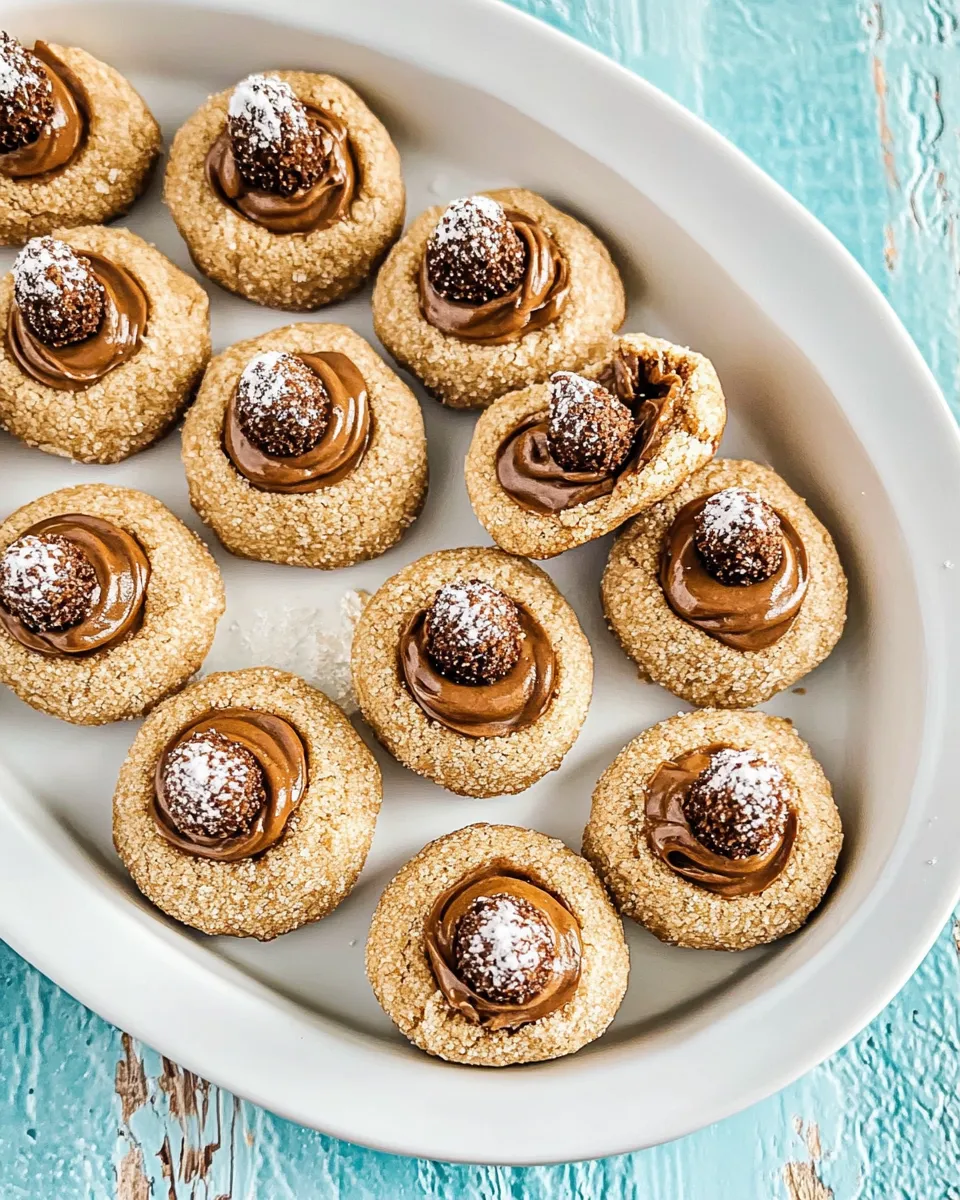
These peanut butter blossoms are the kind of cookie I return to again and again. They bake quickly, store well, and deliver that perfect combo of soft peanut butter cookie and a melty chocolate center. No fuss, just reliable comfort that disappears fast at holiday gatherings and weekday coffee breaks alike.
I like to keep the process straightforward: measure precisely, chill if you want thicker cookies, and top with the Kiss while they’re still warm. The result is glossy, crinkled tops and a soft center that holds the chocolate without turning greasy.
Shopping List
Ingredients
- 1/2 cup butter, softened — provides richness and tender texture; bring to room temp so it creams smoothly.
- 1/2 cup peanut butter — the main flavor; creamy or crunchy works, but creamy gives a more uniform dough.
- 1 cup granulated sugar, divided — 1/2 cup for the dough and 1/2 cup reserved for rolling; the reserved sugar gives a sparkly exterior.
- 1/2 cup light brown sugar — adds moisture and depth of flavor; pack gently when measuring.
- 1 large egg — binds and adds lift; use a fresh egg at room temperature for best incorporation.
- 1 tablespoon milk — loosens the dough slightly so it stays tender.
- 1 teaspoon vanilla extract — rounds and enhances the peanut butter flavor.
- 1 3/4 cups all-purpose flour — the structure; spoon and level the flour to avoid a dry dough.
- 1 teaspoon baking soda — the leavening agent; measure carefully for consistent rise.
- 1/2 teaspoon salt — balances sweetness and sharpens flavors.
- 48 Hershey’s Kisses, unwrapped — the signature chocolate center; unwrap before baking so you can press them in quickly.
Peanut Butter Blossoms Cooking Guide
- If you will not chill the dough, preheat the oven to 375°F (190°C). If you plan to chill the dough, wait to preheat until you remove the dough from the refrigerator.
- In a large bowl, combine 1/2 cup softened butter, 1/2 cup peanut butter, 1/2 cup of the granulated sugar (reserve the remaining 1/2 cup for rolling) and 1/2 cup light brown sugar. Cream with an electric mixer for 2–3 minutes, until light and fluffy.
- Add 1 large egg, 1 tablespoon milk and 1 teaspoon vanilla extract to the butter mixture and beat just until combined.
- Add 1 3/4 cups all-purpose flour, 1 teaspoon baking soda and 1/2 teaspoon salt. Stir with a spoon or low-speed mixer until the flour is absorbed and the dough is uniform. Do not overmix.
- OPTIONAL: Cover the dough and chill in the refrigerator for 1 hour to reduce spreading and deepen flavor. If chilling, remove dough from the refrigerator and then preheat the oven to 375°F (190°C).
- Divide the dough into four equal portions. From each portion, roll twelve 1-inch balls (48 total). Pour the reserved 1/2 cup granulated sugar into a small bowl and roll each dough ball in the sugar to coat.
- Arrange the sugared dough balls on a baking sheet (lined with parchment or lightly greased if desired) at least 2 inches apart.
- Bake the cookies for 6–8 minutes, until they begin to puff and the edges are set but not deeply browned.
- Remove the baking sheet from the oven. Working quickly, gently press one unwrapped Hershey’s Kiss into the center of each cookie. Return the baking sheet to the oven and bake 2 additional minutes, until the cookies are light golden brown.
- Remove the baking sheet from the oven and let the cookies cool on the pan for about 2 minutes. Transfer the cookies to a wire rack to cool completely.
- Once cooled, store the cookies in an airtight container.
Why This Recipe Is Reliable
The formula here balances fat, sugar, and leavening so the cookies spread just enough and stay tender. The combination of butter and peanut butter gives a moist crumb and a toasty flavor that stands up to the chocolate Hershey’s Kiss. By offering an optional chill step, the recipe adapts to both quick baking sessions and more deliberate prep—chill for thicker, chewier cookies or skip chilling for a faster batch.
The baking times are short, which helps keep centers soft while the edges set. The reserved granulated sugar for rolling does double duty: it prevents a sticky exterior and creates that classic glossy sparkle. These elements make the recipe forgiving even if your oven runs a bit hot or cool.
Ingredient Swaps & Substitutions
Want to tweak this to match pantry staples or dietary needs? Here are practical swaps that keep the spirit of the cookie.
- Peanut butter: Sunflower seed butter or another nut butter can replace peanut butter cup-for-cup. Note: flavor and oil content vary, which can slightly change texture.
- Butter: Stick butter is preferable for texture. If you must, use an equal amount of margarine, but expect a slightly different mouthfeel.
- Granulated sugar: You can try a 1:1 swap with coconut sugar, but color and flavor will be darker and more caramel-like.
- Brown sugar: Use dark brown sugar for deeper molasses notes; light brown is milder.
- Milk: Any dairy or non-dairy milk works in the tablespoon amount; almond or oat milk are fine.
- Hershey’s Kisses: Mini chocolate candies or a small piece of chocolate bar will work, but unwrapped Kisses are sized perfectly for the cookie.
Equipment at a Glance
Keep the tools simple. The right equipment makes the job easier and the results consistent.
- Electric mixer (hand or stand) — creaming butter and sugars evenly saves time and gives consistent lift.
- Mixing bowls — at least one large bowl for dough assembly.
- Spoon or rubber spatula — for folding in flour without overmixing.
- Baking sheet(s) — sturdy sheets that conduct heat evenly.
- Parchment paper or silicone mat — optional, but helps prevent sticking and simplifies cleanup.
- Wire rack — for cooling so bottoms don’t get soggy.
- Measuring cups and spoons — accurate dry and liquid measuring is key.
Slip-Ups to Skip
Small mistakes can change texture fast. Here’s what to watch for.
- Don’t overmix after you add the flour. Overworked dough makes dense, tough cookies.
- Don’t press the chocolate into a cookie that’s already cooled. The Kiss needs warmth to soften and stick, so work quickly right out of the oven.
- Don’t skip rolling in the reserved sugar. It’s not decorative only; it reduces stickiness and produces that classic look.
- Avoid using straight-from-the-fridge butter unless the recipe calls for creaming cold butter—softened butter blends more evenly with peanut butter and sugar.
- Don’t crowd the baking sheet. Cookies at least 2 inches apart bake evenly and retain shape.
Warm & Cool Weather Spins
Temperature matters for dough behavior. Here’s how to adapt.
- Warm kitchens: Dough will be softer and may spread more. Chill the dough for 30–60 minutes before rolling if your kitchen is above 75°F (24°C).
- Cold kitchens or winter: If your home is chilly, let the dough sit at room temperature 10–15 minutes to soften slightly for easy rolling. Don’t heat it; you don’t want it greasy.
- High humidity: Sugar can clump and flour can absorb more moisture. Measure flour carefully and consider adding it a tablespoon at a time if the dough seems too soft.
Cook’s Notes
Texture control
If you prefer a higher rise and chewier interior, chill the dough for an hour before scooping. For thinner, crisper edges, skip chilling and bake immediately.
Chocolate placement
Press the Hershey’s Kiss gently but firmly; don’t push it down to the pan. The goal is for it to nest in the top without flattening the cookie. If your Kisses are very cold, warm them briefly in your hands for easier pressing.
Batch timing
Bake similar-sized dough balls together to keep timing consistent. If you must mix sizes, remove smaller cookies earlier to avoid overbaking.
Make-Ahead & Storage
These cookies store well, which makes them great for hosting or gifting.
- Make-ahead dough: The dough can be chilled, covered, for up to 24 hours. Bring it out and let it soften slightly before rolling.
- Freezing dough balls: Roll the dough into balls, freeze on a sheet until firm, then transfer to a labeled freezer bag for up to 3 months. Bake from frozen—add a minute or two to baking time and press the Kiss in after the initial bake as directed.
- Cooked cookies: Store at room temperature in an airtight container layered with parchment for up to 5 days. For longer storage, freeze fully cooled cookies in a single layer, then pack; thaw at room temperature before serving.
Peanut Butter Blossoms Q&A
Why did my cookies flatten too much?
Likely causes: dough was too warm (butter/peanut butter melted), or you skipped chilling in a warm kitchen. Chill the dough for 30–60 minutes next time or bake with cooler dough.
How can I get the Kiss to stay shiny and centered?
Press the Kiss in immediately after the initial bake while the cookie surface is still soft. If the Kiss is too cold, it can crack or not meld; warm it slightly first.
Can I use natural peanut butter?
Yes, but natural peanut butter often contains separated oil and can make the dough looser. Stir thoroughly and measure after mixing. You may need a short chill before rolling.
Do I have to use Hershey’s Kisses?
No. Small chocolate discs, wrapped mini chocolates (unwrapped before pressing), or pieces of chocolate bars work. Keep in mind size differences will change the finished look.
Bring It to the Table
Serve these on a simple platter lined with parchment or a festive tin for gifting. They pair beautifully with milk, coffee, or tea. If you’re making them for a party, stagger warm batches so guests get freshly baked cookies during the event.
For a finishing touch, scatter a few extra unwrapped Kisses in a separate bowl so guests can pick their favorite. Or line up a small plate of holiday sprinkles for kids to press lightly onto the cookie before the Kiss sets—just be ready for very enthusiastic decorating.
These peanut butter blossoms are quiet crowd-pleasers. They demand minimal hands-on time, store well, and travel without fuss. Make a double batch; you’ll thank me when they vanish in minutes.

Peanut Butter Blossoms Recipe
Ingredients
Ingredients
- 1/2 cupbuttersoftened
- 1/2 cuppeanut butter
- 1 cupgranulated sugardivded
- 1/2 cuplight brown sugar
- 1 largeegg
- 1 tablespoonmilk
- 1 teaspoonvanilla extract
- 1 3/4 cupsall purpose flour
- 1 teaspoonbaking soda
- 1/2 teaspoonsalt
- 48 Hershey's Kissesunwrapped
Instructions
Instructions
- If you will not chill the dough, preheat the oven to 375°F (190°C). If you plan to chill the dough, wait to preheat until you remove the dough from the refrigerator.
- In a large bowl, combine 1/2 cup softened butter, 1/2 cup peanut butter, 1/2 cup of the granulated sugar (reserve the remaining 1/2 cup for rolling) and 1/2 cup light brown sugar. Cream with an electric mixer for 2–3 minutes, until light and fluffy.
- Add 1 large egg, 1 tablespoon milk and 1 teaspoon vanilla extract to the butter mixture and beat just until combined.
- Add 1 3/4 cups all-purpose flour, 1 teaspoon baking soda and 1/2 teaspoon salt. Stir with a spoon or low-speed mixer until the flour is absorbed and the dough is uniform. Do not overmix.
- OPTIONAL: Cover the dough and chill in the refrigerator for 1 hour to reduce spreading and deepen flavor. If chilling, remove dough from the refrigerator and then preheat the oven to 375°F (190°C).
- Divide the dough into four equal portions. From each portion, roll twelve 1-inch balls (48 total). Pour the reserved 1/2 cup granulated sugar into a small bowl and roll each dough ball in the sugar to coat.
- Arrange the sugared dough balls on a baking sheet (lined with parchment or lightly greased if desired) at least 2 inches apart.
- Bake the cookies for 6–8 minutes, until they begin to puff and the edges are set but not deeply browned.
- Remove the baking sheet from the oven. Working quickly, gently press one unwrapped Hershey’s Kiss into the center of each cookie. Return the baking sheet to the oven and bake 2 additional minutes, until the cookies are light golden brown.
- Remove the baking sheet from the oven and let the cookies cool on the pan for about 2 minutes. Transfer the cookies to a wire rack to cool completely.
- Once cooled, store the cookies in an airtight container.
Equipment
- Large Bowl
- Electric Mixer
- Small Bowl
- Baking Sheet
- Parchment Paper
- Wire Rack
Notes
*If opting to chill the dough, which helps prevent spreading and gives the cookies an amazing flavor, do not preheat oven until ready to bake the cookies.
If you like your cookies gooey and soft, bake for 5 minutes, then place the Kisses on and bake for an additional 2 minutes. Then make sure to let them cool completely on the baking sheet before you attempt to remove them.
Cookies can be stored in an airtight container for 4-5 days, or frozen up to two months.