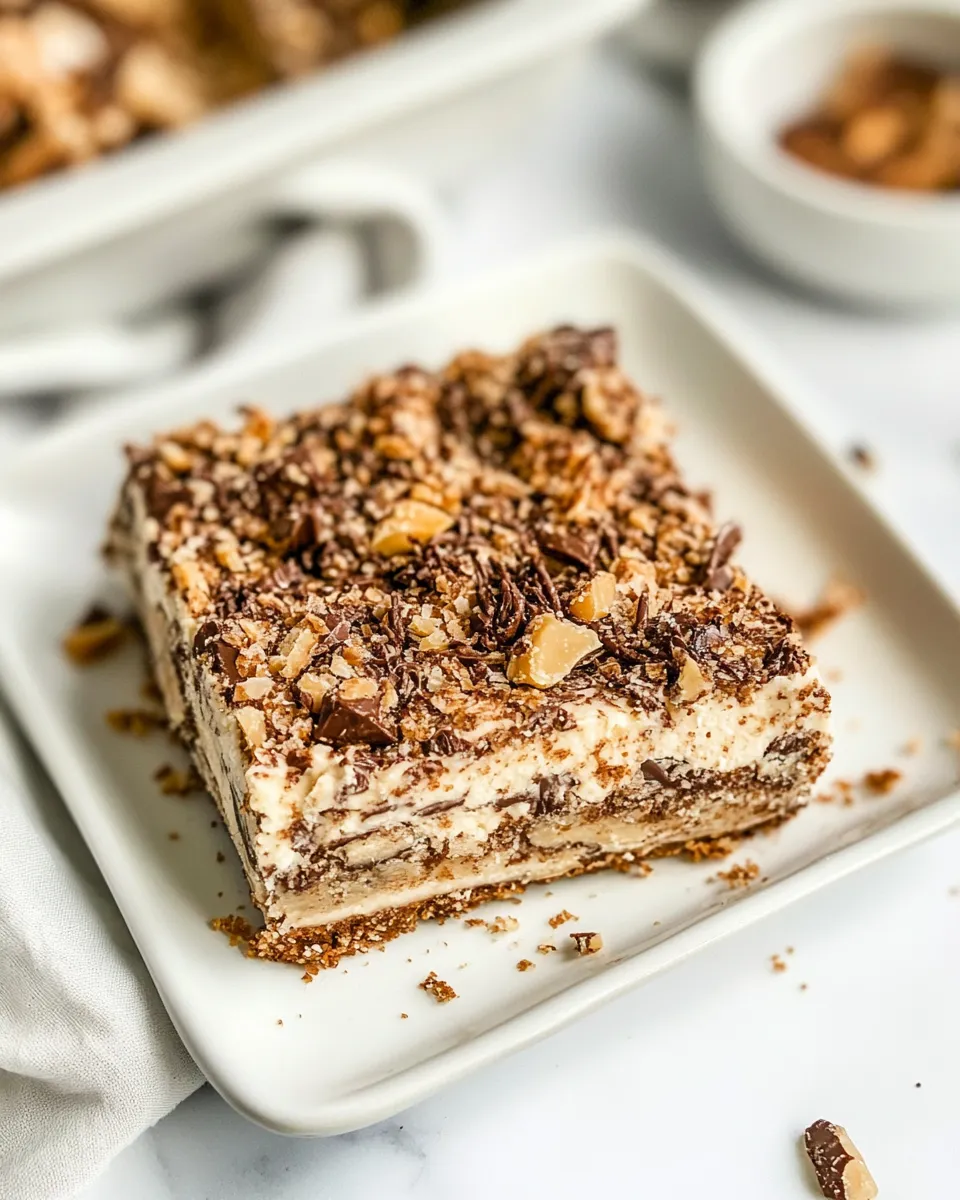
I fell for these the first time I baked them. They’re unapologetically rich, studded with crunchy Butterfinger pieces and topped with a peanut-butter frosting that’s silky and forgiving. If you like a bar that feels like a candy-bar in dessert form, this one will become a regular in your rotation.
The method is straightforward: a sturdy, buttery base loaded with chopped Butterfinger, baked until just set, then cooled and slathered with a creamy peanut-butter frosting. No tempering chocolate, no fancy techniques—just careful timing and simple mixing.
Below I walk you through everything you need: the exact ingredients, the step-by-step process (as written in the recipe), and practical tips for slicing, storing, and troubleshooting. Bring a 9×13 pan and a good oven mitt; I’ll handle the rest.
What You’ll Gather
This recipe uses pantry-basics plus a stash of Butterfinger “fun size” bars. The dough is forgiving but likes gentle handling once you add the flour. Prep your Butterfinger pieces ahead of time so the mix goes quickly when the wet and dry ingredients are ready.
Ingredients
- 1 cup butter — provides richness and structure to the base; use unsalted for control, salted if you like a touch more seasoning.
- 1 cup light brown sugar — adds moisture and a mild caramel note to the dough.
- 1/2 cup granulated sugar — balances the brown sugar for better texture and crisping.
- 1/2 teaspoon vanilla extract — lifts flavors in both the dough and frosting; adds depth.
- 2 large eggs — bind the dough and contribute to tender crumb.
- 2 1/2 cups all-purpose flour — the structure for the bars; measure accurately for consistent results.
- 1 teaspoon baking soda — gives a subtle lift so bars aren’t too dense.
- 1/2 teaspoon salt — balances sweetness and enhances flavor.
- 2 cups Butterfinger Bars — about 15 “fun size” bars, coarsely chopped — the crunch and signature flavor; chop coarsely so pieces remain noticeable.
- 3/4 cup creamy peanut butter — for the frosting; choose a smooth variety for a silky texture.
- 1/2 cup butter softened — combines with peanut butter to make a stable, spreadable frosting.
- 1/2 teaspoon vanilla extract — in the frosting; mirrors the vanilla in the base for continuity.
- 1 1/2 cups powdered sugar — sweetens and structures the frosting; sift if lumpy.
- 1-2 Tablespoons milk — adjusts frosting consistency; start with the lower amount and add as needed.
- 1/2 cup chopped butterfinger bits — about 4 “fun size” bars — reserved for topping so you get crunchy contrast on each bar.
Cooking (Butterfinger Bars): The Process
- Preheat the oven to 350°F (175°C). Lightly grease a 9×13-inch baking pan and set aside.
- Coarsely chop about 15 “fun size” Butterfinger bars to measure 2 cups. Separately chop about 4 “fun size” bars to measure 1/2 cup and reserve for topping.
- In a large mixing bowl, cream together 1 cup butter, 1 cup light brown sugar, and 1/2 cup granulated sugar until smooth and light. Add 1/2 teaspoon vanilla extract and 2 large eggs, and mix until combined.
- Add 2 1/2 cups all-purpose flour, 1 teaspoon baking soda, and 1/2 teaspoon salt. Mix on low speed (or stir) just until the dry ingredients are incorporated—do not overmix.
- Fold the 2 cups coarsely chopped Butterfinger pieces into the dough until evenly distributed.
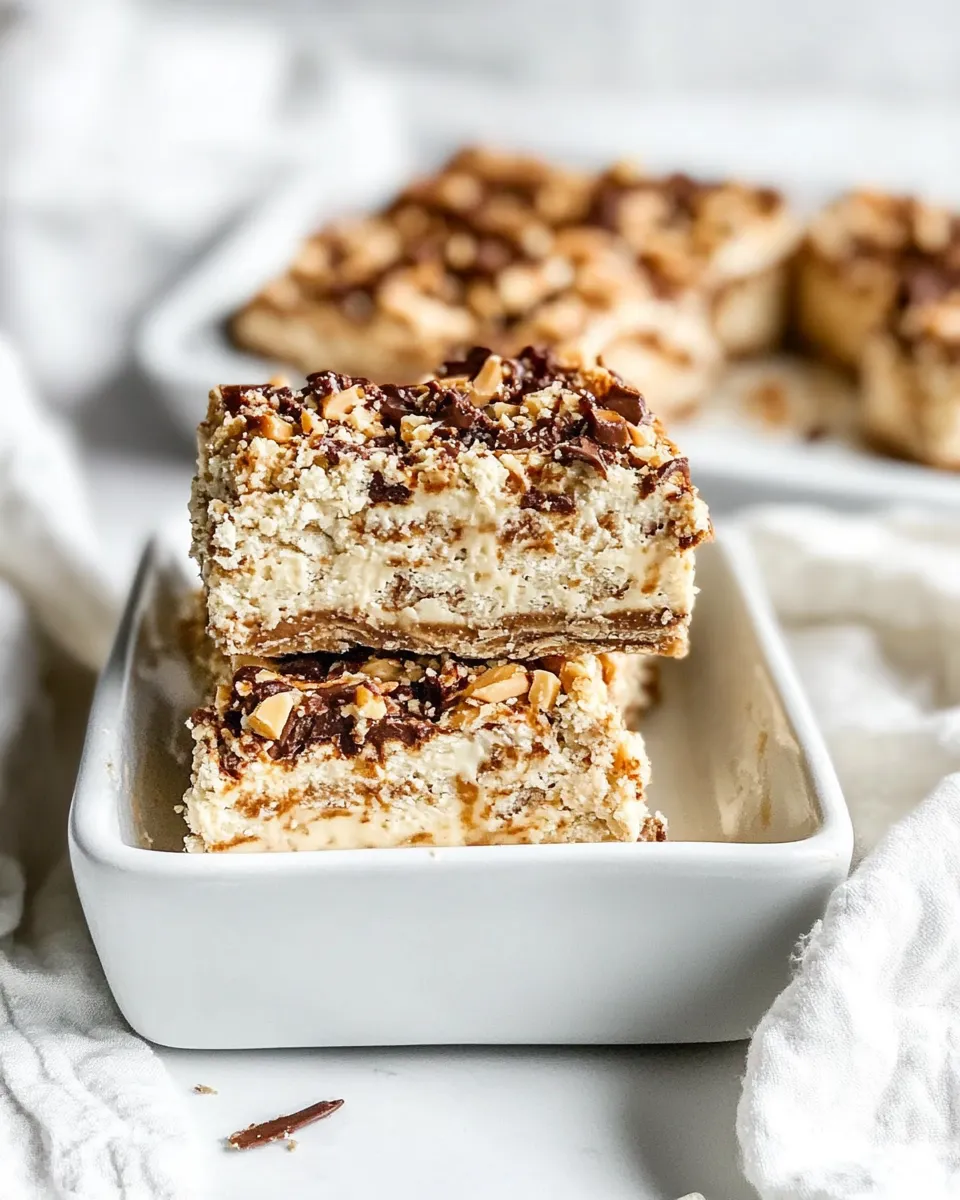
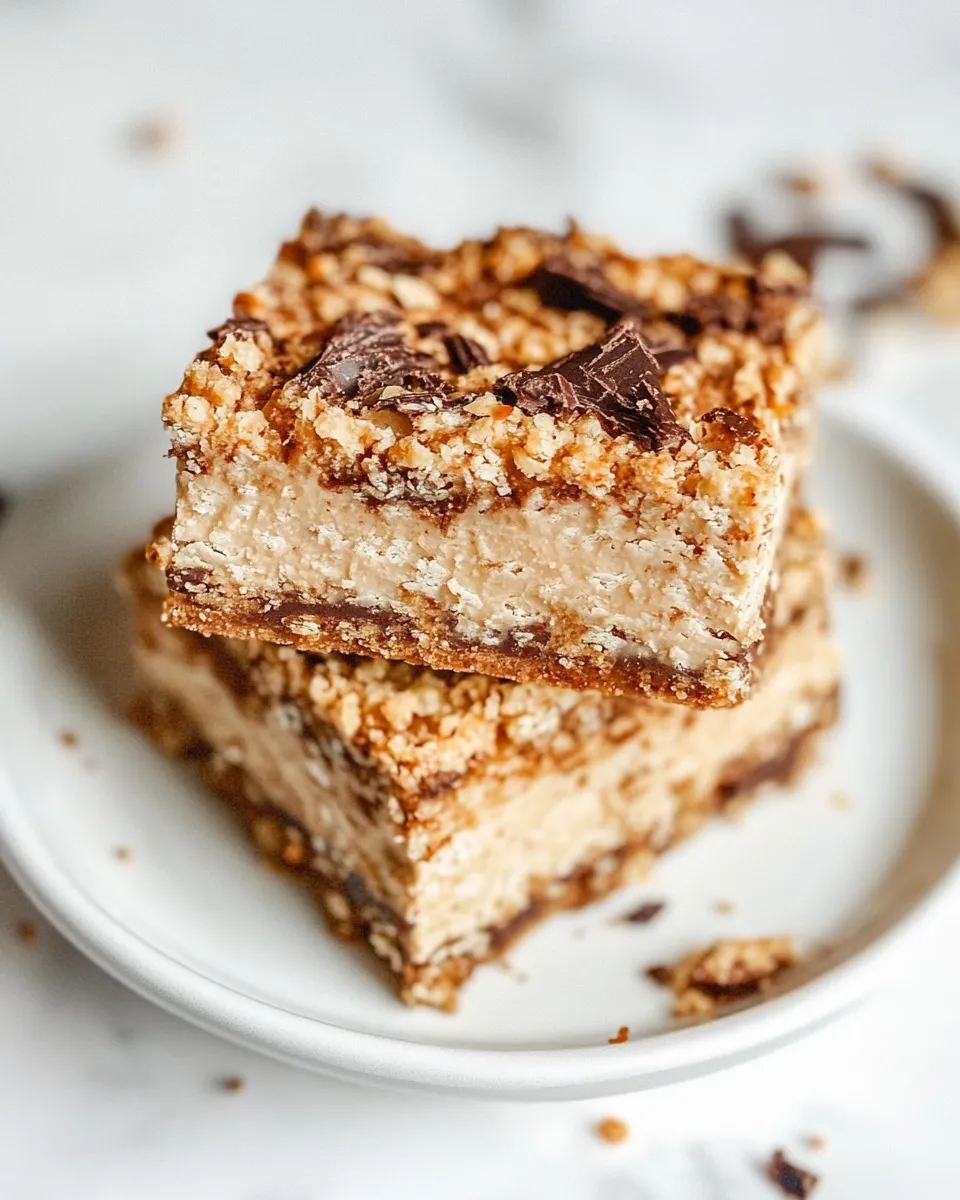
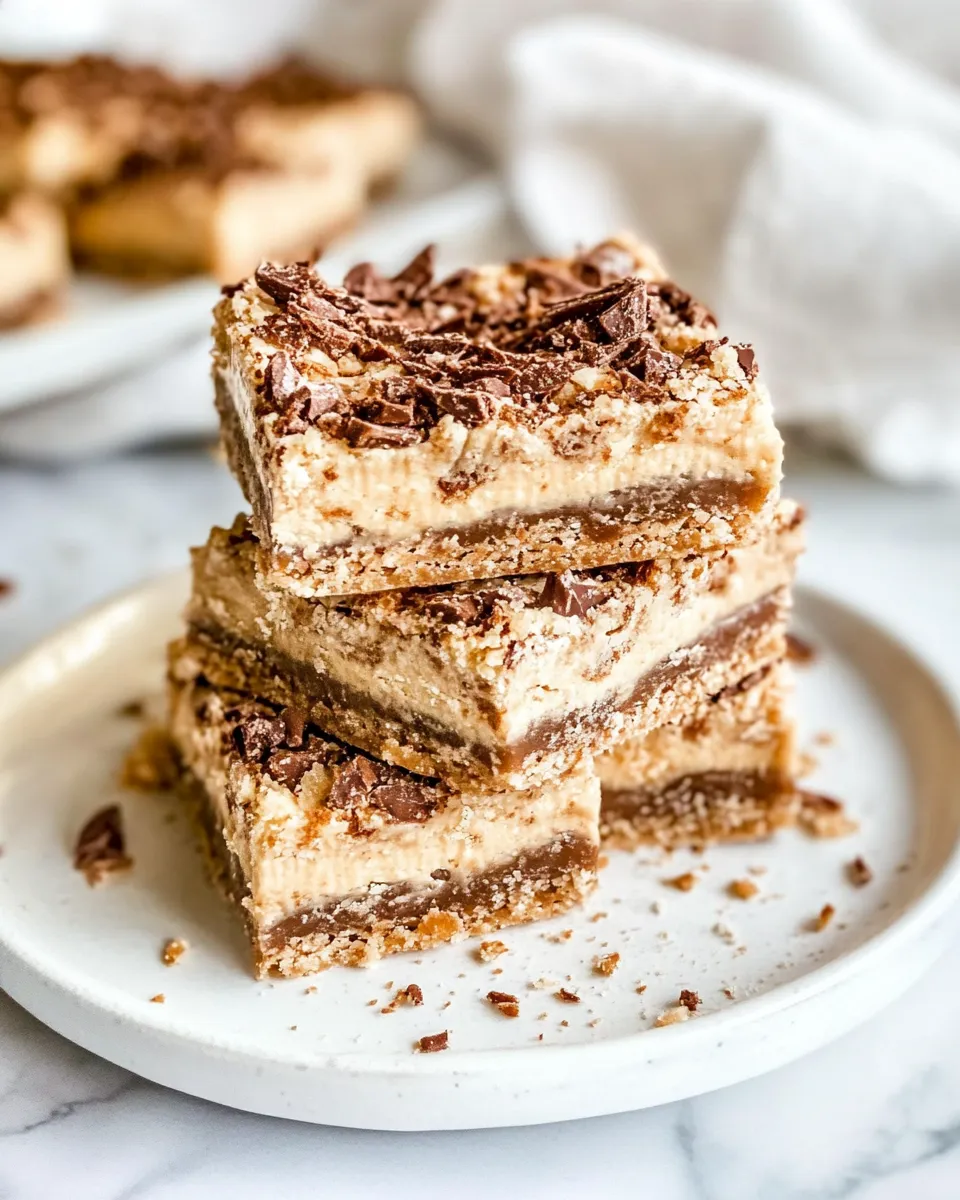
- Press the dough evenly into the prepared 9×13-inch pan. Bake at 350°F for 24–26 minutes, until the center is set and the surface is no longer glossy.
- Remove the pan from the oven and let the bars cool completely in the pan on a wire rack before frosting.
- To make the frosting, beat 3/4 cup creamy peanut butter and 1/2 cup softened butter together until smooth. Add 1/2 teaspoon vanilla extract and mix to combine.
- With the mixer on low, add 1 1/2 cups powdered sugar and 1–2 tablespoons milk (start with 1 tablespoon and add the second if needed) until fully incorporated. Increase mixer speed and beat the frosting 1–2 minutes, until light and fluffy.
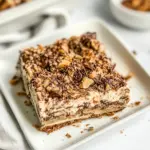
- Spread the frosting evenly over the completely cooled bars. Sprinkle the reserved 1/2 cup chopped Butterfinger bits on top, pressing lightly so they adhere.
- Allow the frosting to set slightly, then cut into bars and serve.
Why This Recipe Works
The base is essentially a sturdy cookie dough pressed into a pan. Butter and sugar creamed together create an emulsion that traps air and yields a tender, slightly chewy texture after baking. The two sugars—brown and granulated—play off each other: brown sugar keeps moisture and adds depth, while granulated sugar helps with structure and a slight crust.
Baking at 350°F for the specified 24–26 minutes keeps the center set without drying out the edges. The instruction to remove the pan and cool fully before frosting is crucial. If the base is even slightly warm, the frosting will melt and become oily. Let it cool completely for a clean layer and neat slices.
The frosting is simple but reliable: equal parts peanut butter-fortified butter and powdered sugar create stability, while the optional milk loosens the texture for easy spreading. The extra Butterfinger bits on top return the candy-bar crunch you expect, so every bite has texture contrast—soft bar, creamy frosting, crunchy candy.
Smart Substitutions
- Butter — If you must, use a high-quality stick margarine in a pinch, but flavor and texture will be different.
- Light brown sugar — Dark brown sugar will add a molasses note and deepen color; it’s fine to swap if you prefer that flavor.
- Creamy peanut butter — Natural peanut butter can be used, but you may need to stir it to smooth and possibly add the second tablespoon of milk for spreadability.
- All-purpose flour — Do not swap for whole-wheat directly; it will change texture. If you must, replace up to 25% with whole-wheat for a nuttier note and accept a denser bar.
- Butterfinger Bars — For a similar effect, other crunchy, chocolate-coated candy bars can be used, but Butterfinger has a unique flaky crunch that’s part of the charm.
Recommended Tools
- 9×13-inch baking pan — The recipe is sized for this pan. Using a different size changes thickness and bake time.
- Stand mixer or hand mixer — Speeds up creaming and frosting; a sturdy spatula works too for the dough if you prefer hand mixing.
- Mixing bowls — One large for dough and one for frosting keeps the workflow smooth.
- Wire rack — Essential for cooling the bars completely before frosting.
- Offset spatula — Makes spreading frosting even and tidy, especially across the whole pan.
- Sharp chef’s knife — For chopping the Butterfinger bars; a serrated knife can help with the final slicing if the top is firm.
Troubleshooting Tips
Base is too dense
If your bars feel overly heavy, you likely overmixed after adding the flour, or measured flour too tightly. Spoon the flour into the measuring cup and level with a knife instead of scooping directly. Mix just until combined—stop when you no longer see dry streaks.
Center sinks or stays gooey
Bake time and oven calibration matter. If the center isn’t set after 26 minutes, give it 2–4 more minutes and test. Ovens vary; a center that jiggles indicates it needs more time. Avoid underbaking for texture and safety.
Frosting separates or is runny
Frosting will separate if the ingredients are too warm. Make sure the softened butter isn’t melted. If frosting is runny, add a bit more powdered sugar, 1–2 tablespoons at a time, until it firms up. If it’s too stiff, add that second tablespoon of milk.
Butterfinger pieces melt into the dough
Chop the Butterfinger pieces coarsely and fold them in gently. If the room or hands are warm, the candy can soften; keep the workspace cool and fold quickly so the pieces keep texture.
How to Make It Lighter
These bars are inherently rich, but you can reduce heaviness without ruining the concept.
- Use half the frosting on the bars, or spread a thinner layer to cut sugar and fat per serving.
- Replace half the butter in the base with an equal measure of unsweetened applesauce—expect a moister, slightly softer texture.
- Serve smaller portions. Cutting into smaller bars preserves the same flavors with less on the plate.
Chef’s Notes
Prep Tip: Chop all Butterfinger pieces before you begin creaming. It keeps the process flowing and prevents overmixing while the Butterfinger is added. Cooling Tip: The bars must be completely cool before frosting. I like to let them sit at room temperature for about an hour on a wire rack, then refrigerate for 15–20 minutes if I need to speed things up.
Slicing: For neat bars, chill the frosted slab for 30 minutes, then use a long, sharp knife wiped clean between cuts. A warm knife makes cleaner cuts; dip in hot water, dry, and slice for very tidy edges.
Shelf Life & Storage
Room temperature: Store in an airtight container for up to 3 days. The frosting will remain soft but stable.
Refrigerator: Keep in an airtight container for up to 1 week. Bring bars to room temperature before serving for best flavor and texture.
Freezer: Wrap tightly and store for up to 3 months. Thaw in the refrigerator overnight, then bring to room temperature before serving. Avoid thawing at room temperature from fully frozen if you want to keep the frosting intact.
Butterfinger Bars Q&A
Q: Can I make these ahead?
A: Yes. Bake and cool the base, then wrap tightly and refrigerate for up to 2 days before frosting. The frosting is best fresh, but you can prepare it and store in the fridge for one day; whip briefly before spreading.
Q: Can I double the recipe?
A: You can double the ingredients, but bake in two separate 9×13 pans rather than a larger pan to keep thickness and bake time consistent.
Q: What if I don’t have “fun size” Butterfinger bars?
A: Use any Butterfinger bars you have, chopped to match the measured cup amounts. The recipe specifies cups of chopped candy so measure by volume after chopping.
Q: Are these freezer-friendly after cutting?
A: Yes. Individually wrap bars for best results. Thaw in the fridge or at room temperature.
Final Bite
These Butterfinger Bars are simple to make and deliver exactly what you want: candy-bar satisfaction with the ease of a sheet-baked dessert. Follow the process, mind the cooling step, and you’ll have a tray of bars that travel well, freeze well, and disappear quickly. Make a batch for a potluck or keep a pan on hand for weekend snacking—either way, you’ve got a reliably delicious bar that’s full of crunch and comfort.
Butterfinger Bars
Ingredients
Ingredients
- 1 cupbutter
- 1 cuplight brown sugar
- 1/2 cupgranulated sugar
- 1/2 teaspoonvanilla extract
- 2 largeeggs
- 2 1/2 cupsall-purpose flour
- 1 teaspoonbaking soda
- 1/2 teaspoonsalt
- 2 cupsButterfinger Barsabout 15 “fun size” bars coarsely chopped
- 3/4 cupcreamy peanut butter
- 1/2 cupbuttersoftened
- 1/2 teaspoonvanilla extract
- 1 1/2 cupspowdered sugar
- 1-2 Tablespoonsmilk
- 1/2 cupchopped butterfinger bitsabout 4 “fun size” bars
Instructions
Instructions
- Preheat the oven to 350°F (175°C). Lightly grease a 9×13-inch baking pan and set aside.
- Coarsely chop about 15 “fun size” Butterfinger bars to measure 2 cups. Separately chop about 4 “fun size” bars to measure 1/2 cup and reserve for topping.
- In a large mixing bowl, cream together 1 cup butter, 1 cup light brown sugar, and 1/2 cup granulated sugar until smooth and light. Add 1/2 teaspoon vanilla extract and 2 large eggs, and mix until combined.
- Add 2 1/2 cups all-purpose flour, 1 teaspoon baking soda, and 1/2 teaspoon salt. Mix on low speed (or stir) just until the dry ingredients are incorporated—do not overmix.
- Fold the 2 cups coarsely chopped Butterfinger pieces into the dough until evenly distributed.
- Press the dough evenly into the prepared 9×13-inch pan. Bake at 350°F for 24–26 minutes, until the center is set and the surface is no longer glossy.
- Remove the pan from the oven and let the bars cool completely in the pan on a wire rack before frosting.
- To make the frosting, beat 3/4 cup creamy peanut butter and 1/2 cup softened butter together until smooth. Add 1/2 teaspoon vanilla extract and mix to combine.
- With the mixer on low, add 1 1/2 cups powdered sugar and 1–2 tablespoons milk (start with 1 tablespoon and add the second if needed) until fully incorporated. Increase mixer speed and beat the frosting 1–2 minutes, until light and fluffy.
- Spread the frosting evenly over the completely cooled bars. Sprinkle the reserved 1/2 cup chopped Butterfinger bits on top, pressing lightly so they adhere.
- Allow the frosting to set slightly, then cut into bars and serve.
Equipment
- 9x13-inch baking pan
- Mixing Bowl
- Mixer
- Wire Rack
- Oven
Notes
Storage Instructions:
Keep in an airtight container in the fridge for up to a week.
Freezing Instructions:
Cool butterfinger bars completely then flash freeze uncovered for 30 minutes to harden the frosting. Wrap tightly in plastic wrap and tinfoil. Freeze for up to a month.